The Simple Things

Taking time to live well
  • Home
  • Subscribe
  • SHOP
  • Newsletter
  • About
  • Work with us
  • Home
  • Subscribe
  • SHOP
  • Newsletter
  • About
  • Work with us

Blog

Taking Time to Live Well

  • All
  • Chalkboard
  • Christmas
  • Competition
  • could do
  • Eating
  • Escape
  • Escaping
  • Fresh
  • Fun
  • gardening
  • Gathered
  • Gathering
  • Growing
  • Haikus
  • Interview
  • Living
  • Looking back
  • Magazine
  • magical creatures
  • Making
  • Miscellany
  • My Neighbourhood
  • Nature
  • Nest
  • Nesting
  • outing
  • playlist
  • Reader event
  • Reader offer
  • Shop
  • Sponsored post
  • Sunday Best
  • Think
  • Uncategorized
  • Wellbeing
  • Wisdom
Photography: Amanda Heywood

Photography: Amanda Heywood

Cucumber, matcha and lime face mask

Lottie Storey March 13, 2018

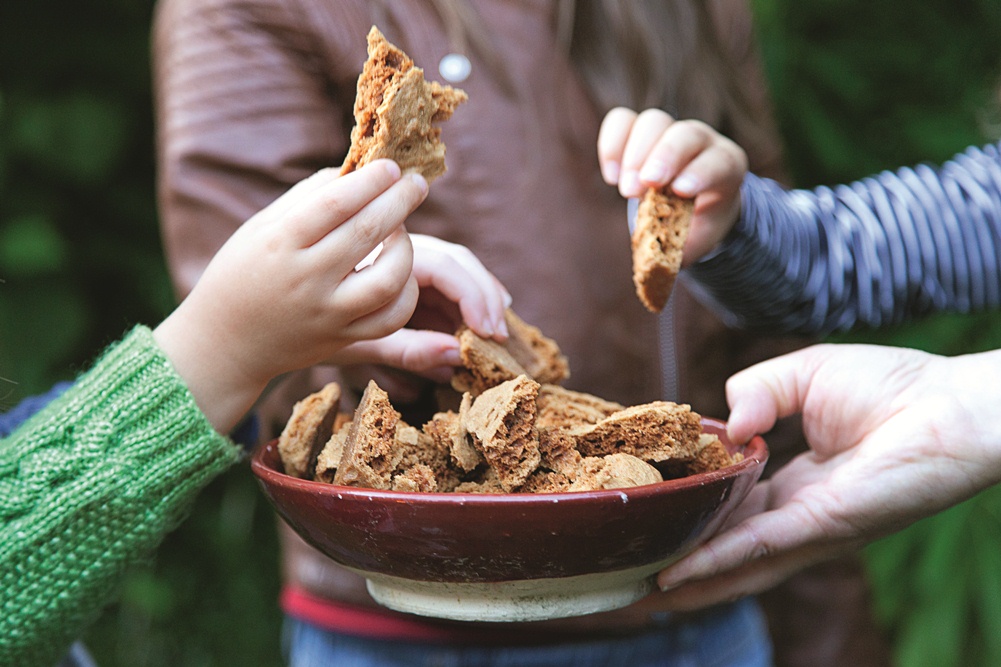
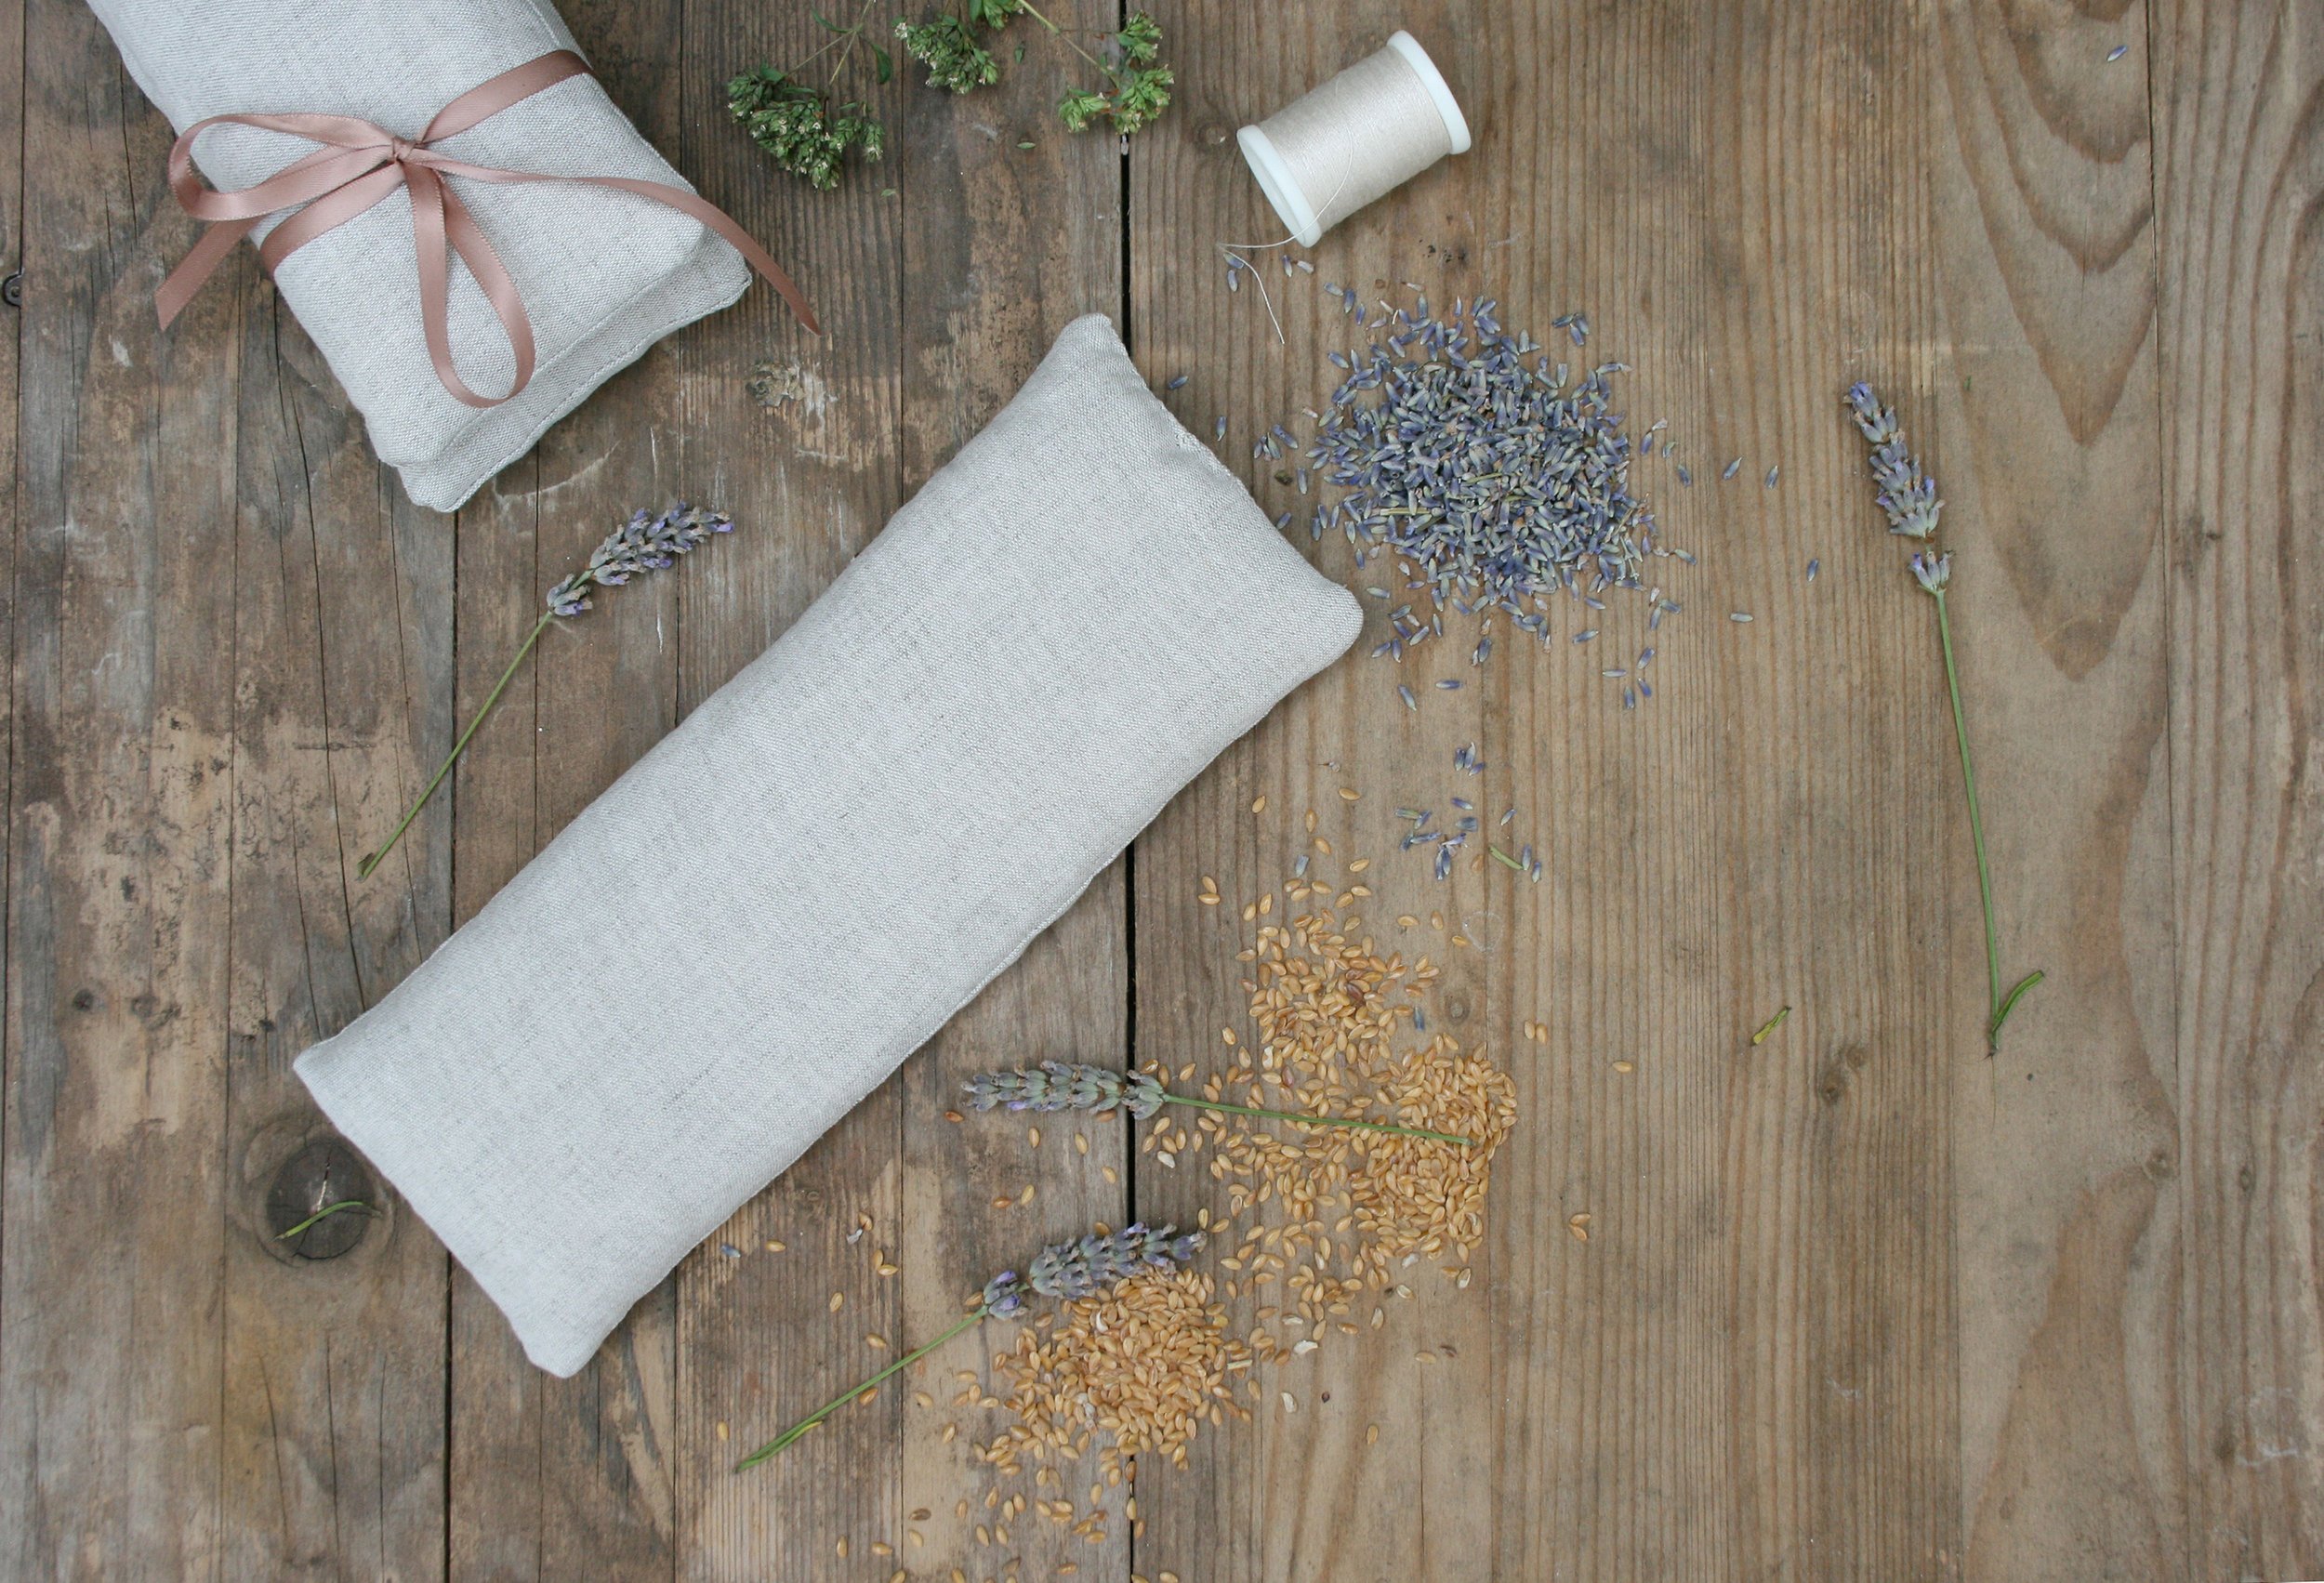
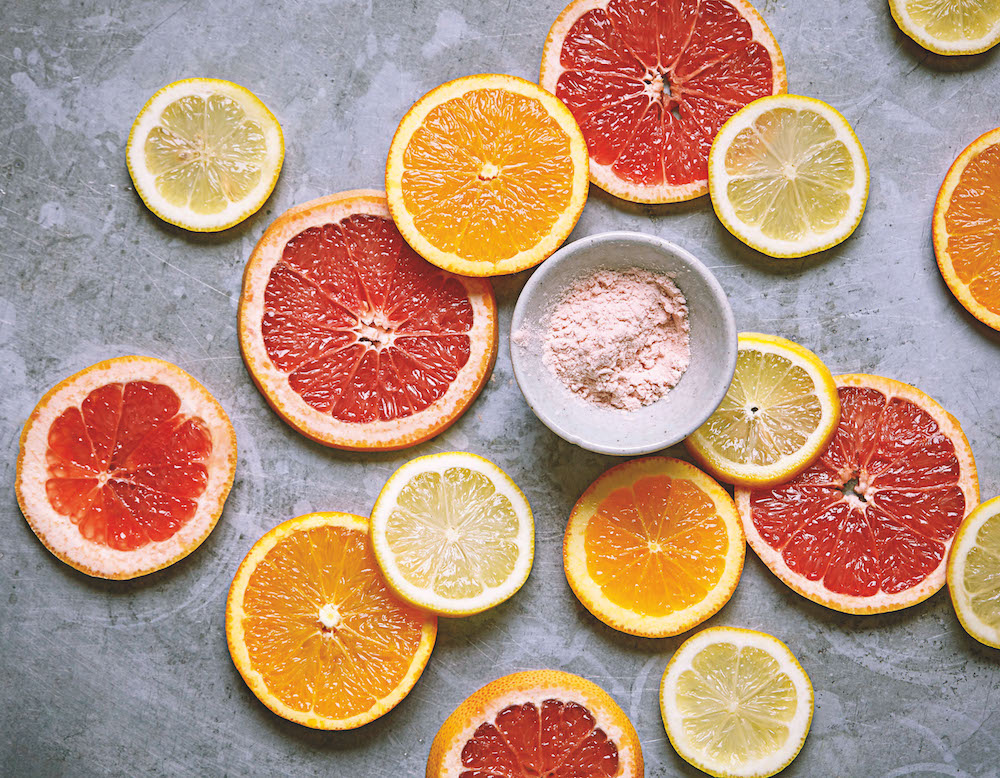
This refreshing, zingy mask can be made with ingredients that you may already have in your kitchen.

Makes approx 380ml
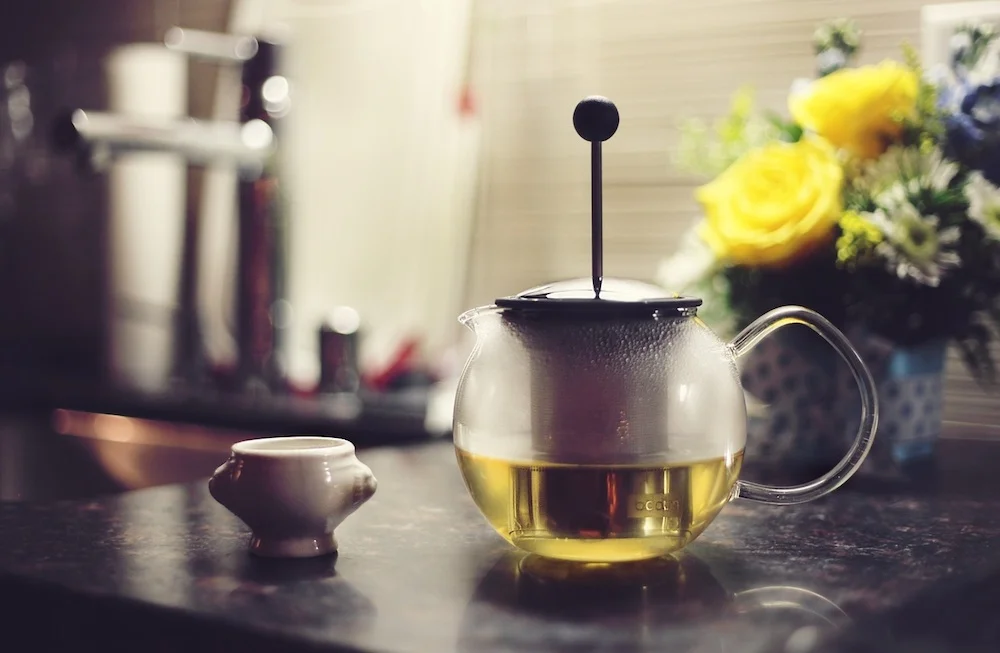
1 green tea bag or 5g (1 tsp) Matcha green tea powder
75g cucumber
2.5g (1⁄2 tsp) vegetable gelatine powder, such as Vegeset
20 drops lime essential oil

1 Pour 300ml hot (not boiling) water on the green teabag or matcha powder in a mug or jug (follow the packet instructions for ratios of tea to water). If using powder, stir to combine or leave the teabag to infuse for 10 mins. Leave to cool a little.
2 Chop slices of cucumber and whizz in a blender with the green tea until cucumber is fully blitzed. When completely cool, add gelatine to the liquid and stir to combine (check the ratios of gelatine powder to water on the packet (typically 1 tsp per 600ml).
3 Place mixture in a pan over a low heat, stirring all the time. Once it has reached boiling point, remove pan from the heat and allow to cool to around 40C. Add the lime essential oil. For 300ml use 20 drops.
4 Pour into a bowl and allow to cool before placing in the fridge to set.
5 Spread mask over face and neck and relax while the antioxidant, anti-ageing green tea and cooling, soothing cucumber get to work. Leave for 5–10 mins before removing with warm water and a muslin cloth.
6 Use straight away ideally, but can be stored in the fridge for up to two days. 

Taken from Handmade Spa by Juliette Goggin and Abi Righton (Jacqui Small).
 

  Buy ,  download  or  subscribe   See the sample of our latest issue  here   Order  our new Celebrations Anthology   Pre-order a copy of  Flourish 4 , our new wellbeing bookazine   Listen to  our podcast  – Small Ways to Live Well

Get hold of your copy of this month's The Simple Things - buy, download or subscribe

View the sampler here.


More from the March issue:

Featured
EGGShell-tealights-the-simple-things.png
Apr 10, 2023
Eggshell tea lights
Apr 10, 2023
Apr 10, 2023
anna-jimenez-calaf-64616-unsplash.jpg
Mar 20, 2021
You know spring has properly arrived when...
Mar 20, 2021
Mar 20, 2021
SIM69.WHATITREASURE_J Hitt What I Treasure Recipe Book Image.JPG
Mar 26, 2018
What I treasure | My hand-written recipe book
Mar 26, 2018
Mar 26, 2018

More homemade remedies:

Featured
Wellbeing.jpg
Feb 11, 2024
Make | Kitchen Face Masks
Feb 11, 2024
Feb 11, 2024
Bathsalts make 2.jpg
Oct 30, 2022
Make | Homemade Bath Salts
Oct 30, 2022
Oct 30, 2022
Rosemary Coconut Scalp .jpg
Feb 6, 2021
Make | Rosemary, Peppermint and Lemon Scalp Rub
Feb 6, 2021
Feb 6, 2021
In Making Tags natural skincare, home remedies, march, issue 69, face pack, tea, natural new year
Comment
SIM68.MAKES_Panphlets_004.png

Make | A three-hole pamphlet

Lottie Storey February 16, 2018

Give the basics of bookmaking a try by crafting this nifty three-hole pamphlet.

You will need:
2 sheets A2 paper (it should be no thinner than 80gsm and no thicker than 130gsm, short-grain; standard printer paper is 80gsm)
Bone folder (londonbookarts.org)
Shoe knife (or an old butter knife can do the job)
1 sheet colourful or decorative A4 paper thicker than your text paper (no thinner than 100gsm and no thicker than 175gsm, short-grain)
Waste paper
Mechanical pencil
Metal ruler
Scalpel
Cutting mat
Scissors or shears
Awl
Bookbinding needle (ratchford.co.uk)
About 60cm of linen thread, 18/3 or 25/3 thickness (see the selection at londonbookarts.org)

SIM68.MAKES_LCBA_PamphletSBS_005.png
SIM68.MAKES_LCBA_PamphletSBS_020.png
SIM68.MAKES_LCBA_PamphletSBS_026.png
SIM68.MAKES_LCBA_PamphletSBS_034.png
SIM68.MAKES_LCBA_PamphletSBS_038.png
SIM68.MAKES_LCBA_PamphletSBS_042.png
SIM68.MAKES_LCBA_PamphletSBS_063.png
SIM68.MAKES_LCBA_PamphletSBS_079.png
SIM68.MAKES_LCBA_PamphletSBS_128.png
SIM68.MAKES_LCBA_PamphletSBS_005.png SIM68.MAKES_LCBA_PamphletSBS_020.png SIM68.MAKES_LCBA_PamphletSBS_026.png SIM68.MAKES_LCBA_PamphletSBS_034.png SIM68.MAKES_LCBA_PamphletSBS_038.png SIM68.MAKES_LCBA_PamphletSBS_042.png SIM68.MAKES_LCBA_PamphletSBS_063.png SIM68.MAKES_LCBA_PamphletSBS_079.png SIM68.MAKES_LCBA_PamphletSBS_128.png


  • First make two sections from your A2 sheets of paper. Take one sheet and fold in half, short edge to short edge. Make sure the edges are exactly aligned, before making a sharp crease using your bone folder.
  • Slit the paper two-thirds of the length along the fold using a shoe knife. This helps to avoid ‘crow’s feet’ or wrinkles from forming at the corners of the folds.
  • Turn the folded sheet 90 degrees and fold the sheet a second time.
  • As before, slit the sheet two thirds of the way using a shoe knife.
  • Turn the folded sheet 90 degrees and fold the sheet a third time.
  • Do not slit the sheet again. You now have an A5 16-page, or octavo, section.
  • Repeat with second sheet of A2.
  • Take your two octavo sections (16 pages each) and combine the two sections by inserting one inside of the centre fold of the other (step 1). This will give you a 32-page section. 
  • Fold the A4 cover paper in half widthways, or short edge to short edge. Make sure the edges are exactly aligned before making a sharp crease using your bone folder (step 2).
  • Make a sewing station template: take a piece of waste paper and cut to the same height as your pamphlet and roughly 60mm wide (step 3).
  • Make three marks on the edge of the waste paper (step 4): one at the centre (find this by folding the sheet in half lengthwise) and two at either end, around 30mm in from the top and bottom. The sewing stations will be at these points.
  • Place the section inside the folded cover (step 5).
  • Lay the book on the work surface with the spine edge aligned to the edge of the work surface. Open the book to the centre fold and place the sewing station template along the fold. Using an awl or pricker, make holes at each of the sewing stations (step 6).
  • With a needle and about 60cm of linen thread (or a length 2.5 to 3 times the height of the book), begin stitching the section from the centre hole, station B (see step 7).
  • From the outside in, insert needle and thread at station B, leaving a tail end of approximately 3cm.
  • Bring the needle out through the top hole, station C.
  • Go along the spine and in again at station A, then out through central station B.
  • Tie the two ends of thread together with a reef knot and trim any excess thread (step 8). Make sure that the two ends are on either side of the thread running from A to C, so that the knot is firmly in place.
  • Once the book has been bound, close the book, place a sheet of waste paper over the spine and go over the spine with a bone folder. If desired, trim the book.

Extracted from Making Books by Simon Goode and Ira Yonemura (Pavilion).


  Buy ,  download  or  subscribe   See the sample of our latest issue  here   Order  our new Celebrations Anthology   Pre-order a copy of  Flourish 4 , our new wellbeing bookazine   Listen to  our podcast  – Small Ways to Live Well

Get hold of your copy of this month's The Simple Things - buy, download or subscribe

View the sampler here


More from the February issue:

Featured
SIM68.JOURNAL_113_WordJar_JournalSparks.png
Feb 27, 2018
Journal sparks | Word Jar
Feb 27, 2018
Feb 27, 2018
SIM68.EVENTS_Unknown-1.jpeg.png
Feb 26, 2018
The faces of Fairtrade
Feb 26, 2018
Feb 26, 2018
SIM68.png
Feb 25, 2018
Nest | Cacti
Feb 25, 2018
Feb 25, 2018

More weekend projects to make:

Featured
Lanyard & Key Fob.jpg
Jun 1, 2025
Project | Make a Scrap fabric Key Fob
Jun 1, 2025
Jun 1, 2025
TEA COSY JUMPER.jpg
Jan 25, 2025
How to | Make a Tea Cosy from an Old Jumper
Jan 25, 2025
Jan 25, 2025
Wellbeing.jpg
Feb 11, 2024
Make | Kitchen Face Masks
Feb 11, 2024
Feb 11, 2024
In Making Tags make, weekend project, Make project, issue 68, February
Comment
Photography: Ali Allen

Photography: Ali Allen

Seasonal winter shots

Lottie Storey February 9, 2018

Ginger tops the list of effective natural home remedies. Try these combinations to help settle upset tummies, soothe migraines and ward off viruses

To make: Peel and juice the ginger first, then feed the herb or spice through the juicer. Finally, juice the fruit.

Each of the following recipes makes one winter shot.
Asian Pear Drop: 2cm piece of ginger, 1⁄4 of a stick of lemongrass and half
a pear.
Sunshine Ginger: 2cm piece of ginger, 1 blood orange or 2 clementines and
a dusting of cinnamon.
Winter Ginger: 2cm slice of ginger, 1 apple and a drop of oregano essential oil.
Blushing Ginger: 2cm piece of ginger, 2 cardamom pods (feed whole through a juicer or grind the seeds and add later after juicing), 4cm piece of rhubarb and 1 small or 1⁄2 medium-sized beetroot. Solo Ginger: 2cm piece of ginger,
1⁄4 lemon (zest and all) and a dusting of cayenne pepper.
Persian Ginger: 2cm piece of ginger, 1 tbsp fresh rose petals or 1⁄4 tsp rosewater and 15 pitted cherries.

From Tonics & Teas by Rachel de Thample (Kyle Books).

  Buy ,  download  or  subscribe   See the sample of our latest issue  here   Order  our new Celebrations Anthology   Pre-order a copy of  Flourish 4 , our new wellbeing bookazine   Listen to  our podcast  – Small Ways to Live Well

Get hold of your copy of this month's The Simple Things - buy, download or subscribe

View the sampler here.


More from the January issue:

Featured
SIM68.JOURNAL_113_WordJar_JournalSparks.png
Feb 27, 2018
Journal sparks | Word Jar
Feb 27, 2018
Feb 27, 2018
SIM68.EVENTS_Unknown-1.jpeg.png
Feb 26, 2018
The faces of Fairtrade
Feb 26, 2018
Feb 26, 2018
SIM68.png
Feb 25, 2018
Nest | Cacti
Feb 25, 2018
Feb 25, 2018

More homemade remedies:

Featured
Wellbeing.jpg
Feb 11, 2024
Make | Kitchen Face Masks
Feb 11, 2024
Feb 11, 2024
Bathsalts make 2.jpg
Oct 30, 2022
Make | Homemade Bath Salts
Oct 30, 2022
Oct 30, 2022
Rosemary Coconut Scalp .jpg
Feb 6, 2021
Make | Rosemary, Peppermint and Lemon Scalp Rub
Feb 6, 2021
Feb 6, 2021
In Making Tags cold, winter, illness, cough drops, natural skincare, home remedies, february, issue 68
Comment

Nest | Soak in a spruce needle bath

Lottie Storey January 2, 2018

Don’t throw away your Christmas tree clippings. Spruce needles are an invigorating natural remedy, great for clearing the head. If you feel a cold coming on or are simply exhausted, have a bath with this spruce tree essence and let the scent of a forest work its magic

You will need:

3 fresh twigs from a spruce tree, washed
1 litre water

1 Cut the spruce twigs into small pieces, place them in a saucepan and add the water. Bring to the boil, reduce the heat to low and simmer for 10 minutes.
2 Now remove the pan from the heat, cover with a cloth, and let the solution of twigs infuse for another 10 minutes while you run your bath.
3 Strain and add the solution to your bath. Relax in the bath for 20 minutes, breathing in deeply and taking in all the wonderful forest scents.
4 Go to bed immediately and rest!

From Vinegar Socks, Traditional Home Remedies for Modern Living by Karin Berndl and Nici Hofer

More from the January issue:

Featured
Jan 24, 2017
Recipe: Raspberry biscuits with lemon coriander curd
Jan 24, 2017
Jan 24, 2017
Jan 22, 2017
Winter Skin Tonic
Jan 22, 2017
Jan 22, 2017
Jan 20, 2017
Recipe: DIY tortilla chips
Jan 20, 2017
Jan 20, 2017

More natural remedies:

Featured
Dec 26, 2016
Christmas Survival Tummy Tonic
Dec 26, 2016
Dec 26, 2016
Oct 8, 2016
Make: Luxurious Body Butter
Oct 8, 2016
Oct 8, 2016
May 31, 2016
Homemade rose face cream
May 31, 2016
May 31, 2016
  Buy ,  download  or  subscribe   See the sample of our latest issue  here   Order  our new Celebrations Anthology   Pre-order a copy of  Flourish 4 , our new wellbeing bookazine   Listen to  our podcast  – Small Ways to Live Well


Get hold of your copy of this month's The Simple Things - buy, download or subscribe

View the sampler here.

In Christmas, Making Tags issue 42, december, christmas, christmas tree, home remedies, natural new year
Comment
Photography: Ali Allen

Photography: Ali Allen

Seasonal tonic

Lottie Storey December 22, 2017

Make a batch of these immune-boosting shots to prevent a cold from ruining your Christmas

Opt for fresh, organic produce to maximise benefits – and if one ingredient is unavailable, just double up one of the others.

Makes 6 x 50ml shots
2 tbsp chopped garlic
2 tbsp chopped onion
2 tbsp grated fresh ginger
2 tbsp grated horseradish root
2 tbsp chopped cayenne pepper (or any other chilli)
350ml raw apple cider vinegar

1 Pile the garlic, onion, ginger, horseradish and pepper into a 350ml lidded sterilised jar. (To sterilise, wash it in hot soapy water, dry with a clean cloth, then place in a 200C/Fan 180C/ 400F oven for 10 mins.)
Fill the jar with raw apple cider vinegar, close the lid tightly and shake.
2 Store in a cool, dark place, shaking at least once a day for two weeks.
3 Filter the tonic through a clean piece of muslin, pour into a sterilised bottle. Take a 50ml shot three times a day (on an empty stomach) as soon as you feel the symptoms of a cold. It will keep at room temperature for up to six months.


Recipe from Tonics & Teas by Rachel de Thample (Kyle Books)

  Buy ,  download  or  subscribe   See the sample of our latest issue  here   Order  our new Celebrations Anthology   Pre-order a copy of  Flourish 4 , our new wellbeing bookazine   Listen to  our podcast  – Small Ways to Live Well

Get hold of your copy of this month's The Simple Things - buy, download or subscribe

View the sampler here.


More from the December issue:

Featured
9.new years final.png
Dec 31, 2024
How to | Make a Could-Do List Happen
Dec 31, 2024
Dec 31, 2024
SIM66.GATHERING_IMG_3201.png
Dec 24, 2023
Recipe | Roasted Brussels sprouts with nuts, lemon & pomegranate
Dec 24, 2023
Dec 24, 2023
SIM66.NIBBLES_fruit nut choc disc01.png
Dec 29, 2022
Recipe | Fruit and nut chocolate discs
Dec 29, 2022
Dec 29, 2022

More homemade remedies:

Featured
Wellbeing.jpg
Feb 11, 2024
Make | Kitchen Face Masks
Feb 11, 2024
Feb 11, 2024
Bathsalts make 2.jpg
Oct 30, 2022
Make | Homemade Bath Salts
Oct 30, 2022
Oct 30, 2022
Rosemary Coconut Scalp .jpg
Feb 6, 2021
Make | Rosemary, Peppermint and Lemon Scalp Rub
Feb 6, 2021
Feb 6, 2021
In Making, Christmas Tags cold, winter, illness, cough drops, natural skincare, home remedies, issue 66, december, christmas
Comment
Photography by Anne Deppe.

Photography by Anne Deppe.

Make | Marbled tree baubles

Lottie Storey December 6, 2017

Give baubles a quick marble makeover courtesy of bright nail varnish 

You will need:
Colourful thread or string
Scissors
White Christmas tree baubles in various sizes (try hobbycraft.co.uk)
Large bowl
Nail varnish in two colours, here orange and lilac

1 Attach a piece of string to a Christmas tree bauble. Fill a large bowl with enough lukewarm water to completely submerge the bauble (leaving room for displacement).
2 Add a few drops from each of the bottles of nail varnish to the water. The nail varnish will form a thin, colourful film on the surface.
3 Now immerse the bauble completely in the bowl, holding the cap and ring to push it underwater.
4 A thin layer of nail varnish will coat the bauble. Hang it up to dry for a couple of hours.

Taken from Supercraft Christmas by Sophie Pester and Catharina Bruns, (Dorling Kindersley).

Turn to page 38 of December's The Simple Things where we celebrate the role of the bauble in Christmases past, present and many more into the future.

  Buy ,  download  or  subscribe   See the sample of our latest issue  here   Order  our new Celebrations Anthology   Pre-order a copy of  Flourish 4 , our new wellbeing bookazine   Listen to  our podcast  – Small Ways to Live Well

Get hold of your copy of this month's The Simple Things - buy, download or subscribe

View the sampler here


More from the December issue:

Featured
9.new years final.png
Dec 31, 2024
How to | Make a Could-Do List Happen
Dec 31, 2024
Dec 31, 2024
SIM66.GATHERING_IMG_3201.png
Dec 24, 2023
Recipe | Roasted Brussels sprouts with nuts, lemon & pomegranate
Dec 24, 2023
Dec 24, 2023
SIM66.NIBBLES_fruit nut choc disc01.png
Dec 29, 2022
Recipe | Fruit and nut chocolate discs
Dec 29, 2022
Dec 29, 2022

More weekend projects to make:

Featured
Lanyard & Key Fob.jpg
Jun 1, 2025
Project | Make a Scrap fabric Key Fob
Jun 1, 2025
Jun 1, 2025
TEA COSY JUMPER.jpg
Jan 25, 2025
How to | Make a Tea Cosy from an Old Jumper
Jan 25, 2025
Jan 25, 2025
Wellbeing.jpg
Feb 11, 2024
Make | Kitchen Face Masks
Feb 11, 2024
Feb 11, 2024
In Making, Christmas Tags make, weekend project, Make project, christmas, issue 66, december
Comment
SIM66.NEST_xmas wreath Nest image1.png

Make | Foraged Christmas wreath

Lottie Storey November 28, 2017

If you’re short of foliage in your garden, a wintry walk to fetch some is just the thing before getting creative with your finds

You will need:
Bronze medium flat wreath frame, approx 25cm across
Hobby wire
A selection of greenery (we used eucalyptus, ivy, holly, thistle and gypsophila)
Length of narrow ribbon for hanging Ribbon for decoration (we used velvet ribbon)
Scissors
Secateurs

SIM66.NEST_xmas wreath materials_b.png


1 Using secateurs, trim the ivy and eucalyptus to manageable lengths of approx 20–30cm. Secure the foliage to the wreath ring, using wire to hold the sprigs in place at various intervals. Gradually work around the ring. Continue attaching the foliage until the ring is covered and none of the wire ring can be seen.
2 Once you have an initial layer secured to the ring, you can start to add in shorter lengths of foliage among the greenery. You should be able to secure these additional pieces without wire by weaving them into the base coverage.
3 Next take some of the holly, thistles and gypsophila and trim them into lengths of approx 7cm each. Gather two or three together to create small bunches and wrap the stems with a little wire to secure. Make three of these and place them at regular intervals around the wreath. Push each one into the wreath and secure with wire from the back.
4 Add in a few further individual thistles and gypsophila sprigs until your wreath has enough interest and balance.
5 Take a length of ribbon and tie centrally around the base of the ring, securing with a bow. Trim the loose ends to make it neat.
6 Finally, turn the wreath over and, using your fingers, feel to find the top of the wreath ring. Thread a length of narrow ribbon through the ring to create a hanging loop. Your wreath is now ready to hang. To keep it fresh and green, spritz it with water every few days.

SIM66.NEST_xmas wreath step5d.png
  Buy ,  download  or  subscribe   See the sample of our latest issue  here   Order  our new Celebrations Anthology   Pre-order a copy of  Flourish 4 , our new wellbeing bookazine   Listen to  our podcast  – Small Ways to Live Well

Get hold of your copy of this month's The Simple Things - buy, download or subscribe

View the sampler here


More from the December issue:

Featured
9.new years final.png
Dec 31, 2024
How to | Make a Could-Do List Happen
Dec 31, 2024
Dec 31, 2024
SIM66.GATHERING_IMG_3201.png
Dec 24, 2023
Recipe | Roasted Brussels sprouts with nuts, lemon & pomegranate
Dec 24, 2023
Dec 24, 2023
SIM66.NIBBLES_fruit nut choc disc01.png
Dec 29, 2022
Recipe | Fruit and nut chocolate discs
Dec 29, 2022
Dec 29, 2022

More weekend projects to make:

Featured
Lanyard & Key Fob.jpg
Jun 1, 2025
Project | Make a Scrap fabric Key Fob
Jun 1, 2025
Jun 1, 2025
TEA COSY JUMPER.jpg
Jan 25, 2025
How to | Make a Tea Cosy from an Old Jumper
Jan 25, 2025
Jan 25, 2025
Wellbeing.jpg
Feb 11, 2024
Make | Kitchen Face Masks
Feb 11, 2024
Feb 11, 2024
In Making, Christmas Tags make, weekend project, Make project, christmas, issue 66, december
Comment
SIM65.MAKES_Step 7 Finished 3.png

Make | Craft your own countdown

Lottie Storey November 21, 2017

Channel your excitement about the festive season into making this simple and pretty project

Not that we need bribery, but the pleasure of opening an advent calendar each day is an extra reason to look forward to getting out of bed in December. The first commercially produced advent calendar dates to 1903 but our project harks back to the very first, 18th-century versions, which were handmade. This easy-to-make design combines natural foliage, a bit of festive sparkle and a little treat in each envelope to be opened in the countdown to Christmas. Who could resist? And, on that note, it’s as easy to adapt for grown-ups as children.

Envelope advent calendar

SIM65.MAKES_Step 1 Materials 2.png
 1 Gather two near-identical bunches of foliage and bind them together with wire. Attach the foliage bunches to the wooden hoop, securing at intervals with wire. Allow the two bunches to overlap slightly at the base of the hoop to hide the join. Any

1 Gather two near-identical bunches of foliage and bind them together with wire. Attach the foliage bunches to the wooden hoop, securing at intervals with wire. Allow the two bunches to overlap slightly at the base of the hoop to hide the join. Any visible wire can be hidden with the addition of a leaf or two.

 2 Take three of the mini baubles and string onto a piece of wire, twisting to secure and form a cluster. Repeat with the remaining three. Secure each cluster along the base of the hoop on opposite sides.

2 Take three of the mini baubles and string onto a piece of wire, twisting to secure and form a cluster. Repeat with the remaining three. Secure each cluster along the base of the hoop on opposite sides.

 3 Remove any hanging loops from your tree decoration, then glue it securely to the centre of the hoop base using a glue gun. Leave the whole hoop piece aside to dry.

3 Remove any hanging loops from your tree decoration, then glue it securely to the
centre of the hoop base using a glue gun. Leave the whole hoop piece aside to dry.

 4 Paint the numbers 1 to 24 on the front of the envelopes. Once dried, fill with miniature gifts and treats (see opposite for inspiration) and seal the envelopes. Using a hole punch, create a hole in the top of each envelope.

4 Paint the numbers 1 to 24 on the front of the envelopes. Once dried, fill with miniature gifts and treats (see opposite for inspiration) and seal the envelopes. Using a hole punch, create a hole in the top of each envelope.

 5 Thread a length of twine through each envelope hole and secure with a double knot. Secure the other end to the decorated hoop. It’s best to hang your hoop (using the length of satin ribbon) before attaching the envelopes to avoid tangles. Vary the

5 Thread a length of twine through each envelope hole and secure with a double knot. Secure the other end to the decorated hoop. It’s best to hang your hoop (using
the length of satin ribbon) before attaching the envelopes to avoid tangles. Vary the lengths of twine a little, so that the envelopes don’t all hang at the same length. 

 Carefully hang your advent calendar in its final position and let the countdown begin.

Carefully hang your advent calendar in its final position and let the countdown begin.

Makes 24 days of festive cheer
Wooden embroidery hoop 20cm (inner ring); try hobbycraft.co.uk
Beading/thin jewellery wire (hobbycraft.co.uk)
Foliage – long-lasting and fragrant, such as ivy, eucalyptus and rosemary
6 mini baubles (these are from dobbies.com)
Christmas character tree decoration (search eBay for vintage options)
Twine
24 small brown envelopes approx 6x9cm
60cm satin ribbon for hanging (uk.flyingtiger.com)
24 mini treats (see below for ideas)
Scissors
Ink and brush
Hole punch
Glue gun

1 Gather two near-identical bunches of foliage and bind them together with wire. Attach the foliage bunches to the wooden hoop, securing at intervals with wire. Allow the two bunches to overlap slightly at the base of the hoop to hide the join. Any visible wire can be hidden with the addition of a leaf or two.
2 Take three of the mini baubles and string onto a piece of wire, twisting to secure and form a cluster. Repeat with the remaining three. Secure each cluster along the base of the hoop on opposite sides.
3 Remove any hanging loops from your tree decoration, then glue it securely to the
centre of the hoop base using a glue gun. Leave the whole hoop piece aside to dry.
4 Paint the numbers 1 to 24 on the front of the envelopes. Once dried, fill with miniature gifts and treats (see below for inspiration) and seal the envelopes. Using a hole punch, create a hole in the top of each envelope.
5 Thread a length of twine through each envelope hole and secure with a double knot. Secure the other end to the decorated hoop. It’s best to hang your hoop (using the length of satin ribbon) before attaching the envelopes to avoid tangles. Vary the lengths of twine a little, so that the envelopes don’t all hang at the same length. Carefully hang your advent calendar in its final position and let the countdown begin.

l Chocolate coins l Mini playing cards l Lip balm l Hair slides l Cinema tickets l Badges or patches l Bookmarks l Temporary tattoo l Teabags

  Buy ,  download  or  subscribe   See the sample of our latest issue  here   Order  our new Celebrations Anthology   Pre-order a copy of  Flourish 4 , our new wellbeing bookazine   Listen to  our podcast  – Small Ways to Live Well

Get hold of your copy of this month's The Simple Things - buy, download or subscribe

View the sampler here


More from the November issue:

Featured
SIM65.MAKES_Step 7 Finished 3.png
Nov 21, 2017
Make | Craft your own countdown
Nov 21, 2017
Nov 21, 2017
SIM65.CAKE_parsnipcake_2.png
Nov 20, 2017
Recipe | Parsnip and maple syrup cake with parsnip crisps
Nov 20, 2017
Nov 20, 2017
nov 65 back cover.png
Nov 19, 2017
You can do anything but not everything
Nov 19, 2017
Nov 19, 2017

More weekend projects to make:

Featured
Lanyard & Key Fob.jpg
Jun 1, 2025
Project | Make a Scrap fabric Key Fob
Jun 1, 2025
Jun 1, 2025
TEA COSY JUMPER.jpg
Jan 25, 2025
How to | Make a Tea Cosy from an Old Jumper
Jan 25, 2025
Jan 25, 2025
Wellbeing.jpg
Feb 11, 2024
Make | Kitchen Face Masks
Feb 11, 2024
Feb 11, 2024
In Making, Christmas Tags make, weekend project, Make project, sewing, issue 65, november, christmas
Comment
Photography: Sarah Cuttle

Photography: Sarah Cuttle

Homemade cough drops

Lottie Storey November 13, 2017

These antiviral lozenges help to soothe sore throats and ease tickly coughs. Make in advance for the winter months ahead, or boil up a batch for a poorly friend

You will need:
5cm piece of fresh ginger, sliced
1 tbsp whole cloves
4 tbsp dried elderflowers (or 5 fresh elderflower heads, main green stalks removed)
Elderflower cordial (optional) 
400g unrefined sugar
250ml honey
Juice of 1⁄2 lemon
Icing sugar, to dust or for covering

1 Take a very large, heavy based saucepan (2-litre capacity is ideal). Put the spices into the pan with 300ml water. Bring gently to boil, then simmer, covered, for 10 mins.
2 Remove from the heat and add the fresh or dried elderflowers, set aside to infuse for 20 mins.
3 Strain the liquid into a heatproof jug and measure it – you’ll need 250ml of the infusion for this recipe (if it needs topping up use water or elderflower cordial for extra flavour). Return the 250ml liquid to the pan and then add sugar, lemon juice and honey.
4 Carefully heat until the mixture comes to a gentle rolling boil. Continue boiling gently until the sugar reaches hard crack stage (149–154C on a sugar thermometer), about 15–20 mins. This is the point at which a drop of liquid turns to brittle strands when dropped into chilled water (caution: the liquid is extremely hot). Take off the heat.
5 Drop teaspoonfuls onto a tray lined with greaseproof paper and leave to set. Then, once hardened, sprinkle with icing sugar to prevent them sticking together.
6 Suck one sweet as needed. Store wrapped in greaseproof paper individually or covered in a thick layer of icing sugar in an airtight container.

Taken from The Handmade Apothecary by Vicky Chown and Kim Walker (Kyle Books). 

  Buy ,  download  or  subscribe   See the sample of our latest issue  here   Order  our new Celebrations Anthology   Pre-order a copy of  Flourish 4 , our new wellbeing bookazine   Listen to  our podcast  – Small Ways to Live Well

Get hold of your copy of this month's The Simple Things - buy, download or subscribe

View the sampler here.


More from the November issue:

Featured
SIM65.MAKES_Step 7 Finished 3.png
Nov 21, 2017
Make | Craft your own countdown
Nov 21, 2017
Nov 21, 2017
SIM65.CAKE_parsnipcake_2.png
Nov 20, 2017
Recipe | Parsnip and maple syrup cake with parsnip crisps
Nov 20, 2017
Nov 20, 2017
nov 65 back cover.png
Nov 19, 2017
You can do anything but not everything
Nov 19, 2017
Nov 19, 2017

More homemade remedies:

Featured
Wellbeing.jpg
Feb 11, 2024
Make | Kitchen Face Masks
Feb 11, 2024
Feb 11, 2024
Bathsalts make 2.jpg
Oct 30, 2022
Make | Homemade Bath Salts
Oct 30, 2022
Oct 30, 2022
Rosemary Coconut Scalp .jpg
Feb 6, 2021
Make | Rosemary, Peppermint and Lemon Scalp Rub
Feb 6, 2021
Feb 6, 2021
In Making Tags issue 65, november, cold, winter, illness, kindness, cough drops, natural skincare, home remedies
Comment
PARKIN-PIC.jpg

Recipe | Traditional Parkin ginger and treacle cake

Future Admin October 18, 2017

Traditionally enjoyed in Yorkshire on Bonfire Night, parkin is a seasonal treat, packed with black treacle and spiced with ginger. It's the oatmeal in the recipe that gives it a unique, not quite ginger cake, texture. Bettys have been making it in Harrogate for 30 years, so they should know what they're on about! Bag yourself a Bettys traditional Yorkshire parkin for Bonfire Night.

If you're in the mood for baking one yourself here's Bettys' recipe for mini parkin.

Ingredients                                                 Special Equipment

100g butter                                                 8 mini loaf tins
40g black treacle                                       or x 1 1lb loaf tin
180g golden syrup
110g soft brown sugar
100g self raising flour
3 tsp ground ginger
1 tsp ground nutmeg
40g oats
40g ground almonds
2 tsp whole milk
2 eggs

Method
Preheat the oven to 160°C (fan assisted). Line the base of the mini loaf tins with a piece of baking parchment paper.

1. Place the butter, black treacle, golden syrup and soft brown sugar in a heavy based pan over a medium heat. Gently warm through to melt the butter and stir until the sugar has completely dissolved. When the mixture comes up to the boil, turn off the heat and set aside whilst you prepare the other ingredients.

2. In a large mixing bowl, mix together the self raising flour, spices, oats and ground almonds until they are well combined.

3. Pour the warm mixture over the dry ingredients and mix in well.  Set the mixture aside to cool a little.

4. Beat the milk and egg together thoroughly and then gradually stir into the warm mixture.

5. Pour the mix into the prepared loaf tins and bake in the preheated oven for 20-25 minutes until well risen and a skewer inserted in the centre comes out clean.

6. Leave the loaves to cool down slightly before turning out onto a wire cooling rack.

Did you know Bettys also run a cookery school in Harrogate? Find out more.

  Buy ,  download  or  subscribe   See the sample of our latest issue  here   Order  our new Celebrations Anthology   Pre-order a copy of  Flourish 4 , our new wellbeing bookazine   Listen to  our podcast  – Small Ways to Live Well

Get hold of your copy of this month's The Simple Things - buy, download or subscribe

View the sampler here


More from the November issue:

Featured
SIM65.MAKES_Step 7 Finished 3.png
Nov 21, 2017
Make | Craft your own countdown
Nov 21, 2017
Nov 21, 2017
SIM65.CAKE_parsnipcake_2.png
Nov 20, 2017
Recipe | Parsnip and maple syrup cake with parsnip crisps
Nov 20, 2017
Nov 20, 2017
nov 65 back cover.png
Nov 19, 2017
You can do anything but not everything
Nov 19, 2017
Nov 19, 2017

More Bonfire Night inspiration:

Featured
Nov 5, 2024
Recipe: Cinder Toffee
Nov 5, 2024
Nov 5, 2024
Fire Jonathan Cherry.JPG
Nov 5, 2020
Fun | Games to play around a fire
Nov 5, 2020
Nov 5, 2020
Cattern Cakes Kirstie Young.jpg
Nov 3, 2020
Recipe | Cattern Cakes
Nov 3, 2020
Nov 3, 2020
In Eating, Making Tags parkin, cake, bonfire night, treacle, ginger, november, autumn
4 Comments
Photograph: Jonathan Cherry

Photograph: Jonathan Cherry

Weekend project | Post-it reminders

Lottie Storey September 30, 2017

This sewing project by Sarah Corbett reinvents the Post-it as a form of activism, giving a moment to pause and reflect

You may have been spurred into action by Sarah Corbett’s wisdom on page 34 of October's The Simple Things. If so, this project is a way of trying out a little craftivism (activism using craft) for yourself. Inspired by the simplicity of the Post-it Note, it was created as part of Bystander Revolution, a global anti-bullying initiative (bystanderrevolution.org). We’re so used to living and acting quickly, but a physical object like a Post-it Note can take us out of auto-pilot and remind us to stop and think. These are stitched rather than scrawled on, the act of hand-stitching bringing an opportunity to really consider our words and action, while the #crafterthought questions help to focus reflection on the message being created. You could keep your embroidered sticky notes or give them as gifts – or display them in your office, park or local café for people to see.

#CRAFTERTHOUGHTS

  • If I was being bullied, how would I want people to help me?
  • How can I show love to a bully to help them stop bullying others?
  • Using my talents and voice, how can I be part of the Bystander Revolution? 

Post-it reminders

GIVE YOUR WORDS WEIGHT WITH THESE PERMANENT POST-ITS

You will need

Post-it Notes
Biro or fabric invisible ink pen
Thin cotton fabric, ideally in Post-it Note colours
Black embroidery thread
Embroidery needle, ideally size 5–7
Embroidery hoop (not essential)
Bondaweb
Felt fabric, ideally in Post-it Note colours
Fabric scissors

1 Use a biro to write your message on a Post-it Note. Use one of the ideas opposite or come up with your own. Use the biro or fabric invisible ink pen to trace the message onto your cotton fabric (you can use a light box, or place it against a window or the light of
your computer screen to see the message through it).

2 Cut a finger-to-shoulder length of thread, thread your embroidery needle and embroider your message using a simple back stitch, with the help of an embroidery hoop, if you like. Use six strands of thread for thick words and two or three strands for smaller messages in thinner pen.

3 Cut out a piece of Bondaweb a little larger than your Post-it Note shape, and iron onto the back of your cotton fabric.

4 Place your Post-it Note on the back of your fabric, over the Bondaweb in the position you want your fabric Post-it, and cut around with fabric scissors to the shape and size of the real Post-it note.

5 Peel off your Bondaweb, then place the cotton, Bondaweb side facing out, onto your piece of felt fabric.

6 Heat your iron to low. Put your felt and cotton Post-it under a towel and briefly iron so the fabrics fuse. Cut your felt to the same size as the cotton square.

Place your handmade Post-it Note messages where they will have the most impact. Share your process and final piece online with followers or friends. You can tag @craftivists on Instagram or Twitter, or share on the Facebook page Craftivist Collective to encourage others to take part.

Project courtesy of craftivist-collective.com 

Get hold of your copy of this month's The Simple Things - buy, download or subscribe

View the sampler here


More from the October issue:

Featured
SIM64.GATHERING_SimpleThingsNov17_Autumn Lunch_29.png
Nov 14, 2020
Recipe | Lamb hotpot and mustardy greens
Nov 14, 2020
Nov 14, 2020
freestocks-org-62592.jpg
Oct 31, 2020
Halloween | Simple spells
Oct 31, 2020
Oct 31, 2020
Dec-17-Subs-page-image3_jwretA.png
Nov 29, 2017
Christmas | Giftwrapped subscriptions to The Simple Things
Nov 29, 2017
Nov 29, 2017

More weekend projects:

Featured
LemongrassChickenRedCurryCoconutSauce.jpg
Aug 23, 2023
Recipe | Tandoor Lemon Chicken with Mango & Coriander Salad
Aug 23, 2023
Aug 23, 2023
Folk enamel tumbler.jpg
Aug 5, 2023
Make | Folk art enamelware
Aug 5, 2023
Aug 5, 2023
Lavender eye pillow.jpg
Jul 22, 2023
Make | A Soothing Lavender Eye Pillow
Jul 22, 2023
Jul 22, 2023
In Making Tags issue 64, october, weekend project, craft, craftivism, activism
Comment
Photography: Nassima Rothacker

Photography: Nassima Rothacker

Lavender and peppermint bath soak

Lottie Storey September 11, 2017

If you’re in need of a good night’s sleep, the essential oils in this bath soak will leave you feeling extra relaxed, while the naturally therapeutic salts will soothe muscles and comfort irritated skin. Aaaaah. That’s better...

Makes 700g (enough for a week of baths)
600g Epsom salts*
75g sea salt
160g bicarbonate of soda
20 drops lavender essential oil
10 drops peppermint essential oil

Mix all the ingredients together in a small bowl and then tip them into a jar or another airtight container. The salts can be stored for up to three months. When you come to use them, pour about 100g into the bath while the water is running. Use your salts as often as you like. For a
truly luxurious experience, sprinkle a few flower heads into the bath.
* Epsom salts (magnesium sulphate) have been used for their therapeutic effect on aching joints and muscles for over a century. Used with potassium- and iodine- rich sea salt, these minerals are absorbed directly into the skin and will also help soothe dermatitis and any inflammation. Avoid using if pregnant.

From The Art of the Natural Home by Rebecca Sullivan (Kyle Books).

  Buy ,  download  or  subscribe   See the sample of our latest issue  here   Order  our new Celebrations Anthology   Pre-order a copy of  Flourish 4 , our new wellbeing bookazine   Listen to  our podcast  – Small Ways to Live Well

Get hold of your copy of this month's The Simple Things - buy, download or subscribe

View the sampler here.


More from the September issue:

Featured
Sep 25, 2017
Nest | String of hearts
Sep 25, 2017
Sep 25, 2017
coffee and walnut mini loaf cake recipe.png
Sep 23, 2017
Recipe | Coffee & walnut mini loaf cakes
Sep 23, 2017
Sep 23, 2017
SIM63.RUBBISHARTISTS_EL Ian Berry Studio  04.jpg
Sep 22, 2017
Creativity | Meet the makers using waste as a material for art
Sep 22, 2017
Sep 22, 2017

More homemade skincare:

Featured
Wellbeing.jpg
Feb 11, 2024
Make | Kitchen Face Masks
Feb 11, 2024
Feb 11, 2024
Bathsalts make 2.jpg
Oct 30, 2022
Make | Homemade Bath Salts
Oct 30, 2022
Oct 30, 2022
Rosemary Coconut Scalp .jpg
Feb 6, 2021
Make | Rosemary, Peppermint and Lemon Scalp Rub
Feb 6, 2021
Feb 6, 2021
In Making, Living Tags issue 63, september, natural skincare, home remedies, bath
Comment
Photography: LINDSAY ZIER-VOGEL

Photography: LINDSAY ZIER-VOGEL

Make | I love my city tote bag

Lottie Storey August 15, 2017

Make and decorate totes that celebrate what you love about where you live

You will need

For the bag:
38 x 46cm cotton twill (outer fabric) 
38 x 46cm cotton fabric (liner fabric)
1 spool thread, to match twill
2 pieces of cotton webbing (50 x 4cm), for tote handles
OR, a ready-made blank tote bag

For the decoration:
2 skeins embroidery floss
Size 4 embroidery needle
18cm wooden embroidery hoop (or smaller)
Scissors
Pencil and white eraser
Ruler and straight pins
Iron

Embroider your love letter:
1 Think of something that you love about where you live. Maybe it’s a flower seller or the view from the waterfront, a skyline, or a certain stretch of road.
2 Pre-wash and dry fabric.
3 In pencil, write the letter in the centre of the twill fabric, leaving at least 6cm at the top and at least 10cm at the bottom. If using an existing tote bag, centre text.
4 Using all six strands of embroidery floss, chain stitch around pencilled text. To chain stitch: make a small stitch on your fabric. Bring the needle back up through the fabric a short distance below your stitch. Loop your thread through the first stitch, pull through before re-inserting your needle into the same hole you came up through. Repeat, by passing the needle through the last loop you made.
5 Trim loose threads and iron out any crease marks from the hoop. If you’re using an existing tote, you’re done! If sewing your own tote bag, proceed to the next step.

Make your bag:
1 Start by making the lining: pin together two pieces of liner material with right sides facing. Using a sewing machine with a 1cm seam allowance, stitch along one side, turn onto bag bottom, and turn again, sewing up the other side.
2 Pinch corner and line up the side seams so that corner fabric makes a triangle. Measure 7.5cm from corner and draw a perpendicular line with pencil. Sew along that line, keeping side seams open. Complete both liner corners and cut off extra fabric. Keep tote inside out and pin 4cm seam from open edge of bag.
3 Then make the outer bag: pin together two pieces of twill with right sides facing. Using a sewing machine with a 1cm seam allowance, stitch both sides of the bag and the bottom.
4 Pinch corner and line up side seams so that the corner fabric makes a triangle. Measure 8cm from the corner and draw a perpendicular line with pencil. Sew along that line, keeping the side seams open. Complete both corners and cut off any extra fabric.
5 Flip fabric right-side out and pin a 4cm seam from the open edge of bag.
6 Slide lining inside outer shell and pin corners together. Pin handle fabric to twill 10cm from the edge of the bag, with 10cm between each end of the handles. Pin outer fabric to inner fabric. Be careful to tuck handle tops down into bag. Sew through all layers at the top of the bag, keeping the handles sandwiched between the lining and the outside twill. Trim any loose threads to neaten it up.

Project by Lindsay Zier-Vogel, reprinted with permission from Strange Material: Storytelling through Textiles edited by Leanne Prain (Arsenal Pulp Press).


  Buy ,  download  or  subscribe   See the sample of our latest issue  here   Order  our new Celebrations Anthology   Pre-order a copy of  Flourish 4 , our new wellbeing bookazine   Listen to  our podcast  – Small Ways to Live Well

Get hold of your copy of this month's The Simple Things - buy, download or subscribe

View the sampler here


More from the August issue:

Featured
Aug 28, 2017
Recipe | Vegetable crisps
Aug 28, 2017
Aug 28, 2017
Aug 26, 2017
Britain's outdoor games
Aug 26, 2017
Aug 26, 2017
Aug 20, 2017
Garden hacks | Reuse cooking water on your plants
Aug 20, 2017
Aug 20, 2017

More weekend projects to make:

Featured
Lanyard & Key Fob.jpg
Jun 1, 2025
Project | Make a Scrap fabric Key Fob
Jun 1, 2025
Jun 1, 2025
TEA COSY JUMPER.jpg
Jan 25, 2025
How to | Make a Tea Cosy from an Old Jumper
Jan 25, 2025
Jan 25, 2025
Wellbeing.jpg
Feb 11, 2024
Make | Kitchen Face Masks
Feb 11, 2024
Feb 11, 2024
In Making Tags make, issue 62, august, weekend project, Make project, tote bag, sewing
Comment
Photography: Nassima Rothacker

Photography: Nassima Rothacker

Make | Natural food colouring

Lottie Storey July 31, 2017

There’s no need to rely on artificial food colourings when most colours can be created with natural ingredients found in your kitchen. Add a teaspoon at a time, increasing gradually for a more intense colour

Pink
125g pack of cooked beetroot
2 tsp juice from the pack
Blitz the beetroot and juice in a food processor until smooth. Strain if desired. Store in an airtight contained for up to two weeks in the fridge.

Purple
70g blueberries
4tsp water
Blitz the berries and water in a food processor until smooth. Strain through a superfine mesh sieve to separate solids. Store in a jar for up to a month.

Green
60g spinach
Enough water to cover it
Cover spinach in water and boil for 5 mins. Strain and discard liquid. Blitz spinach and6tbsp water in a food processor. Add more water if needed. Strain through a fine sieve, cool and store in a jar for up to a month.

Yellow
120ml water
1⁄2 tsp turmeric
Put water and turmeric in a small pan and heat for 5 mins. Allow to cool and store in an jar in the fridge up to a month.

Red
80g raspberries
4 tsp water
Blitz berries and water in a food processor until smooth. Strain to remove seeds. Store in a jar for up to two weeks in the fridge.

From The Art of the Natural Home by Rebecca Sullivan (Kyle Books).


  Buy ,  download  or  subscribe   See the sample of our latest issue  here   Order  our new Celebrations Anthology   Pre-order a copy of  Flourish 4 , our new wellbeing bookazine   Listen to  our podcast  – Small Ways to Live Well

Get hold of your copy of this month's The Simple Things - buy, download or subscribe

View the sampler here


More from the August issue:

Featured
Aug 28, 2017
Recipe | Vegetable crisps
Aug 28, 2017
Aug 28, 2017
Aug 26, 2017
Britain's outdoor games
Aug 26, 2017
Aug 26, 2017
Aug 20, 2017
Garden hacks | Reuse cooking water on your plants
Aug 20, 2017
Aug 20, 2017

More natural recipes:

Featured
chickweed aloe aftersun ice cubes.jpeg
Aug 8, 2018
Ice cube aftersun
Aug 8, 2018
Aug 8, 2018
Jelly Fish.png
Jul 6, 2018
Natural first aid | Jellyfish stings
Jul 6, 2018
Jul 6, 2018
SIM71.FORAGING_Elderflower Cleanser a1 .png
May 26, 2018
Elderflower toner
May 26, 2018
May 26, 2018
In Making, Eating Tags issue 62, august, home remedies
Comment
Photography: Nassima Rothacker

Photography: Nassima Rothacker

Make your own simple face serum

Lottie Storey July 5, 2017

Serums can feel like an expensive luxury but they don’t have to be. 

Used before applying moisturiser, they give a boost to your skin and this homemade version uses vitamin C for its antioxidant properties and its role in repairing collagen. 

Great for sun-stressed skin, it’s quick and easy to prepare – just make it when you need it...

1 tsp vitamin C powder (available from health food shops or online. Just make sure you buy a natural one)
2 tsp filtered water

Stir the vitamin C powder into water until fully dissolved. Use before bed after washing your face and before applying moisturiser. Smooth onto your face in a circular upward motion and let it sink in.

From The Art of the Natural Home by Rebecca Sullivan (Kyle Books). 


More from the July issue:

Featured
Jul 24, 2017
July issue: One day left to buy!
Jul 24, 2017
Jul 24, 2017
Jul 18, 2017
Miscellany | Jane Austen special
Jul 18, 2017
Jul 18, 2017
Jul 13, 2017
Escape | Outing to the sea
Jul 13, 2017
Jul 13, 2017

More natural skincare recipes:

Featured
Wellbeing.jpg
Feb 11, 2024
Make | Kitchen Face Masks
Feb 11, 2024
Feb 11, 2024
Bathsalts make 2.jpg
Oct 30, 2022
Make | Homemade Bath Salts
Oct 30, 2022
Oct 30, 2022
Rosemary Coconut Scalp .jpg
Feb 6, 2021
Make | Rosemary, Peppermint and Lemon Scalp Rub
Feb 6, 2021
Feb 6, 2021
  Buy ,  download  or  subscribe   See the sample of our latest issue  here   Order  our new Celebrations Anthology   Pre-order a copy of  Flourish 4 , our new wellbeing bookazine   Listen to  our podcast  – Small Ways to Live Well

Get hold of your copy of this month's The Simple Things - buy, download or subscribe

View the sampler here.

In Making Tags issue 61, july, natural skincare, vitamin c, face serum, citrus
Comment
Image: Joe Shillington/Unsplash

Image: Joe Shillington/Unsplash

Mindful moments | Download a chatterbox to colour in

Lottie Storey June 26, 2017

Pretty much any activity can be a mindful activity, it’s fair to say, but colouring in, carefully and attentively, is particularly suitable. These beautiful illustrations by Emma Farrarons combine a colouring exercise with simple, fun and imaginative activities to help make any day a little more mindful. Download Emma’s chatterbox now or turn to page 52 of June’s The Simple Things for more mindful activities and colouring doodles.

Remember how much fun you had making chatterboxes as a child? Create a mindfulness chatterbox filled with eight different activities to help remind you to break your day and make time for mindfulness. Fold a square piece of paper as shown here. Come up with your own ideas or you can use the template as a guide.


More from the June issue:

Featured
Feb 17, 2019
Small acts of kindness
Feb 17, 2019
Feb 17, 2019
Jun 27, 2017
Recipe | Gooseberry cake
Jun 27, 2017
Jun 27, 2017
Jun 26, 2017
Mindful moments | Download a chatterbox to colour in
Jun 26, 2017
Jun 26, 2017

More mindfulness:

Featured
istock brain fog.jpg
Feb 6, 2022
Brain fog | And how to beat it
Feb 6, 2022
Feb 6, 2022
Feb 14, 2019
Think: Love mindfully
Feb 14, 2019
Feb 14, 2019
SIM79.LEAPINGHARE_LH-MIBA_MindfulBaking CVR (1).jpg
Dec 19, 2018
Reader offer | Baking for sharing
Dec 19, 2018
Dec 19, 2018
  Buy ,  download  or  subscribe   See the sample of our latest issue  here   Order  our new Celebrations Anthology   Pre-order a copy of  Flourish 4 , our new wellbeing bookazine   Listen to  our podcast  – Small Ways to Live Well

Get hold of your copy of this month's The Simple Things - buy, download or subscribe

View the sampler here.

In Think, Making Tags issue 60, june, mindfulness, mindful, colouring, download
1 Comment

Make: Vanilla linen spray

Lottie Storey May 8, 2017

The rich, sweet scent of vanilla is one many of us find familiar and comforting. Making your own vanilla extract is easy and economical, but you do need to be patient as it takes a couple of months to infuse.

Use it to make this versatile spray, which freshens up bedlinen and doubles up as a body and hair mist (any leftover extract can be dabbed on as a perfume or added to cakes, of course).
 
DIY VANILLA EXTRACT
8 whole vanilla pods (fresh with a strong smell of vanilla)
500ml spiced rum (such as Captain Morgan or any good-quality brandy, unflavoured vodka, bourbon or dark rum) 
Pint-size mason jar with lid
Cling film

Slice each vanilla pod lengthwise and chop into tiny pieces. Add the chopped vanilla to the mason jar, then fill the jar with rum. Place a piece of cling film over the top of the jar and screw on the lid. Shake for one minute.Store the jar in a dark cabinet for two months, shaking daily for 10–15 seconds. There’s no need to strain the vanilla bits, just leave in the jar. The flavouring will get stronger and more aromatic as it ages.

LINEN SPRAY
2 tbsp vanilla extract* 
2 tbsp purified water

Add the vanilla extract and water to a 60ml dark glass spritzer bottle, screw on the top, and shake vigorously. Set aside for 24 hours. Store at room temperature away from heat and light and use within one year. Shake before spritzing on sheets and pillowcases.

Recipe from Making Love Potions by Stephanie L Tourles (Storey).

 * If you don’t have time to make your own, use an extract made with Madagascar Bourbon or Tahitian vanilla pods.


More from the May issue:

Featured
May 29, 2017
Recipe | Smoked trout, cucumber and coconut salad with dosa
May 29, 2017
May 29, 2017
May 27, 2017
Garden hacks | Make a colander hanging basket
May 27, 2017
May 27, 2017
May 26, 2017
Recipe | Picnic Pies
May 26, 2017
May 26, 2017

More natural home projects:

Featured
chickweed aloe aftersun ice cubes.jpeg
Aug 8, 2018
Ice cube aftersun
Aug 8, 2018
Aug 8, 2018
Jelly Fish.png
Jul 6, 2018
Natural first aid | Jellyfish stings
Jul 6, 2018
Jul 6, 2018
SIM71.FORAGING_Elderflower Cleanser a1 .png
May 26, 2018
Elderflower toner
May 26, 2018
May 26, 2018
  Buy ,  download  or  subscribe   See the sample of our latest issue  here   Order  our new Celebrations Anthology   Pre-order a copy of  Flourish 4 , our new wellbeing bookazine   Listen to  our podcast  – Small Ways to Live Well

Get hold of your copy of this month's The Simple Things - buy, download or subscribe

View the sampler here.


In Making Tags issue 59, may, homemade, home remedies, natural skincare, vanilla
Comment

Make: Giant paper flower

Lottie Storey May 3, 2017

This huge, decorative bloom is a sunflower you can enjoy all year

YOU WILL NEED:
Assorted colours of tissue paper
Scissors
Fuzzy pipe cleaners

1 Carefully stack approximately 12 sheets of tissue paper, lining up all the edges carefully. The flower pictured uses four yellow sheets for the centre, these are stacked on top, then two or three white and then six sheets of orange. (To make smaller versions, just omit the inside yellow pieces and use fewer sheets, cut smaller, for the outer petals.)

2 Start to fold all sheets over at the same time in 5cm folds. Now fold back the other way, and repeat accordion-style until you have folded all the paper.

3 Unfold all the paper carefully and take out the yellow paper that will be used for the centre of the flower. Fold the yellow paper back in pleats, then fold the folded paper in half widthways. Trim off half of the unfolded ends.

4 Make 5cm-long cuts into the trimmed edge of the folded yellow paper.

5 Now fold the white and orange sheets back up together and fold in half widthways. Trim the unfolded edges together with a rounded edge for your petals. If you find them too thick to trim all together, do half at a time.

6 Carefully unfold all of your papers, place them back in their original stacked order and then fold them back up all together in the concertina style.

7 Fold this in half and wrap a pipe cleaner through the centre of the folded tissue paper. Twist to secure.

8 Starting with one side of the yellow paper, gently pull out and fluff up one piece of the tissue. Separate each piece as you work through the layers of the tissue paper. Be careful not to pull too hard on the papers as they rip easily.

9 Continue on the other side, gently separating and pulling up each piece of tissue paper and fluffing it until you have a full flower shape.

Adapted from Decorate for a Party by Holly Becker and Leslie Shewring (Jacqui Small) 


More from the May issue:

Featured
May 29, 2017
Recipe | Smoked trout, cucumber and coconut salad with dosa
May 29, 2017
May 29, 2017
May 27, 2017
Garden hacks | Make a colander hanging basket
May 27, 2017
May 27, 2017
May 26, 2017
Recipe | Picnic Pies
May 26, 2017
May 26, 2017

More making projects:

Featured
Lanyard & Key Fob.jpg
Jun 1, 2025
Project | Make a Scrap fabric Key Fob
Jun 1, 2025
Jun 1, 2025
TEA COSY JUMPER.jpg
Jan 25, 2025
How to | Make a Tea Cosy from an Old Jumper
Jan 25, 2025
Jan 25, 2025
Wellbeing.jpg
Feb 11, 2024
Make | Kitchen Face Masks
Feb 11, 2024
Feb 11, 2024
  Buy ,  download  or  subscribe   See the sample of our latest issue  here   Order  our new Celebrations Anthology   Pre-order a copy of  Flourish 4 , our new wellbeing bookazine   Listen to  our podcast  – Small Ways to Live Well

Get hold of your copy of this month's The Simple Things - buy, download or subscribe

View the sampler here.

In Making Tags issue 59, may, Make project, papercraft, flowers, school holiday ideas
Comment

Make: Skin-boosting body butter

Lottie Storey February 21, 2017

Great for dry skin, this icing-soft whip is made for slathering all over and smells as good as it feels

Makes 100g; lasts six months in an airtight container

YOU WILL NEED:
50g mango butter
50ml jojoba oil
5 drops geranium essential oil
2 drops vitamin E oil

1 Melt the mango butter in a bain-marie. 
2 Slowly add the jojoba oil, stirring as you do.
3 Place in the fridge to cool for 5 mins. 
4 Stir in the essential oils.
5 Whisk the mixture with an electric whisk, then put back in the fridge for a further 5 mins. Repeat until you have a creamy texture, almost like icing on a cake.
6 Spoon into your container, being careful to maintain the fluffiness.

Extracted from Clean Beauty: Recipes to Manage your Beauty Routine Naturally by Dominika Minarovic and Elsie Rutterford (Square Peg). Photography: Charlotte Kibbles


More from the February issue:

Featured
Mar 29, 2017
Competition: Win with Nature's Path Organic cereals
Mar 29, 2017
Mar 29, 2017
Feb 21, 2017
Make: Skin-boosting body butter
Feb 21, 2017
Feb 21, 2017
Unknown_jwret.jpg
Feb 20, 2017
Recipe: Feelgood fish fingers
Feb 20, 2017
Feb 20, 2017

More natural skincare posts:

Featured
Wellbeing.jpg
Feb 11, 2024
Make | Kitchen Face Masks
Feb 11, 2024
Feb 11, 2024
Bathsalts make 2.jpg
Oct 30, 2022
Make | Homemade Bath Salts
Oct 30, 2022
Oct 30, 2022
Rosemary Coconut Scalp .jpg
Feb 6, 2021
Make | Rosemary, Peppermint and Lemon Scalp Rub
Feb 6, 2021
Feb 6, 2021
  Buy ,  download  or  subscribe   See the sample of our latest issue  here   Order  our new Celebrations Anthology   Pre-order a copy of  Flourish 4 , our new wellbeing bookazine   Listen to  our podcast  – Small Ways to Live Well

Get hold of your copy of this month's The Simple Things - buy, download or subscribe

View the sampler here

In Making Tags natural skincare, february, issue 56, make, the simple things
Comment

Make: Repairing hair oil

Lottie Storey February 1, 2017

Argan oil will nourish your hair, working magic on damaged or colour-treated locks

2 tbsp argan oil*
3 drops rosemary essential oil
3 drops cedar wood essential oil
3 drops lavender essential oil

1 Pour the argan oil into a small bottle and add the essential oils. Shake well and use a tiny amount on the tips of wet hair after washing to bring moisture to dry ends.
2 Or use it as an intense conditioner to add shine. Massage the mixture into tired, dry and lifeless hair. Let it absorb for 15–20 minutes before shampooing.

Why it works
Argan oil is highly moisturising, nourishing and rich in antioxidants and vitamins A and E. It stimulates cell activity and boosts circulation. Rosemary is antibacterial, regulating sebum levels in your scalp. Cedar is anti-inflammatory. Lavender has potent skin-soothing powers and helps heal wounds.

From All Natural Beauty by Karin Berndl and Nici Hofer (Hardie Grant). 

*And yes, it is sustainable: no trees are harmed in the extraction of argan oil. 


More from the February issue:

Featured
Mar 29, 2017
Competition: Win with Nature's Path Organic cereals
Mar 29, 2017
Mar 29, 2017
Feb 21, 2017
Make: Skin-boosting body butter
Feb 21, 2017
Feb 21, 2017
Unknown_jwret.jpg
Feb 20, 2017
Recipe: Feelgood fish fingers
Feb 20, 2017
Feb 20, 2017

More natural skincare posts:

Featured
Wellbeing.jpg
Feb 11, 2024
Make | Kitchen Face Masks
Feb 11, 2024
Feb 11, 2024
Bathsalts make 2.jpg
Oct 30, 2022
Make | Homemade Bath Salts
Oct 30, 2022
Oct 30, 2022
Rosemary Coconut Scalp .jpg
Feb 6, 2021
Make | Rosemary, Peppermint and Lemon Scalp Rub
Feb 6, 2021
Feb 6, 2021
  Buy ,  download  or  subscribe   See the sample of our latest issue  here   Order  our new Celebrations Anthology   Pre-order a copy of  Flourish 4 , our new wellbeing bookazine   Listen to  our podcast  – Small Ways to Live Well

Get hold of your copy of this month's The Simple Things - buy, download or subscribe

View the sampler here.

In Making Tags issue 56, february, natural skincare
Comment
  • Blog
  • Older
  • Newer
Featured
  Buy ,  download  or  subscribe   See the sample of our latest issue  here   Order  our new Celebrations Anthology   Pre-order a copy of  Flourish 4 , our new wellbeing bookazine   Listen to  our podcast  – Small Ways to Live Well
Aug 29, 2025
Aug 29, 2025

Buy, download or subscribe

See the sample of our latest issue here

Order our new Celebrations Anthology

Pre-order a copy of Flourish 4, our new wellbeing bookazine 

Listen to our podcast – Small Ways to Live Well

Aug 29, 2025
Join our Newsletter
Name
Email *

We respect your privacy and won't share your data.

email marketing by activecampaign
facebook-unauth twitter pinterest spotify instagram
  • Subscriber Login
  • Stockists
  • Advertise
  • Contact

The Simple Things is published by Iceberg Press

The Simple Things

Taking time to live well

We celebrate slowing down, enjoying what you have, making the most of where you live, enjoying the company of of friends and family, and feeding them well. We like to grow some of our own vegetables, visit local markets, rummage for vintage finds, and decorate our home with the plunder. We love being outdoors and enjoy the satisfaction that comes with a job well done.

facebook-unauth twitter pinterest spotify instagram