The Simple Things

Taking time to live well
  • Home
  • Subscribe
  • SHOP
  • Newsletter
  • About
  • Work with us
  • Home
  • Subscribe
  • SHOP
  • Newsletter
  • About
  • Work with us

Blog

Taking Time to Live Well

  • All
  • Chalkboard
  • Christmas
  • Competition
  • could do
  • Eating
  • Escape
  • Escaping
  • Fresh
  • Fun
  • gardening
  • Gathered
  • Gathering
  • Growing
  • Haikus
  • Interview
  • Living
  • Looking back
  • Magazine
  • magical creatures
  • Making
  • Miscellany
  • My Neighbourhood
  • Nature
  • Nest
  • Nesting
  • outing
  • playlist
  • Reader event
  • Reader offer
  • Shop
  • Sponsored post
  • Sunday Best
  • Think
  • Uncategorized
  • Wellbeing
  • Wisdom

How to | Win at Pottery Painting

David Parker April 12, 2025

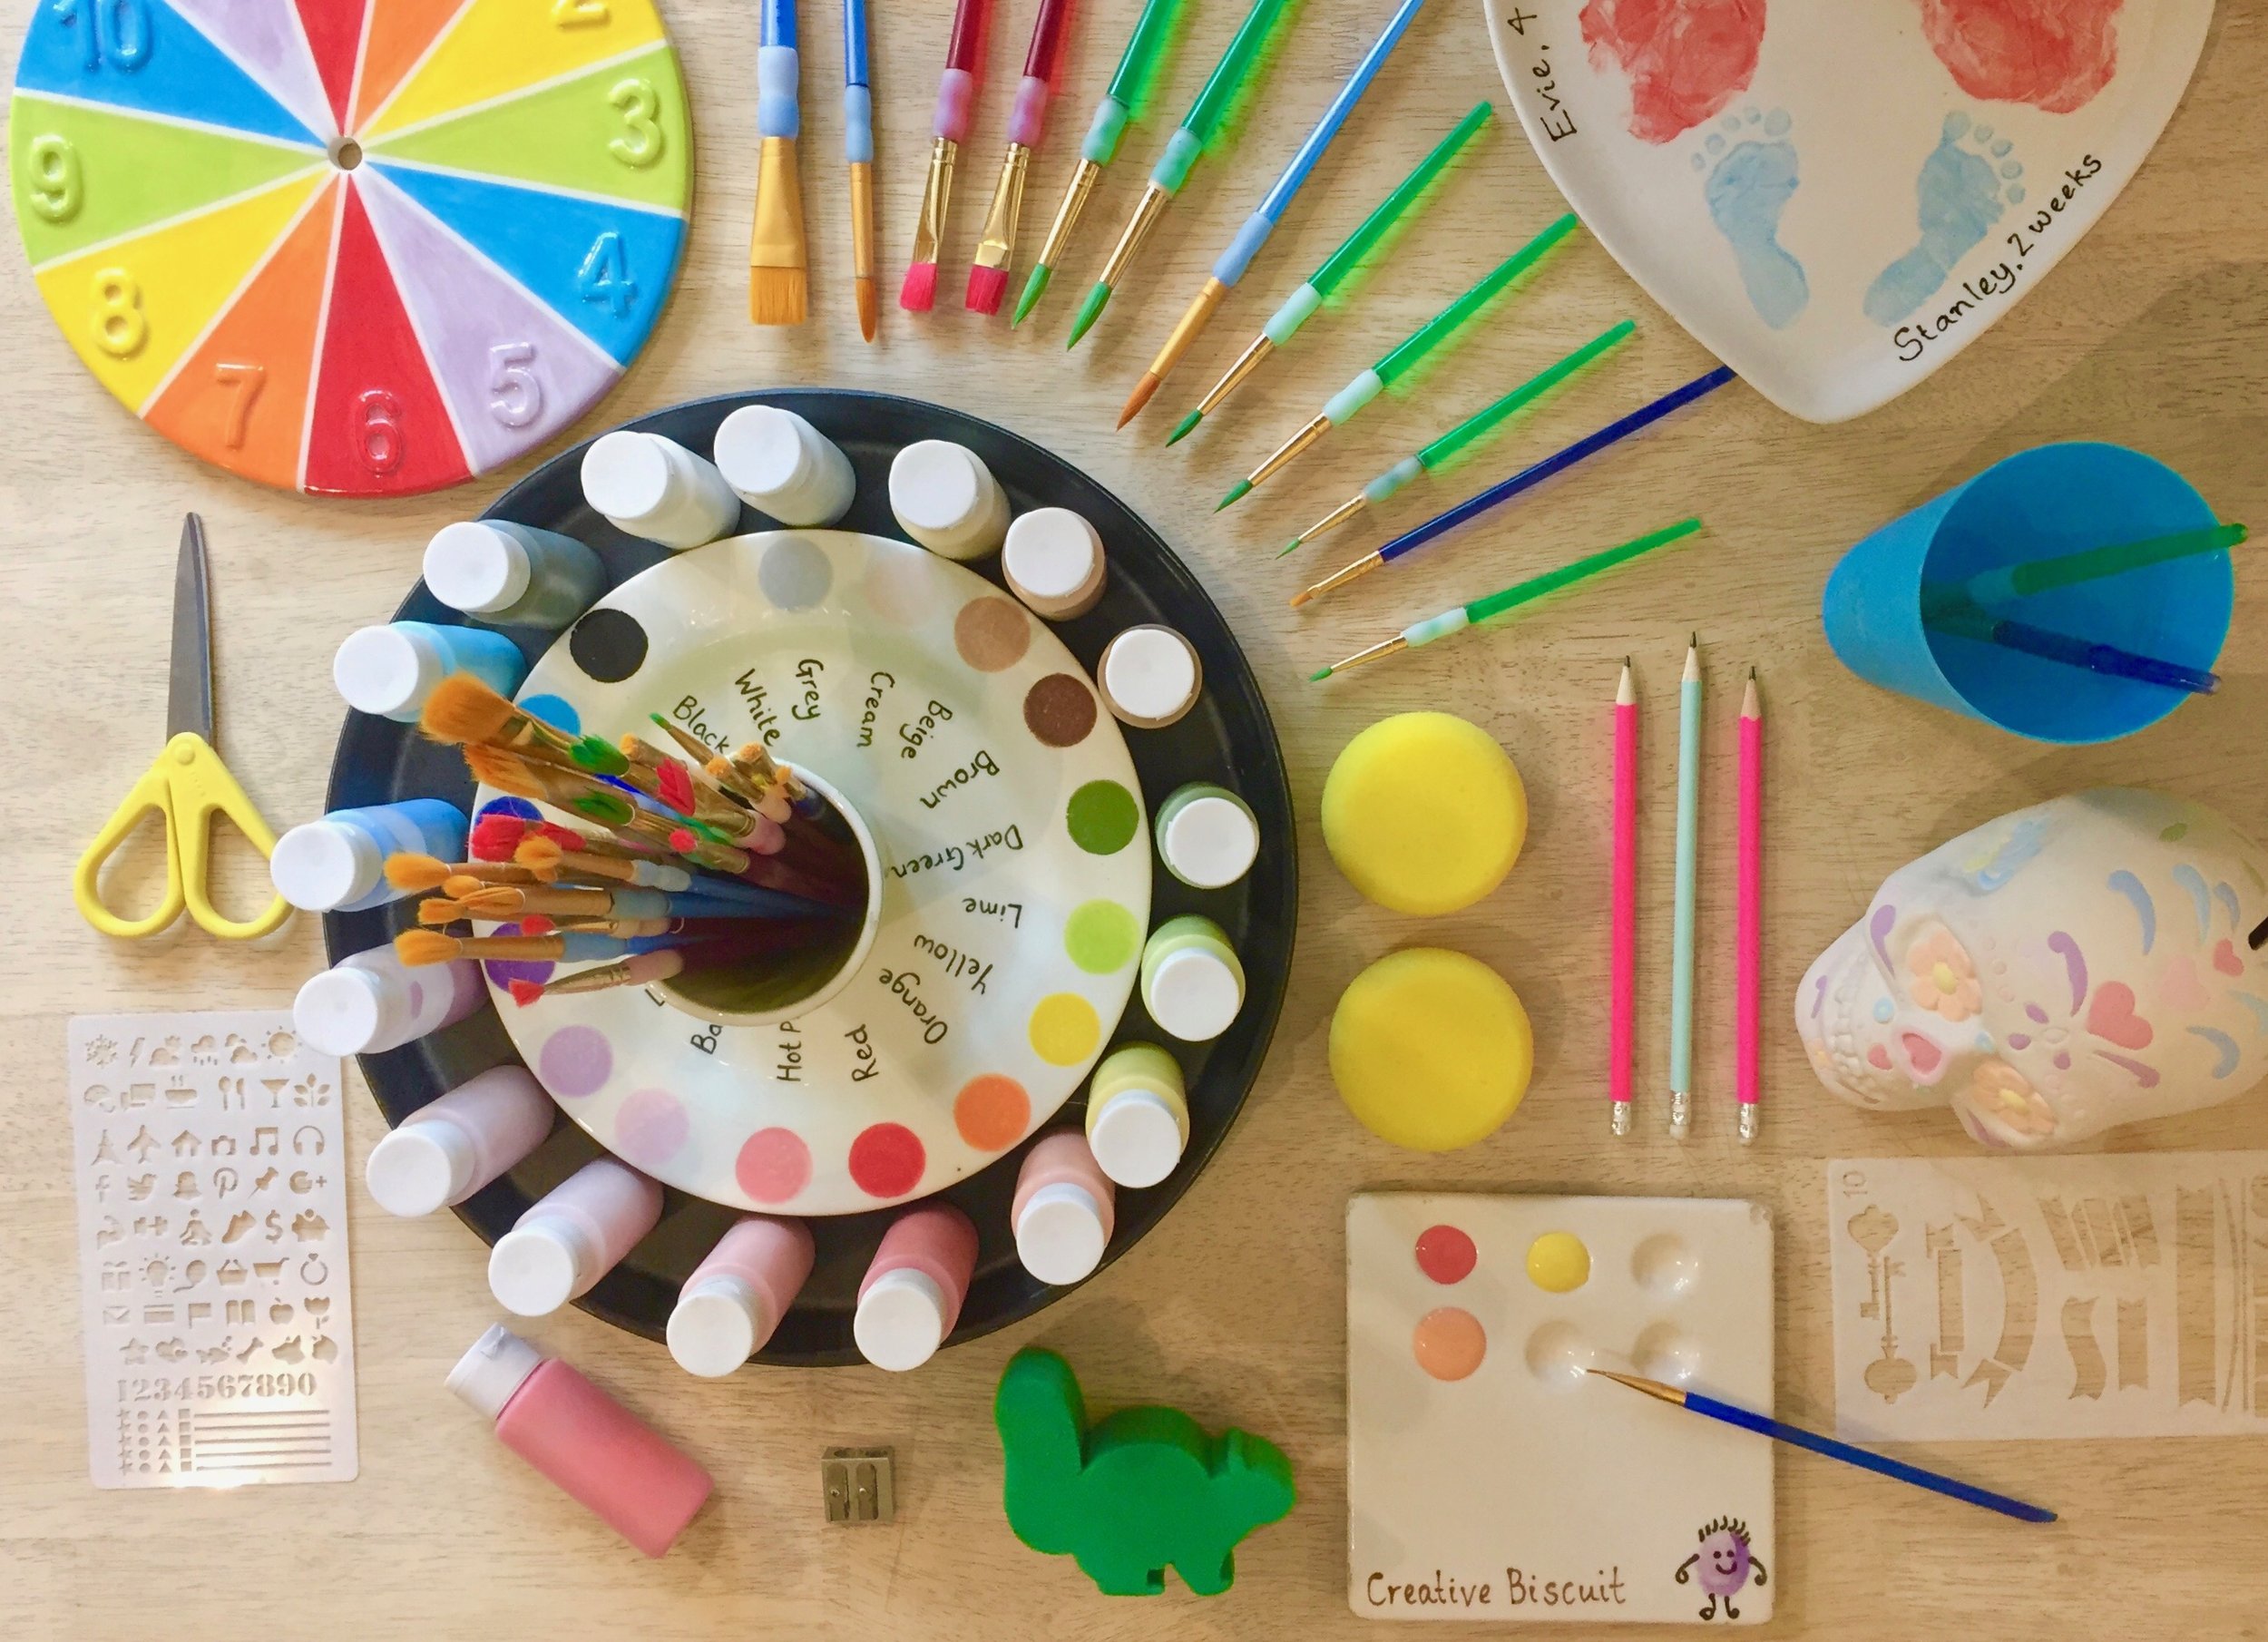
Whether you’re planning a quiet afternoon painting a mug or a get-together with a gang of friends painting plates over a few cuppas in your local pottery cafe, a blank canvas can be a bit overwhelming, especially if you’re no Van Gogh. We asked Karen Dunn, owner of ceramics cafe Creative Biscuit, for her best tips for no-fail designs - even if you struggle to draw a stick man

Patterns – If you don’t think you can draw go for patterns instead. Spots, stripes, a scalloped edge, simple shapes and patterns in bold colours always look great.

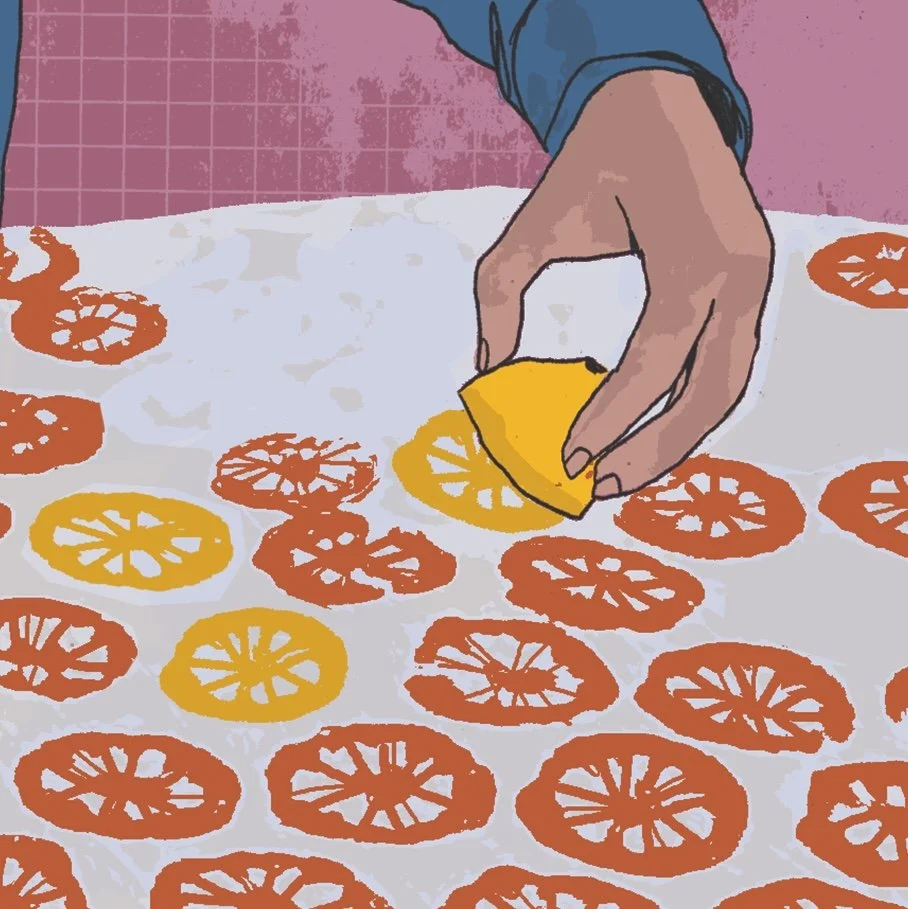
Sponges – Go full Emma Bridgewater and use shaped sponges to decorate your ceramics. As above you can use simple shapes such as circles or squares or use a shaped sponge such as a leaf or a heart. Dip the sponge in paint and make sure you fully soak up the paint to get an even print.

Tape – You can use masking tape or similar to create a pattern on ceramic, as wherever you place tape will remain white. Paint over the top and then using a pin to find the end of the tape, pull the tape off to reveal your white pattern underneath – plus the peeling is very satisfying.

Tracing – Copy a picture onto ceramic by taking your drawing or a print out of an image you would like to copy on paper and on the reverse side coat the back of the image with a soft pencil, covering the area in graphite. Next turn it over so the pencil is facing the ceramic and trace over the top of the picture with a ball point pen or similar to transfer the image to ceramic. Note: Pencil burns away in the kiln so make sure you paint everything you want to see when it comes out of the kiln.

Scratching – Like the pottery technique sgraffito, you can create scratched patterns in your underglaze paint. Make sure you put three good layers of paint on your ceramic then using a skewer or anything with a sharp tip to scratch out your pattern.

Bubble painting – A bubble pattern on ceramics looks impressive but is very easy to create. Get some washing up liquid, plus a little bit of water and a lot of the underglaze paint in the colour you wish to use and mix well. Get a straw and blow bubbles in the mixture. You can then either build up a mound of bubbles and wipe the ceramic through them or scoop bubbles with your hand and place them on the ceramic when you would like them to be.

Hand and footprints – Hand and footprints last forever when painted on ceramic and are really easy to do. Paint the hand or foot you want to print with a layer of paint – not too thick so it smudges and not too thin or you won’t see the print. Bring the ceramic to the hand or foot, then press on and off quickly. If you or your child is a bit too big for a hand or footprint, you can always do fingerprints and turn them into other things such as people or patterns.

You can find more inspiration at creativebiscuit.co.uk which is based in East London, and hear more from Karen in our My Day in Cups of Tea pages in our April issue, in shops now.

Buy this month's The Simple Things - buy, download or subscribe

More artistic inspiration…

Featured
Pottery Painting 2.jpeg
Apr 12, 2025
How to | Win at Pottery Painting
Apr 12, 2025
Apr 12, 2025
AliFoxon5.JPG
Apr 10, 2021
New hobby | Plein Air Sketching
Apr 10, 2021
Apr 10, 2021
Sketchbook Club Houses pic.JPG
Apr 10, 2020
Friday Sketchbook Club | Houses
Apr 10, 2020
Apr 10, 2020

More from our blog…

Featured
Water Boatman.jpg
May 24, 2025
Nature | Pond-Dipping for Grown-ups
May 24, 2025
May 24, 2025
RS2832_iStock-1278591330.jpg
May 23, 2025
Sponsored Post | Get your family active with Youth Sport Trust
May 23, 2025
May 23, 2025
Screenshot 2025-05-21 at 08.52.06.png
May 21, 2025
Playlist | Great Heights
May 21, 2025
May 21, 2025
In Fun Tags issue 154, painting, how to
Comment
9.new years final.png

How to | Make a Could-Do List Happen

Lottie Storey December 31, 2024

Apparently only one in ten of us sticks to our New Year’s Resolutions, although here at The Simple Things, we favour Could-Do Lists rather than strict rules and ideas that work at any time of year, rather than piling the pressure on all on one day.

These tips will improve your odds of making your could-do list happen… whenever you choose to do so…

1 Resolve to make a change that you want. Success is more likely when driven by internal, rather than external forces.
2 Focus on one thing. Scientists have shown that willpower requires energy. Channel it well.
3 Be specific about what you want to achieve, when and how. You’re more likely to succeed than if starting with a vague plan.
4 Tell those around you. In a study, more than 70% who sent weekly updates on their goal to a friend reported success (compared to 35% of those striving alone).
 

And here are a few ideas for things you might want to add to your 2025 Could-Do List…

  • Mix a great martini 

  • Book a trip somewhere on your bucket list

  • Read a book by an author you’re unfamiliar with

  • Spend a day wildlife-watching… birds, badgers.. it’s up to you

  • Have a small party for no reason at all

  • Spend time outdoors every day

  • Learn a new craft

  • Get a penfriend or strike up a correspondence with an old friend

  • Go on a ‘pilgrimage’ to somewhere meaningful for you

  • Use local ingredients to make a local recipe

  • Watch a film in the open air or at a drive-through

  • Keep a diary for a month and keep the habit if you enjoy it

This blog was first published in December 2018. You’ll find a Could-Do list in every issue of The Simple Things. Buy this month's The Simple Things - buy, download or subscribe


More could-do lists:

Featured
Could do Feb.JPG
Jan 29, 2022
February | A Could-do List
Jan 29, 2022
Jan 29, 2022
Could do list.JPG
Dec 31, 2021
January | Could-do lists
Dec 31, 2021
Dec 31, 2021
Dec Could Do.JPG
Nov 20, 2021
A Could-Do List for December
Nov 20, 2021
Nov 20, 2021

More how-to posts…

Featured
Pottery Painting 2.jpeg
Apr 12, 2025
How to | Win at Pottery Painting
Apr 12, 2025
Apr 12, 2025
9.new years final.png
Dec 31, 2024
How to | Make a Could-Do List Happen
Dec 31, 2024
Dec 31, 2024
Synchronised swimmers.jpg
Aug 17, 2024
How to | Do a Swimming Pool Handstand
Aug 17, 2024
Aug 17, 2024
In Christmas, Miscellany Tags christmas, issue 66, december, christmas miscellany, how to, new year's resolutions, new year
Comment

How to | Do a Swimming Pool Handstand

Iona Bower August 17, 2024

Want to look effortlessly sporty and stylishly carefree at the same time? Here’s how to do an underwater handstand. 

Practise the following steps in secret - perhaps on early mornings at the pool - until you can do an underwater handstand with ease (and without causing alarm… or a tidal wave). Don’t be tempted to try it on land though (unless you are a gymnast or under the age of 12).

1. Choose a depth of water you feel comfortable in. Deep water will support your body more, meaning you don’t have to use as many muscles or exercise so much balance. However, the deeper the water, the harder it is to keep your hands on the pool floor. Shallower water makes it a little easier to stay on the bottom but you won’t be buoyed up by the water so much. Experiment a bit and find what suits you best but maybe start with the water about waist height.

2. Plant your feet firmly together on the floor of the pool and take a deep breath into your lungs. Hold your breath and in one, hopefully swift, movement lift your feet, bring your knees into your chest and plant your hands, palm down, where your feet were. 

3. Once your palms are firmly on the floor of the pool, steadily push your legs up into a handstand position. Once they’re there, point your toes and press your legs together (this will help you stay in position). While you’re practising, you can always ask a trusted friend to catch your legs for you.

4. When you can’t hold your breath any longer let your legs fall forward over your body and return to a standing position. Once you’ve taken a breath of air, you may shout “TA-DAAAAH!” if you wish. 

Once you’ve mastered a handstand, if you want to be REALLY fancy you might like to take inspiration from the synchronised swimmers (pictured here) that Ella Foote met for our August issue’s Modern Eccentrics page. Photography by Jonathan Cherry. 

Buy this month's The Simple Things - buy, download or subscribe

More from our August issue…

Featured
Beetle Bucket.jpg
Aug 20, 2024
Make | A Beetle Bucket
Aug 20, 2024
Aug 20, 2024
Synchronised swimmers.jpg
Aug 17, 2024
How to | Do a Swimming Pool Handstand
Aug 17, 2024
Aug 17, 2024
Summer Reading Anneliese.jpg
Aug 1, 2024
Summer Reads | And Summer Tipples
Aug 1, 2024
Aug 1, 2024

More blogs for aquatic adventurers…

Featured
Synchronised swimmers.jpg
Aug 17, 2024
How to | Do a Swimming Pool Handstand
Aug 17, 2024
Aug 17, 2024
Swim Pond.jpg
Sep 23, 2023
Project | Build a Garden Swimming Pond
Sep 23, 2023
Sep 23, 2023
SIM75.MYPLOT_DSC05480.png
Sep 11, 2018
My Plot | Natural born swimmers
Sep 11, 2018
Sep 11, 2018
In Fun Tags issue 146, swimming, how to
Comment

How to | Start a Community Fridge

Iona Bower February 28, 2023

Feed the thousands and save food from landfill

We were inspired to hear about Chesham Community Fridges this month, an organisation which won in the Working Together category of our much-coveted Neighbourhood Awards. 

You may have seen one advertised near you or tried it out yourself in a bid to save food from landfill. Community Fridges are popping up everywhere and doing so much good.Chesham’s Community Fridge was originally established with help from Hubbub, one of the first pioneers of the Community Fridge movement. They have a very helpful guide to setting up on their website. If you’re considering starting your own, here’s a brief overview of the things Hubbub say you should think about before you begin.

1. You’ll need an organisation to ‘lead’ your project (it can’t be an individual) so consider who that could be. It could be a church, local charity or other volunteer organisation. You’ll also need them to include the fridge on their liability insurance.

2. Consider contacting environmental health before you start for advice and to make sure you’re properly registered. 

3. When seeking a location, look for somewhere covered and secure. An area with good footfall is best but as long as it’s accessible that’s the main thing. 

4. Things you might want in your space (as well as the fridge) include: a freezer, shelves for dry food storage, bins for packaging and recycling, a table on which to sort out the bags, scales for weighing things, wall space for an information board. You could even have a herb garden if you have some outdoor space, too. 

Find out more about Chesham Community Fridges, as well as our other Neighbourhood Awards winners, which include eco initiatives, community shops and craft collectives, in our March ‘Light’ issue, on sale now. 

Buy this month's The Simple Things - buy, download or subscribe

More ways to make the most of leftovers…

Featured
leftover laksa.jpg
Apr 12, 2022
Recipe | Leftover Laksa
Apr 12, 2022
Apr 12, 2022
BrusselsSproutTree Mowie Kay.jpg
Dec 26, 2019
How to | do Christmas leftovers better
Dec 26, 2019
Dec 26, 2019
Jan 4, 2016
Recipe: Soda ale bread
Jan 4, 2016
Jan 4, 2016

More from our blog…

Featured
Water Boatman.jpg
May 24, 2025
Nature | Pond-Dipping for Grown-ups
May 24, 2025
May 24, 2025
RS2832_iStock-1278591330.jpg
May 23, 2025
Sponsored Post | Get your family active with Youth Sport Trust
May 23, 2025
May 23, 2025
Screenshot 2025-05-21 at 08.52.06.png
May 21, 2025
Playlist | Great Heights
May 21, 2025
May 21, 2025
In My Neighbourhood Tags community fridge, neighbourhood awards, community, how to, issue 129
Comment

Photograph: Alamy

How to | Ice Skate Without Embarrassment

Iona Bower January 8, 2022

If it’s been a while and you don’t want to embarrass yourself on the rink, read our quick ice skating primer and you’ll be Jayne Torvill dancing to Bolero in no time (in your head at least).

Assuming you haven’t hit an ice rink since you were in short trousers, but have an invitation to one this winter, fear not. It’s not *quite* like riding a bike but it’s definitely something you can be passable at within an hour or so. 

Getting started

When you first get on the ice, it goes without saying that you should stick to the barriers to begin with. They’re there for you to hold onto, particularly while you find your ice legs again. Now is not the time for a Triple Salchow. Remember: enthusiasm bears no relation to skill. 

Standing on your own two feet

Once you feel a bit steadier, you can let go of the barrier but perhaps stay within grabbing distance for now. Go around the outside of the rink, first taking marching steps with each foot and then beginning to glide on just one foot with each step, as if you were riding a scooter. Then try it on the other foot. Once you’ve got the hang of the step, glide, step, glide business, try doing a little glide with each foot on each step you take. 

A word on posture

As you skate, you should keep your knees just loosely bent and your arms close to your body. This will keep your centre of gravity steady. And you don’t want wibbly wobbly passers mistaking your flailing arm for an offer of support and grabbing it as they hit the ice, either. 

Getting up speed

Now you’ve mastered gliding you can try ‘stroking’, which is basically a long glide. With each step forward and glide you take on one foot, lift the other behind you and as you step onto the foot in the air and glide on it, you lift the first foot behind you. You’re properly skating now. 

How to fall well

Learn to fall with grace, rather than from grace, by getting out in front of the problem and practising falling and getting up. First, make sure you aren’t going to fall in front of another skater. Bend your knees quite low into a crouch, lean forward and then tip gently onto your side onto the ice. Roll immediately onto your bottom and put your hands in your lap; this is essential if you want to avoid any nasty skate-blade-fingers interfaces. Once you’ve checked around you that no other skaters are nearby, turn onto all fours, place both hands on the ice in front of you and put one foot between your hands. Once you’re steady move the other foot between your hands, too, and push yourself up to a standing position. Practising falling and getting up is really important, both for safety and to avoid looking like an upturned turtle in mittens, crying and getting sweaty and wishing you’d said you’d look after the bags and coats by the mulled wine stall instead. Trust us. We speak from experience. 

How to stop

Last but very much not least, you’ll need to know how to come to a halt. It works the same way as stopping on skis: turn your toes inward so that the sides of the blades make a bit of a snow plough effect on the ice, which will slow you down. (Alternatively, you can do what most people do and career helplessly towards the barriers shouting “MOVE IT OR LOSE IT” and let physics do its work as you hit the wall.)

The picture above is from our feature Let It Snow, in our December issue, which you can still buy a back issue of from our online store. If you’re a fan of celebrating the micro seasons, including snow falling and everything icing over, look out for our January issue feature, The 72 Seasons, which explains a few of the ‘micro’ seasons to enjoy during winter, and at other times of year, too! The January issue is in shops now. 

Buy this month's The Simple Things - buy, download or subscribe

More winter inspiration…

Featured
Stocksy Outing Fresh Air.jpg
Dec 14, 2024
Wellbeing | A Breath of Fresh Air
Dec 14, 2024
Dec 14, 2024
Skating Swans Alamy.jpg
Jan 8, 2022
How to | Ice Skate Without Embarrassment
Jan 8, 2022
Jan 8, 2022
Cobwebs Stocksy.jpeg
Jan 3, 2022
Science lesson | How frost is made
Jan 3, 2022
Jan 3, 2022

From our January issue…

Featured
SIM115_Gathering_Tattie Scones - Simple Things Burns Night 2021 - Kym Grimshaw-11.jpg
Jan 22, 2022
Recipe | Tattie Scones
Jan 22, 2022
Jan 22, 2022
bullfinch 2.jpg
Jan 4, 2022
Birdwatch | The Bullfinch
Jan 4, 2022
Jan 4, 2022
Cobwebs Stocksy.jpeg
Jan 3, 2022
Science lesson | How frost is made
Jan 3, 2022
Jan 3, 2022
In Fun Tags ice skating, winter, how to
Comment

Illustration: Lara Paulussen

How To | Shear a Sheep

Iona Bower November 16, 2021

Because you never know when you may be called upon to perform a skilled piece of animal husbandry

Just in case you ever find yourself, clippers in hand, being asked to give a sheep a short back and sides, here’s how to do it step by step. The Simple Things takes no responsibility for any mis-sheared sheep or injuries that befall you while shearing a sheep while following our instructions. Sorry.


1. First, catch your sheep

Approach the animal slowly and calmly but with a determined look in your eye that lets the sheep know who’s boss. We’ll assume you have chosen a dry day (you can’t shear wet wool) and that the sheep has fasted for a day, too; those things aren’t your concern. Herd the sheep to your shearing site with your arms and legs, then gently tip the sheep onto her back, holding her right leg in your right hand and the woolly top of the brisket with your left hand. She should have all four feet in the air, belly exposed, head turned to one side and be leaning back into your body with your legs supporting her shoulders. We never said this was a dignified process. 

2. Start shearing

Begin with the belly piece as this is dirtiest and worth the least money. You’re aiming to get the whole fleece off in one piece with the belly piece wrapped in the middle but it’s a bit like peeling an orange in one go - it takes practice - so just do your best. If you’re right handed, hold the shears in your right hand and use your left to pull the skin taut to avoid nicks. Start each blow (that’s the technical term for each ‘go’ with the shears) at the brisket (neck) end, and shear down to the flank (back legs). Take a blow down the left side, then the right side, then do the middle - like you do with painting your nails. 


3. Do the delicate bits

Shear around the crotch and down the inside of each hind leg by leaning right over the sheep, with her head still resting on your leg. Be very careful of her teats - cover them with your hand as you shear as it is possible to cut them right off and that won’t be a relaxing experience for you or the sheep. 


4. Mind the hind

Turn the sheep onto its right side and shear the outside of the left hind leg. Four blows should take you from the foot up to near the back bone. 


5. Tails you win

If the sheep has a tail, do it at this stage, shearing from tip to top and finishing with a short blow up the back at the base of the tail. 


6. More familiar ground: chest, neck and chin

Turn her side on to you, your right foot in between her hind legs and the left behind her back supporting her bottom. We hope you wore some old shoes for this… Hold her head under the chin with her head facing up at you. Try not to let her sad look make you feel awkward. Take the clippers from the brisket to just below the chin, ‘unzipping’ the fleece, and then up the face in short strokes, ending at the bottom of the ear and eye. 


7. Show a bit of leg

Again, shift her slightly onto her right side and lean over her to shear up her left leg and onto the left shoulder. Do inside the left foreleg while you’re here. 

8. The big mow

You’re on the home strait now and are about to shear the back. Lie her on her right side across your shin with your right foot placed between her back legs and your left foot under her shoulder. Starting at the tail, take long, steady blows up the back down her left side, beginning at the outside edge and working across to just past the spine. 

9. Home and hosed

Shift the sheep onto her left side and shear the rest of the neck and shoulders, then the right foreleg, from the shoulder, downwards.  Finally, shear the wool down her left back and side, from the neck towards her rear end, finishing with the right hind leg. Ta da! You’re done!


10. You should now skirt (clean) and roll the fleece ready for sale, but we think you’ve done enough. Give your hands a thorough wash, sit down for a well-deserved cuppa and reflect upon the fact that a pro shearer can do all that in under two minutes. We’re more at home with a knit one, purl one sort of endeavour if we’re honest. 

We were inspired to find out more about sheep-shearing after we read the Know A Thing or Two feature on wool in our November issue.

Buy this month's The Simple Things - buy, download or subscribe

More from our November issue…

Featured
Kelpies statue Alamy.jpg
Nov 2, 2021
Visit | Giant Statues
Nov 2, 2021
Nov 2, 2021
Wellbeing Sleep Stocksy.jpg
Oct 31, 2021
How to | Get to Sleep More Easily
Oct 31, 2021
Oct 31, 2021
Black Widow Cocktail 2.JPG
Oct 30, 2021
Tipple | Black Widow Cocktails
Oct 30, 2021
Oct 30, 2021

More things to know a thing or two about…

Featured
Dragon new.jpg
Feb 10, 2024
Outing | Hunting for Dragons
Feb 10, 2024
Feb 10, 2024
sheep.jpg
Nov 16, 2021
How To | Shear a Sheep
Nov 16, 2021
Nov 16, 2021
Bee_Illo.jpg
Jul 10, 2019
Hive mind | reviving a bee
Jul 10, 2019
Jul 10, 2019
In Think Tags wool, sheep, how to, katot, know a thing or two
Comment
Illustration: Kavel Rafferty

Illustration: Kavel Rafferty

How to | make an astronomy mirror

Iona Bower October 2, 2019

Go stargazing without straining your neck with this clever make

This make is fairly easy to put together and will provide you with hours of fun on a clear Autumn night. Head out with a Thermos and your guide to the night sky and see what you can spot.

You will need

A mirror, the bigger the better
Weather-proof sealant (optional)
Robust table or flat, stable surface large enough to hold the mirror
Binoculars
Planks of wood (one per viewer)
Clean pieces of cloth

1 Find a mirror and give it a clean so it’s as clear as possible. Treating the frame with weather-proof sealant can help it last longer.
2 Lay mirror onto your flat surface facing upwards. Secure in place.
3 Prop your plank against the mirror and wedge into place so it doesn’t move. Put your binoculars on top and angle so you can see the mirror.
4 Keep the mirror covered up until it’s dark, then use your binoculars to look at the reflection of the skies. Use a bit of cloth to wipe the mirror if it gets fogged up.
5 Make sure you take the mirror back inside or cover it up once you’re finished staring at the stars.

Find more makes, fun and facts on our Miscellany pages every issue.

Get hold of your copy of this month's The Simple Things - buy, download or subscribe


More from our October issue…

Featured
Pumpkin Beer Keg Jonathan Cherry.jpg
Oct 31, 2023
Make | a pumpkin beer keg
Oct 31, 2023
Oct 31, 2023
Back cover cartoon.jpg
Oct 22, 2019
October | a final thought
Oct 22, 2019
Oct 22, 2019
Spooky Stories Alamy.jpg
Oct 19, 2019
Build your own spooky story
Oct 19, 2019
Oct 19, 2019

More from our miscellanies…

Featured
PANCAKES.jpg
Mar 4, 2025
How to | Improve Your Pancake Toss
Mar 4, 2025
Mar 4, 2025
yellowhammer.jpg
Jun 21, 2023
Competition | Win a copy of A Year of Birdsong
Jun 21, 2023
Jun 21, 2023
EGGShell-tealights-the-simple-things.png
Apr 10, 2023
Eggshell tea lights
Apr 10, 2023
Apr 10, 2023
In Miscellany Tags issue 88, October, miscellany, stargazing, how to
Comment
Lock pic.JPG

How to | work a canal lock

Iona Bower July 6, 2019

Learn a niche skill that looks ever so impressive

It’s always a joy to be able to step up at moments of group panic and confidently and smugly say ‘I’ll take care of that’. Should you find yourself navigating a narrow boat unexpectedly (it could happen) you’ll need to be able to work the canal’s locks in order to pilot the boat up or down the water. While all about you spill their Pimms and flap their hands in despair at the paddles, here’s how to calmly and collectedly navigate a lock. Ahoy!

  1. Put down your beer, like a hero.

  2. For the purposes of these instructions we’re going to assume you are travelling upstream. You need one person at the tiller (the steering pole) and one person operating the lock (that’s you). Check the lock. It should be clear with no boat approaching the other way. The water in the lock has to be at the same level as you are before you can open the gates and enter it. As we’re assuming you’re travelling up the canal, if the lock is not empty when you arrive, empty it by opening the paddles on the bottom gate. Once the water is at the same level as you, you can open the gates. 

  3. Open the gate nearest the boat and ask the person at the tiller to take the boat (carefully) into the lock. It is traditional to shout ‘left a bit, left a bit, NO! YOU PUSH IT RIGHT TO GO TO THE LEFT!. That’s right… No TOO FAR NOW. Lawks! You nearly had the front off it then!’ as they steadily pilot the boat into the lock. Close the bottom gate behind the boat.

  4. Open the paddles in the top gate and let the water into the lock. The paddles are the big Victorian iron cog shenanigans either side of the lock. Take your special key (called a windlass), place the hole in your windlass over the sticky-outy bit on the paddle and turn it to open. Stand to the side and keep your knees out of the way. If you accidentally let go of a windlass while the paddle is raised it can drop fast and the windlass can fly off and the paddles drop suddenly, causing horrible damage to the lock or you. It is permissible to swear colourfully if this happens. As the paddles open, the boat will rise slowly in the lock like well-proved loaf.

  5. When the lock is full and the levels inside the lock and in front of you are level you will be able to open the top gate. Do so by putting your back against it and slowly leaning back to push it open, rather than bending over and pushing with your hands. This ‘pushing with your back’ manoeuvre prevents injury but more importantly will help mark you out as a canal know-it-all and impress any passers-by. 

  6. Let your tiller person know to bring the boat out of the gate. If you want to sound smug and irritate the person at the tiller, shout casual and unhelpful commands like ‘take it to starboard a little’. No-one mortal can remember which way starboard is when under stress and in charge of a 60ft boat. Call them over to the bank with a louche wave of the hand, then step casually back on board and resume your position at your beer.

  7. Graciously bask in the admiration of your crew and never tell them that it’s actually much easier to work a lock than it is to pilot the boat through one. Ahem.

In our July ‘Embrace’ issue, which is out now, we tried out a canal boating weekend courtesy of ABC Boat Hire. They are currently offering discounts for 202 and have a few last minute deals on breaks this year, too. Pick up a copy of the July issue in shops now for more details.

Get hold of your copy of this month's The Simple Things - buy, download or subscribe

More from our July issue…

Featured
Back cover Michelle Rial from Am I Overthinking this Chronicle Books.jpg
Jul 23, 2019
July | a final thought
Jul 23, 2019
Jul 23, 2019
Lavender Lia Leendertz and Kirstie Young.jpg
Jul 20, 2019
Science | why lavender calms
Jul 20, 2019
Jul 20, 2019
Reader holiday.jpg
Jul 18, 2019
Reader offer | The Simple Things Holiday
Jul 18, 2019
Jul 18, 2019

More things to become good at…

Featured
PANCAKES.jpg
Mar 4, 2025
How to | Improve Your Pancake Toss
Mar 4, 2025
Mar 4, 2025
Drystonewall.jpg
Sep 1, 2019
How to | build a dry stone wall
Sep 1, 2019
Sep 1, 2019
SIM68.MISCELLANY_HowHardPortrait.png
Feb 15, 2018
How to draw a realistic portrait
Feb 15, 2018
Feb 15, 2018


In Escape Tags issue 85, July, how to, canal boat, outdoor adventures
1 Comment
Illustration: Joe Snow

Illustration: Joe Snow

How to make a pine cone bird feeder

Lottie Storey January 19, 2019

Bring birds to your garden in time for the Big Garden Birdwatch

January marks 40 years of the RSPB’s Big Garden Bird Watch. It all began in 1979 with a modest plan to provide something to occupy the society’s junior membership. But when Biddy Baxter gave it a mention on Blue Peter, the society was flooded with 34,000 requests to join in. And The Big Garden Birdwatch has been ruffling feathers ever since.

This year’s Big Garden Birdwatch takes place from 26-28 January. You can sign up for your free pack to join in here. Then all you need is a free morning, a view of your outside space, a large pot of tea and a bit of cake (we recommend seedcake if you’re really getting into the spirit of the thing) and an identifier for your garden birds. We’ve printed a nifty identifier for some of the most common garden birds in our January issue, which is on sale now (or buy a copy here). You can thank us later.

In the meantime, here’s a simple way to make a bird feeder to encourage more feathery fellas to your garden in preparation for the big day.

A pine cone makes a great natural base for a bird feeder, with an open structure that’s just the thing for stuffing full of nutritious and delicious titbits for our feathered friends during harsh, wintry weather

How to make your feeder

1 Collect medium to large pine cones. Don’t worry if they’re tightly closed – just bring them indoors for a few days or pop in the oven to encourage ‘blooming’.

2 Attach string to the tip of the pine cone, ready for hanging up.

3 Spread a layer of peanut butter, fat or suet over the cone, pressing in between the scales so it’s entirely covered. Place a mix of birdseed on a tray and roll the pine cone until well coated. Go for a general mix to encourage a variety of garden birds or choose something more specific to attract a particular species – niger seed, for example, is a favourite for goldfinches and greenfinches while peanuts are the snack of choice for blue tits, great tits and siskins.

4 Hang in a secluded part of the garden, near the shelter of a hedge or shrub to provide birds with a quick safe haven nearby if they need it.

5 Replenish once supply is depleted.


More from the January issue:

Featured
SIM79.CHALKBOARD_ST Back Jan19_01.JPG
Jan 29, 2019
January: a final thought
Jan 29, 2019
Jan 29, 2019
Up Helly Aa.jpg
Jan 28, 2019
How to: Party like a Viking
Jan 28, 2019
Jan 28, 2019
cabbage.jpg
Jan 26, 2019
Cabbage: a prince among brassica
Jan 26, 2019
Jan 26, 2019

More How to posts:

Featured
PANCAKES.jpg
Mar 4, 2025
How to | Improve Your Pancake Toss
Mar 4, 2025
Mar 4, 2025
Drystonewall.jpg
Sep 1, 2019
How to | build a dry stone wall
Sep 1, 2019
Sep 1, 2019
SIM68.MISCELLANY_HowHardPortrait.png
Feb 15, 2018
How to draw a realistic portrait
Feb 15, 2018
Feb 15, 2018
  Buy ,  download  or  subscribe   See the sample of our latest issue  here   Buy a copy of our latest anthology:  A Year of Celebrations   Buy a copy of  Flourish 2 , our wellbeing bookazine  Listen to  our podcast  - Small Ways to Live Well

Get hold of your copy of this month's The Simple Things - buy, download or subscribe

View the sampler here.

In gardening, Miscellany Tags how to, issue 54, december, wildlife, garden, birds, issue 79, big garden birdwatch
Comment
Illustration: Kavel Rafferty

Illustration: Kavel Rafferty

How to build your own camp stove

Lottie Storey August 9, 2018

Impress your neighbours (that will be the squirrels then) with this simple campsite DIY

You will need:
Large rocks or green logs
Spade (optional)
Tinder, such as as dry leaves or grass
Dry twigs for kindling
Dry firewood
Grill
Water to hand

Pick a spot at least 3m from anything flammable and on exposed earth. Create a keyhole-shaped border from large rocks or green logs. Dig a shallow pit within main hole. Now assemble your fire. Tinder goes in the middle. Kindling is next: try a teepee or stacking method. Once it’s going, add your firewood – try to spread it out evenly. After the flames have died down, use the resulting coals to cook food (rake coals from the pit to the square section for more even heat). Lay a grill on top of the stones and get sizzling!


  Buy ,  download  or  subscribe   See the sample of our latest issue  here   Buy a copy of our latest anthology:  A Year of Celebrations   Buy a copy of  Flourish 2 , our wellbeing bookazine  Listen to  our podcast  - Small Ways to Live Well

Get hold of your copy of this month's The Simple Things - buy, download or subscribe

View the sampler here.


More from the August issue:

Featured
SIM74.MYPLOT_IMG_0730.png
Aug 28, 2018
Six medicinal herbs worth growing
Aug 28, 2018
Read More →
Aug 28, 2018
SIM74.COMFORT_MINI MODERNS Pavilion Reed Diffuser - Gin Fizz 200ml.png
Aug 26, 2018
The Comfort of Things | A guide to home fragrance
Aug 26, 2018
Read More →
Aug 26, 2018
SIM74.HOMETOUR_Bureaux_House_Pod_Idladla_17.png
Aug 24, 2018
The tiny house movement
Aug 24, 2018
Read More →
Aug 24, 2018

More camping:

Featured
Camping Alamy.jpeg
May 17, 2025
Outdoors | Camping Truths
May 17, 2025
May 17, 2025
max-hermansson-w5uE11FiAc8-unsplash.jpg
Jun 18, 2024
Adventures | Stay in a Bothy
Jun 18, 2024
Jun 18, 2024
Caravan pic.jpg
Aug 9, 2022
Cooking | Meals for a One-Ring Burner
Aug 9, 2022
Aug 9, 2022
In Miscellany Tags issue 74, august, summer, camping, how to
Comment
Photograph: Cathy Pyle

Photograph: Cathy Pyle

How to host a salon

Lottie Storey April 7, 2018

A salon supper, dotted with informal talks, brings the promise of knowledge to the table, and good food, too

We all know a bit about something – whether from work or study, travel or a hobby. These pearls of wisdom, however, are unlikely to come up in conversation. Yet, with the right setting, good food and willing friends, you can create a memorable evening, peppered with stories shared (see how on page 29). A modern salon calls for dishes that impress without stealing the show – a menu that needs only the lightest of last-minute prep. The result? Appetites sated and minds broadened.

How to host your own salon

Think about space
How much room have you got for people to sit comfortably? A nice full room creates a buzz, but too many people makes the space seem squashed. Where will you position food and drink? It needs to be accessible without disrupting speakers.

Check, one, two
If you’re not meeting in a house or flat, but in a pub or another borrowed venue, it’s worth checking your speakers can be heard without a microphone.

Be the curator
What do you want your salon to look like and who speaks? It could be that you’re
a group of friends and you all share, or that each of you brings an interesting person to speak.

Choose a theme
This will help an evening hang together. Keep it broad to allow for interpretation and creativity. You can either go abstract – new or lost, for example – or concrete – topics such as holidays or school.

Play the host
Beyond serving food and drink, you’ll need to introduce the event (or ask someone else to): thank people for coming, set out the theme of talks, and describe the shape of the evening – how many speakers there are, when breaks will be – so that guests know what to expect. Then just see where the night takes you.
 

Turn to page 22 of the April issue for more from our salon Gathering, including Beetroot & horseradish dip, Mixed olives with lemon zest, Asparagus spears with parma ham & toasted almonds, Spring lemon & cardamom chicken, Rainbow roasted carrots with cumin and Jewelled couscous with watercress, peppers & pomegranate.

  Buy ,  download  or  subscribe   See the sample of our latest issue  here   Buy a copy of our latest anthology:  A Year of Celebrations   Buy a copy of  Flourish 2 , our wellbeing bookazine  Listen to  our podcast  - Small Ways to Live Well

Get hold of your copy of this month's The Simple Things - buy, download or subscribe

View the sampler here.


More from the April issue:

Featured
SIM71.MAKES_IMG_2891.png
May 6, 2018
Make | Herbal tea bags
May 6, 2018
Read More →
May 6, 2018
SIM71.NEST_DSC_1598.png
May 5, 2018
Nest | Lily of the Valley
May 5, 2018
Read More →
May 5, 2018
shutterstock_93713581 (1).png
Apr 24, 2018
Being boring
Apr 24, 2018
Read More →
Apr 24, 2018

More Gatherings:

Featured
Streetcorn.JPG
Mar 5, 2022
Recipe | Street corn (Elotes)
Mar 5, 2022
Mar 5, 2022
Book Club new Emma Croman.jpg
Feb 12, 2022
Food | Fictional Feasts
Feb 12, 2022
Feb 12, 2022
Prawn Toasts Catherine Frawley.JPG
Feb 9, 2021
Recipe | Sesame Prawn Toasts
Feb 9, 2021
Feb 9, 2021
In Eating Tags issue 70, april, gathering, salon, how to
Comment
HowToFrozen Lake.png

How to cross a frozen lake

Lottie Storey January 19, 2018

No skating on thin ice, if you follow these solid suggestions

Be prepared
Don’t go alone. Carry 15m of rope, an ice pick or ice claws, as well as warm, thick clothes in a waterproof bag.

Study the ice
Clear blue, black or green ice is strongest. Avoid white, milky ice and danger signs including slush, cracks and seams. Ice underneath snow will also be thin and weak. 

How to move
With your ice pick, measure the ice depth at least every 50 metres. 10cm of clear, newly formed ice can support walking (20–30cm, a small car). Wear skis or snowshoes and, in a group, walk about 15 metres apart.

If you fall in...
Keep clothes on but lose shoes. Put your hands and arms on the ice and kick. Use your claws to pull yourself onto the surface, then roll away from the broken ice. Change into dry clothes and seek shelter and hot drinks.

  Buy ,  download  or  subscribe   See the sample of our latest issue  here   Buy a copy of our latest anthology:  A Year of Celebrations   Buy a copy of  Flourish 2 , our wellbeing bookazine  Listen to  our podcast  - Small Ways to Live Well

Get hold of your copy of this month's The Simple Things - buy, download or subscribe

View the sampler here.


More from the January issue:

Featured
SIM67.MAKES_Step3_5.png
Sep 18, 2021
Make | Dip dye stationery
Sep 18, 2021
Sep 18, 2021
SIM67.FRESH_LEON Happy Soups_Sausage-Spinach & Orzo.png
Jan 26, 2018
Spinach, sausage and orzo soup
Jan 26, 2018
Jan 26, 2018
rawpixel-com-274862.png
Jan 22, 2018
Storytelling
Jan 22, 2018
Jan 22, 2018

More how to posts:

Featured
Pottery Painting 2.jpeg
Apr 12, 2025
How to | Win at Pottery Painting
Apr 12, 2025
Apr 12, 2025
9.new years final.png
Dec 31, 2024
How to | Make a Could-Do List Happen
Dec 31, 2024
Dec 31, 2024
Synchronised swimmers.jpg
Aug 17, 2024
How to | Do a Swimming Pool Handstand
Aug 17, 2024
Aug 17, 2024
In Miscellany Tags issue 67, january, how to, winter
Comment
HowHardDreams.png

How to interpret your dreams

Lottie Storey January 15, 2018

Looking for definite answers? You must be dreaming

Attempts at dream decoding date back centuries – think of Joseph interpreting Pharaoh’s dream in the Bible (or, indeed, in the Lloyd Webber musical), for example.

Although there are hundreds of ‘dream dictionaries’ available, they are generally lacking any factual back-up – very broad links is about as far as scientists have got. But while you might not figure out exactly what that particularly vivid dream was supposed to mean, there are other useful ways to consider our dreams that can help us in our everyday (real) lives:
       

  • Because most believe dreams provide insight, they do affect our behaviour. For example, people asked to imagine they dreamt about a plane crash the night before a trip were more likely to cancel than if a real crash had happened. The dream also produced a similar level of anxiety as a real crash.
  • If a dream has produced a strong reaction, it’s probably worth taking the time to reflect on it, and ask yourself if it bears any logical relation to your waking hours – even if that simply means less cheese before bed.
  Buy ,  download  or  subscribe   See the sample of our latest issue  here   Buy a copy of our latest anthology:  A Year of Celebrations   Buy a copy of  Flourish 2 , our wellbeing bookazine  Listen to  our podcast  - Small Ways to Live Well

Get hold of your copy of this month's The Simple Things - buy, download or subscribe

View the sampler here.


More from the January issue:

Featured
SIM67.MAKES_Step3_5.png
Sep 18, 2021
Make | Dip dye stationery
Sep 18, 2021
Sep 18, 2021
SIM67.FRESH_LEON Happy Soups_Sausage-Spinach & Orzo.png
Jan 26, 2018
Spinach, sausage and orzo soup
Jan 26, 2018
Jan 26, 2018
rawpixel-com-274862.png
Jan 22, 2018
Storytelling
Jan 22, 2018
Jan 22, 2018

More sleepy inspiration:

Featured
Sleep - wellbeing Anneliese.jpg
Jan 27, 2024
Wellbeing | Keep the Ability to Sleep Well
Jan 27, 2024
Jan 27, 2024
Wellbeing Sleep Stocksy.jpg
Oct 31, 2021
How to | Get to Sleep More Easily
Oct 31, 2021
Oct 31, 2021
HowHardDreams.png
Jan 15, 2018
How to interpret your dreams
Jan 15, 2018
Jan 15, 2018
In Miscellany Tags issue 67, january, sleep, bed, nest, how to, dreams
Comment
how to embrace change.jpg

How to embrace change

Lottie Storey January 4, 2018

Change happens to us all, it’s how we deal with it that matters

  • Set reasonable expectations and you’ll be better able to manage change and cope with disappointment.
  • Instead of resisting, allow change to unfold and try to understand what’s transforming and why.
  • Notice the change in nature and how it can be a wonderful thing.
  • Learn to live with uncertainty. It’s necessary sometimes, if you want to move forward.
  • Remember that when you accept and learn from change, you inevitably grow stronger. 
  Buy ,  download  or  subscribe   See the sample of our latest issue  here   Buy a copy of our latest anthology:  A Year of Celebrations   Buy a copy of  Flourish 2 , our wellbeing bookazine  Listen to  our podcast  - Small Ways to Live Well

Get hold of your copy of this month's The Simple Things - buy, download or subscribe

View the sampler here.


More from the January issue:

Featured
SIM67.MAKES_Step3_5.png
Sep 18, 2021
Make | Dip dye stationery
Sep 18, 2021
Sep 18, 2021
SIM67.FRESH_LEON Happy Soups_Sausage-Spinach & Orzo.png
Jan 26, 2018
Spinach, sausage and orzo soup
Jan 26, 2018
Jan 26, 2018
rawpixel-com-274862.png
Jan 22, 2018
Storytelling
Jan 22, 2018
Jan 22, 2018

More wisdom:

Featured
Wellbeing woodland walk.jpeg
Mar 29, 2025
Wellbeing | Moodscapes and walking routes
Mar 29, 2025
Mar 29, 2025
Sorry.jpg
Mar 2, 2025
Wellbeing | Say 'Sorry' Well
Mar 2, 2025
Mar 2, 2025
Glimmers.jpeg
Feb 18, 2025
Wellbeing | Eye Spy Glimmers
Feb 18, 2025
Feb 18, 2025
In Magazine, Think Tags issue 67, january, think, how to, change
Comment
Illustration: Joe Snow

Illustration: Joe Snow

How to stop being scared of something

Lottie Storey October 16, 2017

Fear can be useful – a way of coping with extreme situations. However, fight or flight mode kicks in whether the danger is real or imagined. Not in actual danger? This advice may help you bump off things that go bump in the night...

Short term

  • Breathe: deep breaths help the body to get back under control.
  • Walk: make good use of adrenaline if you’re about to approach something frightening.
  • Write it down or speak it out: this helps stop the fear from circling around (and around) your brain.

Long term

  • Identify what it is that scares you and why, and tackle it through exposure. But gradually – don’t dive straight into that shark tank.
  • Look after yourself – those old chestnuts of balanced diet, sleep, exercise and avoiding stimulants all equip you better to cope.
  • If it is too big to manage on your own, get help from a professional.

Even longer term

  • In August, scientists managed to erase fear memories in mice brains using light, so a solution may be possible for humans.

More from the October issue:

Featured
SIM64.GATHERING_SimpleThingsNov17_Autumn Lunch_29.png
Nov 14, 2020
Recipe | Lamb hotpot and mustardy greens
Nov 14, 2020
Nov 14, 2020
freestocks-org-62592.jpg
Oct 31, 2020
Halloween | Simple spells
Oct 31, 2020
Oct 31, 2020
Dec-17-Subs-page-image3_jwretA.png
Nov 29, 2017
Christmas | Giftwrapped subscriptions to The Simple Things
Nov 29, 2017
Nov 29, 2017

More How to suggestions:

Featured
PANCAKES.jpg
Mar 4, 2025
How to | Improve Your Pancake Toss
Mar 4, 2025
Mar 4, 2025
Drystonewall.jpg
Sep 1, 2019
How to | build a dry stone wall
Sep 1, 2019
Sep 1, 2019
SIM68.MISCELLANY_HowHardPortrait.png
Feb 15, 2018
How to draw a realistic portrait
Feb 15, 2018
Feb 15, 2018
Tags how to, fear, issue 64, october
33 Comments
Illustration: Joe Snow

Illustration: Joe Snow

How to live lagom

Lottie Storey October 6, 2017

Ideas for a more balanced life, Swedish style

Just as you’ve mastered hygge, along comes another Scandi concept to get your head around. Lagom (pronounced “law-ghum” or “lah-gum”) is Swedish and means “just the right amount”, or being satisfied with your lot. As Anna Brones explains in Live Lagom, “It’s a happiness drawn from contentment with now.” 

Quality not quantity
Unlike hygge, lagom is not an excuse to stockpile candles. Roughly translating as “less is more”, it’s about valuing what you do have, whether it’s furniture or food. 

Look for balance in all aspects Including work/life 
Switch off, take proper holidays, embrace the Swedish fika coffee break (cinnamon buns encouraged). 

Live in awareness of the wider picture
Taking just enough means there should be plenty for all, a concept that encourages respect for the environment. 

Think more lagom
Ask yourself “Is this good enough?” rather than “Can I do better?”

  Buy ,  download  or  subscribe   See the sample of our latest issue  here   Buy a copy of our latest anthology:  A Year of Celebrations   Buy a copy of  Flourish 2 , our wellbeing bookazine  Listen to  our podcast  - Small Ways to Live Well

Get hold of your copy of this month's The Simple Things - buy, download or subscribe

View the sampler here.


More from the October issue:

Featured
SIM64.GATHERING_SimpleThingsNov17_Autumn Lunch_29.png
Nov 14, 2020
Recipe | Lamb hotpot and mustardy greens
Nov 14, 2020
Nov 14, 2020
freestocks-org-62592.jpg
Oct 31, 2020
Halloween | Simple spells
Oct 31, 2020
Oct 31, 2020
Dec-17-Subs-page-image3_jwretA.png
Nov 29, 2017
Christmas | Giftwrapped subscriptions to The Simple Things
Nov 29, 2017
Nov 29, 2017

More How To posts:

Featured
PANCAKES.jpg
Mar 4, 2025
How to | Improve Your Pancake Toss
Mar 4, 2025
Mar 4, 2025
Drystonewall.jpg
Sep 1, 2019
How to | build a dry stone wall
Sep 1, 2019
Sep 1, 2019
SIM68.MISCELLANY_HowHardPortrait.png
Feb 15, 2018
How to draw a realistic portrait
Feb 15, 2018
Feb 15, 2018
In Miscellany Tags issue 64, october, how to, lagom, hygge
Comment
Illustration: Joe Snow

Illustration: Joe Snow

How to make yourself smarter

Lottie Storey September 21, 2017

Quite easy – if you’re a gum-chewing, coffee-guzzling daydreamer with incredible self belief...

Short term: 
Drink coffee after a task. Boosts your chances of remembering it (also works with chewing gum or doodling while you do it).

Listen to music you like. This increases dopamine levels, in turn thought to improve cognition.

Daydream. Daydreamers do better on tests than their more focussed peers. 

Long term: 
Exercise. Increases the level of a protein that helps in growing new neurons.

Eat brain-friendly food. Food with Omega-3 fatty acids like fish, as well as B vitamins (think green veg, milk and shellfish), are believed to be good for brains. 

Clean your teeth properly. Having no teeth is linked to lesser cognitive abilities.

Really long term: 
Stick around. Over subsequent decades, IQ scores have been getting better and better – so, thanks simply to when you were born, you’re probably smarter than your great grandmother.

And a super easy short-term fix... 
Studies have shown that just believing you can be cleverer actually makes it come true.

  Buy ,  download  or  subscribe   See the sample of our latest issue  here   Buy a copy of our latest anthology:  A Year of Celebrations   Buy a copy of  Flourish 2 , our wellbeing bookazine  Listen to  our podcast  - Small Ways to Live Well

Get hold of your copy of this month's The Simple Things - buy, download or subscribe

View the sampler here


More from the September issue:

Featured
Sep 25, 2017
Nest | String of hearts
Sep 25, 2017
Sep 25, 2017
coffee and walnut mini loaf cake recipe.png
Sep 23, 2017
Recipe | Coffee & walnut mini loaf cakes
Sep 23, 2017
Sep 23, 2017
SIM63.RUBBISHARTISTS_EL Ian Berry Studio  04.jpg
Sep 22, 2017
Creativity | Meet the makers using waste as a material for art
Sep 22, 2017
Sep 22, 2017

More How to posts:

Featured
PANCAKES.jpg
Mar 4, 2025
How to | Improve Your Pancake Toss
Mar 4, 2025
Mar 4, 2025
Drystonewall.jpg
Sep 1, 2019
How to | build a dry stone wall
Sep 1, 2019
Sep 1, 2019
SIM68.MISCELLANY_HowHardPortrait.png
Feb 15, 2018
How to draw a realistic portrait
Feb 15, 2018
Feb 15, 2018
In Miscellany Tags how to, How to, issue 63, september, miscellany
Comment
Illustration: Joe Snow

Illustration: Joe Snow

How to build a swing

Lottie Storey August 7, 2017

Branch out with this playful addition to a garden

You will need:
Wood that’s at least 2.5cm thick, avoid pine and damaged wood
Poly twist rope
Handsaw
Sandpaper
Drill

1 Find a thick, living branch, parallel to the ground.
2 Cut your board to measure 45 x 25cm and sandpaper it.
3 Drill four holes a little bigger than your rope width in each corner of the wood, 2.5cm in.
4 Cut rope into two lengths twice the height of the swing plus 3.5 m.
5 Take a piece of rope and double it over so cut ends are together.
6 Holding the looped end, place rope over branch and then thread the two cut ends to secure the loop against the tree branch. Repeat with the second bit of rope – the same distance apart as the holes on the seat.
7 Thread lengths through the four holes and adjust for height.
8 Tie each length in a figure eight stopper knot under the swing.


More practical and playful suggestions in Miscellany, every month in The Simple Things!

  Buy ,  download  or  subscribe   See the sample of our latest issue  here   Buy a copy of our latest anthology:  A Year of Celebrations   Buy a copy of  Flourish 2 , our wellbeing bookazine  Listen to  our podcast  - Small Ways to Live Well

Get hold of your copy of this month's The Simple Things - buy, download or subscribe

View the sampler here


More from the August issue:

Featured
Aug 28, 2017
Recipe | Vegetable crisps
Aug 28, 2017
Aug 28, 2017
Aug 26, 2017
Britain's outdoor games
Aug 26, 2017
Aug 26, 2017
Aug 20, 2017
Garden hacks | Reuse cooking water on your plants
Aug 20, 2017
Aug 20, 2017


More How to ideas:

Featured
PANCAKES.jpg
Mar 4, 2025
How to | Improve Your Pancake Toss
Mar 4, 2025
Mar 4, 2025
Drystonewall.jpg
Sep 1, 2019
How to | build a dry stone wall
Sep 1, 2019
Sep 1, 2019
SIM68.MISCELLANY_HowHardPortrait.png
Feb 15, 2018
How to draw a realistic portrait
Feb 15, 2018
Feb 15, 2018
In Miscellany Tags How to, how to, issue 62, august, summer, school holiday ideas
Comment
Illustration: Joe Snow

Illustration: Joe Snow

How to make mosquito repellent

Lottie Storey June 14, 2017

Persuade mozzies to buzz off with this natural spray

You will need:
Small spray bottle
Distilled or boiled water
Witch hazel or vodka
Vegetable glycerin
Essential oils, one or a combination of the following: lemon, citronella, tea tree, rosemary, lavender, mint or eucalyptus

1 Mix your water and witch hazel (or vodka) in the ratio 1:4.
2 Transfer to your spray bottle, leaving space for shaking.
3 Add a tsp of vegetable glycerin and 30 drops of essential oil (essential oils shouldn’t be applied directly on the skin – and keep kids away from them too). 
4 Give it a good shake before use. You’ll need to reapply every few hours.

More from the June issue:

Featured
Feb 17, 2019
Small acts of kindness
Feb 17, 2019
Feb 17, 2019
Jun 27, 2017
Recipe | Gooseberry cake
Jun 27, 2017
Jun 27, 2017
Jun 26, 2017
Mindful moments | Download a chatterbox to colour in
Jun 26, 2017
Jun 26, 2017

More How to posts:

Featured
Pottery Painting 2.jpeg
Apr 12, 2025
How to | Win at Pottery Painting
Apr 12, 2025
Apr 12, 2025
9.new years final.png
Dec 31, 2024
How to | Make a Could-Do List Happen
Dec 31, 2024
Dec 31, 2024
Synchronised swimmers.jpg
Aug 17, 2024
How to | Do a Swimming Pool Handstand
Aug 17, 2024
Aug 17, 2024
  Buy ,  download  or  subscribe   See the sample of our latest issue  here   Buy a copy of our latest anthology:  A Year of Celebrations   Buy a copy of  Flourish 2 , our wellbeing bookazine  Listen to  our podcast  - Small Ways to Live Well

Get hold of your copy of this month's The Simple Things - buy, download or subscribe

View the sampler here.

In Miscellany Tags How to, how to, issue 60, june
1 Comment
Illustration: Joe Snow

Illustration: Joe Snow

How to become an expert stone skimmer

Lottie Storey June 3, 2017

You may not beat the world record of 88 bounces but you can give it your best shot 

Pick your pebble

Even the novice spinner can improve their chances by seeking out flat, round and smooth stones. Scientists have proved that stones of roughly 5cm in diameter fare best (it’s down to their surface area). Record holder Kurt Steiner recommends a weight of around 100–200g and a thickness of 6mm.

Find your entry point

Another previous record holder advises keeping the first bounce close – aiming for splashdown within 4.5 metres of the throwing point.

Give it a spin

Spin the stone as it leaves your fingers.

Let’s get technical

Those clever scientists have proved you need to ensure there’s an angle of 20 degrees between the stone and the water and that it’s launched at a speed of at least 5.6 miles per hour. How you actually use that knowledge out in the wild, we’re less sure of, but you’ve got until 27 September, the date of this year’s World Stone Skimming Championship near Oban in Scotland, to figure it out. 


More from the June issue:

Featured
Feb 17, 2019
Small acts of kindness
Feb 17, 2019
Feb 17, 2019
Jun 27, 2017
Recipe | Gooseberry cake
Jun 27, 2017
Jun 27, 2017
Jun 26, 2017
Mindful moments | Download a chatterbox to colour in
Jun 26, 2017
Jun 26, 2017

More How To suggestions:

Featured
Pottery Painting 2.jpeg
Apr 12, 2025
How to | Win at Pottery Painting
Apr 12, 2025
Apr 12, 2025
9.new years final.png
Dec 31, 2024
How to | Make a Could-Do List Happen
Dec 31, 2024
Dec 31, 2024
Synchronised swimmers.jpg
Aug 17, 2024
How to | Do a Swimming Pool Handstand
Aug 17, 2024
Aug 17, 2024
  Buy ,  download  or  subscribe   See the sample of our latest issue  here   Buy a copy of our latest anthology:  A Year of Celebrations   Buy a copy of  Flourish 2 , our wellbeing bookazine  Listen to  our podcast  - Small Ways to Live Well

Get hold of your copy of this month's The Simple Things - buy, download or subscribe

View the sampler here


In Miscellany Tags issue 60, june, how to, How to, school holiday ideas
Comment
  • Blog
  • Older
  • Newer
Featured
  Buy ,  download  or  subscribe   See the sample of our latest issue  here   Buy a copy of our latest anthology:  A Year of Celebrations   Buy a copy of  Flourish 2 , our wellbeing bookazine  Listen to  our podcast  - Small Ways to Live Well
Feb 27, 2025
Feb 27, 2025

Buy, download or subscribe

See the sample of our latest issue here

Buy a copy of our latest anthology: A Year of Celebrations

Buy a copy of Flourish 2, our wellbeing bookazine

Listen to our podcast - Small Ways to Live Well

Feb 27, 2025
Join our Newsletter
Name
Email *

We respect your privacy and won't share your data.

email marketing by activecampaign
facebook-unauth twitter pinterest spotify instagram
  • Subscriber Login
  • Stockists
  • Advertise
  • Contact

The Simple Things is published by Iceberg Press

The Simple Things

Taking time to live well

We celebrate slowing down, enjoying what you have, making the most of where you live, enjoying the company of of friends and family, and feeding them well. We like to grow some of our own vegetables, visit local markets, rummage for vintage finds, and decorate our home with the plunder. We love being outdoors and enjoy the satisfaction that comes with a job well done.

facebook-unauth twitter pinterest spotify instagram