The Simple Things

Taking time to live well
  • Home
  • Subscribe
  • SHOP
  • Newsletter
  • About
  • Work with us
  • Home
  • Subscribe
  • SHOP
  • Newsletter
  • About
  • Work with us

Blog

Taking Time to Live Well

  • All
  • Chalkboard
  • Christmas
  • Competition
  • could do
  • Eating
  • Escape
  • Escaping
  • Fresh
  • Fun
  • gardening
  • Gathered
  • Gathering
  • Growing
  • Haikus
  • Interview
  • Living
  • Looking back
  • Magazine
  • magical creatures
  • Making
  • Miscellany
  • My Neighbourhood
  • Nature
  • Nest
  • Nesting
  • outing
  • playlist
  • Reader event
  • Reader offer
  • Shop
  • Sponsored post
  • Sunday Best
  • Think
  • Uncategorized
  • Wellbeing
  • Wisdom
Photography: Ali Allen

Photography: Ali Allen

The lost art of squirreling away

Iona Bower September 28, 2019

Why we love a larder, and why you should, too

Somewhere in the last 50-or-so years, larders were lost and became a bit of a thing of the past. We probably all remember a grandparent or auntie who had a really decent larder. If you were lucky it was a proper cold room with shelves on all four sides, precariously stacked with tins, jars, packets and boxes. Otherwise it might have been an outhouse, or just a particularly big kitchen cupboard. Either way, they were a bit magic. A woman of a certain age could don a tabard, stick her head briefly inside the larder and - ta dah! - emerge with an armful of packets and tins from which a cake would appear, or a jelly filled with fruit, or simply a tin of cocoa powder and a packet of biscuits. 

But, as post-war kitchens became smaller and fridges ever bigger, the larder fell out of favour, no longer needed as we filled our American-style fridges with food that would last for days and freezers took more of the strain. 

However, in the last decade, larders have been having a moment again, with several big kitchen companies creating beautiful, freestanding larder-armoires, that open their capacious doors as if to hug you to the bosom of their dried goods and tins. And we’re not surprised. Because what is nicer than a larder?

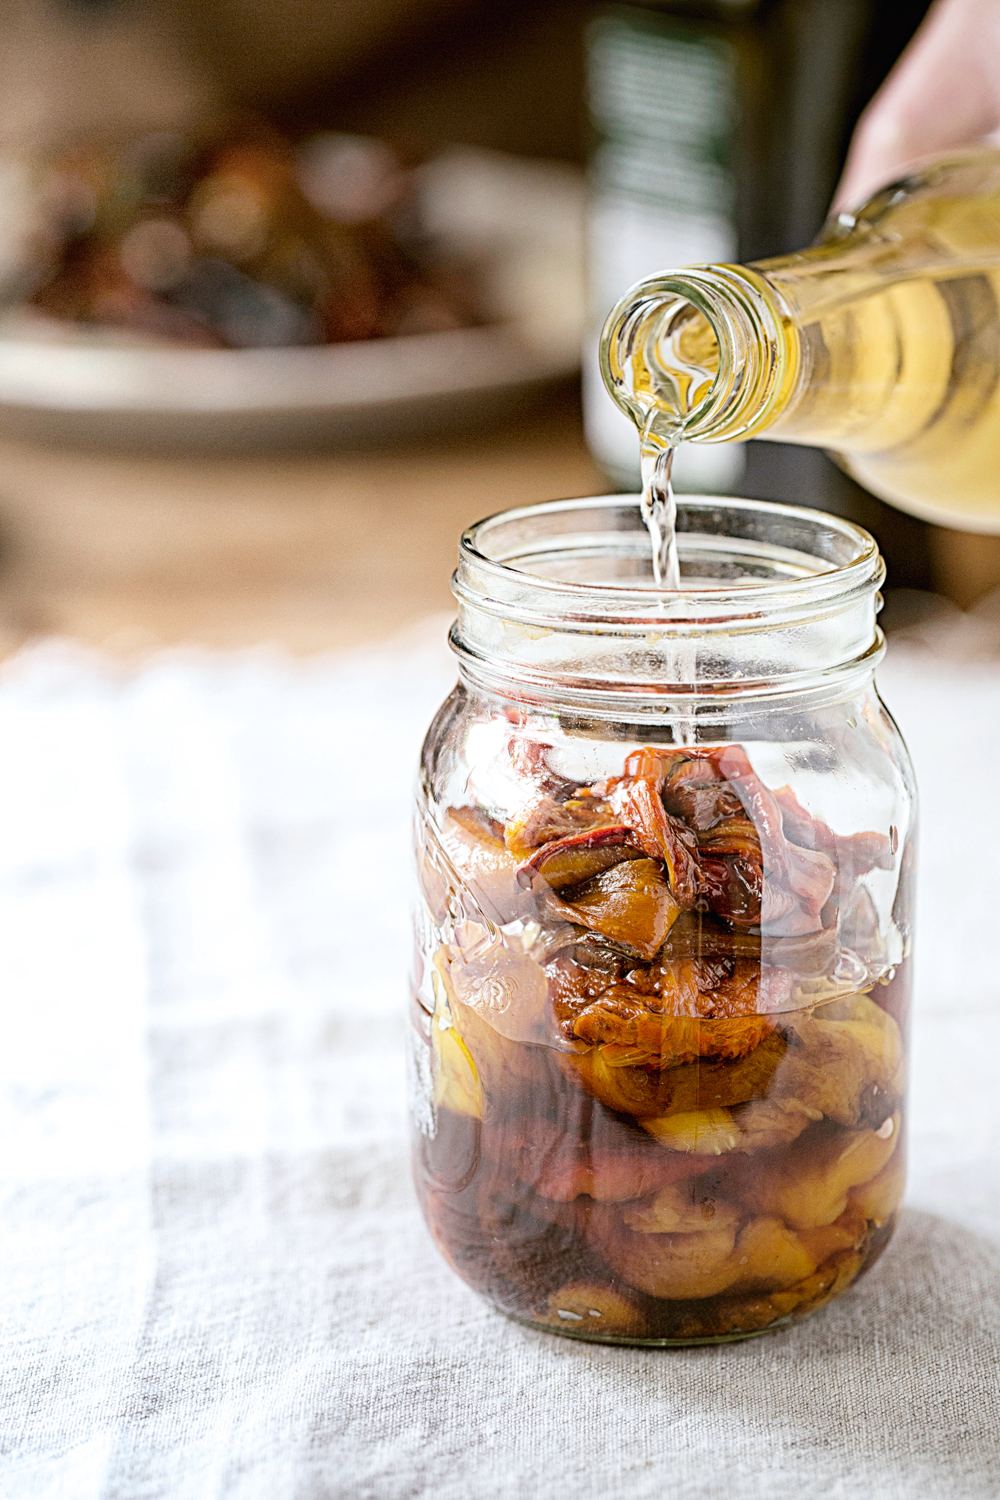
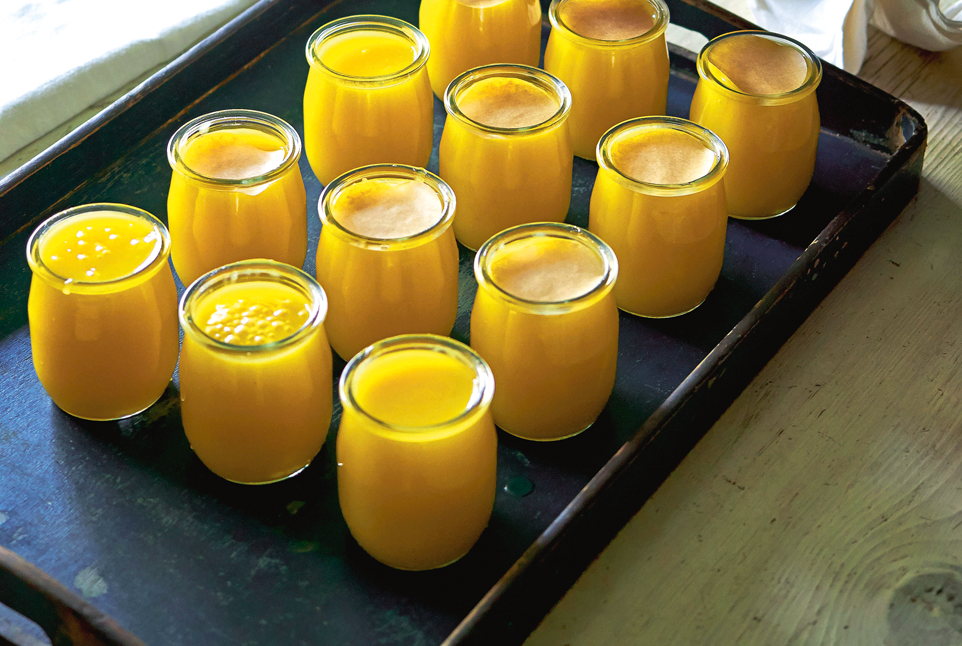
We all aspire to the sort of larder stocked with home-bottled tomatoes, chutney from the allotment and jars of apples dried in a low oven (the sort of larder that calls for large Kilner jars and chalkboard labels). 

But all larders are a joy. The kind you can lean on one Thursday night when the supermarket shut just as you arrived and the fridge is bare, but just at the back of the larder is a packet of dry pasta, a jar of roasted peppers that came in a hamper at Christmas and a bottle of red, and suddenly dinner is saved. Or the sort of larder that seems to be full to the gunwales with flour, currants, rice and other utilitarian things, but you know that one rainy afternoon, if you have a bit of a dig about you will emerge, victorious, with the remains of a homemade fruit cake and a chocolate orange you hid from yourself for just such an occasion.

You don’t even need to have a larder to larder well. Got a shed? Give it a tidy and set up a small book shelf in there for your jars and tins. An outdoor bunker does the job equally well, with the addition of a small storage unit. A cupboard under the stairs makes a good larder, and means you don’t have to set foot outside in inclement weather. Or, for ultimate convenience, dedicate a cupboard in your kitchen to be a larder cupboard and feel the joy every time you open the door. Wherever you choose to create your larder, do make sure it’s mouse and bug proof (there’s nothing sadder than another creature stealing all your hard work). Once you’ve got your space sorted you can set about planning the contents.

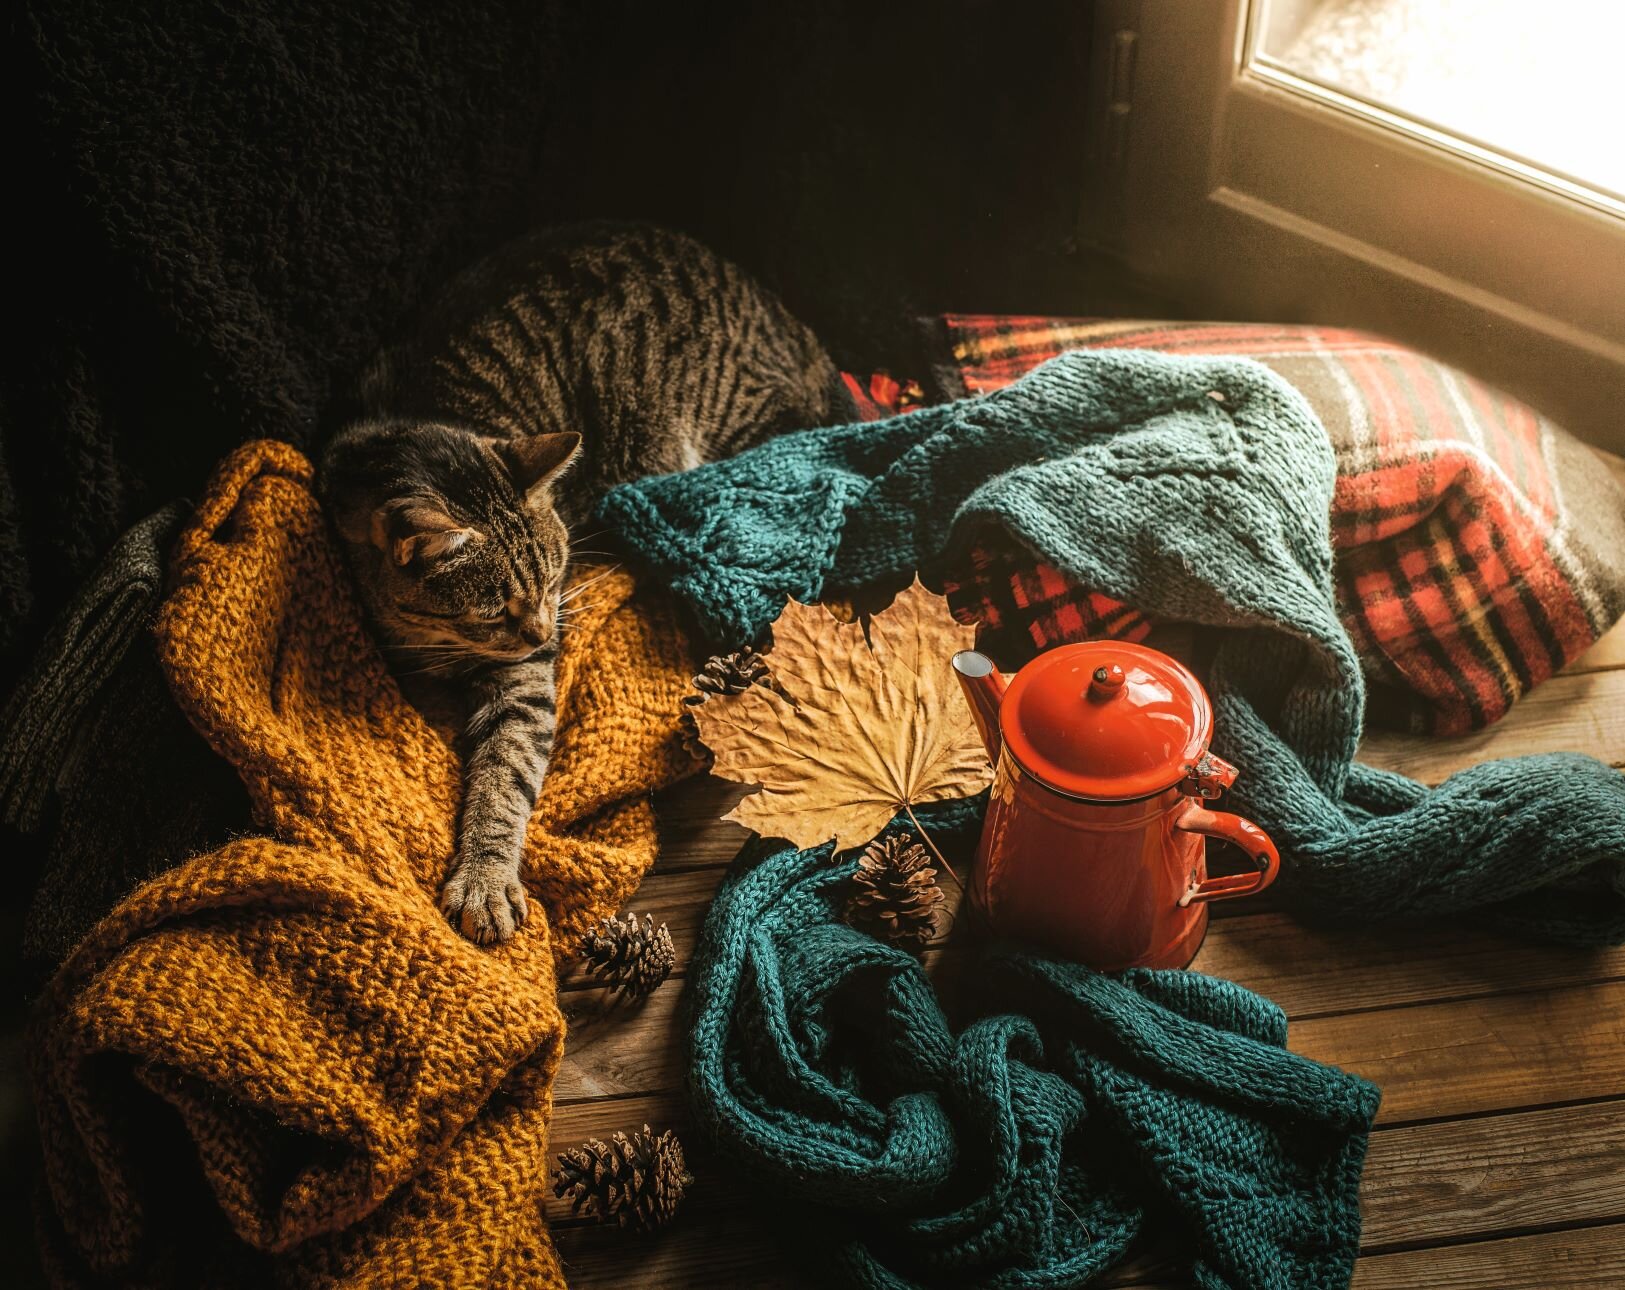
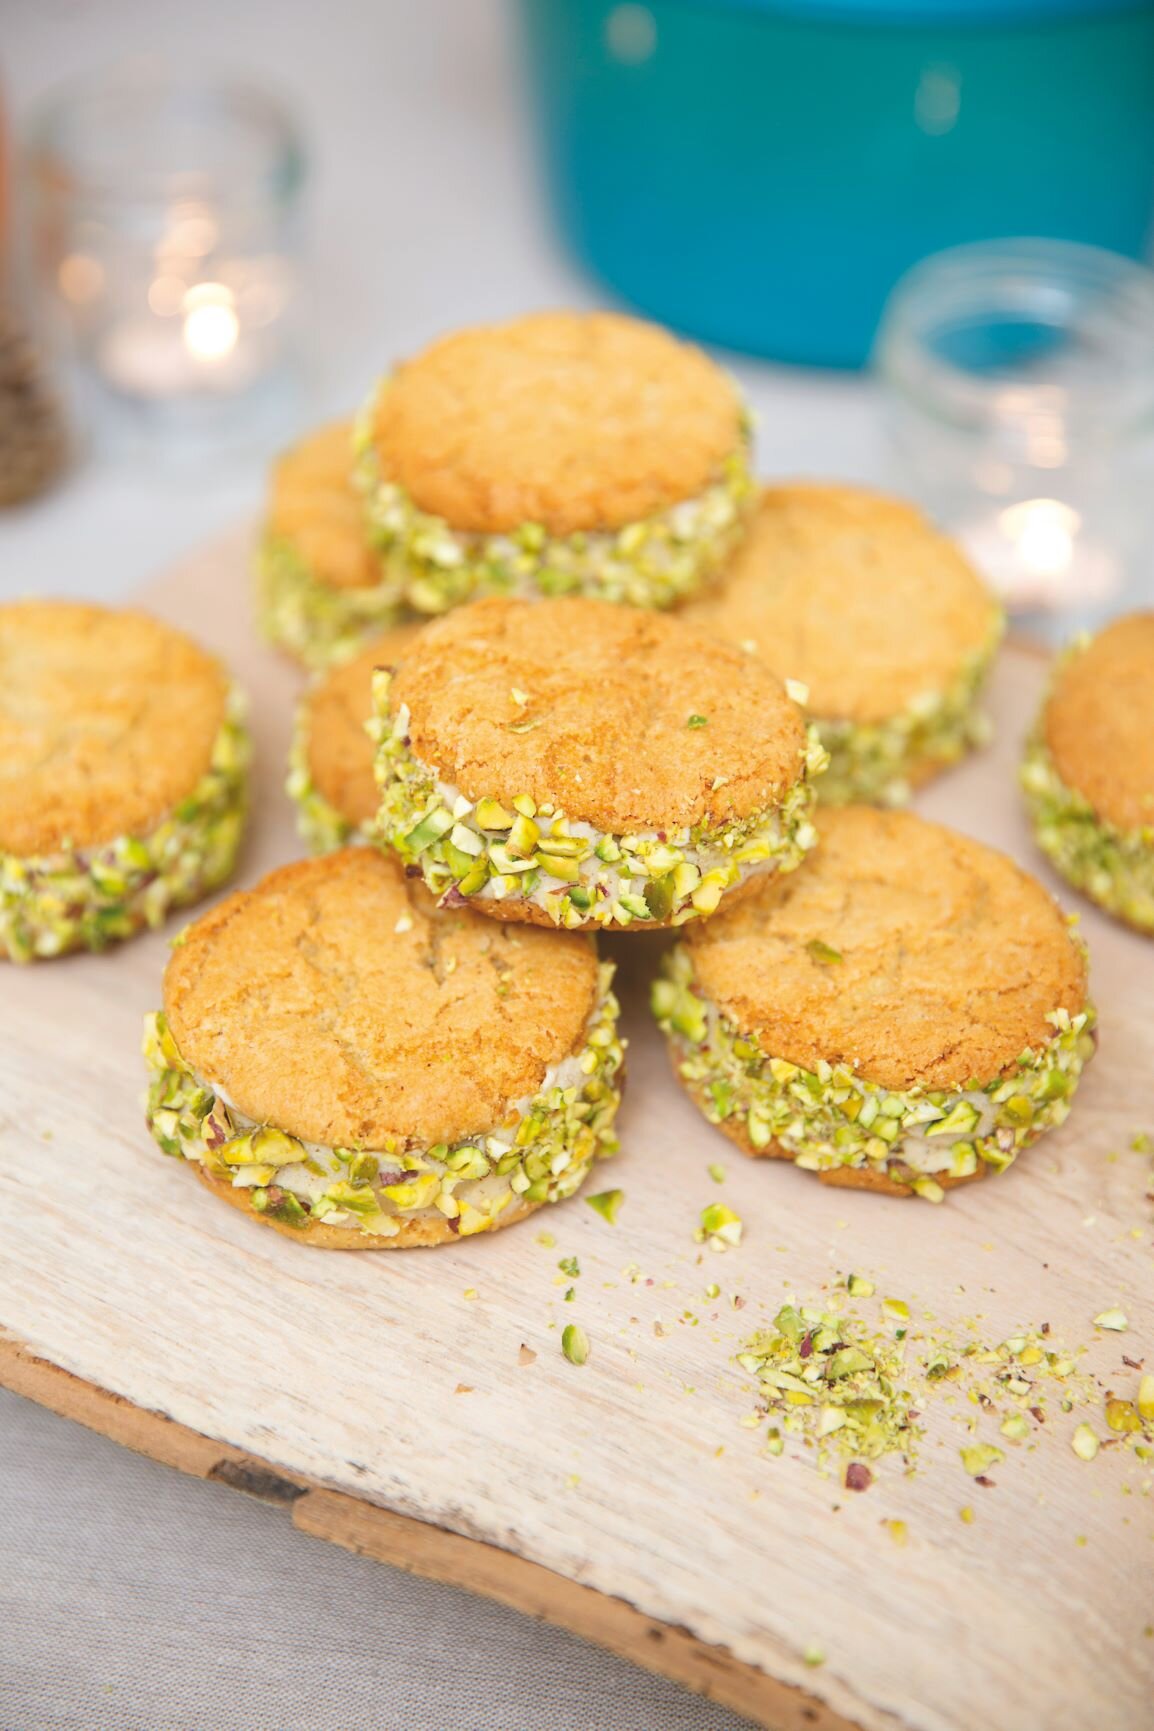
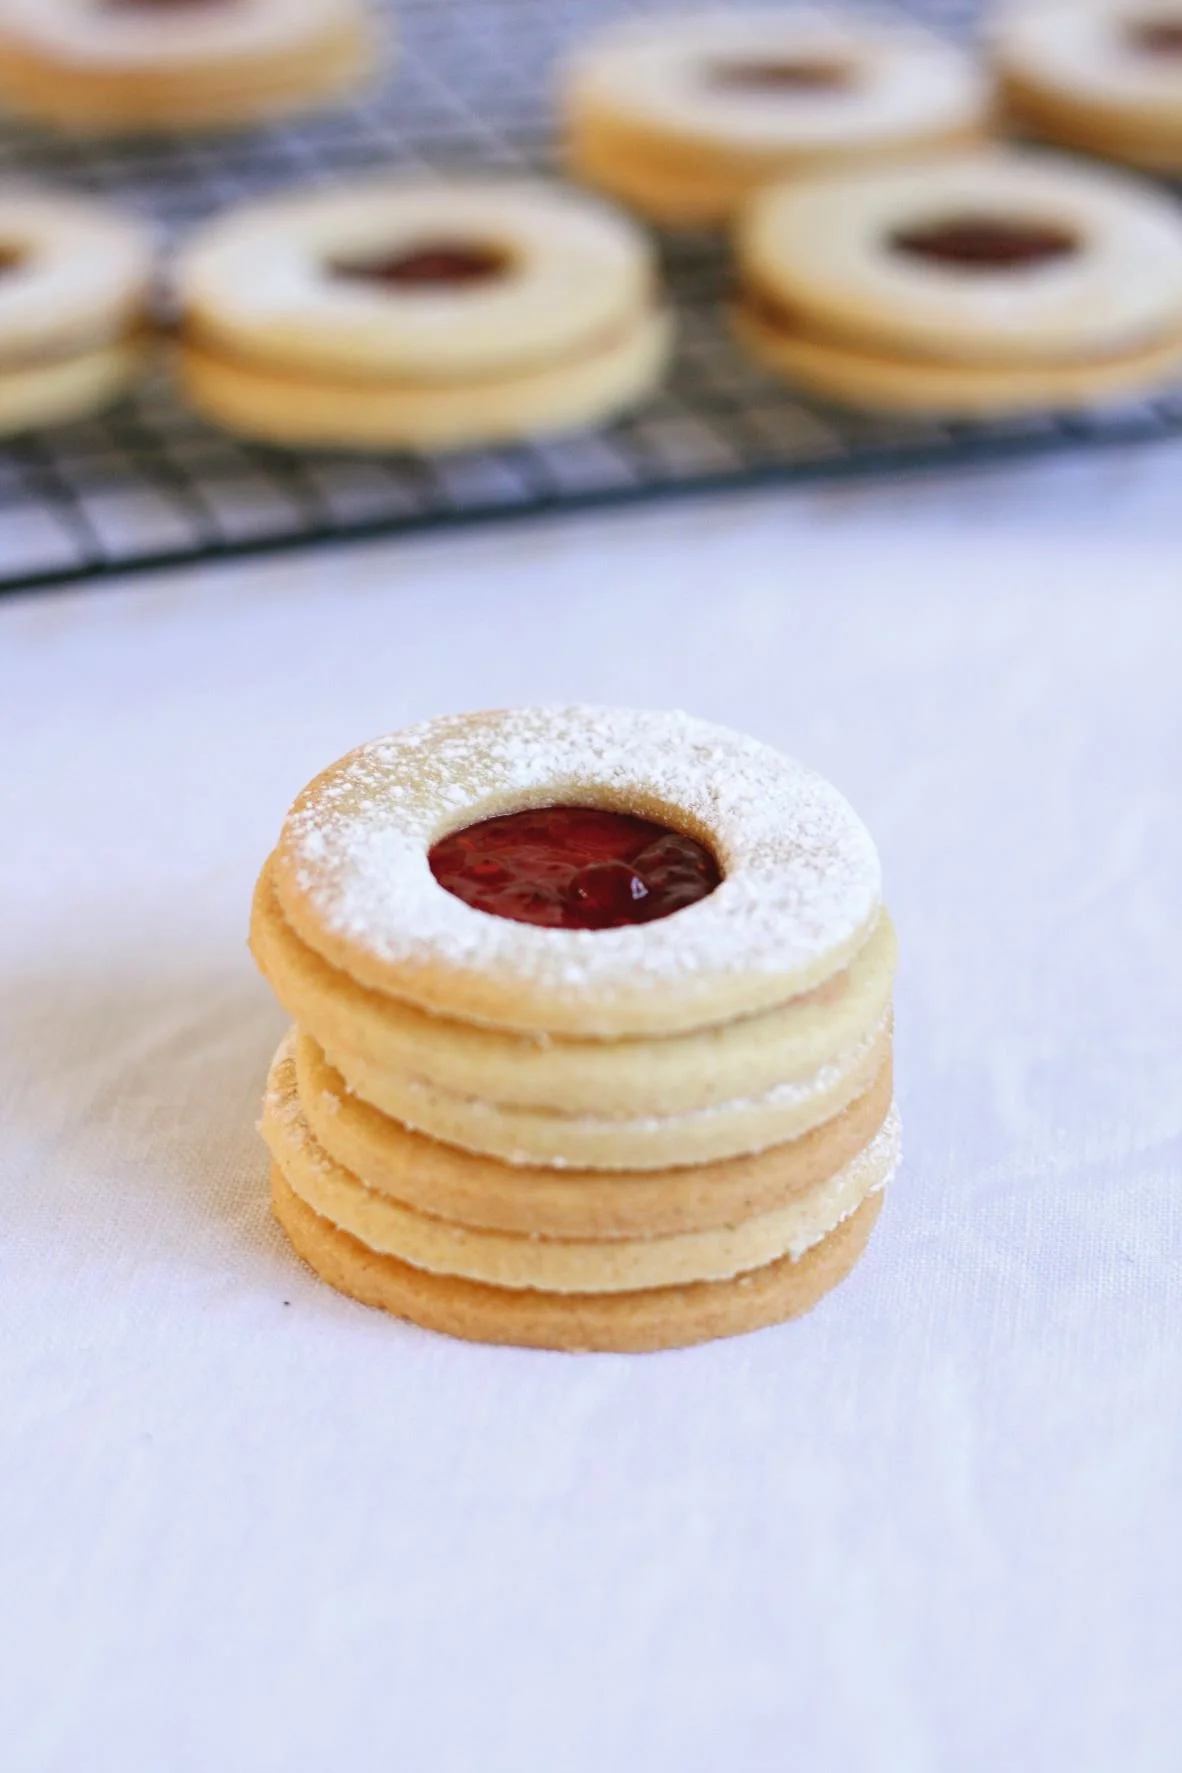
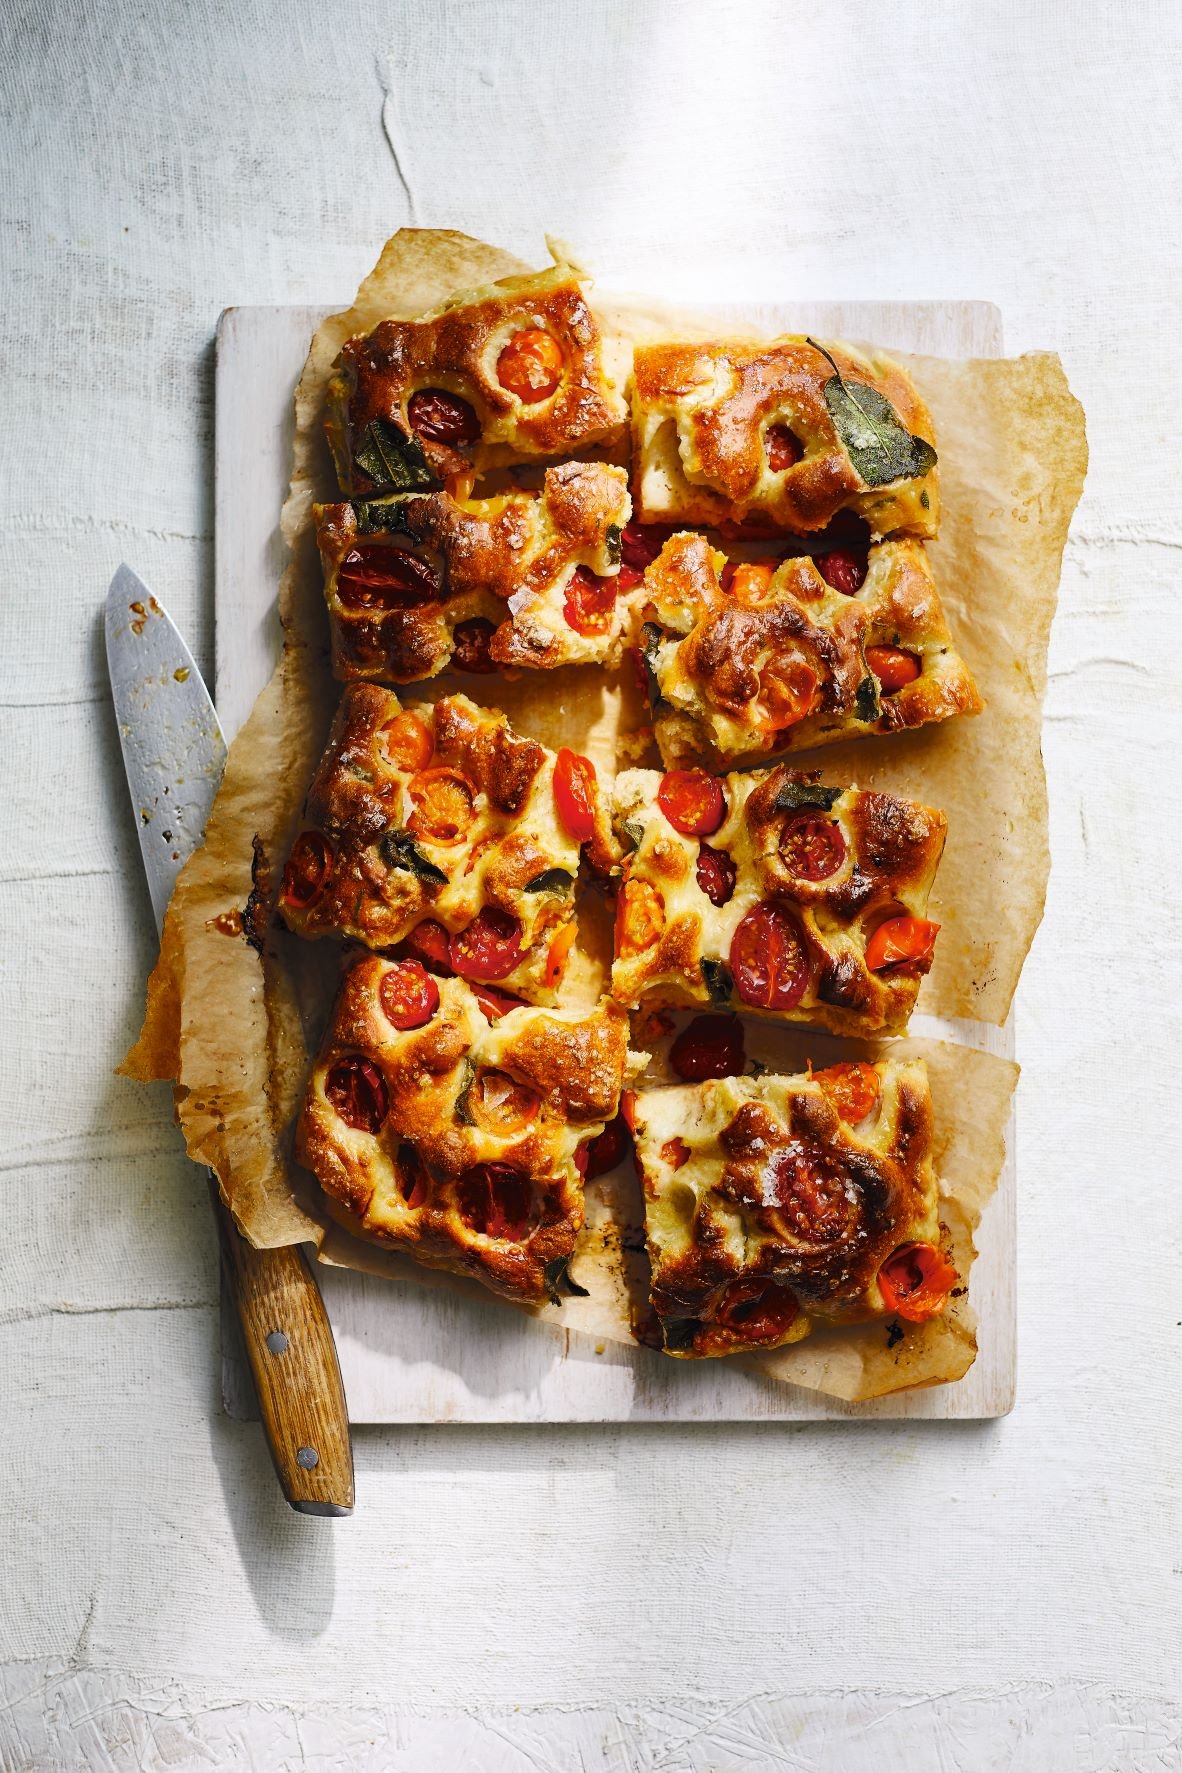
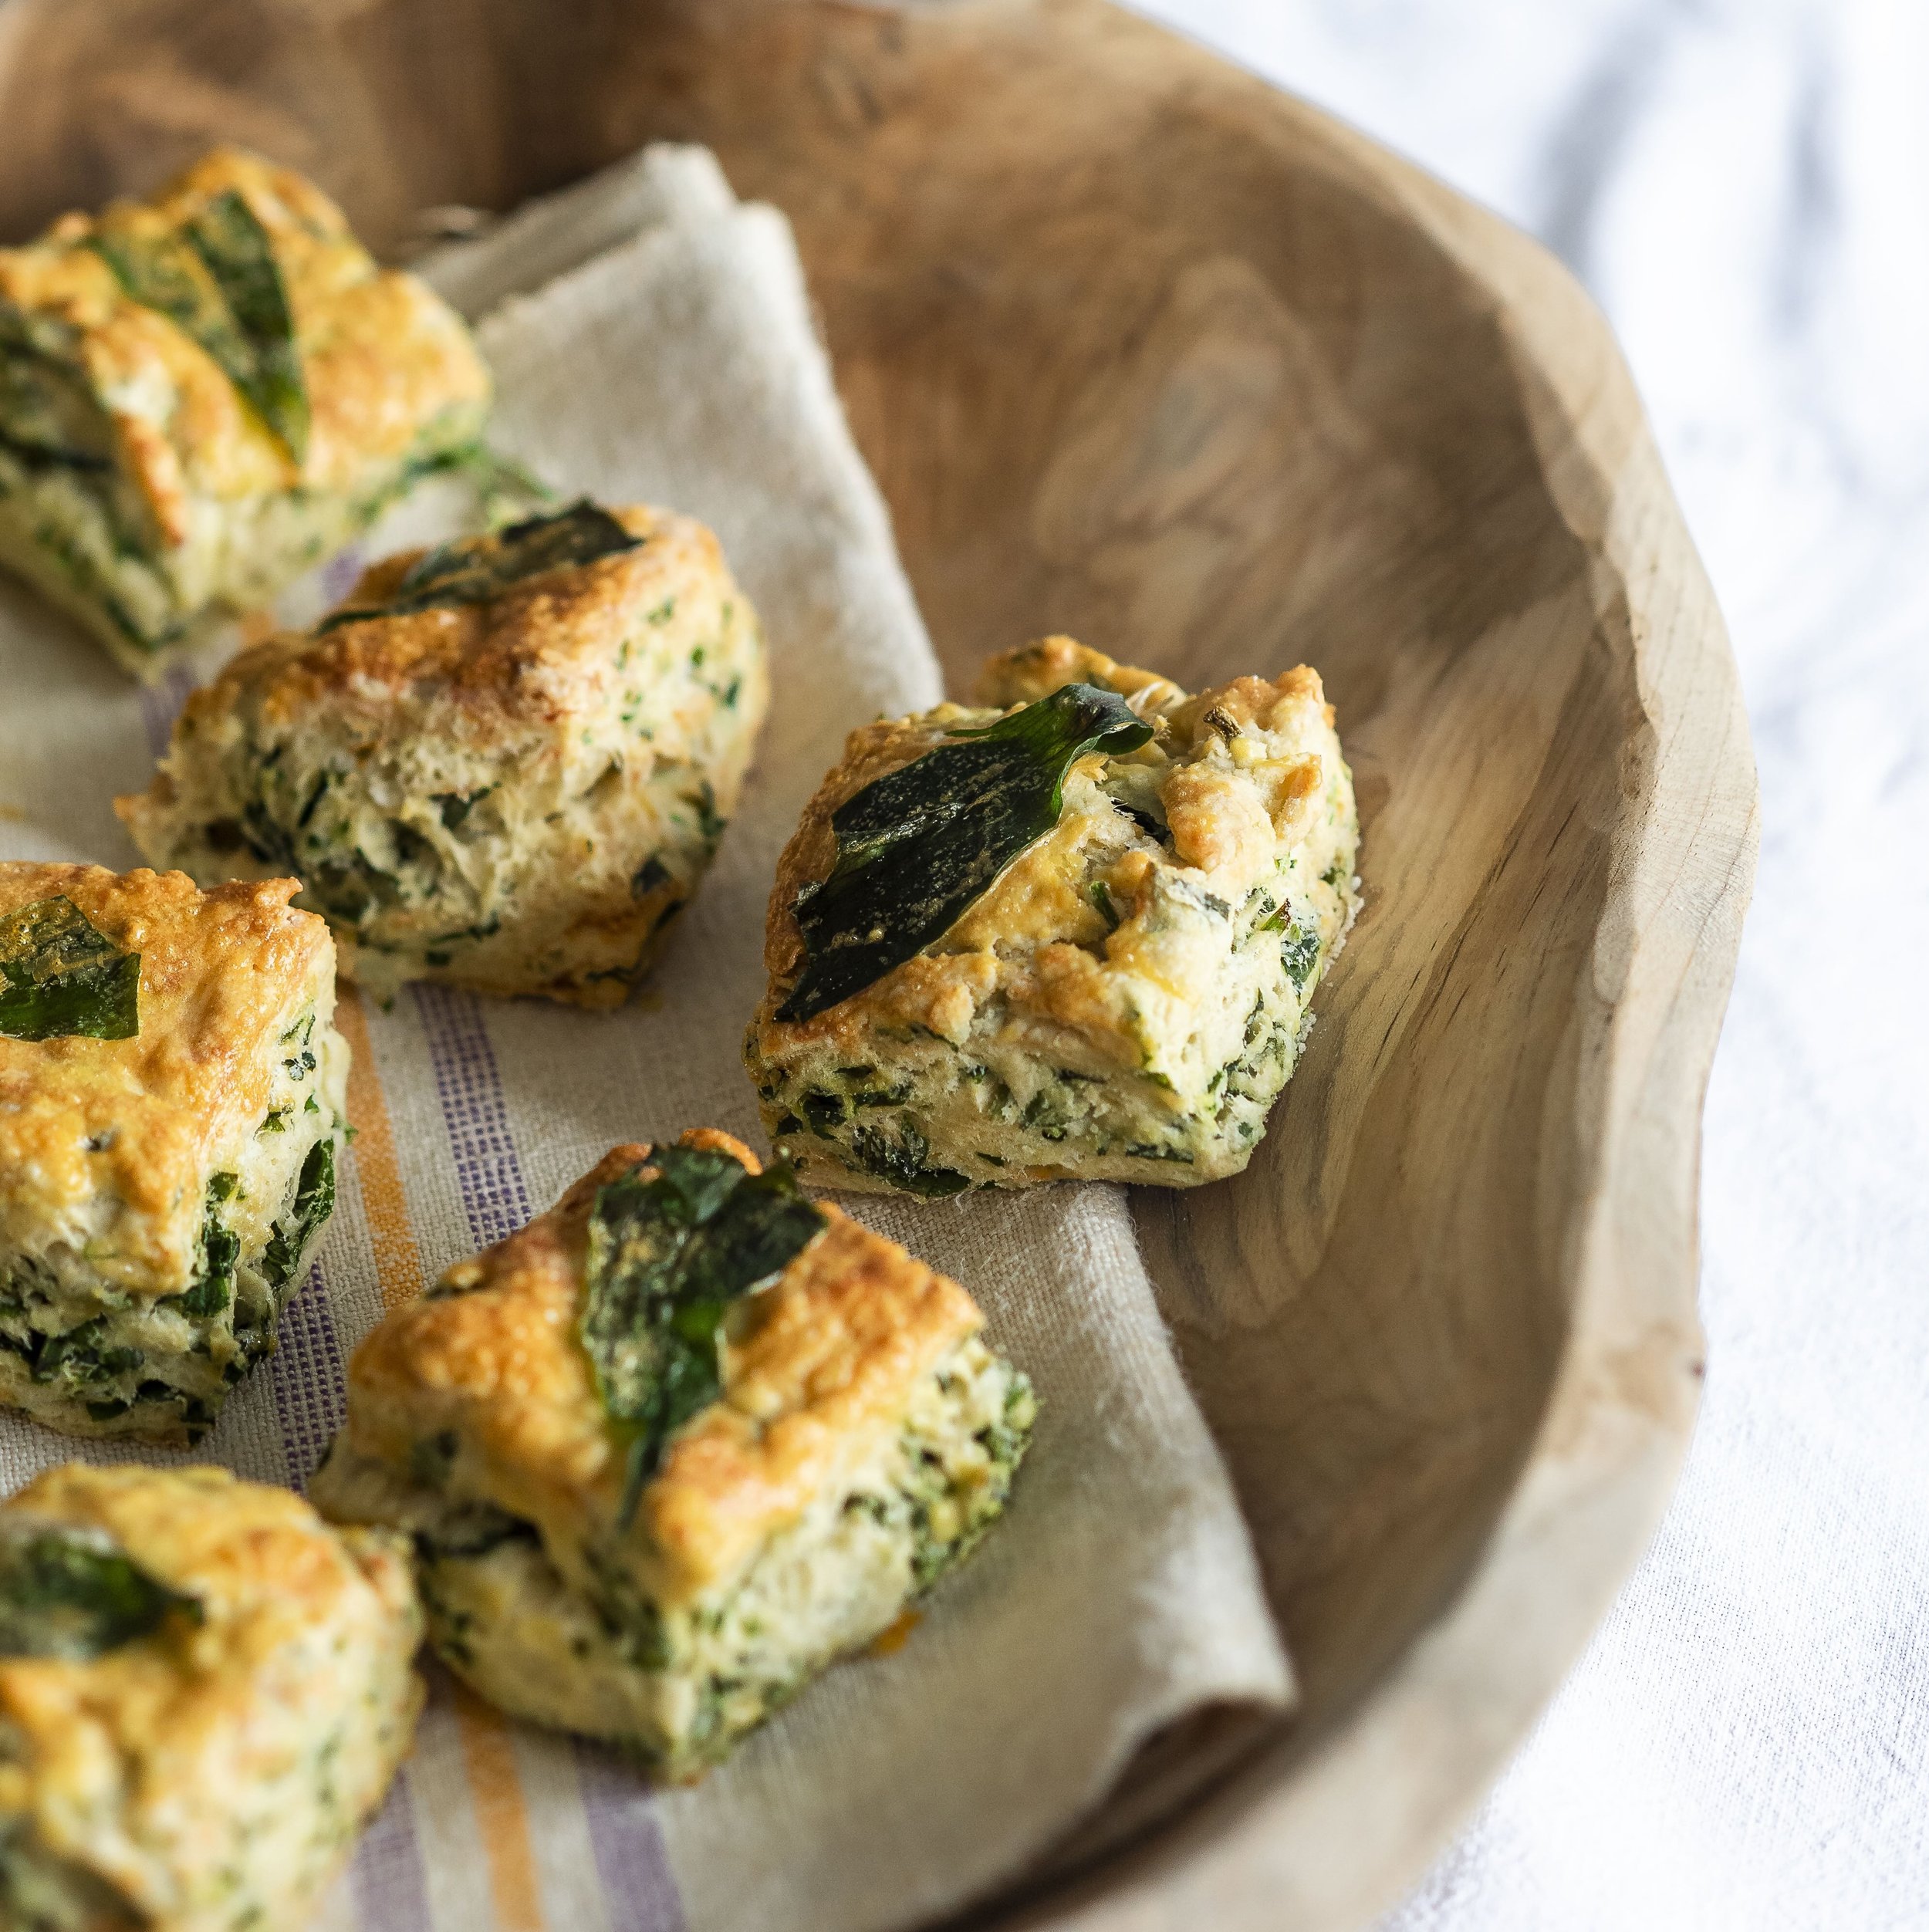
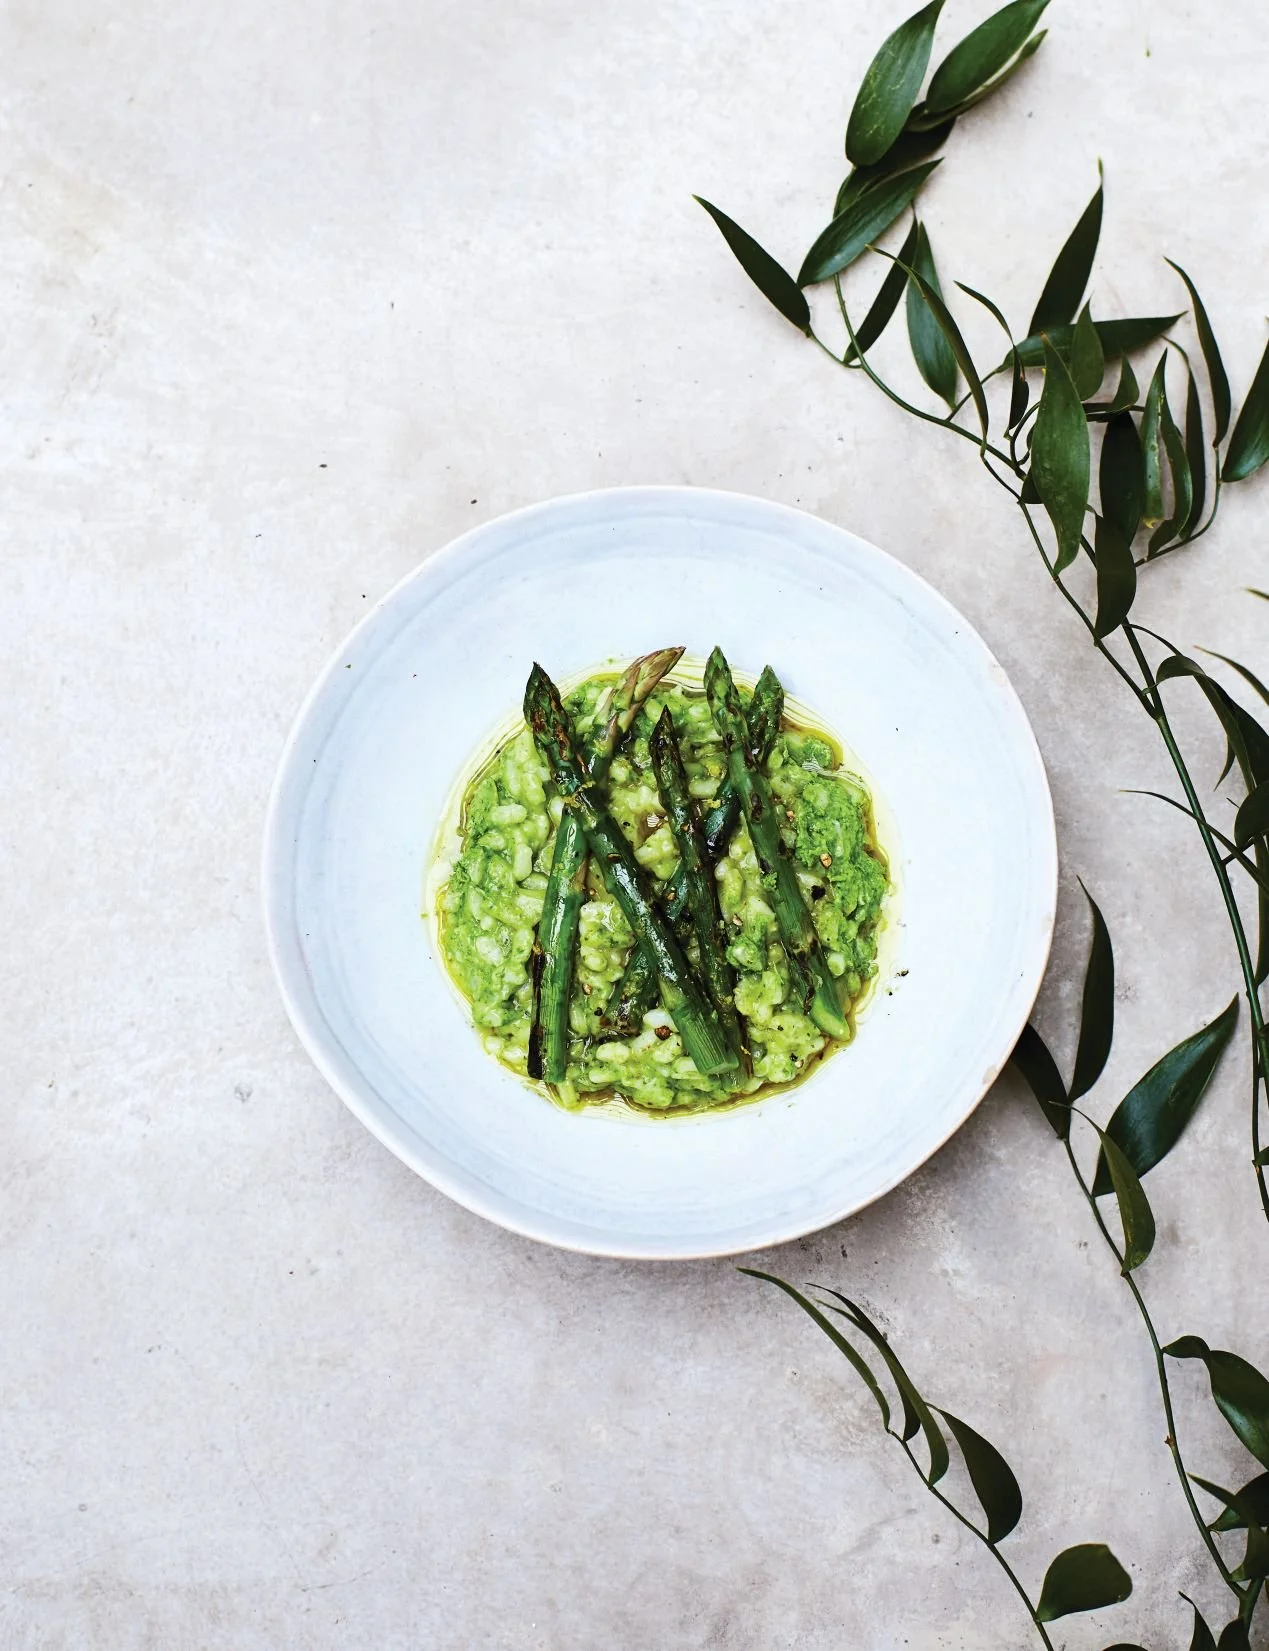
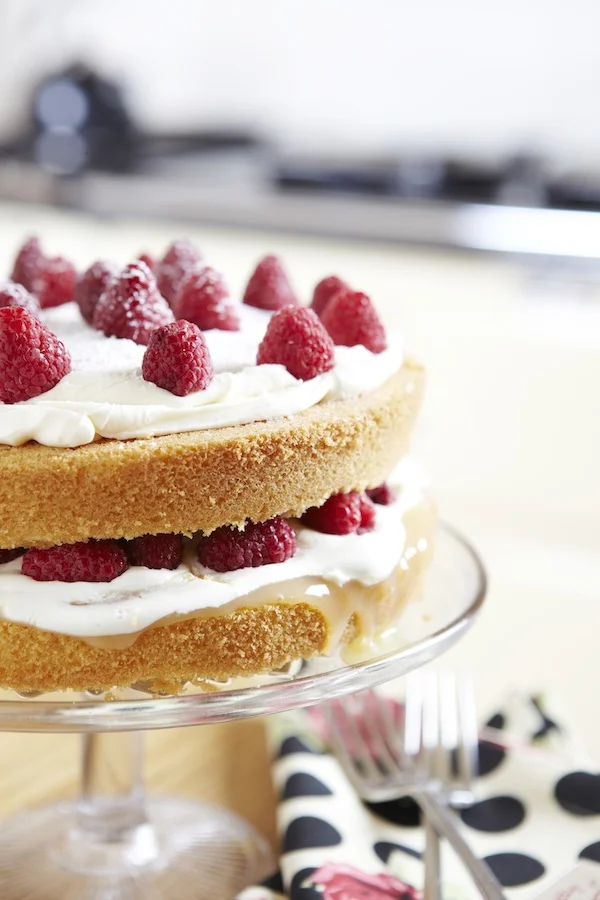
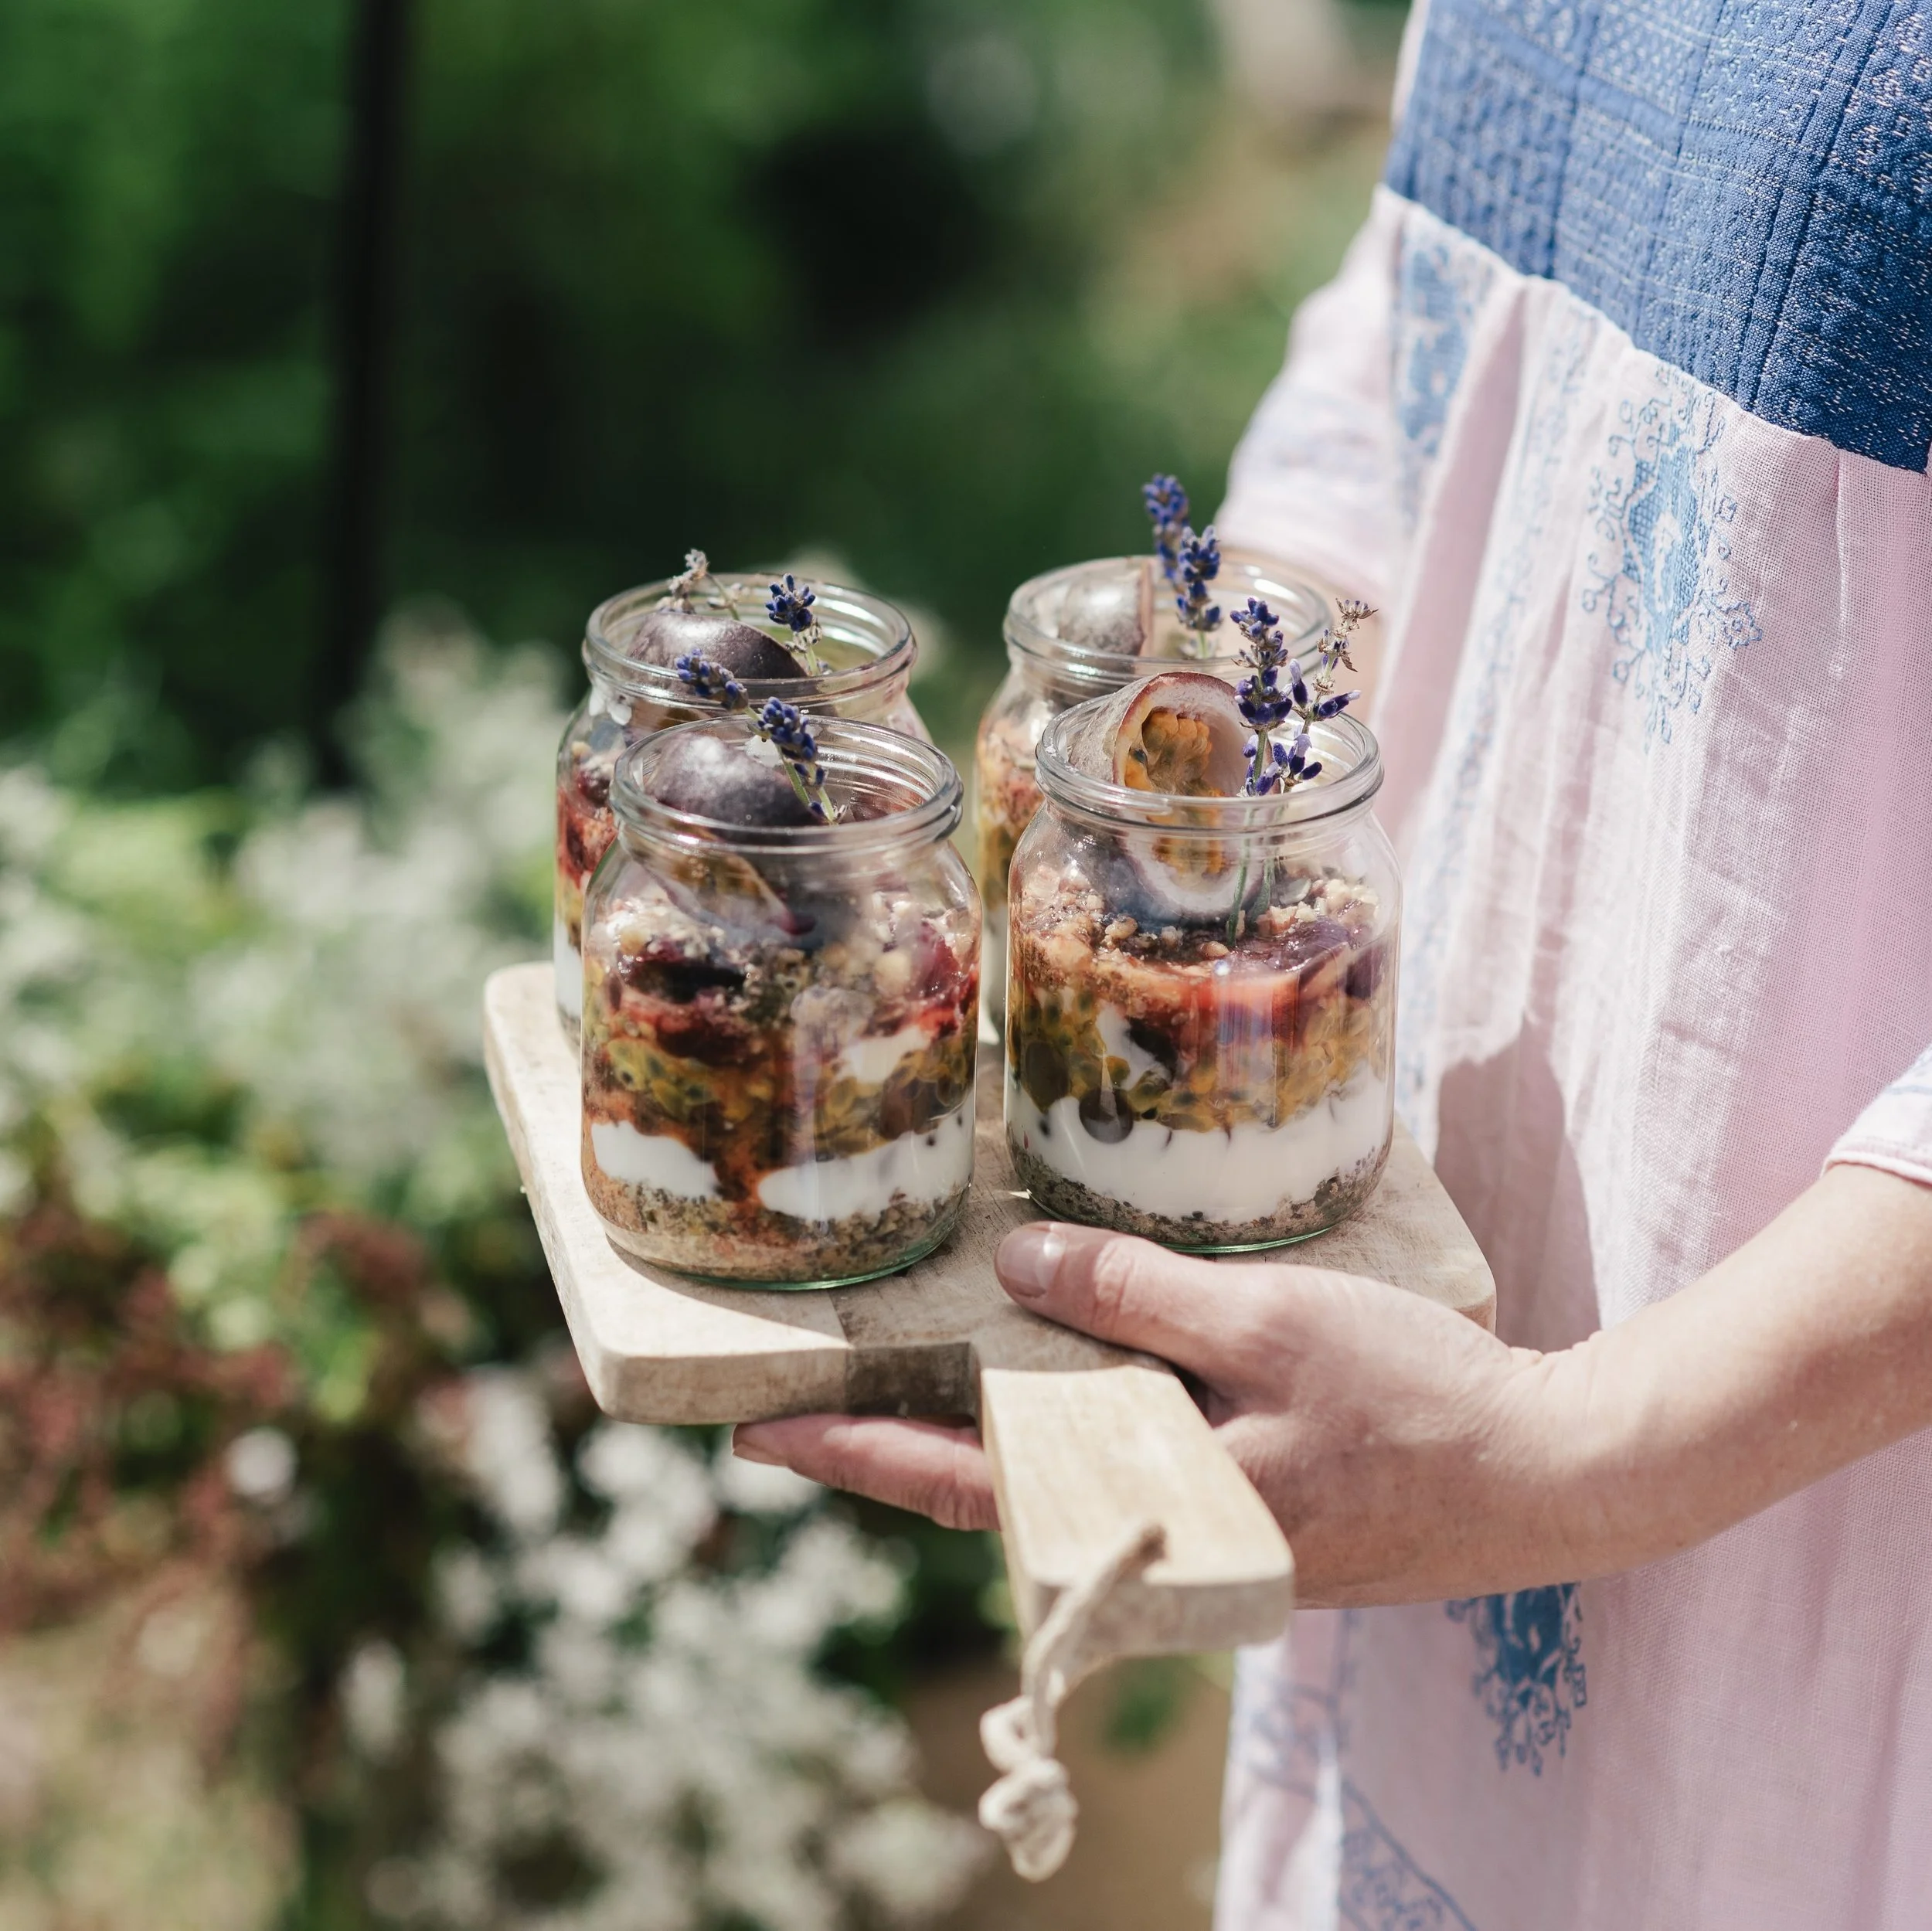
There’s an art to squirreling away, you see. Some squirreling requires hard work and forward planning while other aspects require a bit of recklessness and a glint in your eye. You have to consider not only what you might need, but also what you might just fancy. October is prime squirreling time: you can use up the last of the summer gluts making jams, biscuits and other goodies that will cheer the winter months. In fact, we have some fabulous ideas for this from Rachel de Thample in our October issue, everything from marrow marmalade to homemade Worcestershire sauce. But it’s also a good time to stash away a fancy tin of biscuits, some posh chocolates (or maybe simply a Crunchie bar, just for you, hidden on the top shelf behind the butter beans, to be eaten under the duvet with a book on a sad, snowy Sunday). The Norwegians might say: ‘There’s no such thing as bad weather, only bad clothes’. We say ‘there’s no such thing as bad weather, only a badly prepared larder’. Get ready to hunker down. 

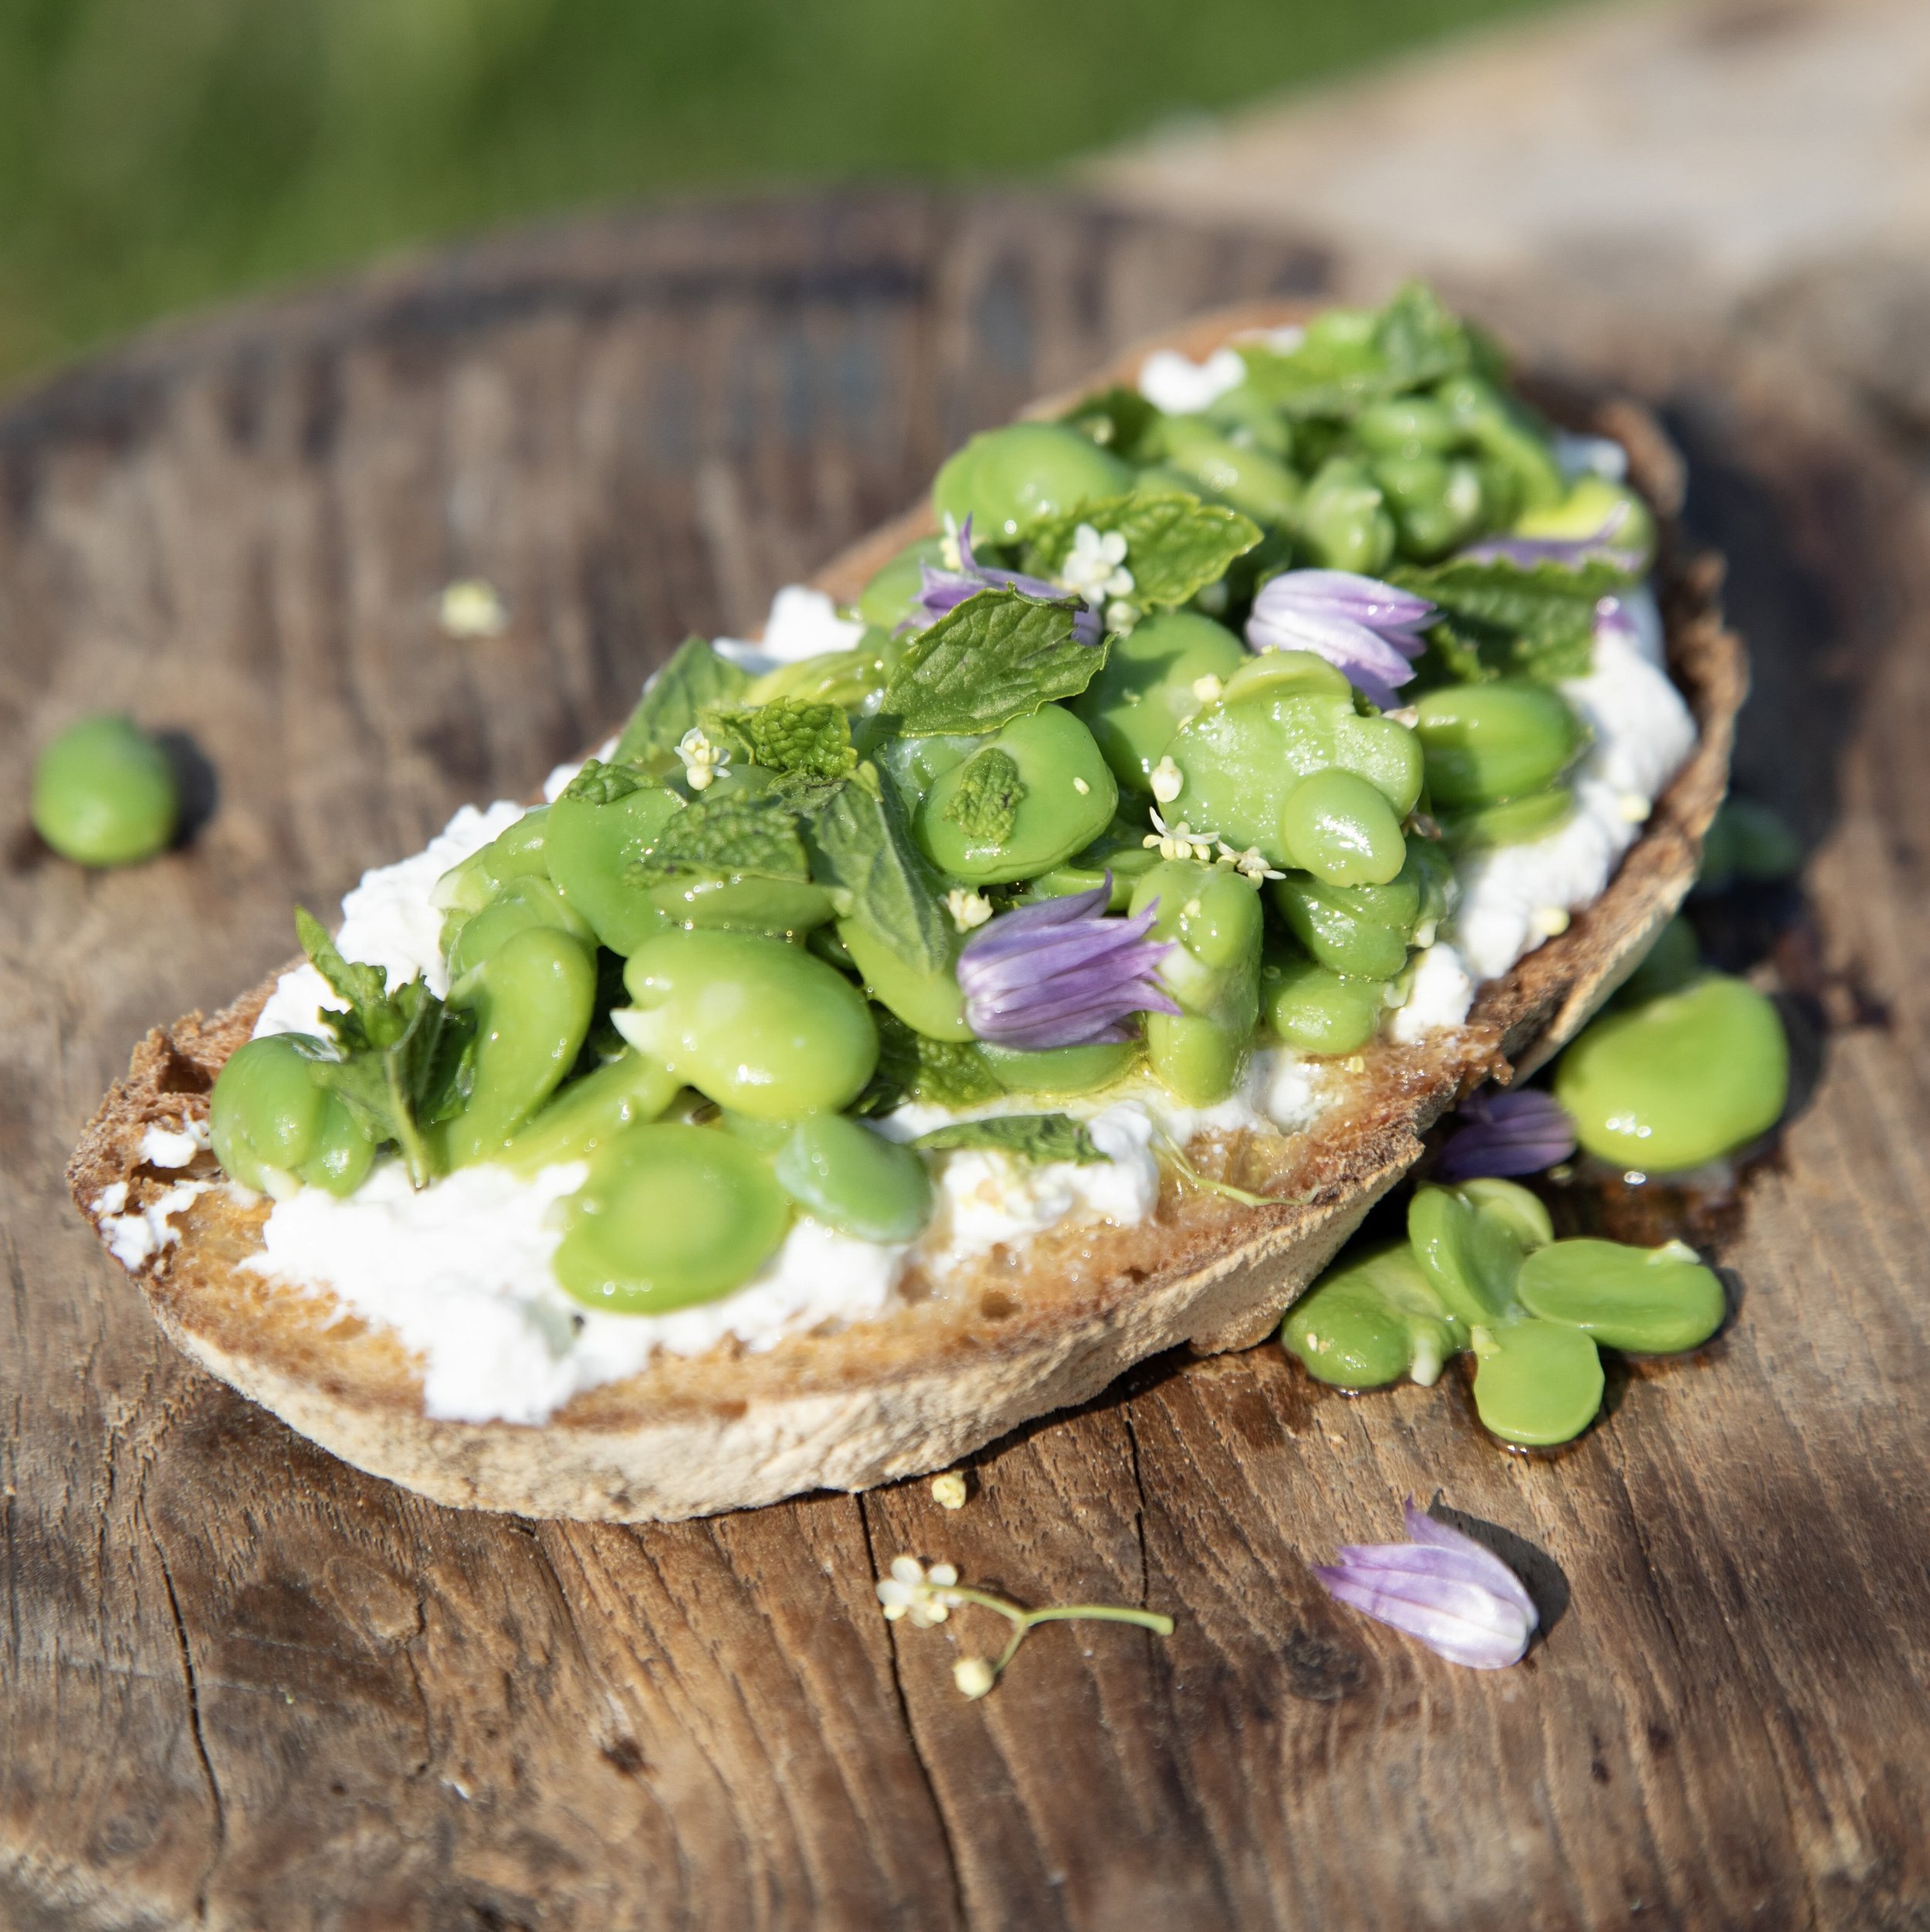
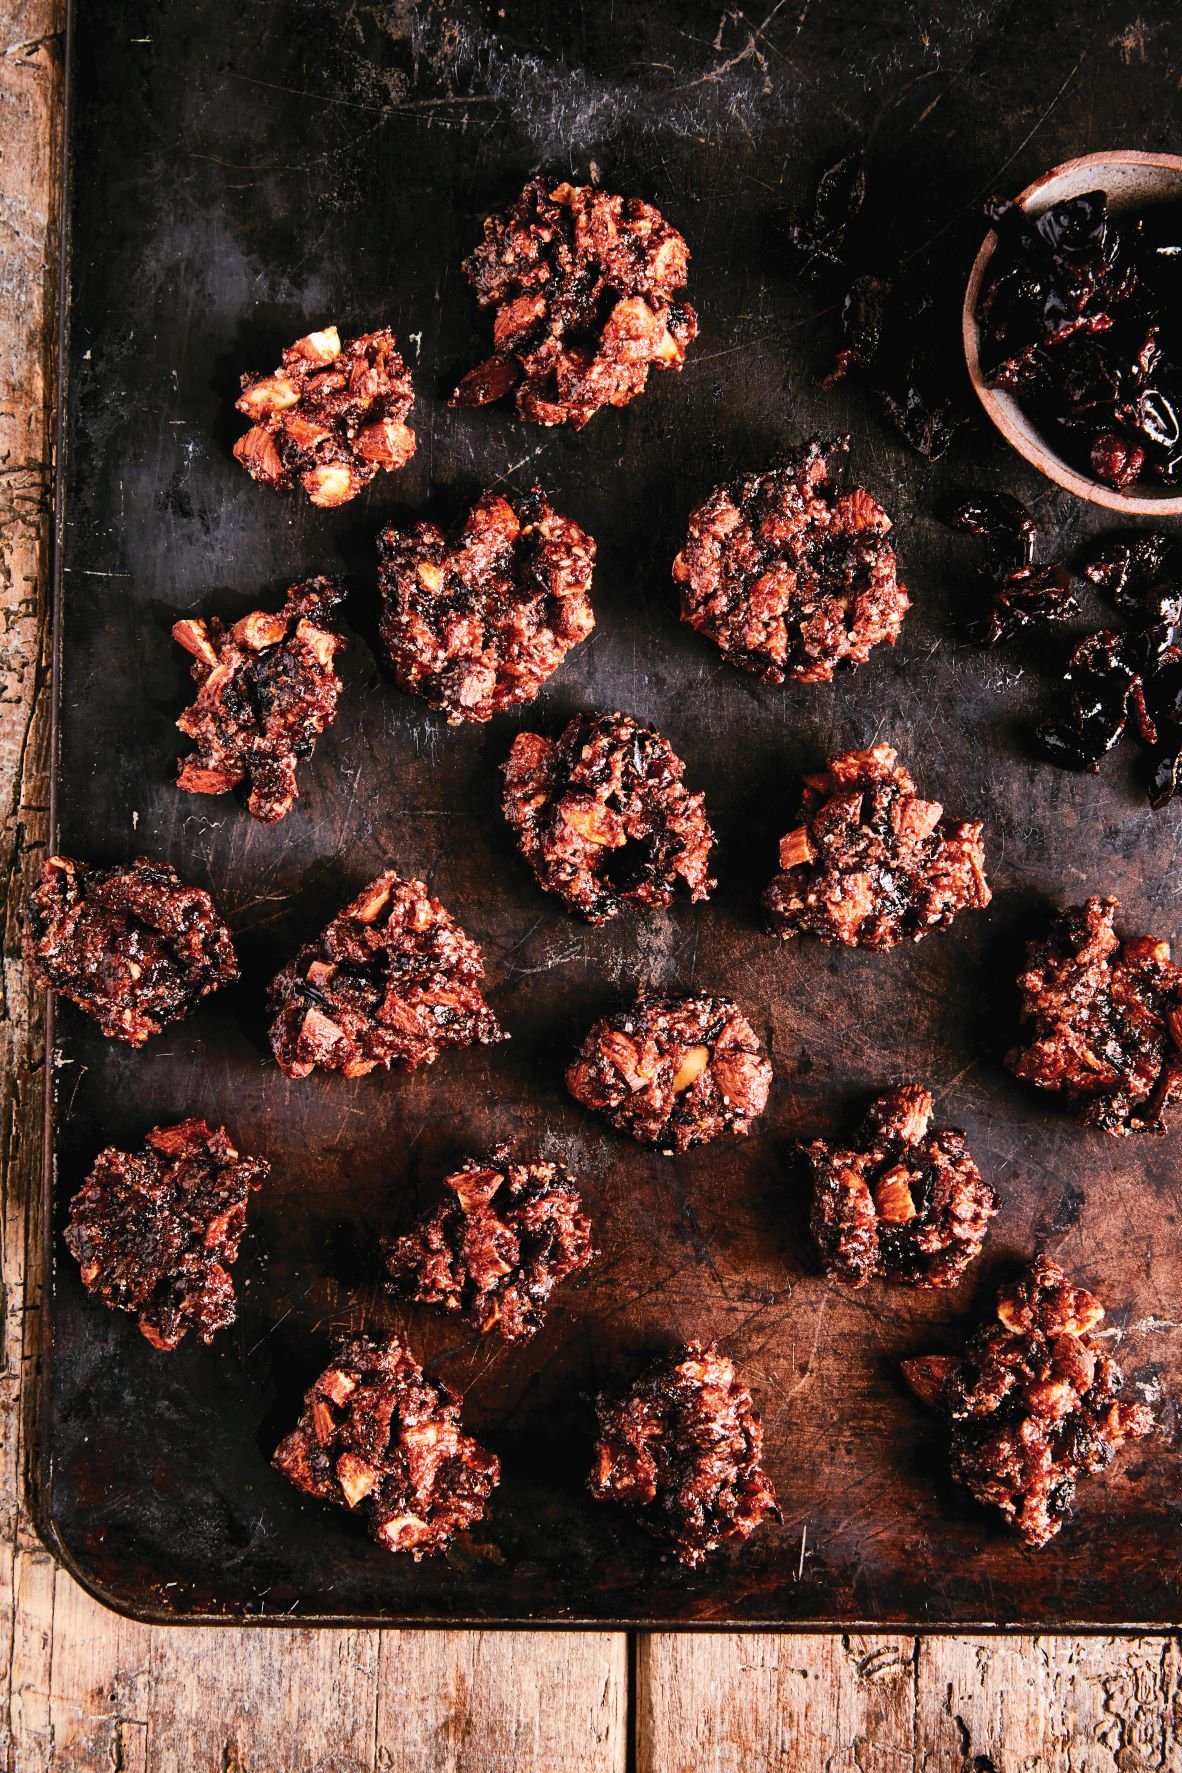
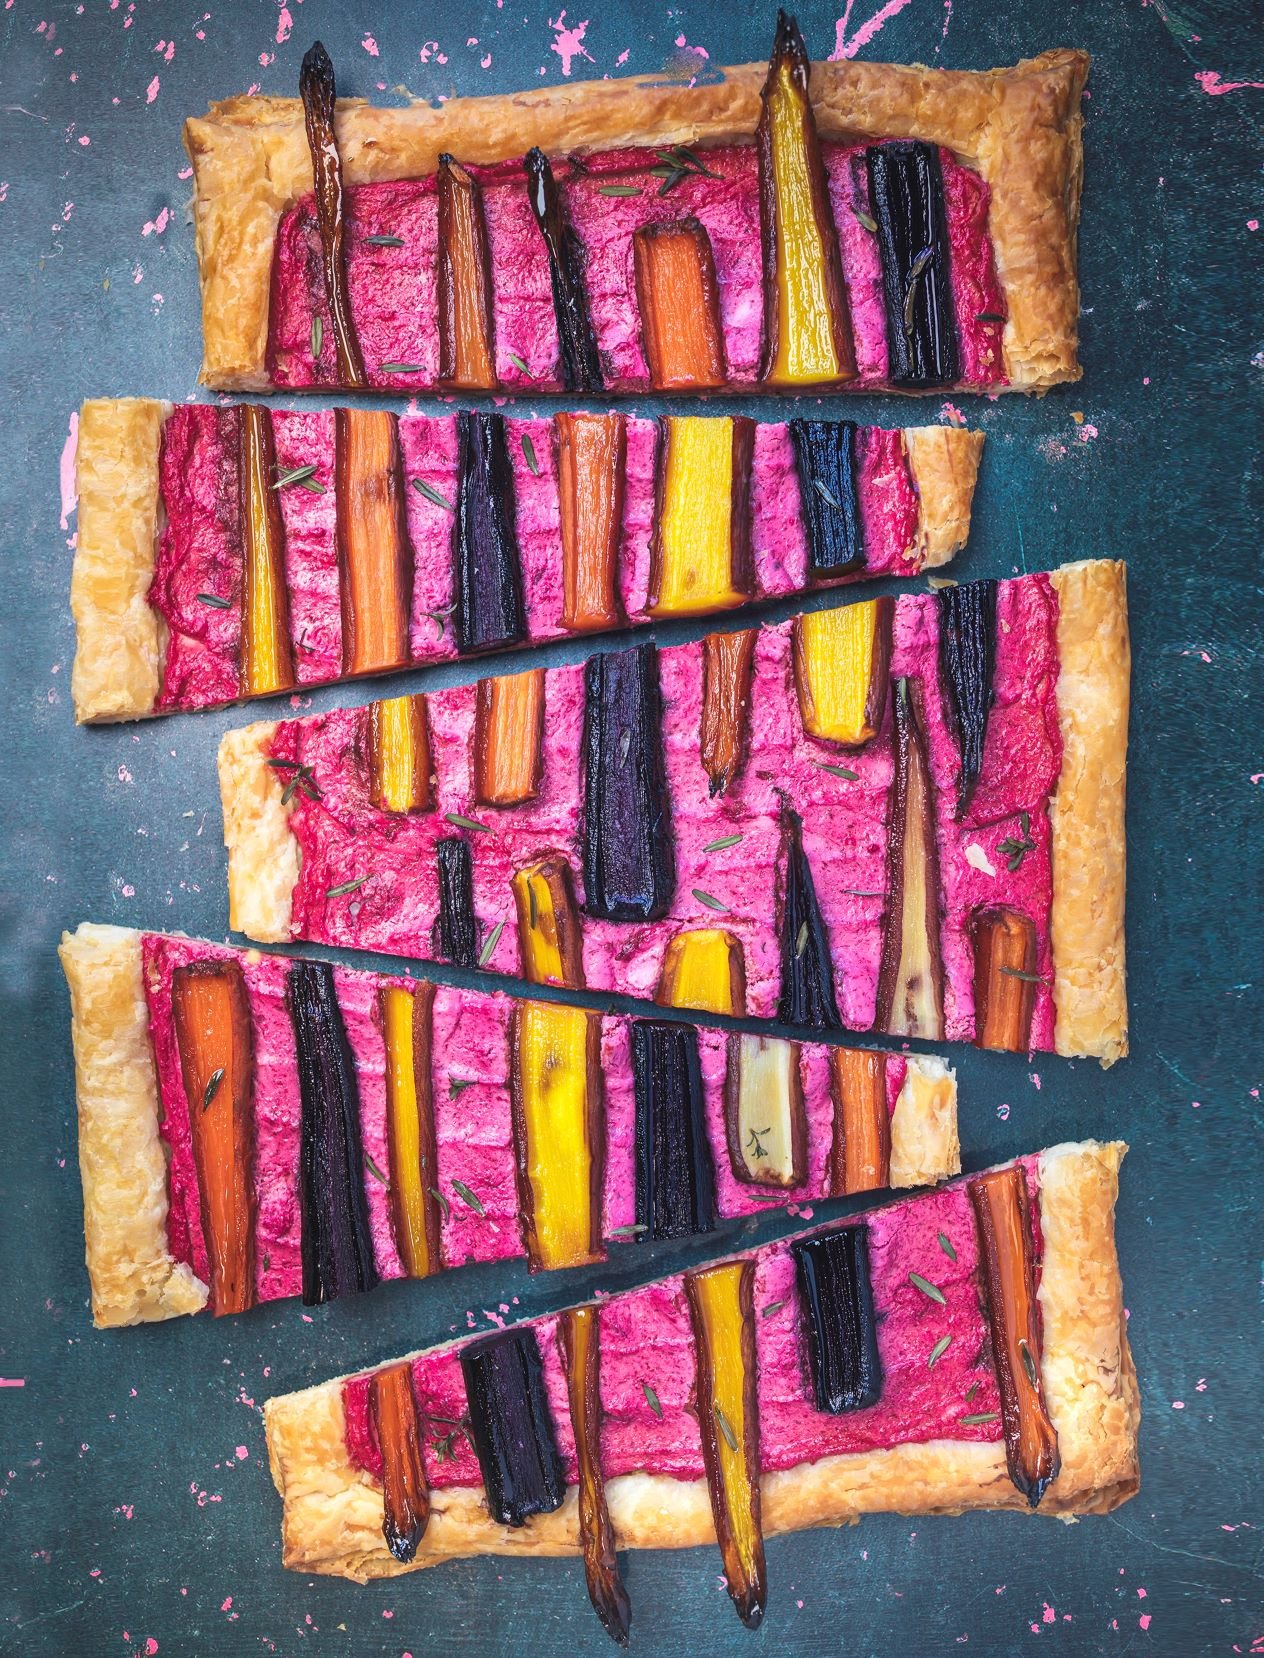
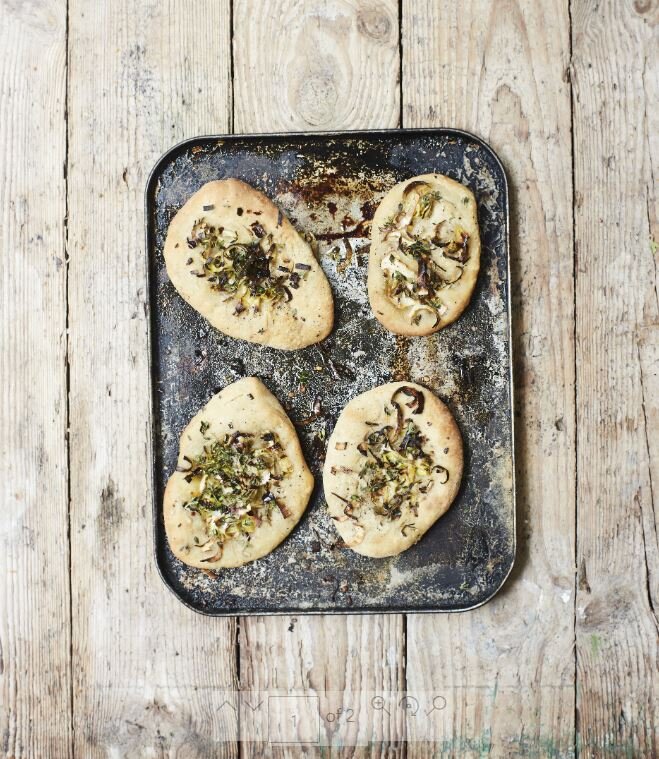
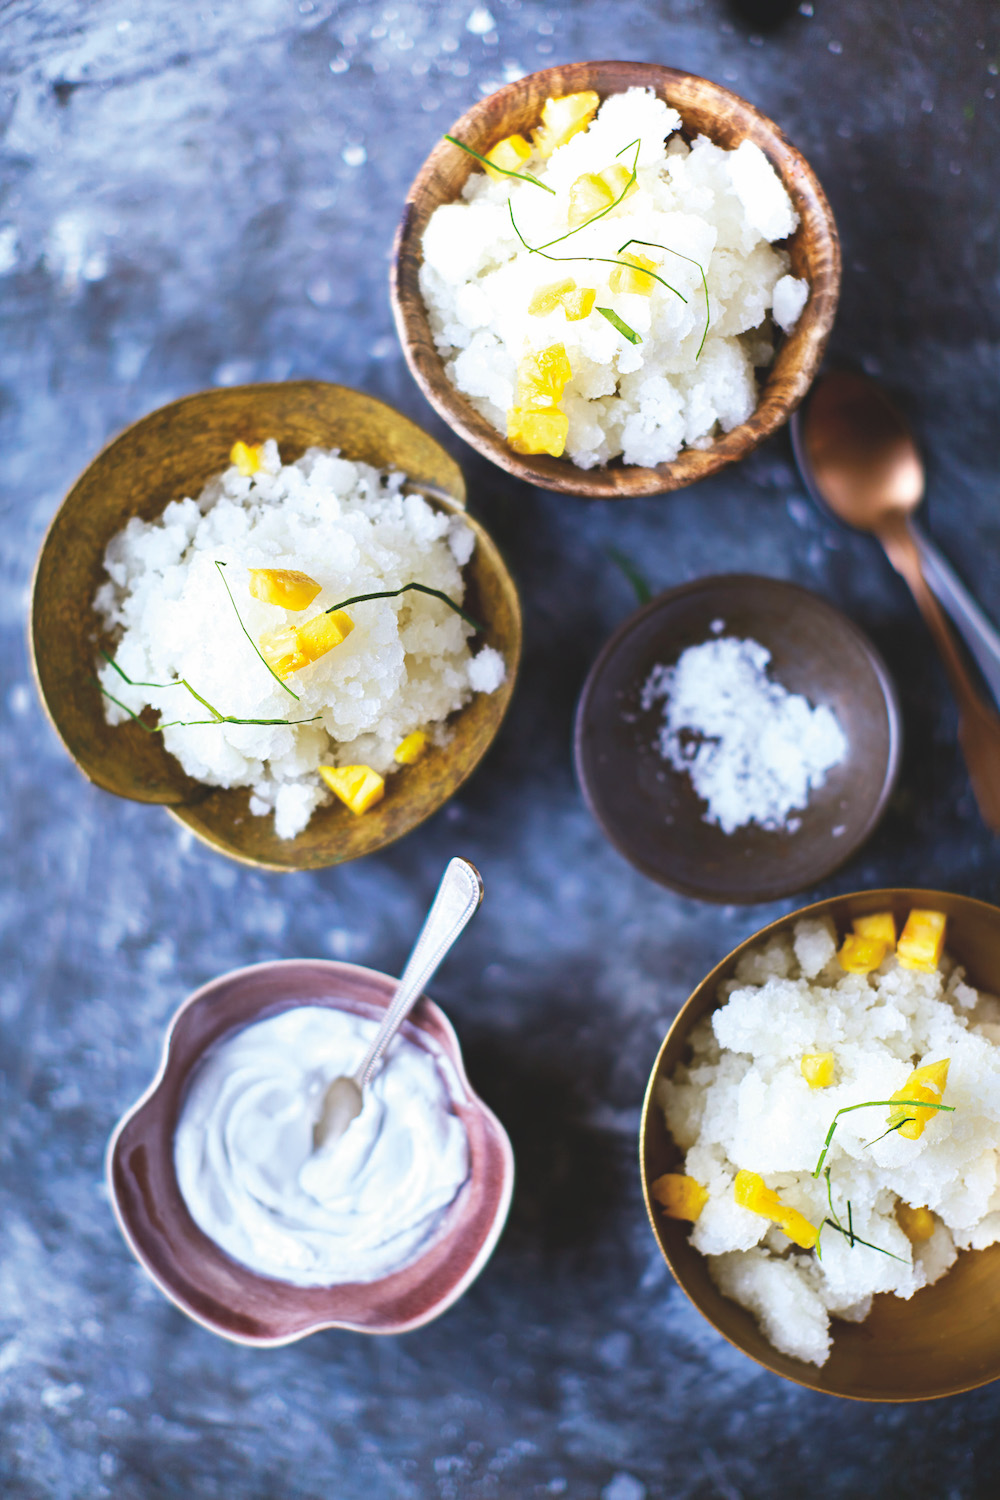
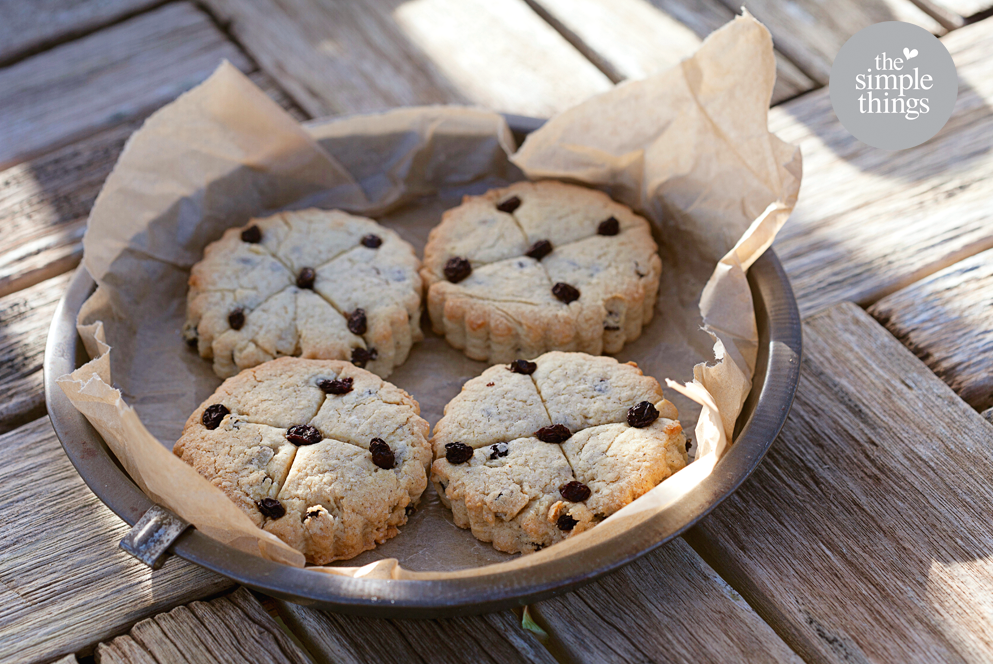
Our October issue has several recipes from Gifts from the Modern Larder: Homemade Presents to Make  and Give by Rachel de Thample (Kyle Books). Photography by Ali Allen. The ‘Create’ issue is in shops now.

Get hold of your copy of this month's The Simple Things - buy, download or subscribe

More things we love about October…

Featured
Pumpkin Beer Keg Jonathan Cherry.jpg
Oct 31, 2023
Make | a pumpkin beer keg
Oct 31, 2023
Oct 31, 2023
Apples Cathy Pyle.jpg
Oct 22, 2022
Primer | Know Your Apples
Oct 22, 2022
Oct 22, 2022
Getty Simple Thing.jpg
Oct 12, 2021
A simple thing | darker days
Oct 12, 2021
Oct 12, 2021

More from our October issue…


In Eating Tags issue 88, October, larder, baking, food
2 Comments
Photography: Jonathan Cherry. Recipe: Bex Long. Styling: Gemma Cherry

Photography: Jonathan Cherry. Recipe: Bex Long. Styling: Gemma Cherry

Recipe | Ginger snaps

Iona Bower September 19, 2019

Crunchy, spicy biscuits ideal for eating with pumpkin ice cream

Our October issue has a very special ‘gathering’ feature with recipes for a pumpkin party. It’s got everything from autumnal salads to a fabulously moreish sausage roll and even a pumpkin beer keg. But we have made a date to create the pumpkin ice cream sandwiches pictured above - sweet pumpkin ice cream squidged between ginger snaps and rolled in pistachios. Who says ice cream is for summer?

You can make them using any shop-bought ginger snaps but if you fancy going the whole hog, you can make the ginger snaps using the recipe below.

Ginger snaps

Makes 24

225g plain flour

1 tsp baking powder

1 tsp bicarbonate of soda

1 tbsp ground ginger

Pinch of salt

120g unsalted butter

120g caster sugar

5 tbsp (75g) golden syrup

1 Preheat oven to 180C/Fan 160C/Gas 4. Line 2 baking trays with greaseproof

paper.

2 Sift the flour, baking powder, bicarbonate of soda, ginger and salt into a large

bowl. Cut the butter into cubes and rub into the flour until the mixture

resembles fine breadcrumbs.

3 Stir in the sugar. Add the golden syrup and mix together well. Bring it all

together with your hands to make a smooth ball of dough.

4 Break off small walnut-sized pieces, roll into balls and place on the lined

baking trays. Allow space between each ball as they will spread during cooking.

5 Bake for 10-15 mins until the ginger snaps have spread and turned golden

brown.

6 Leave to cool for 5 mins on the baking trays before using a spatula to

carefully move them to wire racks to cool completely.


Don’t forget to buy the October ‘create’ issue for the rest of the recipes for our pumpkin party.

Get hold of your copy of this month's The Simple Things - buy, download or subscribe


More biscuit inspiration…

Featured
Shortbread.jpg
Nov 11, 2023
Recipe | Chai Spiced Shortbread
Nov 11, 2023
Nov 11, 2023
jammie dodgers Louise Gorrod.jpg
Nov 6, 2021
Recipe | Homemade Jammie Dodgers
Nov 6, 2021
Nov 6, 2021
Feb 13, 2021
Recipe: Peanut butter jammie dodgers
Feb 13, 2021
Feb 13, 2021

More from our September issue…

Featured
Pumpkin Beer Keg Jonathan Cherry.jpg
Oct 31, 2023
Make | a pumpkin beer keg
Oct 31, 2023
Oct 31, 2023
Back cover cartoon.jpg
Oct 22, 2019
October | a final thought
Oct 22, 2019
Oct 22, 2019
Spooky Stories Alamy.jpg
Oct 19, 2019
Build your own spooky story
Oct 19, 2019
Oct 19, 2019


In Eating Tags issue 88, October, baking, biscuits, halloween, pumpkin, ice cream
Comment
Photography: Nassima Rothacker

Photography: Nassima Rothacker

Eat | Wild September Salad

Iona Bower September 7, 2019

Eating out in the wild this month? Why pack a salad when you can scour hedgerows for woodland treats?

Al fresco dinners take on a new, more exciting element in early autumn. You can still enjoy mild days and longer evenings but also bring out more robust flavours and warming dishes that just shout ‘Autumn’ at you.

In our September issue, we have a very special ‘gathering’ feature we’ve called Into The Woods, with recipes by Rachel de Thample. It’s all about cooking over a fire and making the most of the great outdoors before the days become shorter, with everything from koftas and flatbreads to pear crumble and apple hot toddies. We particularly liked this simple Wild September Salad, which you can serve as part of this campfire feast or at any late summer, early autumn picnic. Just find your way to a likely looking hedgerow and see what nature has provided.

Leaves to look out for

Yarrow Feathery leaves resembling camomile – delicious aniseed flavour.
Alkanet Use the smaller, newer leaves and pretty blue flowers, which taste like cucumber.
Three-cornered leek Looks like wild garlic, tastes like wild garlic, but its triangular stems enjoy a late flush in early autumn.
Wild rocket Resembles farmed rocket, although the leaves range from greyish green to dark green. Smells peppery.
Shepherd’s purse Its tiny love-heartlike seed pods have a nice punchy, mustardy flavour.
Wood sorrel Small clover-like leaves, only smaller and tinged bronze; lemony tasting.

(There’s a good hedgerow food guide at wildfooduk.com.) Wash freshly picked leaves well, then pat dry with kitchen towel. Tumble together in a large bowl to mix and either pack into flatbreads or serve as a side with a drizzle of extra virgin olive oil.

Get hold of your copy of this month's The Simple Things - buy, download or subscribe

More from our September issue…

Featured
back cover.JPG
Sep 24, 2019
September | a final thought
Sep 24, 2019
Sep 24, 2019
Coastal Path.jpg
Sep 21, 2019
Walking on the edge of land
Sep 21, 2019
Sep 21, 2019
Tiny Books Rachel Hazell.jpg
Sep 18, 2019
In praise of | teeny, tiny books
Sep 18, 2019
Sep 18, 2019

More ideas to get you excited for autumn…

Featured
Hasselback Squash.JPG
Nov 9, 2024
Recipe | Hasselback Squash with Chestnuts, Pancetta & Mushrooms
Nov 9, 2024
Nov 9, 2024
Rainbow minestrone good things to eat.jpg
Oct 5, 2024
Recipe | Rainbow Minestrone Soup with Basil Mayo Topping
Oct 5, 2024
Oct 5, 2024
Apple Rose Cake Rebecca Lewis.jpg
Sep 28, 2024
Recipe | Apple & Cinnamon Rose Cake
Sep 28, 2024
Sep 28, 2024
In Eating Tags issue 87, september, open fire cooking, autumn recipes, autumn salads, autumn leaves
Comment
Photography: Nassima Rothacker

Photography: Nassima Rothacker

Bake a basic sourdough loaf

Iona Bower September 4, 2019

This month marks Sourdough September and we can’t think of much that’s more worth celebrating

As summer draws to a close our minds turn to home comforts, particularly those that involve flowery hands and warm smells emanating from ovens. For our September ‘Begin’ issue, we visited Sourdough School to begin finding out from sourdough guru Vanessa Kimbell how to make that delicious, crusty, chewy bread. You can read all about it on p22 of the issue. To give you a flavour, though, we’ve posted one of Vanessa’s simple sourdough recipes here. Don’t say we aren’t good to you. You can find out lots more about sourdough at The Sourdough School.

Allow yourself about 3 –4 hours for the dough to be mixed, folded and shaped ready to place in the coldest part of the fridge to prove overnight.(If you are new to bread making, you can, instead of shaping the dough and putting it into a banneton, grease a 2lb bread tin liberally with butter, let the dough rise in it overnight in the fridge and then bake as per the recipe instructions below.)

Equipment:
A large mixing bowl
A round cane banneton
2 clean tea towels
A Dutch oven or La Cloche
A large heatproof pan, a sharp knife or ‘lame’ to slash the dough with

Ingredients:
300g water
100g sourdough leaven (made with your starter)*
100g of stoneground organic wholemeal flour
400g organic strong white flour
10g fine sea salt mixed with 15g of cold water
25g rice flour mixed with 25g of stone ground white flour (for dusting your banneton)
Semolina to dust the bottom of the baking surface

Makes 1 loaf

Late afternoon

In a large bowl whisk your water and starter and mix well. Add all the flour and mix until all the ingredients come together into a large ball.

Cover with a clean damp cloth and let the dough rest on the side in the kitchen for between 30 mins and 2 hours – this what bakers call Autolyse

Add the salt mixed with the water and dimple your fingers into the dough to allow the salty water and salt to distribute evenly throughout the dough.  Leave for 10 mins.

Next lift and fold your dough over, do a quarter turn of your bowl and repeat 3 more times. Repeat 3 times at 30 min intervals with a final 15 min rest at the end.

Shape the dough lightly into a ball then place into a round banneton dusted with flour (If you don’t have a banneton then use a clean tea towel dusted with flour inside a colander). Dust the top with flour, then cover with a damp tea-towel

Leave your dough to one side until it is 50% bigger then transfer to the fridge , and leave to prove there for 8 – 12 hours.

The following morning

The next morning preheat your oven to 220°C for at least 30 mins before you are ready to bake. Place your cloche or baking stone in the oven and a large pan of boiling water underneath (or use a Dutch oven). The hydration helps form a beautiful crust.

Once the oven is up to full heat, carefully remove the baking stone from the oven, taking care not to burn yourself, dust with a fine layer of semolina, which stops the bread sticking, then put your dough onto the baking stone and slash the top with your blade. This decides where the bread will tear as it rises. Bake for an hour.

Turn the heat down to 180°C (and remove the lid if you are using a Dutch oven) and bake for another 10 -15  mins.  You need to choose just how dark you like your crust but I suggest you bake until it is a dark brown – it tastes much better.

Storage

Sourdough is really best left to cool completely before slicing and is even better if left for a day to let the full flavour develop. Once your sourdough has cooled, store in a linen or cotton bread bag, or wrapped in a clean tea towel. If you don’t like a crunchy crust on your sourdough bread, simply wrap your bread in a clean tea towel whilst it is still warm.

* To make 100g of leaven, use 1 tbsp of sourdough starter, 40g of water and 40g of strong white flour, mix well and leave, covered on the side in the kitchen in the morning. It will be lively and bubbly and ready to bake with in the evening.

Get hold of your copy of this month's The Simple Things - buy, download or subscribe

More from our September issue…

Featured
back cover.JPG
Sep 24, 2019
September | a final thought
Sep 24, 2019
Sep 24, 2019
Coastal Path.jpg
Sep 21, 2019
Walking on the edge of land
Sep 21, 2019
Sep 21, 2019
Tiny Books Rachel Hazell.jpg
Sep 18, 2019
In praise of | teeny, tiny books
Sep 18, 2019
Sep 18, 2019

More sourdough (and other) baking inspiration…

Featured
Lammas Loaf.jpg
Aug 1, 2023
Bake | A Lammas loaf
Aug 1, 2023
Aug 1, 2023
Tomato focaccia 2.jpg
Sep 15, 2022
Recipe | Tomato Focaccia
Sep 15, 2022
Sep 15, 2022
Mar 11, 2020
Recipe | nettle soda bread
Mar 11, 2020
Mar 11, 2020
In Eating Tags issue 87, september, sourdough, baking, bread
Comment
Photography: Kirstie Young

Photography: Kirstie Young

Eat | Blackberry and goats' cheese flatbreads

Iona Bower August 31, 2019

Crumble certainly has its place but if you’re looking for something a little different for your blackberry glut, look no further than this simple September starter, side or light lunch to share

This combination straddles the sweet and savoury worlds and is all the better for it. Sweet and sharp blackberries pair well with creamy goat’s cheese, thinly sliced onions tip it towards savoury while the final drizzle of honey pulls it back to a harmonious and very seasonal whole.

Makes 4

500g strong white flour
2 tsp salt
1 tsp instant yeast
1 tbsp extra virgin olive oil
½ red onion, finely sliced
2 tbsp red wine vinegar
150g soft goat’s cheese, cut into discs
400g blackberries, gently crushed with a fork
1 tbsp fresh or dried thyme
2 tbsp runny honey

1 Put the flour, salt and yeast in a large bowl. Pour over 325ml warm water and the olive oil, and mix to a soft dough. Tip out onto a floured surface and knead for 10 mins, then transfer to a clean bowl, cover with a tea towel and set aside to rise for about 2 hours, or until doubled in size.

2 Meanwhile, put the red onion in a small bowl with the vinegar, mix together and leave to marinate.

3 Once the dough has risen, set a baking tray upside down on a high shelf in the oven and preheat to 240C/Fan 220C/Gas 9.

4 Sprinkle a handful of flour on your work surface and roll out a quarter of the dough as thinly as you can. Sprinkle another handful of flour on the heated baking tray, transfer the dough to the tray and bake for 6 mins.

5 Drain the onion and pat dry with kitchen roll. Remove the flatbread from the oven and scatter over a quarter of the cheese, a quarter of the blackberries, a quarter of the onion and a quarter of the thyme. Return to the oven for about 7 mins.

6 Drizzle the flatbread with a little honey and eat immediately. Repeat with the remaining dough and ingredients to make four flatbreads. Cook’s note: If you have a special pizza oven or a pizza stone, you may be able to put the topping onto the raw dough and cook it all together, but most standard ovens won’t get hot enough to make flatbreads without soggy bottoms unless you cook the base a little first.

This recipe is by Lia Leendertz and is part of our Finders Keepers series on foraging. You can find the rest of the recipes for blackberries and elderberries in our September issue. We’ve got everything from elderberry lemonade to roast blackberry fool!

Get hold of your copy of this month's The Simple Things - buy, download or subscribe

More from our September issue…

Featured
back cover.JPG
Sep 24, 2019
September | a final thought
Sep 24, 2019
Sep 24, 2019
Coastal Path.jpg
Sep 21, 2019
Walking on the edge of land
Sep 21, 2019
Sep 21, 2019
Tiny Books Rachel Hazell.jpg
Sep 18, 2019
In praise of | teeny, tiny books
Sep 18, 2019
Sep 18, 2019

More fun for foragers…

Featured
Broad beans.jpeg
May 10, 2025
Recipe | Spring Beans on Toast
May 10, 2025
May 10, 2025
Sloe and nut 3.jpg
Nov 5, 2022
Recipe | Sticky Sloe and Nut Clusters
Nov 5, 2022
Nov 5, 2022
Seaweed alamy.jpg
Jan 16, 2021
Nature | Seaweed Weather Forecasting
Jan 16, 2021
Jan 16, 2021


In Eating Tags foraging, finders keepers, blackberries, blackberry, september, simple things, issue 87, flatbreads
Comment
The Earth’s Crust Bakery, Castle Douglas

The Earth’s Crust Bakery, Castle Douglas

Nostalgia | Forgotten bakery goods

Iona Bower August 14, 2019

The joy of a good bakery, like the joy of a good bookshop, never ages. They might have become more artisan, more European, more generally fancy, but at the heart of a good bakery is that same ‘nose-pressed-to-the-glass, nostrils heady with the scent of sugar feeling that captured us as children, eyes like dinner plates and hands ready to grab. 

In our August issue, we’ve featured a few of the most inspiring bakeries in the world, taken from Europe’s Best Bakeries by Sarah Guy. And we have to say it’s an awe-inspiring collection, including The Earth’s Crust Bakery at Castle Douglas, pictured above. It took us right back to our earliest memories of bakeries, and - we’re going to give away our age here - we’ve collated below a few of our favourite classic bakery goods. There’s nothing civilised about most of them. Each is a frivolous carb- and sugar-fuelled mini feast. Exactly as it should be. 

Join us on a trip down memory lane. And leave us a comment at the end of the blog reminding us of any bakery goods you enjoyed as a child that we might have forgotten…


Traffic light biscuits

Oh the indulgence! Two shortbread biscuits sandwiched together, the top with three tempting holes cut out, through which oozed not one, nor two but THREE differently coloured fruit curds (red, yellow and green obviously). We still have no idea what flavour each colour was meant to denote. Presumably strawberry, lemon and… erm… lime? Apple? Green flavour? It matters not. The point was that buttery shortbread crumbling beneath your gappy-toothed bite and nearly falling to the floor, but for the curd that kept it safely anchored to the main biscuit. 

Nest cakes

Mysteriously sold all year round, these Easter treats were usually assembled from Cornflakes or Shredded Wheat, crushed and mixed with melted chocolate, dolloped into paper cases and decorated with tiny eggs. And none of your posh Mini Eggs of today, oh no. These eggs were of the 1980s ‘pure sugar, encased in a shell, again of pure sugar’ variety. Just looking at them made your teeth ache. What’s not to love?

Ice cream cone ‘cakes’

We struggled to remember what the deal was here but we remember jealously coveting them, that’s for sure. Askey’s wafer cones, filled with some sort of sticky sugary goo, that bonded any two surfaces quicker than Bostick. We think it was meant to represent ice-cream. The whole thing was topped with Hundreds and Thousands  - the proper sugar strands, not your modern, ball-style nonsense. We clearly remember that they were created in a rainbow colourway, with multicolured sugar strands atop a pink sugar goo and there was also a chocolate version, with a chocolate goo topped with only dark chocolate sugar strands (for the more classy and discerning eight-year-old, presumably). 


Iced fingers

Take off the icing and you basically have a plain, unassuming roll, but lined up in the bakery window, iced fingers were pure joy. There’s something deliciously simple (and almost unashamedly cheeky) about icing a plain bread roll and calling it a cake. We admire this. 


Meringue ghosts

Not just for Halloween, these crumbly creatures of the night seemed to be on bakery shelves all year round. Swirls of wonky meringue with chocolate drop eyes and a demeanour that would terrify an apple puff. 

Sticky buns

We’re taking a very specific type of sticky here. Not your average iced bun (we’ve covered those), and not a Chelsea bun either (no glace cherries here). Proper sticky buns were simple fruit buns made sticky with some sort of mysterious glaze and tiny crystals of sugar that were inexplicably perfect cube shapes. What WERE those things? Anyway, inexplicably sticky buns were a classic and have somehow not been the same in the last 30 years at least. And we still don’t know where that mad square sugar came from. Intriguing!


Do leave us memories of your forgotten bakery goods below. We can’t wait to read them. Pick up our August issue to read more about some of the best bakeries in the world.


Get hold of your copy of this month's The Simple Things - buy, download or subscribe


More from our August issue…

Featured
BACK COVER.jpg
Aug 22, 2019
August | a final thought
Aug 22, 2019
Aug 22, 2019
TheWayHome, MarkBoyle.jpg
Aug 17, 2019
Lost arts | writing a nice, newsy letter
Aug 17, 2019
Aug 17, 2019
Earth's Crust Castle douglas Europe’s Best Bakeries by Sarah Gu.jpg
Aug 14, 2019
Nostalgia | Forgotten bakery goods
Aug 14, 2019
Aug 14, 2019

More classic bakes to relive…

Featured
Apr 7, 2023
Recipe: Easter rabbit biscuits
Apr 7, 2023
Apr 7, 2023
Apr 17, 2022
Recipe: Chocolate truffles
Apr 17, 2022
Apr 17, 2022
Mar 27, 2022
Recipe: Mothering buns
Mar 27, 2022
Mar 27, 2022
In Eating Tags bakeries, cakes, biscuits, baking, august, issue 86
Comment
Aubergines Sasha Gill..jpg

Get to know | aubergines

Iona Bower July 30, 2019

Photography: Sasha Gil

Because this purple veg box staple has been a stranger too long

You might think you know all there is to know about aubergines, but we’d warrant you are wrong. This large purple BERRY (yes, who knew?) brings a little med cheer to any summer dining table or barbecue, and we thought we’d share a few little known facts about it.

1 So, yes, it’s a berry, botanically speaking, but one of the nightshade family, like potatoes and tomatoes. Technically nightshades are poisonous but you’d have to eat an awful lot of the aubergines themselves and the leaves to do yourself any harm beyond a mild tummy ache brought on my overindulgence.

2 At various times aubergines have been believed to cause madness. In 13th-Century Italy it was believed to tip people into insanity and in India in the 19th Century it was noted that madness was more common in summer when aubergines were in season… Nothing to do with the heat, then?

3 Aubergines contain more nicotine than any other plant (with the possible exception of the tobacco plant). However, they aren’t dangerous, or even addictive (though they are very moreish, we find).

4 Aubergines consist of 95% water and half their volume is air.

5 Traditionally, in China, as part of her dowry, a woman must have at least 12 aubergine recipes at her fingertips before her wedding day. This sounds eminently sensible to us, unless you like to eat a LOT of ratatouille. 

The picture above is of Miso-Caramel Aubergines from Jackfruit & Blue Ginger (Murdoch Books), recipe and photography by Sasha Gill. You can find the recipe in our August issue, which is on sale now.

Get hold of your copy of this month's The Simple Things - buy, download or subscribe

More from our August issue…

Featured
BACK COVER.jpg
Aug 22, 2019
August | a final thought
Aug 22, 2019
Aug 22, 2019
TheWayHome, MarkBoyle.jpg
Aug 17, 2019
Lost arts | writing a nice, newsy letter
Aug 17, 2019
Aug 17, 2019
Earth's Crust Castle douglas Europe’s Best Bakeries by Sarah Gu.jpg
Aug 14, 2019
Nostalgia | Forgotten bakery goods
Aug 14, 2019
Aug 14, 2019

More veggie lunches for summer…

Featured
SIM69.PIEANDMASH_Vegetable Plthivier-8436.jpg
Mar 8, 2025
Recipe | Pepper, aubergine & feta pithivier
Mar 8, 2025
Mar 8, 2025
Rainbow Carrot & Beetroot Tart.jpg
Feb 7, 2023
Recipe | Rainbow Carrot & Beetroot Tart
Feb 7, 2023
Feb 7, 2023
Leek flatbreads Ali Allen.JPG
Feb 28, 2021
Recipe | Leek & Thyme Flatbreads
Feb 28, 2021
Feb 28, 2021
In Eating Tags issue 86, August, aubergine, vegetarian
Comment
Recipe & photography: Catherine Frawley

Recipe & photography: Catherine Frawley

Seaside recipe | prawn skewers

Iona Bower July 27, 2019

Because nothing says ‘beach lunch’ like crustaceons and crusty bread

Whether you’re heading to the coast this weekend or gathering friends in the garden, these hot, citrusy, umami prawns will be a welcome addition to the table, the picnic rug or the sand.

Makes 8

2 garlic cloves, crushed
Juice of ½ lime
3 tbsp olive oil
2 tbsp honey
½ red chilli, finely chopped
350g unpeeled, precooked prawns, fresh or frozen (if frozen, fully defrosted)
2 limes, quartered

1 Add the crushed garlic, lime juice, olive oil, honey and red chilli to a large bowl, whisk together. Add the prawns, toss to coat and leave to marinate for 15 mins.
2 Thread the prawns onto the skewers and add a lime quarter to each. Keep remaining marinade to brush on to the skewers during cooking.
3 On a griddle pan over a medium heat or on a barbecue, cook each side for 1–2 mins, brushing with any extra marinade. Serve immediately.

These skewers are just part of our Seafood and Sandcastles menu featured in our August issue, where you’ll find all the recipes. If you’d like to also try the barbecue nachos, crab burgers, delicious salads and messy Eton mess, you can pick up a copy in the shops today. We guarantee you’ll be the envy of the whole stretch of sand (even if your sandcastles aren’t up to much).

Get hold of your copy of this month's The Simple Things - buy, download or subscribe

Mpre recipes for barbecue days…

Featured
JUNE PLAYLIST.png
May 22, 2024
Playlist | Songs for a barbecue
May 22, 2024
May 22, 2024
Crop dessert pizza Rebecca Lewis.jpg
May 18, 2024
Recipe | Nectarine & Apricot Pudding Pizza
May 18, 2024
May 18, 2024
Gathering Coleslaw.jpg
Aug 13, 2022
Recipe | Summer Veg Coleslaw with Coriander
Aug 13, 2022
Aug 13, 2022

More from our August issue…

Featured
BACK COVER.jpg
Aug 22, 2019
August | a final thought
Aug 22, 2019
Aug 22, 2019
TheWayHome, MarkBoyle.jpg
Aug 17, 2019
Lost arts | writing a nice, newsy letter
Aug 17, 2019
Aug 17, 2019
Earth's Crust Castle douglas Europe’s Best Bakeries by Sarah Gu.jpg
Aug 14, 2019
Nostalgia | Forgotten bakery goods
Aug 14, 2019
Aug 14, 2019
In Eating Tags issue 86, August, barbecue, beach, seaside, summer recipes, seafood, prawns
Comment
Photography: Cathy Pyle  Recipe & styling: Kay Prestney

Photography: Cathy Pyle Recipe & styling: Kay Prestney

Recipe | Watermelon lollies

Iona Bower July 3, 2019

A simple idea for a pretty and cooling treat

Serves 6

½ small watermelon

6 wooden lolly sticks (recycled from ice lollies)

1 Cut the watermelon in half and cut into slices. Cut out 6 triangle shapes with the watermelon skin at the bottom.

2 Make a small inch-long incision into the middle of the skin and insert the wooden lolly stick.

3 Lay the lollies on a pretty plate and put in the fridge to keep cool. Serve as a refreshing bite any time of day or as a casual palate cleanser between a main course and dessert for a supper in the garden.

This idea is just one of the recipes in our July issue for a celebratory gathering for a special day. The menu includes chilled cucumber soup in tea cups, beetroot and horseradish bites, spanakopita, a delicious fig salad and a showstopper of a sponge cake decorated with berries and edible flowers. It’s a lovely menu for a birthday party, get-together of old friends or simply to celebrate summer having properly arrived this weekend. You can find all the recipes starting on p30 and you’ll find the July issue in any shop worth its salt now or online (see links below).

Get hold of your copy of this month's The Simple Things - buy, download or subscribe

More from our July issue…

Featured
Back cover Michelle Rial from Am I Overthinking this Chronicle Books.jpg
Jul 23, 2019
July | a final thought
Jul 23, 2019
Jul 23, 2019
Lavender Lia Leendertz and Kirstie Young.jpg
Jul 20, 2019
Science | why lavender calms
Jul 20, 2019
Jul 20, 2019
Reader holiday.jpg
Jul 18, 2019
Reader offer | The Simple Things Holiday
Jul 18, 2019
Jul 18, 2019

More ice lollies to make…

Featured
Lollies.jpg
Jul 5, 2020
Make | Grown-up ice lollies
Jul 5, 2020
Jul 5, 2020
Watermelon lollies Cathy Pyle recipe Kay Prestney.jpg
Jul 3, 2019
Recipe | Watermelon lollies
Jul 3, 2019
Jul 3, 2019
Aug 2, 2017
Recipe | Tropical lime granita
Aug 2, 2017
Aug 2, 2017


In Eating Tags July, issue 85, ice lollies, summer recipes, gathering
1 Comment
Photography: Con Poulos

Photography: Con Poulos

Cake facts | Upside-down cake

Iona Bower June 30, 2019

A look at the history of this wrong-way-up cake, which is a classic… whichever way you look at it

The history of cake is dotted liberally with fine examples of retro ideas that have wholly endured. In fact, why we think of them as retro is a mystery, since they never really went away. The upside-down cake is an excellent example, and none more than the classic - the Pineapple Upside-down Cake, which has been eliciting excited ‘oohs’ from children and overgrown children alike for over a century.

Upside-down cakes have, in truth, existed for hundreds of years. When cakes would have been cooked over a fire, a clever way to get a nice decorative top with caramelised fruit adorning it, was to put the fruit and sugar in the bottom of a skillet over the fire, so that when the skillet is turned out, the unattractive top becomes the bottom of the cake and the fruity goodness that was on the bottom becomes the top.

But it wasn’t until the advent of the Pineapple Upside-down cake that topsy-turvy patisserie really ‘had a moment’. And for that we have to thank one James Dole. That’s right. Him of the tinned pineapple.

In 1901 Dole invented a machine that could cut pineapples into perfectly sized rings, that he could put into tins. Quickly, one of the most popular uses for pineapple rings became to put their flavour and attractive shape into an upside-down cake. As an aside, we’d also like to award a retro medal to whomever was the first amateur baker to pop a few maraschino cherries in the holes of the pineapple rings. Genius!

In our July issue, we have a less retro but no less welcome topsy turvy cake from Annie Bell’s Baking Bible (Kyle Books). Photography by Con Poulos. Find it on page 7.

Get hold of your copy of this month's The Simple Things - buy, download or subscribe

More from our July issue…

Featured
Back cover Michelle Rial from Am I Overthinking this Chronicle Books.jpg
Jul 23, 2019
July | a final thought
Jul 23, 2019
Jul 23, 2019
Lavender Lia Leendertz and Kirstie Young.jpg
Jul 20, 2019
Science | why lavender calms
Jul 20, 2019
Jul 20, 2019
Reader holiday.jpg
Jul 18, 2019
Reader offer | The Simple Things Holiday
Jul 18, 2019
Jul 18, 2019

More cakes to bake…

Featured
Dec 28, 2024
Recipe: Slow Orange Poppy Seed Cake
Dec 28, 2024
Dec 28, 2024
Oct 31, 2019
Recipe: Soul cakes
Oct 31, 2019
Oct 31, 2019
SIM76.CAKE_175_portuguese_tarts.png
Oct 13, 2018
Recipe | Portugese custard tarts (Pastéis de nata)
Oct 13, 2018
Oct 13, 2018


In Eating Tags July, issue 85, cake, cake fact, baking, upside down
Comment
Photography: Kirstie Young

Photography: Kirstie Young

Cook | Mackerel and samphire fishcakes

Iona Bower June 2, 2019

Samphire is summer on a plate. Try these with a vibrant Green Goddess sauce

These delicious fishcakes can be made with foraged samphire, which is all over mudflats and estuaries at this time of year. But feel free to buy it from Waitrose or fishmongers if you had a less active lunch in mind. You can also buy samphire plants to grow from specialist nurseries. Plant next year in April or May for a crop in summer. Make the Green Goddess sauce before you go if you’re off foraging and keep it in a tightly sealed jar.

300g new potatoes

2 tbsp soured cream

A couple of knobs of butter

250g smoked mackerel fillets

A handful of samphire, washed and chopped

A few tbsp plain flour

Lemon to squeeze over for the dressing

2 anchovies

1 clove crushed garlic

5 tbsp mayonnaise

5 tbsp sour cream

A handful of parsley leaves

handful of tarragon leaves

A bunch of chives

2 tbsp lemon juice

1 Cook the potatoes in boiling salted water until tender. Drain, add the soured cream, a knob of butter and a few grinds of black pepper and mash roughly, so there are still plenty of bigger chunks. Set aside to cool.

2 Flake the mackerel fillets into the potatoes, again leaving plenty of larger pieces, and add the samphire. Form into little patties and transfer to the fridge to firm up.

3 Meanwhile make the dressing. Put all the ingredients in a blender and blitz until smooth and green. Taste and season as required. The dressing will keep in a jar in the fridge for up to one week.

4 Put the flour on a plate, then roll the chilled fishcakes in the flour. Heat a knob of butter in a frying pan and fry the fishcakes until nicely browned on both sides. Serve hot with lemon and the green goddess dressing.

This recipe is from Lia Leendertz’s foraging feature in our June issue, which has lots more samphire recipes in it from a light lunch idea to a fresh sea vegetable and seafood dashi, as well as information on where to find samphire and how to cook it.

Get hold of your copy of this month's The Simple Things -  buy, download or subscribe

More from our June issue…

Featured
Back+cover.jpg
Jun 26, 2019
June: a final thought
Jun 26, 2019
Jun 26, 2019
Strawberries and cream muffins.jpg
Jun 23, 2019
Pudding facts: strawberries and cream
Jun 23, 2019
Jun 23, 2019
Bookshop Lewes.JPG
Jun 15, 2019
Celebrate | Independent Bookshops Week
Jun 15, 2019
Jun 15, 2019

More foraging ideas for throughout the year…

Featured
Broad beans.jpeg
May 10, 2025
Recipe | Spring Beans on Toast
May 10, 2025
May 10, 2025
Sloe and nut 3.jpg
Nov 5, 2022
Recipe | Sticky Sloe and Nut Clusters
Nov 5, 2022
Nov 5, 2022
Seaweed alamy.jpg
Jan 16, 2021
Nature | Seaweed Weather Forecasting
Jan 16, 2021
Jan 16, 2021
In Eating Tags issue 84, June, Lia Leendertz, foraging, samphire, outdoor eating
Comment
Photography: Catherine Frawley

Photography: Catherine Frawley

Cake facts: the best banana loaf

Iona Bower May 8, 2019

Because if a cake’s worth doing it’s worth doing properly

We’ve got a delicious banana walnut loaf in our May issue (pictured above, from Nourish Cakes by Marianne Stewart, Quadrille). Everyone has their own tips for creating the ‘best banana loaf cake in the world’, usually handed down from capable grandparents and great-grandparents. But the one we all know is that black bananas are best. But why?

Black (or slightly over-ripe bananas) are often recommended as being easier to digest, but what makes them the best choice for a banana loaf cake is their flavour and texture.

Firstly, as they ripen and the yellow skin gets steadily blacker, chemical reactions inside the banana flesh turn the starch into sugars, making them taste sweeter and that bit more banana-y in the cake.

Secondly, the flesh becomes softer and easier to mash, and it also breaks down more easily during the baking process, so you don’t get lumps of banana in the cake once it’s cooked. You might like lumps of banana in your cake, in which case, don’t allow us to lead you down a black banana path - feel free to go your own way - but a riper banana gives a smoother cake, nonetheless.

Catching your bananas at the perfect level of cake-readiness is tricky. Ideally, you want a banana that is pretty dark but still has some yellow on it and lots of big, black spots and patches, but you can definitely still bake with completely black bananas. And here’s a pro-banana tip for you: if you’ve got to Tuesday and your bananas look perfect for a loaf cake but you know you won’t be baking until Saturday, pop them in the freezer. The skins will turn completely black in there but the flesh inside will remain at the same level of ripeness, waiting for you to release it from the freezer drawer (take them out a couple of hours before you want them), mash the banana and help it on its way to its higher state of being, transformed from slightly disappointing fruit bowl fellow to much welcomed fluffy banana loaf.

You’ll find the recipe for the banana walnut cake on p29 of our May issue.

Get hold of your copy of this month's The Simple Things - buy, download or subscribe

More from our May issue…

Featured
Kite Getty.JPG
Feb 28, 2020
How to | make a kite
Feb 28, 2020
Feb 28, 2020
Back cover Mari Andrew.jpg
May 27, 2019
May: a final thought
May 27, 2019
May 27, 2019
Analogue Jonathan Cherry.jpg
May 11, 2019
Etymology: jukebox
May 11, 2019
May 11, 2019

More cakes to bake…

Featured
Dec 28, 2024
Recipe: Slow Orange Poppy Seed Cake
Dec 28, 2024
Dec 28, 2024
Oct 31, 2019
Recipe: Soul cakes
Oct 31, 2019
Oct 31, 2019
SIM76.CAKE_175_portuguese_tarts.png
Oct 13, 2018
Recipe | Portugese custard tarts (Pastéis de nata)
Oct 13, 2018
Oct 13, 2018


Get hold of your copy of this month's The Simple Things - buy, download or subscribe

In Eating Tags may, issue 83, banana bread, baking, cake
Comment
Photography: Maja Smend

Photography: Maja Smend

Recipe: Wild garlic soup

Lottie Storey April 6, 2019

Ramsons, or wild garlic, makes for easy foraging. Around now, damp woodland becomes carpeted in bright green leaves, the air heavy with its savoury aroma. If you can’t find any wild garlic, you can replace it with watercress, young nettles (wear gloves when harvesting – the sting will go when cooked!), spinach, kale or chard. 

Wild garlic soup

25g butter
2 potatoes, diced
1 onion, chopped
1 litre chicken or vegetable stock
2 large handfuls of wild garlic leaves, washed and roughly chopped
110ml regular or double cream
Crusty bread, to serve

1 Melt the butter in a large saucepan over a medium heat. When foaming, add the potatoes and onion, and toss in the butter until well coated, then season with salt and pepper. Turn the heat down, cover the pan and cook for 10 mins or until vegetables are soft, stirring regularly so that the vegetables don’t stick and burn.
2 Next, add stock and bring to a rolling boil, then add the wild garlic leaves and cook for 2 mins or until the leaves have wilted. Don’t overcook or it will lose its fresh green colour and flavour.
3 Immediately pour into a blender and blitz until smooth, then return to the clean pan, stir in the cream and taste for seasoning.
4 Serve hot with crusty bread.

COOK’S NOTE: Harvest garlic leaves between March and May before the plant flowers. Be mindful and pick a little here and there. Wild garlic looks similar to the poisonous lily of the valley so always crush the leaves and check for the smell of garlic before picking.

Recipe from Recipes From My Mother by Rachel Allen (Harper Collins). 

If you’ve got a lust for something green and pungent after that you won’t want to miss the start of our new foraging series, Finders Keepers, by Lia Leendertz (first part in our April issue, in shops now). Foraged crops are free, abundant and flavourful. All you need do is get yourself to a good spot at the right time, basket and secateurs in hand, and you have some of the best crops available. Through the foraging seasons of spring, summer and autumn, we’ll show you where to find these crops, how to pick them, and ways to turn them into delicious dishes. This month’s pages include a fabulous recipe for wild garlic, nettle and broad bean frittata that has already gone in our best recipes notebook.

 Get hold of your copy of this month's The Simple Things - buy, download or subscribe

More from the April issue:

Featured
Back cover.JPG
Apr 26, 2019
April: a final thought
Apr 26, 2019
Apr 26, 2019
Green and clean oven gel pic.jpg
Apr 22, 2019
Make: your own clean, green oven gel
Apr 22, 2019
Apr 22, 2019
Charlie and Cho Factory pic.jpg
Apr 14, 2019
Game: Charlie and the Chocolate Factory Puzzler
Apr 14, 2019
Apr 14, 2019

More wild garlic recipes:

Featured
Wild Garlic Scones.jpeg
Apr 5, 2025
Recipe | Wild Garlic & Goat's Cheese Savoury Scones
Apr 5, 2025
Apr 5, 2025
TST119_HomeEc_may 123.jpg
Apr 23, 2022
Recipe | Wild Garlic Risotto with Griddled Asparagus
Apr 23, 2022
Apr 23, 2022
May 2, 2021
Recipe: Wild garlic bannocks with asparagus pesto
May 2, 2021
May 2, 2021
  Buy ,  download  or  subscribe   See the sample of our latest issue  here   Buy a copy of our latest anthology:  A Year of Celebrations   Buy a copy of  Flourish 2 , our wellbeing bookazine  Listen to  our podcast  - Small Ways to Live Well

Get hold of your copy of this month's The Simple Things - buy, download or subscribe

View the sampler here

In Eating Tags issue 58, april, foragin, foraging, wild garlic, soup
Comment
Photography: Cristian Barnett

Photography: Cristian Barnett

Your (sourdough) starter for ten

Iona Bower January 29, 2019

Don’t think of your sourdough starter as a recipe. Think of it as a pet…

Who knew that people give their sourdough starters names? Oh OK, you did then. We had no idea! But now we do we just can’t stop thinking of excellent monikers for them.

Overused it may be but Clint Yeastwood still brings a smile to our faces. And if you want a celebrity starter there’s definitely a rich seam to be tapped. How about Bread Dibnah, or Sheena Yeaston? Matthew Breaderick, Crustin Hoffman or Dough Berrick? Philip Loafyield? Too tenuous?... Yes, ok we’ll leave it there.

You could of course choose something more ‘under the radar’. Bubbles, perhaps. Or Gloopy-Lou.

Or simply go oblique. On one sourdough forum a user explained “Mine is called Eve. She started all this trouble after all.” Another says firmly that she never considered naming hers. Fair enough: “I love my starters, they are my boys, like children, I talk to them  and I'm proud of them. I miss them when I away. But I have never wanted to give them names.” We’re lost for words now, frankly.

In some ways it’s no surprise people feel they need to name their starters. They become like one of the family in many ways, needing regular feeding, plenty of love and attention. A bit like a very low-maintenance pet.

But look after it you must, so we asked Luc Martin, sourdough expert and owner of Pig and Rye Sourdough Bakery, Breakfast and Lunchroom in Tllburg, The Netherlands.

“The best way to look after a starter is feed it every day. At the bakery we use 3-10kg a day and the few hundred grams that’s left gets mixed with fresh flour and water to be used the next day. Our starter is wholegrain rye based, I’ve kept it alive for over ten years but I don’t believe the age of the starter has any effect on the finished bread.”

He has this advice for newbies to the world of sourdough starters: “For a home baker keeping a starter alive is trickier because you don’t necessarily bake every day. The best thing to do is keep the starter alive in a small quantity, like 150g total, then every day bin 100g and refresh with 50g flour 50g water. There are tricks like storing in the fridge, or keeping the starter hydration lower, both will slow fermentation and extend time between feedings but if you make a mistake you can end up killing the starter.” And that would be a sad day indeed. Keep it simple then, folks.

And what does a sourdough guru call his starter? “Mine has no name I’m afraid, but if I did name it it would probably be Blueberry which is how it smells when it’s ready to bake with.”

In our February issue we have a feature on overnight bakes that will make good use of your starters, keep you busy on a Saturday night before bed, and give you a warm glow of smug satisfaction (and a lovely loaf to boot) on Sunday morning. We have recipes by Rachel de Thample for sweet loaves, crumpets, an oat loaf and even apple and cardamom buns. But we especially enjoyed the recipe for this crusty overnight baguette. We strongly recommend you have a go yourself this weekend. And let us know what you named your sourdough starter, too, so we can give Philip Seemore Loafman the credit, too. Here’s one of our February issue recipes to get your started (see what we did there).

Breakfast baguettes

Baguettes are a great way to get into bread-making. They’re easy to make and super satisfying to see (and eat!) the results. Especially great with salted butter and jam.

  • Makes 4 small or 2 large sticks

  • 250g active sourdough starter*,  or 5g instant yeast

  • 325ml water

  • 1 ¾ tsp sea salt

  • 500g strong white bread flour


1  Mix everything together to form  a dough. Give it a good knead until it’s nice and stretchy. Cover with a damp cloth and let rise at room temperature for 8–12 hours, or until doubled in size.

2  Punch down and shape into  2 really long or 4 shorter rectangles – flatten and roll into a baguette shape, tapering and tucking the ends in.

3 Lightly oil a large baking sheet – or two, if needed. Dust with semolina or flour. Arrange the baguettes on the prepared baking sheets, leaving a little room around them so they can rise. Cover with floured plastic and allow to rise for 1½–2 hours or until almost doubled in size.

4 Make diagonal slashes across  each loaf using a sharp knife or razor blade. Bake at 220C/Fan 200C/ Gas 8 for about 15–20 mins or until well browned. Spray with water before baking, then 5 mins and  10 mins into the cooking time.

Cook’s note To activate your sourdough starter, remove from the fridge. Feed 2–4 tbsp of starter with 150g strong white bread flour, plus 150ml water. Whisk or stir until well mixed. Cover loosely with a lid or  a clean cloth. Let it ferment in a warmish place for 8–12 hours.

*For instructions on how to make a sourdough starter visit thesimplethings/blog/sourdoughstarter.

Get hold of your copy of this month's The Simple Things - buy, download or subscribe


More breads and bakes to enjoy…

Featured
Lammas Loaf.jpg
Aug 1, 2023
Bake | A Lammas loaf
Aug 1, 2023
Aug 1, 2023
Tomato focaccia 2.jpg
Sep 15, 2022
Recipe | Tomato Focaccia
Sep 15, 2022
Sep 15, 2022
Mar 11, 2020
Recipe | nettle soda bread
Mar 11, 2020
Mar 11, 2020

More from our February issue…

Featured
Feb chalkboard.jpg
Feb 27, 2019
February: a final thought
Feb 27, 2019
Feb 27, 2019
feb+cake.jpg
Feb 20, 2019
Cake facts: drizzle me this
Feb 20, 2019
Feb 20, 2019
dressing gown.jpg
Feb 16, 2019
Etiquette: dressing gowns
Feb 16, 2019
Feb 16, 2019


In Eating Tags issue 80, february, sourdough, bread, baking
Comment
Photography: Kirstie Young

Photography: Kirstie Young

Cabbage: a prince among brassica

Iona Bower January 26, 2019

Greens that are more than just good for you

Beloved of Crackerjack fans and often associated with, at best, peasant stews and, at worst, crash diets with dubious side-effects, cabbage might not strike you as a vegetable with much spark.

But you would be wrong. Cabbage has a long association with magic and mystery. As well as being really incredibly good for us, cabbage has some intriguing healing properties, too.

Apparently Cato himself advised eating cabbage soaked in vinegar ahead of an evening of heavy drinking: “If you wish, at a dinner party, to drink a good deal and to dine freely, before the feast eat as much raw cabbage and vinegar as you wish, and likewise, after you have feasted, eat about five leaves,” he advised. “It will make you as if you had eaten nothing and you shall drink as much as you please.” Sounds like a more risky enterprise than a dose of milk thistle and a Berocca the morning after but if it’s good enough for Roman statesmen it’s good enough for us.

Caesar’s armies allegedly carried cabbage with them on the march to dress wounds. We imagine it doesn’t have the stick of an Elastoplast but it’s much more manly, somehow.

And indeed modern studies bear out this theory with cabbages being shown to have antibacterial and anti-inflammatory properties. Large savoy cabbage leaves have been used by many a breastfeeding mother to ease the symptoms of engorgement, by placing them in the cup of a brassiere. It’s said the effects are strengthened by putting the leaves in the fridge first, though Caesar never confirmed that to our knowledge.


If that hasn’t convinced you that cabbage is the king of the veg patch, we urge you to read Lia Leendertz’s feature on cabbage in our January issue: Today, Tomorrow, To Keep, in which she shares cabbage recipes for today’s supper, something to look forward to tomorrow and another idea for a cabbagey treat to put away. We’ve tried the sauerkraut and can confirm it is a game changer. The issue is in the shops now.

Get hold of your copy of this month's The Simple Things - buy, download or subscribe

More from the January issue…

Featured
SIM79.CHALKBOARD_ST Back Jan19_01.JPG
Jan 29, 2019
January: a final thought
Jan 29, 2019
Jan 29, 2019
Up Helly Aa.jpg
Jan 28, 2019
How to: Party like a Viking
Jan 28, 2019
Jan 28, 2019
cabbage.jpg
Jan 26, 2019
Cabbage: a prince among brassica
Jan 26, 2019
Jan 26, 2019

More recipes from Today, Tomorrow, To Keep…

Featured
cabbage.jpg
Jan 26, 2019
Cabbage: a prince among brassica
Jan 26, 2019
Jan 26, 2019
SIM76.TODAY,TOMORROW,TOKEEP_Hazelnuts-Granola-7390.png
Oct 5, 2018
Recipe | Chocolate & hazelnut granola
Oct 5, 2018
Oct 5, 2018
SIM74.TTTK_Relish-8992.png
Sep 20, 2018
Recipe | Preserved roasted peppers
Sep 20, 2018
Sep 20, 2018


In Growing, Eating Tags issue 79, january, today tomorrow to keep, cabbage, winter veg
Comment
Photography: Cristian Barnett

Photography: Cristian Barnett

How to: make a sourdough starter

Iona Bower January 24, 2019

Rachel de Thample explains how to make your own sourdough starter

In our February issue we have a feature on ‘wake-up bakes’, that is loaves, cakes, crumpets and baguettes that can be started on a Saturday evening and left overnight to give you fresh bread for Sunday breakfast. The sourdough recipes require what’s called a starter, and you can learn how to make one here. You can find all of the full recipes starting on p38 of the February issue. Take your marks, get set, start your starters!

Simple sourdough starter

Simply mix 100g strong white bread flour with 100g filtered or mineral water (measure it on a digital scale for best results). Loosely cover with a cloth. Set at room temperature in a dark place and leave to ferment for 1 day. If the starter has yet to produce lots of little bubbles across the top, indicating that it is active, add an additional 100g strong white bread flour and 100g filtered or mineral water. Mix well and continue this exercise each day, topping up the starter, until it’s risen slightly and has a good number of little bubbles formed at the top. Once you have your starter activated, you can make sourdough loaves, crumpets and more… If your starter is getting off to a slow start, try adding a piece of dried fruit such as a dried apricot or prune to the mix, a 5cm piece of rhubarb and/or 1 tbsp natural yogurt or kefir, to help feed it.


Dark rye sourdough starter

Rye flour is more absorbent than white flour, so you use slightly more water to get a rye starter going.


Day 1: Add 50ml filtered or mineral water to 2 tbsp rye flour. Stir to make a smooth paste. Cover with a cloth and leave at room temperature (about 20C) away from direct sunlight for 24 hours.

Days 2–4: Repeat the process above. By Day 4 you should start to see some bubbles.

Day 5: Stir in 100g rye flour and 200ml filtered or mineral water.

Day 6: By now your rye sourdough starter or leaven should be active and have developed a fruity smell. Double the quantity of batter using 100g rye flour and 200ml filtered or mineral water.

Day 7: Your starter is ready to make your first batch of bread. Store the starter in the fridge for up to 1 month between bakes. Before making a loaf of bread, take the starter out 12 hours before and feed it with 100g flour and 200ml filter or mineral water to reactive it.

Get hold of your copy of this month's The Simple Things - buy, download or subscribe


More bakes to inspire…

Featured
Want, knead, love: Real, down-to-earth bread baking
Oct 8, 2014
Want, knead, love: Real, down-to-earth bread baking
Oct 8, 2014
Oct 8, 2014
Recipe: Chocolate fridge cake
Aug 15, 2014
Recipe: Chocolate fridge cake
Aug 15, 2014
Aug 15, 2014
Win a KitchenAid or Aga mixer, plus sponge cake recipe (closed 8 July 2014)
May 22, 2014
Win a KitchenAid or Aga mixer, plus sponge cake recipe (closed 8 July 2014)
May 22, 2014
May 22, 2014

More from our February issue…


In Eating Tags issue 80, sourdough starter, sourdough, bread, baking, February
2 Comments
Image and recipe: Kirstie Young

Image and recipe: Kirstie Young

Recipe: Seville and Blood Orange Marmalade

David Parker January 12, 2019

With Seville oranges in season, it's marmalade time. And this blood orange recipe celebrates all that's flavoursome about the citrus classic.

Seville and blood orange marmalade

Preparation time: 30 minutes 
Cooking time: 90 minutes

500g Seville oranges 
500g blood oranges 
1kg granulated sugar 

You will need:
Muslin cloth
Kitchen string
3 large jam jars (or 6 small ones)
Jam thermometer

1 Clean the oranges well and place whole into a large pan. Cover with 4 pints of water (2.25l) and bring to the boil. Reduce to simmer for 1 hour or until the fruit is soft.
2 Remove the oranges from the pan, without discarding any of the cooking liquid, and set aside to cool. Measure out 3 pints of the cooking liquid, topping up if needed with more water.
3 Halve the cooled oranges and scoop out the flesh and pips into a muslin cloth (or white tea-towel); tie with food-safe string. 
4 Place the muslin package into the pan with the 3 pints of cooking liquid.
5 Slice the orange peel as preferred. Add to the pan. Add the sugar and stir over a low heat until dissolved. Bring to a rolling boil for 15 mins. After this time, keep boiling at a lower temp until the liquid reaches 105C. Take off the heat and let sit for a moment before skimming off any scum from the top of the liquid. Pour into hot, sterilised jam jars and seal. 

This blog was first published in January 2012. Pick up our January 2020 for lots more delicious things to do with oranges and lemons.

From our January issue…

Featured
back cover.JPG
Jan 22, 2020
January | a final thought
Jan 22, 2020
Jan 22, 2020
No more sick days bath soak Shutterstock.jpg
Jan 18, 2020
Make | No More Sick Days bath soak
Jan 18, 2020
Jan 18, 2020
Snow day pic Alamy.jpg
Jan 15, 2020
Winter | a suggested snow day timetable
Jan 15, 2020
Jan 15, 2020

More preserves to make…

Featured
jammie dodgers Louise Gorrod.jpg
Nov 6, 2021
Recipe | Homemade Jammie Dodgers
Nov 6, 2021
Nov 6, 2021
Mar 14, 2021
Recipe: Goose egg lemon curd
Mar 14, 2021
Mar 14, 2021
seville-and-blood-orange-marmalade-recipe.png
Jan 12, 2019
Recipe: Seville and Blood Orange Marmalade
Jan 12, 2019
Jan 12, 2019


In Living, Making, Eating Tags jam, preserving, marmalade, january, issue 31, recipe
Comment
Photography: Sara Kiyo Popowa

Photography: Sara Kiyo Popowa

How to: up your packed lunch game

Iona Bower January 2, 2019

Ditch the soggy sarnies. January is the perfect time for a lunch box revolution


After all foodie indulgence of Christmas and New Year, a squashed Marmite sarnie in the bottom of your handbag is a particularly sad sight to behold. We think we all need to practise a little more self care on those first, long, slow back-to-work days, and there’s nothing like the knowledge that you have, stashed away, a delicious little something, made with care and attention, to cheer you at lunchtime.

When we put together our January issue, we all ooohed and aaahhed at the delicious ‘winter jewels’ bento recipe on p17 from Bento Power by Sara Kiyo Popowa (Kyle Books). It’s so quick to put together, happens to be super healthy, and is a sight for screen-sore eyes on a mizzly January day back in the office. Find the recipe on p17 of our January issue. (We suspect there might be some kind of The Simple Things bento-off in the offing, in fact… Competitive? Us?)

And it got us to thinking… how else can we make lunches more exciting? One easy way to zhush up a packed lunch simply is to invest in some lunchtime equipment to encourage you… chopsticks to cheer, tubs to tickle our fancy, sandwich wraps to surprise… Once you’ve invested in the raw materials, you feel spurred on to make some time on a Sunday evening to ensure your weekday lunchtimes are an event, not just a quick refuel.

Here are a few items that we’re going to be treating ourselves to this month in our bid to up our packed lunch game in 2019:

The Takenaka Two-tier Bento box takes lunch to a new level. Literally. It has two levels, you see? Obviously it’s great for bento: dollop in a little rice, some veg and a boiled egg or meat/fish, and top with some fancy extras like crunchy radishes and crispy fried onions (available in a tub at Waitrose ) and then add a little soy sauce or sweet chilli dressing. But you could just as easily use one tier for a nice salad, maybe a few cold potatoes, watercress and leftover salmon, and the other tier for a fresh fruit salad.

£22.50, Souschef.co.uk


If you’re a fan of a good old-fashioned sandwich, don’t be ashamed, embrace it! But it’s easy to increase the fancy lunch factor with a homemade roll or two filled with some delicious deli items. Pickle yourself some cucumber and carrot strips on a Sunday and they’ll last a few days to add bite to any sandwich. Pop them in a crusty baguette with with beansprouts, a handful of salad and a few chillies and you have a Vietnamese-style banh mi roll. Or simply jazz up your sauces and add a little fresh tarragon to mayonnaise to give a leftover roast chicken sandwich a new lease of life. And any sandwich worth its (Himalayan rock) salt needs a fancy and reusable wrapping. We are big fans of BeeBee wraps - beautiful organic cotton beeswax sandwich wraps that make you feel just a little bit special (and ecofriendly, too) as you unwrap your lunch.

From £14, BeeBee.

If the January weather takes a turn for the baltic, never will you feel more smug than when you open a flask of steaming homemade soup, still warm. Make a batch on a weekend, heat your soup while you drink your tea in the morning on Monday, pour it into this lovely Orla Kiely food flask, and you will thank your past self a thousand times by 2pm. It has a wide mouth (don’t we all?) so you can eat directly from it with a decent-sized spoon.

£25, John Lewis.


Is it a fork? Is it a spoon? It is both. Every lunchbox needs one of these sporks. Super for soup, and very useful for anything more solid, too.

£3, Steamer Trading Cookshop.

(Steamer also does some rather fetching reusable chopsticks to go with your Bento box, too. We like the Typhoon Rookie Stix, £3.)


Now, go forth, and love your lunches!

Get hold of your copy of this month's The Simple Things - buy, download or subscribe


More food-to-go inspiration…

Featured
Yogurt Cherry Crumble Jars.jpg
Jun 7, 2025
Recipe | Yogurt, cherry & passionfruit crumble jars
Jun 7, 2025
Jun 7, 2025
Picnic.jpg
Jun 2, 2024
Fun | Games for Picnics
Jun 2, 2024
Jun 2, 2024
Turmeric gingerade.jpg
Sep 2, 2023
Tipple | Turmeric Gingerade
Sep 2, 2023
Sep 2, 2023

More from the January issue…

Featured
SIM79.CHALKBOARD_ST Back Jan19_01.JPG
Jan 29, 2019
January: a final thought
Jan 29, 2019
Jan 29, 2019
Up Helly Aa.jpg
Jan 28, 2019
How to: Party like a Viking
Jan 28, 2019
Jan 28, 2019
cabbage.jpg
Jan 26, 2019
Cabbage: a prince among brassica
Jan 26, 2019
Jan 26, 2019


RECIPE FROM BENTO POWER (KYLE BOOKS). RECIPE & PHOTOGRAPHY: SARA KIYO POPOWA


In Eating Tags issue 79, January, food, lunchbox, bento box, living
Comment
Photography: Jean Cazals

Photography: Jean Cazals

Recipe: Yule log

David Parker December 7, 2018

Roll up, roll up – for our festive yule log! 

This bake is just a little bit fancy but when the making of it is as leisurely and lovely as the eating of it, it’s all worth it. This is no chuck-it-in-the-oven crowd pleaser so embrace the opportunity that brings: take an afternoon off work when the house is quiet and dedicate it to some mindful baking to share with friends and family later on.

The filling

250ml whole milk
1 vanilla pod
3 medium egg yolks
60g caster sugar
25g plain flour
100g soft butter, cut into pieces 
50g hazelnuts in their skins

1. Pour milk into a heavy-based pan. Split the vanilla pod, scrape seeds into the milk, along with split pods. 2. Whisk egg yolks and sugar in a bowl until pale and creamy. Add the flour and mix until smooth. Put the pan of milk over medium heat, bring to just under the boil, take off the heat and slowly pour half of it into the egg, sugar and flour mixture, whisking well as you do so. Add the remaining milk and whisk in well, then pour mixture back into pan.
3. Bring to the boil, whisking continuously, then keep boiling and whisking for one minute, take off the heat and pour into a clean bowl.
4. Scoop out the halves of vanilla pod. Cover the surface of the bowl with greaseproof paper straight away to prevent skin forming. Cool in fridge. Once cool, remove from fridge and whisk to the consistency of a light mayonnaise. Add butter, whisking in a little at at time until the cream is smooth and quite white.
5. Preheat the oven to 180C/Fan 160C/350F. Spread the hazelnuts out over a baking tray and toast for 15–20 mins, shaking occasionally for even cooking. Leave to cool, then grind to a paste using a coffee grinder or pestle and mortar. Mix this into the cream and set aside.


The sponge

125g caster sugar
4 medium eggs
1 tbsp cocoa powder
125g plain flour
25g butter, melted, plus extra for greasing
You will need:
Two 35cm x 27cm x 2cm baking trays, greased and lined

1. Preheat the oven to 180C/Fan 160C/350F. Whisk sugar and eggs in a bowl over a pan of barely simmering water (don’t let base of bowl touch the water) for 3-4 mins until foamy and tripled in volume.
2. Transfer to a food mixer with whisk attachment or use a handheld one and whisk at high speed for 4–5 mins until mixture has cooled and clings easily to the whisk, leaving ribbon trails when you lift it.
3. Sieve cocoa into flour and gently fold in to the mixture a little at a time with a metal spoon. Do the same with the melted butter.
4. With a spoon, turn the mixture into trays and tilt so it spreads into the corners. Bake for 12–15 mins until golden and the centre is springy. Turn out onto cooling rack.

And the rest...

100g sugar
2 tbsp kirsch
Icing sugar, for dusting
500g good natural marzipan 
400g good quality dark chocolate (70%), broken into pieces
Dark chocolate curls or ‘pencils’, cocoa powder, and edible gold leaf (optional), for decoration

1. Start by making a kirsch syrup. Put the sugar in a pan with 200ml water and bring to the boil. Reduce the heat and simmer until the sugar has dissolved and you have a colourless syrup. Take off the heat, stir in the kirsch, and leave to cool.
2. Have ready a large sheet of baking paper. Turn the chocolate sponge onto it so that the top is downwards. Brush with two-thirds of the syrup, then spread hazelnut cream filling on top. Now roll up like a Swiss roll. Lift up the baking paper
and as the sponge starts to roll, tuck it under with your fingertips, then continue to lift the paper and it will continue to roll.
3. Lightly dust your work surface with icing sugar and roll out the marzipan to 2mm thick. Cut out a rectangle just large enough to wrap the log in and set aside trimmings. 
4. Brush the log with the remaining syrup, then lay on top of marzipan, off centre, seam upwards. Bring the marzipan over the top and press down lightly, so that it fits snugly. Tuck marzipan under the log and fold in the ends.
5. Mould marzipan trimmings into balls, then roll into ‘sausages’ to snake along the top of the log, pressing down lightly so they stick. 
6. Have ready a rack over a tray or sheet of baking paper. Using a palette knife or fish slice under each end of the log, lift it onto the rack. Leave these in position so you can easily lift the log up again.
7. Put the chocolate into a heatproof bowl over a pan of barely simmering water – make sure the water comes close to the bottom of the bowl but doesn’t actually touch it. Keep the heat very low so that you don’t get steam in the bowl. Keep stirring all the time and let the chocolate melt slowly, then remove bowl from heat. A little at a time, with the help of a spoon, pour the chocolate over the log until it is covered.
8. As it begins to cool and set a little, use the tip of a spoon or fork to make rough bark-like marks in the chocolate. When the coating is set enough to stay put, lift the log off the rack and onto a board or plate. Decorate with cocoa, chocolate and gold leaf, if you like. Leave for 3–4 hrs at room temperature, then put in the fridge, if necessary, in a box to keep its shine.

Taken from Patisserie Maison by Richard Bertinet (Ebury Press, £20)

This was first published in our December 2014 issue. Our new December issue is out now. If you enjoyed this recipe, be sure not to miss our feature, For the Love of Baking in there. It has recipes, by Rachel de Thample, for Austrian Linzer biscuits, Icelandic Klejner, mulled wine brownies and more. The perfect way to occupy yourself on a quiet, calm day at home during Advent.

Get hold of your copy of this month's The Simple Things - buy, download or subscribe


In Eating, Living Tags recipe, cake, christmas, cake in the house, issue 30, december, baking
Comment
Illustration: Kavel Rafferty

Illustration: Kavel Rafferty

Stir-Up Sunday: Mixing bowl ready, Christmas is on its way!

thesimplethings November 25, 2018

Making a Christmas pudding today is great traditional way to get the whole family together, so grab your mixing bowl, spoon, sixpence and brandy, and get ready to make a wish and sing a traditional rhyme while you're stirring...

Read More
In Eating Tags Christmas, desserts, kitchen, traditions
1 Comment
  • Blog
  • Older
  • Newer
Featured
  Buy ,  download  or  subscribe   See the sample of our latest issue  here   Buy a copy of our latest anthology:  A Year of Celebrations   Buy a copy of  Flourish 2 , our wellbeing bookazine  Listen to  our podcast  - Small Ways to Live Well
Feb 27, 2025
Feb 27, 2025

Buy, download or subscribe

See the sample of our latest issue here

Buy a copy of our latest anthology: A Year of Celebrations

Buy a copy of Flourish 2, our wellbeing bookazine

Listen to our podcast - Small Ways to Live Well

Feb 27, 2025
Join our Newsletter
Name
Email *

We respect your privacy and won't share your data.

email marketing by activecampaign
facebook-unauth twitter pinterest spotify instagram
  • Subscriber Login
  • Stockists
  • Advertise
  • Contact

The Simple Things is published by Iceberg Press

The Simple Things

Taking time to live well

We celebrate slowing down, enjoying what you have, making the most of where you live, enjoying the company of of friends and family, and feeding them well. We like to grow some of our own vegetables, visit local markets, rummage for vintage finds, and decorate our home with the plunder. We love being outdoors and enjoy the satisfaction that comes with a job well done.

facebook-unauth twitter pinterest spotify instagram