The Simple Things

Taking time to live well
  • Home
  • Subscribe
  • SHOP
  • Newsletter
  • About
  • Work with us
  • Home
  • Subscribe
  • SHOP
  • Newsletter
  • About
  • Work with us

Blog

Taking Time to Live Well

  • All
  • Chalkboard
  • Christmas
  • Competition
  • could do
  • Eating
  • Escape
  • Escaping
  • Fresh
  • Fun
  • gardening
  • Gathered
  • Gathering
  • Growing
  • Haikus
  • Interview
  • Living
  • Looking back
  • Magazine
  • magical creatures
  • Making
  • Miscellany
  • My Neighbourhood
  • Nature
  • Nest
  • Nesting
  • outing
  • playlist
  • Reader event
  • Reader offer
  • Shop
  • Sponsored post
  • Sunday Best
  • Think
  • Uncategorized
  • Wellbeing
  • Wisdom

How to | Solve an Agatha Christie Novel

Iona Bower November 18, 2025

Obviously you can simply skip to the last chapter, but here are a few clues that might help you work out by yourself who dunnit before the denouement.

Be suspicious early

The murderer is always introduced in the first half of the book so keep your eyes peeled early doors. HOWEVER, you’re not looking for a typical criminal. Christie’s murderers are usually unlikely, so watch out for any pillars of the community: vicars, doctors, etc, or anyone with a watertight alibi.

Heed the mid-way clue

Christie didn’t want her readers to feel cheated, so often drops an absolute clanger of a clue about halfway through the book. It’s usually so quickly glossed over that you don’t take much note until the killer is unmasked and you remember and kick yourself.

Spot the devil in the detail

Big Data on Christie novels shows up all sorts of interesting coincidences but you need to be in the know to use them to your advantage, so listen up. If it’s set in a country house or there are lots of cars featured, the murderer is almost certain to be female. If cause of death is strangulation, the killer will be male. Christie regularly uses the word ‘interesting’ to describe a clue that is a red herring and glosses over the ‘real’ clues. Yep, we only said she was a great novelist, not a great poker player.

You can find more miscellaneous fun and games on our monthly Miscellany pages at the back of every issue of The Simple Things.

More from our Miscellany pages…

Featured
IMG_5638.jpeg
Nov 18, 2025
How to | Solve an Agatha Christie Novel
Nov 18, 2025
Nov 18, 2025
Cherry Hats 1.jpeg
Sep 7, 2025
Miscellany | Hats of Note
Sep 7, 2025
Sep 7, 2025
PANCAKES.jpg
Mar 4, 2025
How to | Improve Your Pancake Toss
Mar 4, 2025
Mar 4, 2025

More from our blog…

Featured
Burnt orange cocktail.jpeg
Nov 22, 2025
Tipple | Burnt Orange Cocktail
Nov 22, 2025
Nov 22, 2025
IMG_5638.jpeg
Nov 18, 2025
How to | Solve an Agatha Christie Novel
Nov 18, 2025
Nov 18, 2025
Community Sauna Baths HW Site Credit_ Liz Seabrook 3(1).jpeg
Nov 15, 2025
The Rules | Sauna
Nov 15, 2025
Nov 15, 2025
In Fun Tags issue 161, miscellany, murder mystery, reading
Comment

The Rules | Sauna

Iona Bower November 15, 2025

Photography by Liz Seabrook

A few rules to consider before you strip off and heat up

What to wear?

Unlike other sauna cultures where nudity is compulsory, among British bathers, anything goes, from wetsuits to running gear, to hen and stag-do fancy dress. Anything, it seems, is better than nothing!

Rinse first 

Start with wet, clean skin. The first sweat is the dirtiest one, so wash this (and subsequent sweats) off under a shower or in the sea, not in a communal pool.

How long?

Ignore time limits on hot and cold immersions. Even if you only last a few minutes, that’s okay. A sauna session is not a test. Listen to your body and leave when you’re ‘comfortably uncomfortable’.

Etiquette

Remember to close the door when you step in and out. Don’t bag a spot by putting your towel down; the sauna is a shared space and everyone should expect to move around. Speaking quietly and being mindful of what is discussed is basic courtesy. In Finland and Estonia, thorny issues such as politics and religion are kept firmly outside the sauna walls. In Nordic nations, it’s rude to throw water on the rocks without asking or to create mass evacuation by steaming everyone out.

These guidelines are from our November issue feature, Scenic Saunas, which is an extract from Wild Sauna: The Best Outdoor Saunas In Britain by Emma O’Kelly (Wild Things) 

More Scandi habits we like…

Featured
March playlist.JPG
Feb 18, 2021
Playlist | Vardrypp
Feb 18, 2021
Feb 18, 2021
Cardamom buns Kay Prestney.jpg
Dec 22, 2020
Recipe | Swedish kardemummabullar
Dec 22, 2020
Dec 22, 2020
cover shot me.jpg
Dec 15, 2020
Where to buy | Knitwear like our January cover
Dec 15, 2020
Dec 15, 2020

More from our blog…

Featured
Burnt orange cocktail.jpeg
Nov 22, 2025
Tipple | Burnt Orange Cocktail
Nov 22, 2025
Nov 22, 2025
IMG_5638.jpeg
Nov 18, 2025
How to | Solve an Agatha Christie Novel
Nov 18, 2025
Nov 18, 2025
Community Sauna Baths HW Site Credit_ Liz Seabrook 3(1).jpeg
Nov 15, 2025
The Rules | Sauna
Nov 15, 2025
Nov 15, 2025
In Wellbeing Tags issue 161, saunas
Comment

Gardens | Fading flowers

Iona Bower November 11, 2025

Photography by Gap Photos

As autumn fades slowly into winter it can feel like the garden has less to offer but some things are most beautiful as they fade. Here are a few plants that look beautiful in a winter garden with a touch of frost on, or brought inside as a late autumn bouquet.

1 Hydrangeas

As Autumn truly sets in, the hydrangea flowers fade into dusty pinks, yellows and browns, and they just get more beautiful. You can cut a few heads to bring in - you don’t need many as they’re so big - but if you can, enjoy these in the garden as there’s often already new growth on the stems that it would be a shame to lose. 

2 Teasels

Statuesque teasels (pictured above) look great with a dusting of frost on them outdoors and, if left, provide food for birds, including goldfinches. They look dramatic indoors, too, either in a tall vase or woven into a wintry garland using wire, along with pinecones, cinnamon sticks and anything else the season offers. 

3 Honesty

Honestly, Honesty is one of the plants that looks better after it’s ‘gone over’. Once it’s finished its growing season, you can peel back one side of the seed pod that the seeds are stuck to, and leave these outside for the birds, and you’re left with little circles of what looks like tracing paper. They look stunning in a vase indoors and lamp or candlelight will gently illuminate them to look like branches hung with lots of tiny moons. 

4 Lotus seedheads

Totally dramatic, in the garden or a vase, these have a really strong structure that brings an indoor dried bouquet to life. Pair with other seedheads, dried grasses and twigs. Some like to spray them pretty colours but we think they’re just beautiful as nature intended.

5 Alliums

Spent alliums have the look of ghostly fireworks. They come in a variety of globe shapes, some looser shapes with little ‘stars’ at the end of each stalk, some ‘tighter’ that look like fluffy cricket balls. As they fade from whites and purples to light brown they keep their dramatic shape but become more ethereal. Pick them to bring indoors before they fall over. 

For more Autumnal inspiration, read ‘In at the Beginning’ by Jo Mattock in our November issue, which is all about why Autumn is the most exciting time of year in the garden.

Buy this month's The Simple Things -buy, download or subscribe

More things to love about Autumn…

Featured
Conkers 4.JPG
Oct 15, 2022
Make | Conker Laundry Soap
Oct 15, 2022
Oct 15, 2022
Toadstools.jpg
Oct 13, 2020
Nature studies | Fly Agaric Toadstools
Oct 13, 2020
Oct 13, 2020
Sept Salad Nassima Rothacker.jpg
Sep 7, 2019
Eat | Wild September Salad
Sep 7, 2019
Sep 7, 2019

More from our November issue…

Featured
IMG_5638.jpeg
Nov 18, 2025
How to | Solve an Agatha Christie Novel
Nov 18, 2025
Nov 18, 2025
Community Sauna Baths HW Site Credit_ Liz Seabrook 3(1).jpeg
Nov 15, 2025
The Rules | Sauna
Nov 15, 2025
Nov 15, 2025
Teasels Gap Photos.jpeg
Nov 11, 2025
Gardens | Fading flowers
Nov 11, 2025
Nov 11, 2025
In gardening Tags issue 161, winter gardening, seeds
Comment

Photograph by Stocksy

Wellbeing | Hold a Grown-up Sleepover

Iona Bower November 8, 2025

PJs and fluffy socks at the ready - here’s how to do sleepovers properly

In our November issue we looked at the ways in which holding a sleepover as an adult can help cement friendships, find some time for ourselves and even improve our wellbeing. Here are a few suggestions on activities for your sleepovers (and no pillow fights or apple pie beds, we promise!)

1. Teen sleepovers tend to involve long (and usually horribly scary) films, but as an adult you probably want to leave plenty of time for conversation, too. Ditch the long films and choose a TV show or something short that takes less time to watch but that you can chat alongside. Masterchef, Pottery Throwdown or The Traitors are all good choices. Anything with a competition element works well as something you can chat about as you watch. If there’s nothing on right now that you all want to watch, you could go back through the archives. Ed Balls on Strictly from 2016, anyone? 

2. Make it a cafternevening (a late crafternoon) and get everyone to bring something they’re working on, or set up a simple craft everyone can do. It needs to be no more complex than crocheting granny squares really, so you don’t have to concentrate so hard it makes conversation difficult. But working on a project alongside others, you often find chat comes more easily, and it’s nice to have something to remind you of the night too. If sewing isn’t your thing, pottery painting, air clay projects or potting up houseplants or terrariums all work well, too. 

3. Take the food up a notch from takeaway pizza and marshmallows. Cooking together and enjoying sophisticated sharing food can feel sociable without feeling ‘silly’. Put together grazing boards of cheese, charcuterie, olives and nuts. Everyone can make their own, just as they like them. Or you could make a nachos bar together - put someone in charge of the guacamole, someone for grating cheese, someone else for making salsa, and then all dig in once it’s spread out nicely on the table. Beers optional but recommended. 

4. We’re never too grown-up for games but they need to feel low-key and easy to drop in and out of. There’s nothing worse than enforced fun (especially when it goes on for hours). Collaborative board games like Pandemic take away the element of competition. Or try card games that encourage conversation such as We’re Not Really Strangers as a grown-up alternative to ‘Never Have I Ever’. Let’s face it, most of us have already done most of the daft things that might come up in Never Have I Ever by our age, and any that we haven’t, we probably aren’t going to start now!

5. Keep the focus of the sleepover on ‘sleep’. Unlike the slumber parties of our youth, your guests are probably expecting to actually get some shut eye! Let’s face it, 9pm bedtimes feel like a real treat these days for many of us. So make your guests as comfortable as possible, encourage bringing cosy bedtime items such as dressing gowns and warm socks and serve milky drinks or herbal teas to help everyone wind down at bedtime. 

Read more about how you can rekindle the magic of the sleepover in our feature Spend the Night in our November issue. 

Buy this month's The Simple Things -buy, download or subscribe

More from our November issue…

Featured
IMG_5638.jpeg
Nov 18, 2025
How to | Solve an Agatha Christie Novel
Nov 18, 2025
Nov 18, 2025
Community Sauna Baths HW Site Credit_ Liz Seabrook 3(1).jpeg
Nov 15, 2025
The Rules | Sauna
Nov 15, 2025
Nov 15, 2025
Teasels Gap Photos.jpeg
Nov 11, 2025
Gardens | Fading flowers
Nov 11, 2025
Nov 11, 2025

More night-time adventures…

Featured
Sleepover Stocksy.jpeg
Nov 8, 2025
Wellbeing | Hold a Grown-up Sleepover
Nov 8, 2025
Nov 8, 2025
Night Alamy.jpg
Oct 19, 2024
Mini Adventures | The Night Sky
Oct 19, 2024
Oct 19, 2024
October playlist.png
Sep 18, 2024
Playlist | Night-walking
Sep 18, 2024
Sep 18, 2024
In Wellbeing Tags issue 161, sleep, wellbeing, night
Comment

Photography by Rebecca Lewis

Recipe | Pumpkin Soup... in a Pumpkin

Iona Bower November 5, 2025

No need for fine china when you can use a halved pumpkin instead.

Serves 4

2 medium sized, edible pumpkins or squash, for your ‘dishes’

½ tsp paprika

½ tsp chilli flakes

½ tsp cumin

½ tsp coriander seeds

1 medium butternut squash

2 garlic cloves, roughly chopped

3 tbsp extra virgin olive oil

1 onion, finely chopped

1 large carrot, finely chopped

1 large celery stick, finely chopped

1 veggie stock cube

200ml crème fraîche

4 stems of rosemary

1 Preheat the oven to 190C/Fan 170C/Gas 5. Meanwhile, halve the pumpkins or squash and use a large spoon to hollow out the middle, leaving about 1cm of edge all around, so that it holds its shape as a bowl. Put the seeds into a small roasting tin and the flesh into a large roasting tin.

2 In a pestle and mortar, grind together the paprika, chilli, cumin and coriander seeds.

3 Cut the skin off the butternut squash and add the seeds to the pumpkin seeds, then dice up the flesh and add that to the larger roasting tin, along with the chopped garlic cloves. Stir through the ground spice mix, drizzle with 2 tbsp of olive oil, and season. Put both tins in the oven to roast for around 50 mins (or until you can push a fork easily through the flesh), taking the dish out halfway through to give it a shake for even cooking. The seeds will take less time so keep an eye on them and remove when they turn golden brown.

4 Heat 1 tbsp olive oil in a large saucepan and add the onion, carrot and celery. Gently sauté over a medium heat for about 15 mins, or until the veg has softened.

5 Add the vegetable stock cube to 1ltr of boiling water before adding it to the saucepan. Stir thoroughly.

6 Add the roasted pumpkin and butternut squash to the veg and stock and continue to simmer for 15 mins.

7 Using a food processor or a stick blender, blend the soup until smooth.

8 Serve the soup in the halved pumpkins, with a tablespoon of crème fraîche stirred into each one. Then top each one with a rosemary stem, some freshly ground black pepper and some toasted seeds.

Cook’s note: Try to get pumpkins or squash with a flat bottom so that the ‘bowls’ can stand up well.

This recipe is taken from our November issue’s feature, Fire Starters, which is all about food for Bonfire Night. It also includes recipes for Spiced Campfire Popcorn, Chocolate and Nut Dipped Apples, Campfire Cinnamon & Cardamom Twists, Toffee Apple Cake and Chai Spiced Cider. The recipes are by Kay Prestney and the photography by Rebecca Lewis.

Buy this month's The Simple Things -buy, download or subscribe

More pumpkin fun…

Featured
Pumpkin Soup GTTE.jpeg
Nov 5, 2025
Recipe | Pumpkin Soup... in a Pumpkin
Nov 5, 2025
Nov 5, 2025
Pumpkin Beer Keg Jonathan Cherry.jpg
Oct 31, 2023
Make | a pumpkin beer keg
Oct 31, 2023
Oct 31, 2023
David Grant Suttie.jpg
Oct 24, 2021
Pumpkin varieties | What are they gourd for?
Oct 24, 2021
Oct 24, 2021

More from our November issue…

Featured
IMG_5638.jpeg
Nov 18, 2025
How to | Solve an Agatha Christie Novel
Nov 18, 2025
Nov 18, 2025
Community Sauna Baths HW Site Credit_ Liz Seabrook 3(1).jpeg
Nov 15, 2025
The Rules | Sauna
Nov 15, 2025
Nov 15, 2025
Teasels Gap Photos.jpeg
Nov 11, 2025
Gardens | Fading flowers
Nov 11, 2025
Nov 11, 2025
Tags issue 161, bonfire night recipes, soup, pumpkins
Comment

Recipe | Fig & Thyme Sponge

Iona Bower October 26, 2025

Photograph by Emma Croman

There’s always room for pud – especially when it’s as light and as lovely as this is

Serves 6

250g unsalted butter, plus extra for greasing
250g caster sugar
6 medium eggs
2 tsp finely chopped fresh thyme
1 tsp vanilla bean paste
250g self-raising flour
2-3 tbsp milk
120g honey
8 figs
5 sprigs thyme, plus extra for garnish
200g vanilla natural yogurt

1 Preheat the oven to 180C/Fan 160C/ Gas 4. Meanwhile, grease and line a 1kg loaf tin with butter and greaseproof paper.

2 For the sponge, beat the butter and sugar until light and fluffy.

3 Add the eggs, one by one, before adding the thyme and vanilla. Then sift in the flour, folding it into the mix.

4 Finally, add the milk, a splash at a time, and fold in gently.

5 Pour the batter into the tin and bake for 50-60 mins – it’s ready once the top is golden and a skewer comes out clean. Remove the cake to cool completely, but leave the oven on.

6 Meanwhile, butter a 20 x 22cm ovenproof dish and pour in the honey.

7 Chop 4 of the figs into halves and 4 into quarters, then add to the honey along with the 5 sprigs of thyme. Stir to coat, then bake for 15-20 mins, or until the figs caramelise slightly.

6 Serve the cake topped with yogurt, baked figs, and a drizzle of honey.

This recipe is taken from our October ‘gathering’ pages, a menu for a harvest roast, which also includes recipes for Blackberry Fizz, Apple & Pear Roasted Pork, Roasted Garlic Mash with Crispy Sage Browned Butter, Autumn Veg Traybake and Loaded Cauliflower Cheese. The recipes are by Rebecca Finley and the photography by Emma Croman.

More recipes for Autumn…

Featured
Fig Sponge Gathering.jpeg
Oct 26, 2025
Recipe | Fig & Thyme Sponge
Oct 26, 2025
Oct 26, 2025
Baked Pears Kym Grimshaw.jpeg
Sep 27, 2025
Recipe | Baked Pear Pies
Sep 27, 2025
Sep 27, 2025
Hasselback Squash.JPG
Nov 9, 2024
Recipe | Hasselback Squash with Chestnuts, Pancetta & Mushrooms
Nov 9, 2024
Nov 9, 2024

More from our blog…

Featured
Burnt orange cocktail.jpeg
Nov 22, 2025
Tipple | Burnt Orange Cocktail
Nov 22, 2025
Nov 22, 2025
IMG_5638.jpeg
Nov 18, 2025
How to | Solve an Agatha Christie Novel
Nov 18, 2025
Nov 18, 2025
Community Sauna Baths HW Site Credit_ Liz Seabrook 3(1).jpeg
Nov 15, 2025
The Rules | Sauna
Nov 15, 2025
Nov 15, 2025
In Fresh Tags issue 161, autumn recipes, sponge cake
Comment

Project | Whittle a Butter Spreader

Iona Bower October 25, 2025

A wooden butter spreader is a pleasingly tactile piece of Scandinavian tableware and a fun project to begin your whittling journey. 


You will need: 

Fresh round of hardwood, a minimum of 10cm in diameter and roughly 20cm in length 

Axe  

Wooden club 

Pencil 

Sharp carving knife. 


1 Split the log into thin billets, splitting the wood along the grain and into halves each time. The billets for most spreaders need to be roughly 3.5cm at their thickest width on the bark edge. Providing it splits cleanly, you can get up to eight butter spreader billets from a straight piece of 10cm diameter wood. 

2 Choose your favourite billet. With the axe, use the relief cut to carve away the sharp pith edge, removing 1cm of material.  

3 Use the carving knife to flatten the surfaces on both of the cleft faces of the billet. The chest lever grip reducing the material to create a smooth plane. 

4 Draw on your chosen design incorporating the grain. The spreader must be able to stand the stress of everyday use so, for strength, the grain should run through the shape from the handle to the tip. The main stress of the utensil is where the blade meets the handle. Leaving a portion of material behind here will give the spreader longevity. Most butter spreader designs have a handle length of about 10cm before they flow into the blade. If this is your first spreader, keep the shape simple and keep the spine relatively straight to ease yourself in. 

5 Form a taper with the axe along the underside of the spreader from the blade to the end of the handle. Hold the billet at the blade end and, starting from the bottom use the relief cut to break up the fibres before removing. Apply the same method on the spine. 

6 Draw a centreline along the back of the spine and mark with a cross the point where the handle becomes the blade. With the axe, thin the billet on either side of the blade, leaving about 0.5cm either side of the centreline. Redraw the shape of the blade where you have cut it away. 

7 Now use the end grain chop technique to round the tip of the spreader blade, gradually arching the blank away from the axe to increase the angle. 

8 With a carving knife, use the power grip to refine the spreader’s blade, thinning it towards the spreading edge to a width no smaller than 2mm. 

9 Using the chest lever grip, flow the underside of the knife into the handle. Now carve and refine the spreader’s spine using the drawing grip, slowly peeling back long shavings to a desired handle thickness. 

10 With a combination of the thumb push and the pull grip begin to enhance the spreader with smooth facets. To round the tip of the spreader, use the apple peeler grip. 

11 Lastly, combine the thumb push and the apple peeler grips to chamfer the edges on the handle’s end and along the length of the spreader’s blade. 

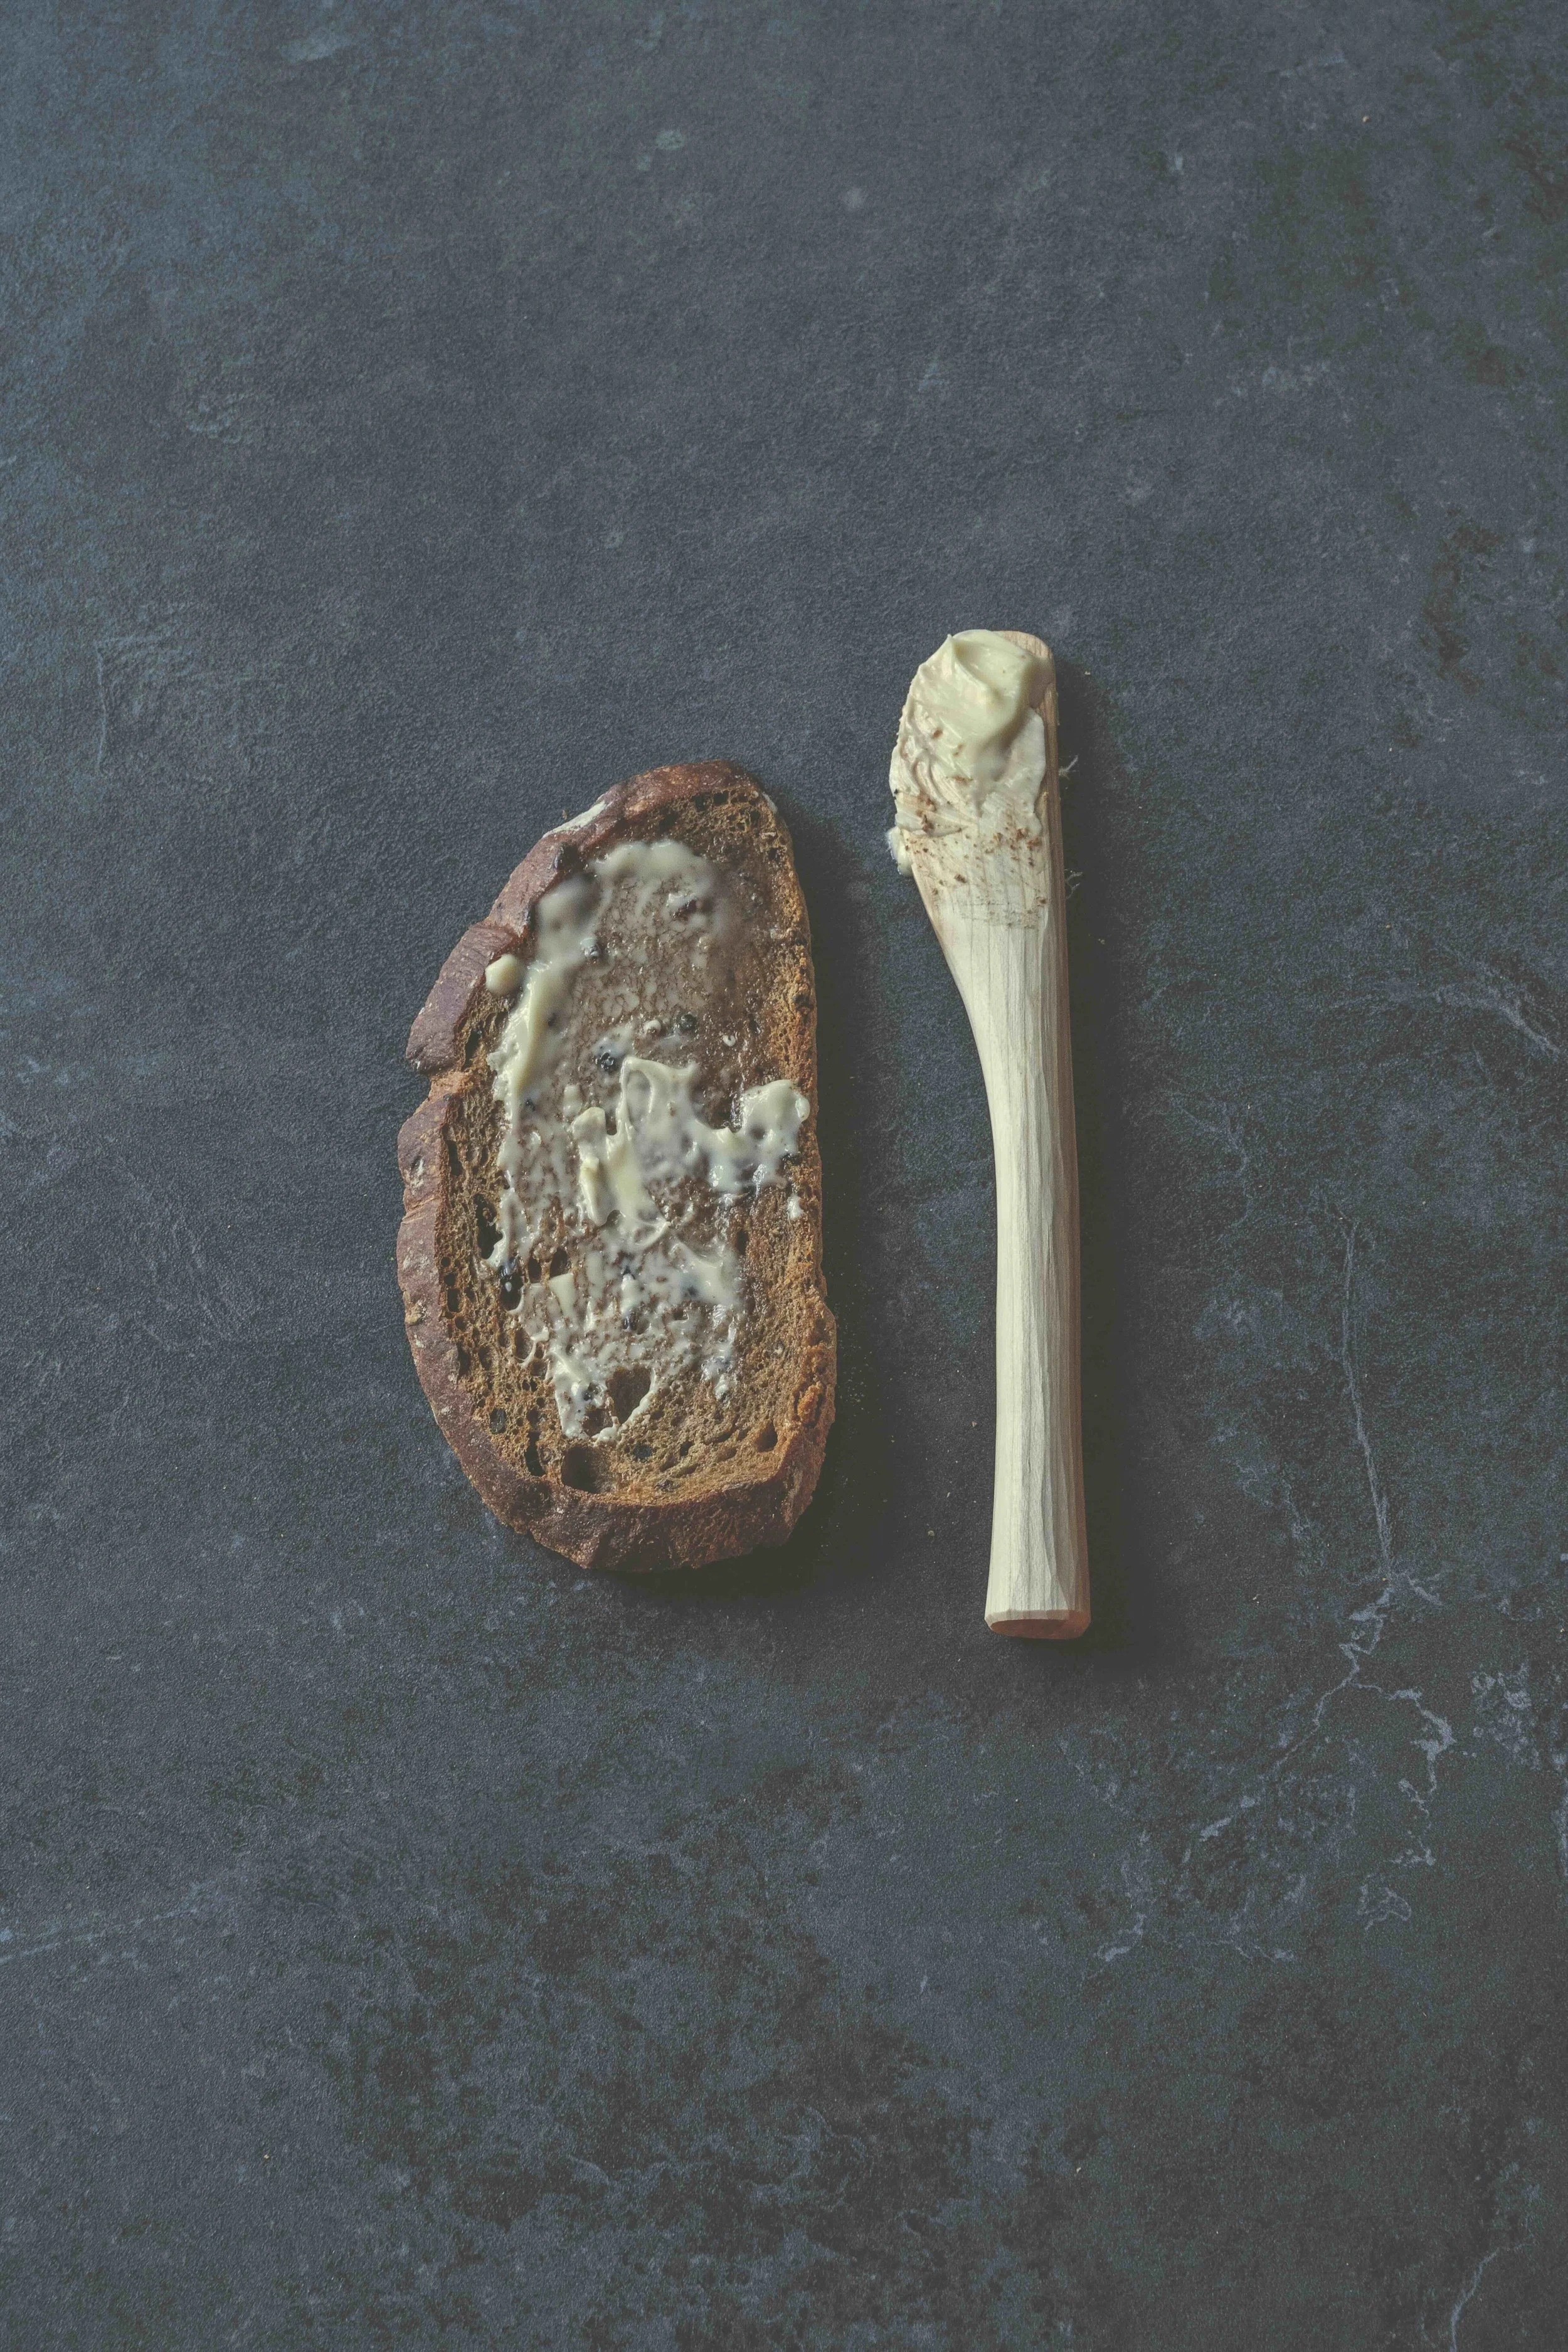
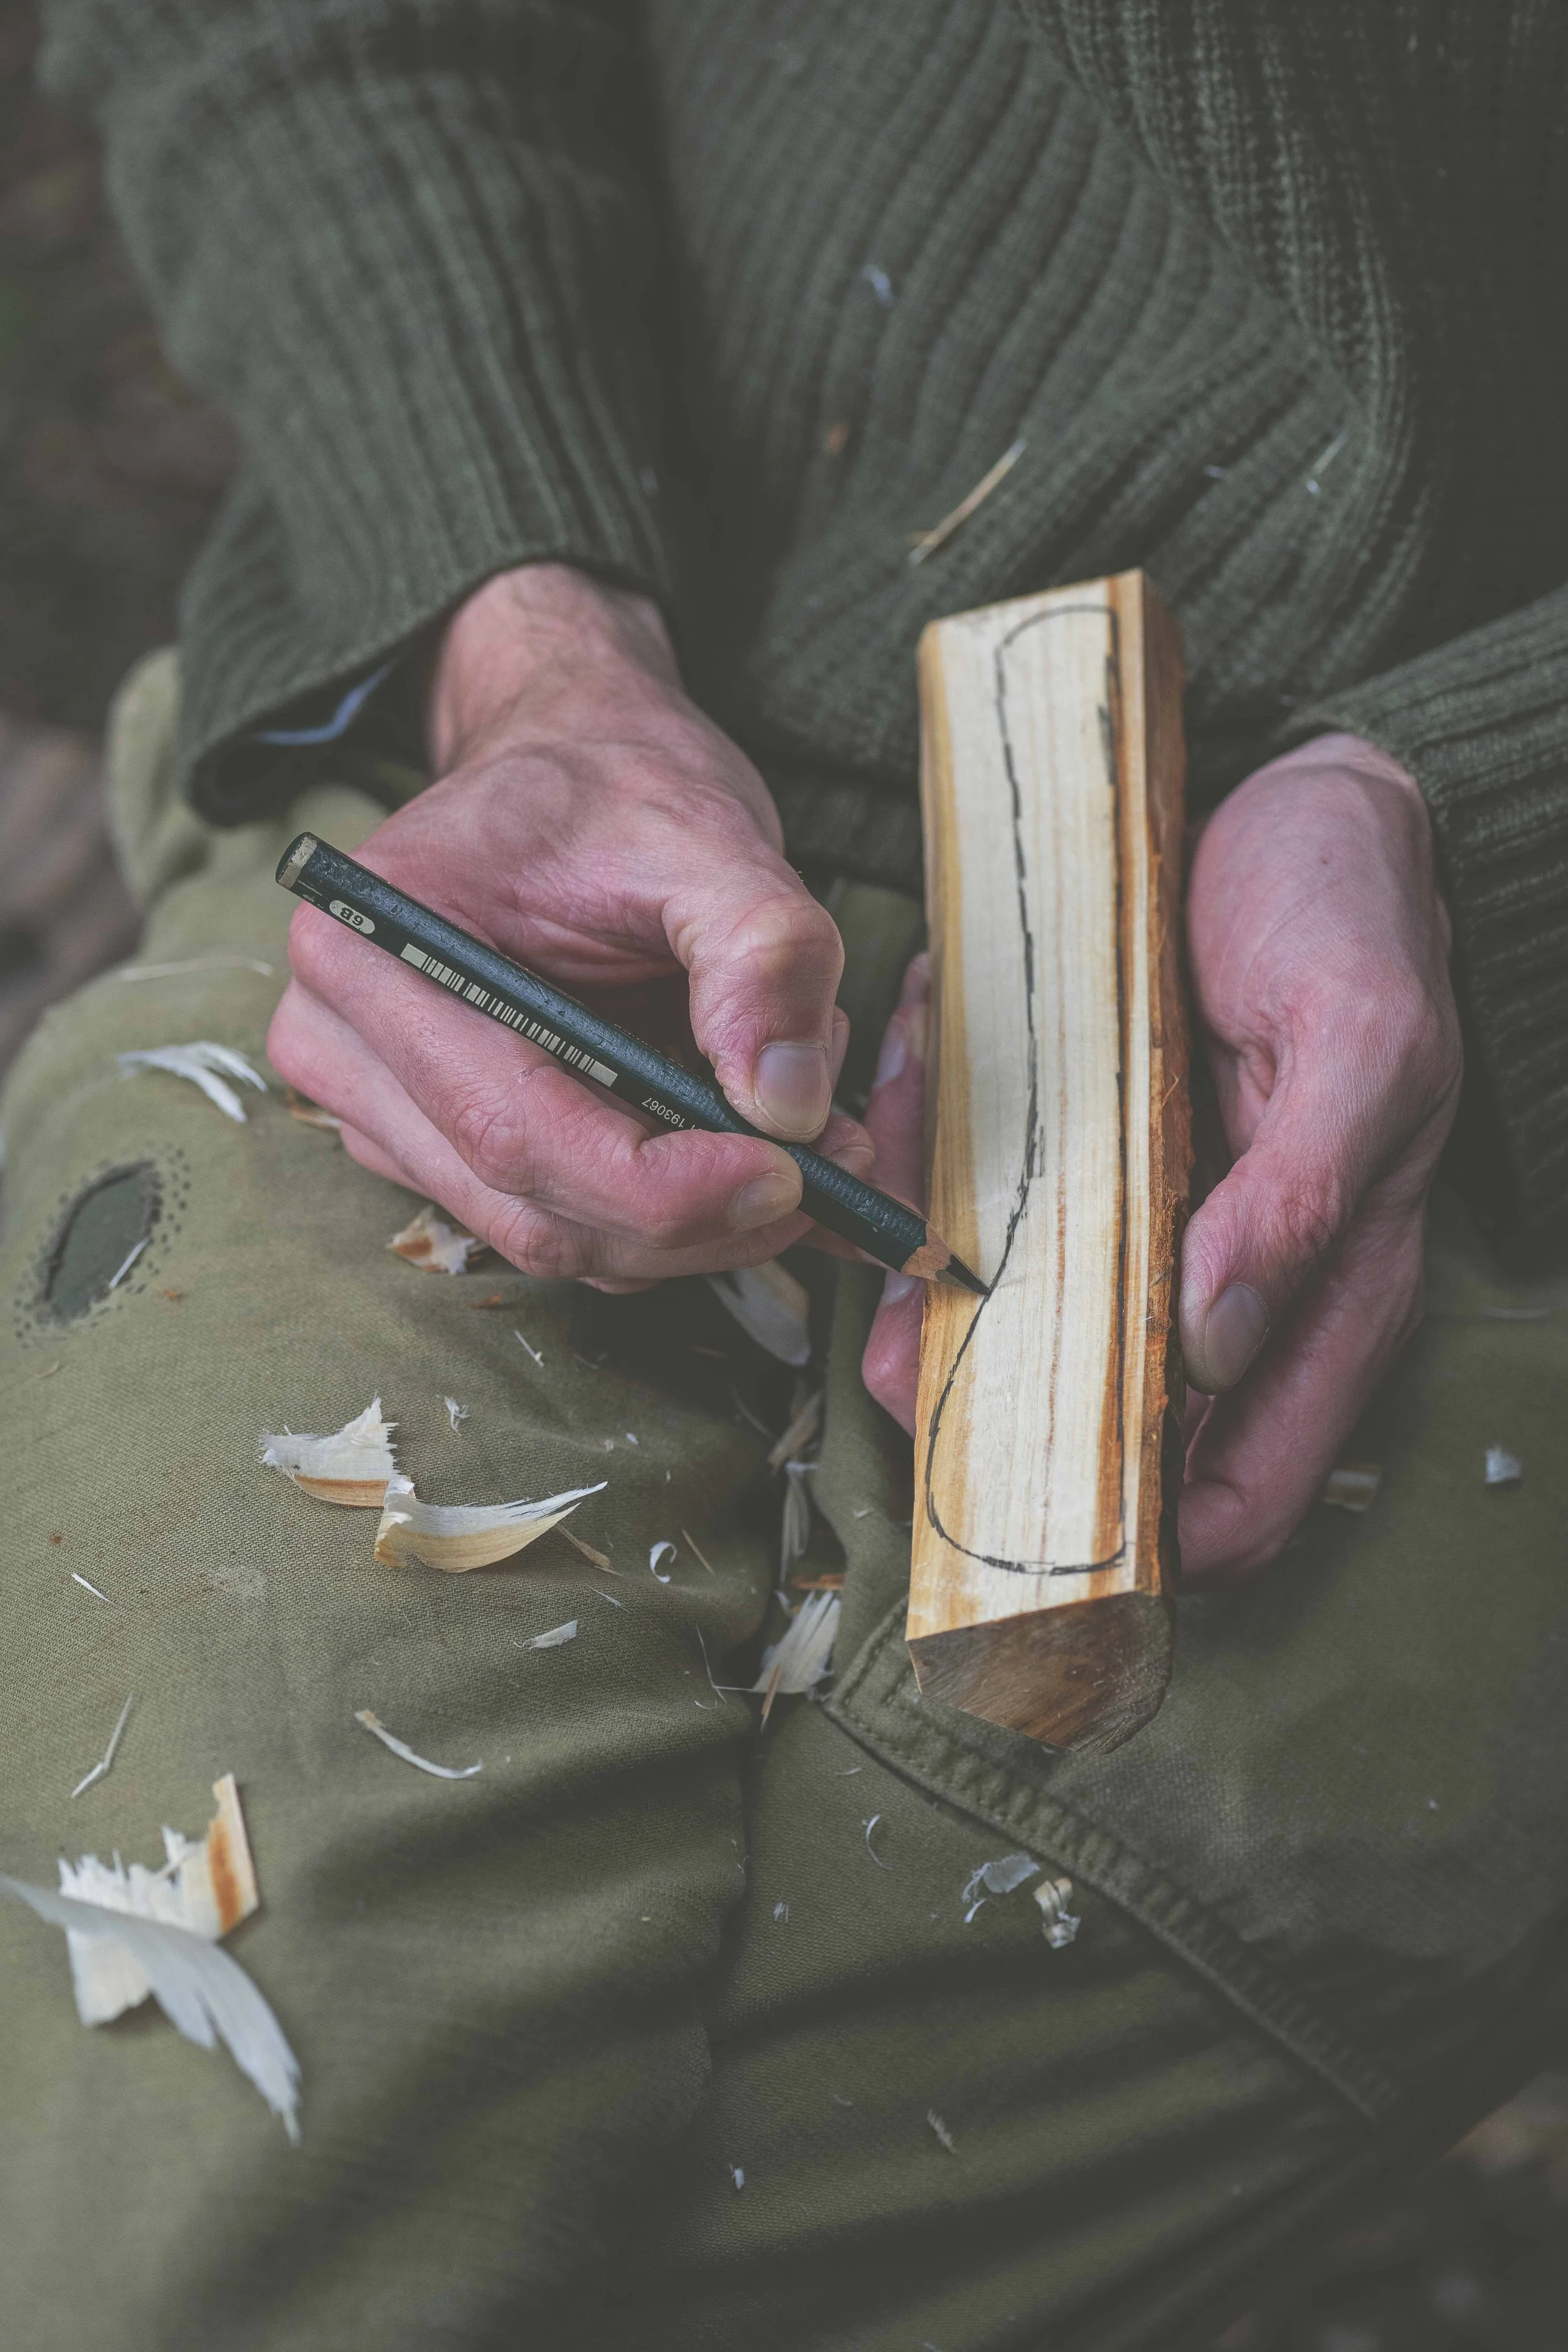
Maker’s note: As many butter spreader billets can be harvested from one piece of wood, you can play with a variety of shapes and forms. Could you make the perfect jam smearer? How can you get into the corners of the jar? This is a fantastic opportunity to loosen up into fun shapes and let the imagination flow. 


Cutting grips 

Here’s how to make all the cuts you need to complete your butter spreader.
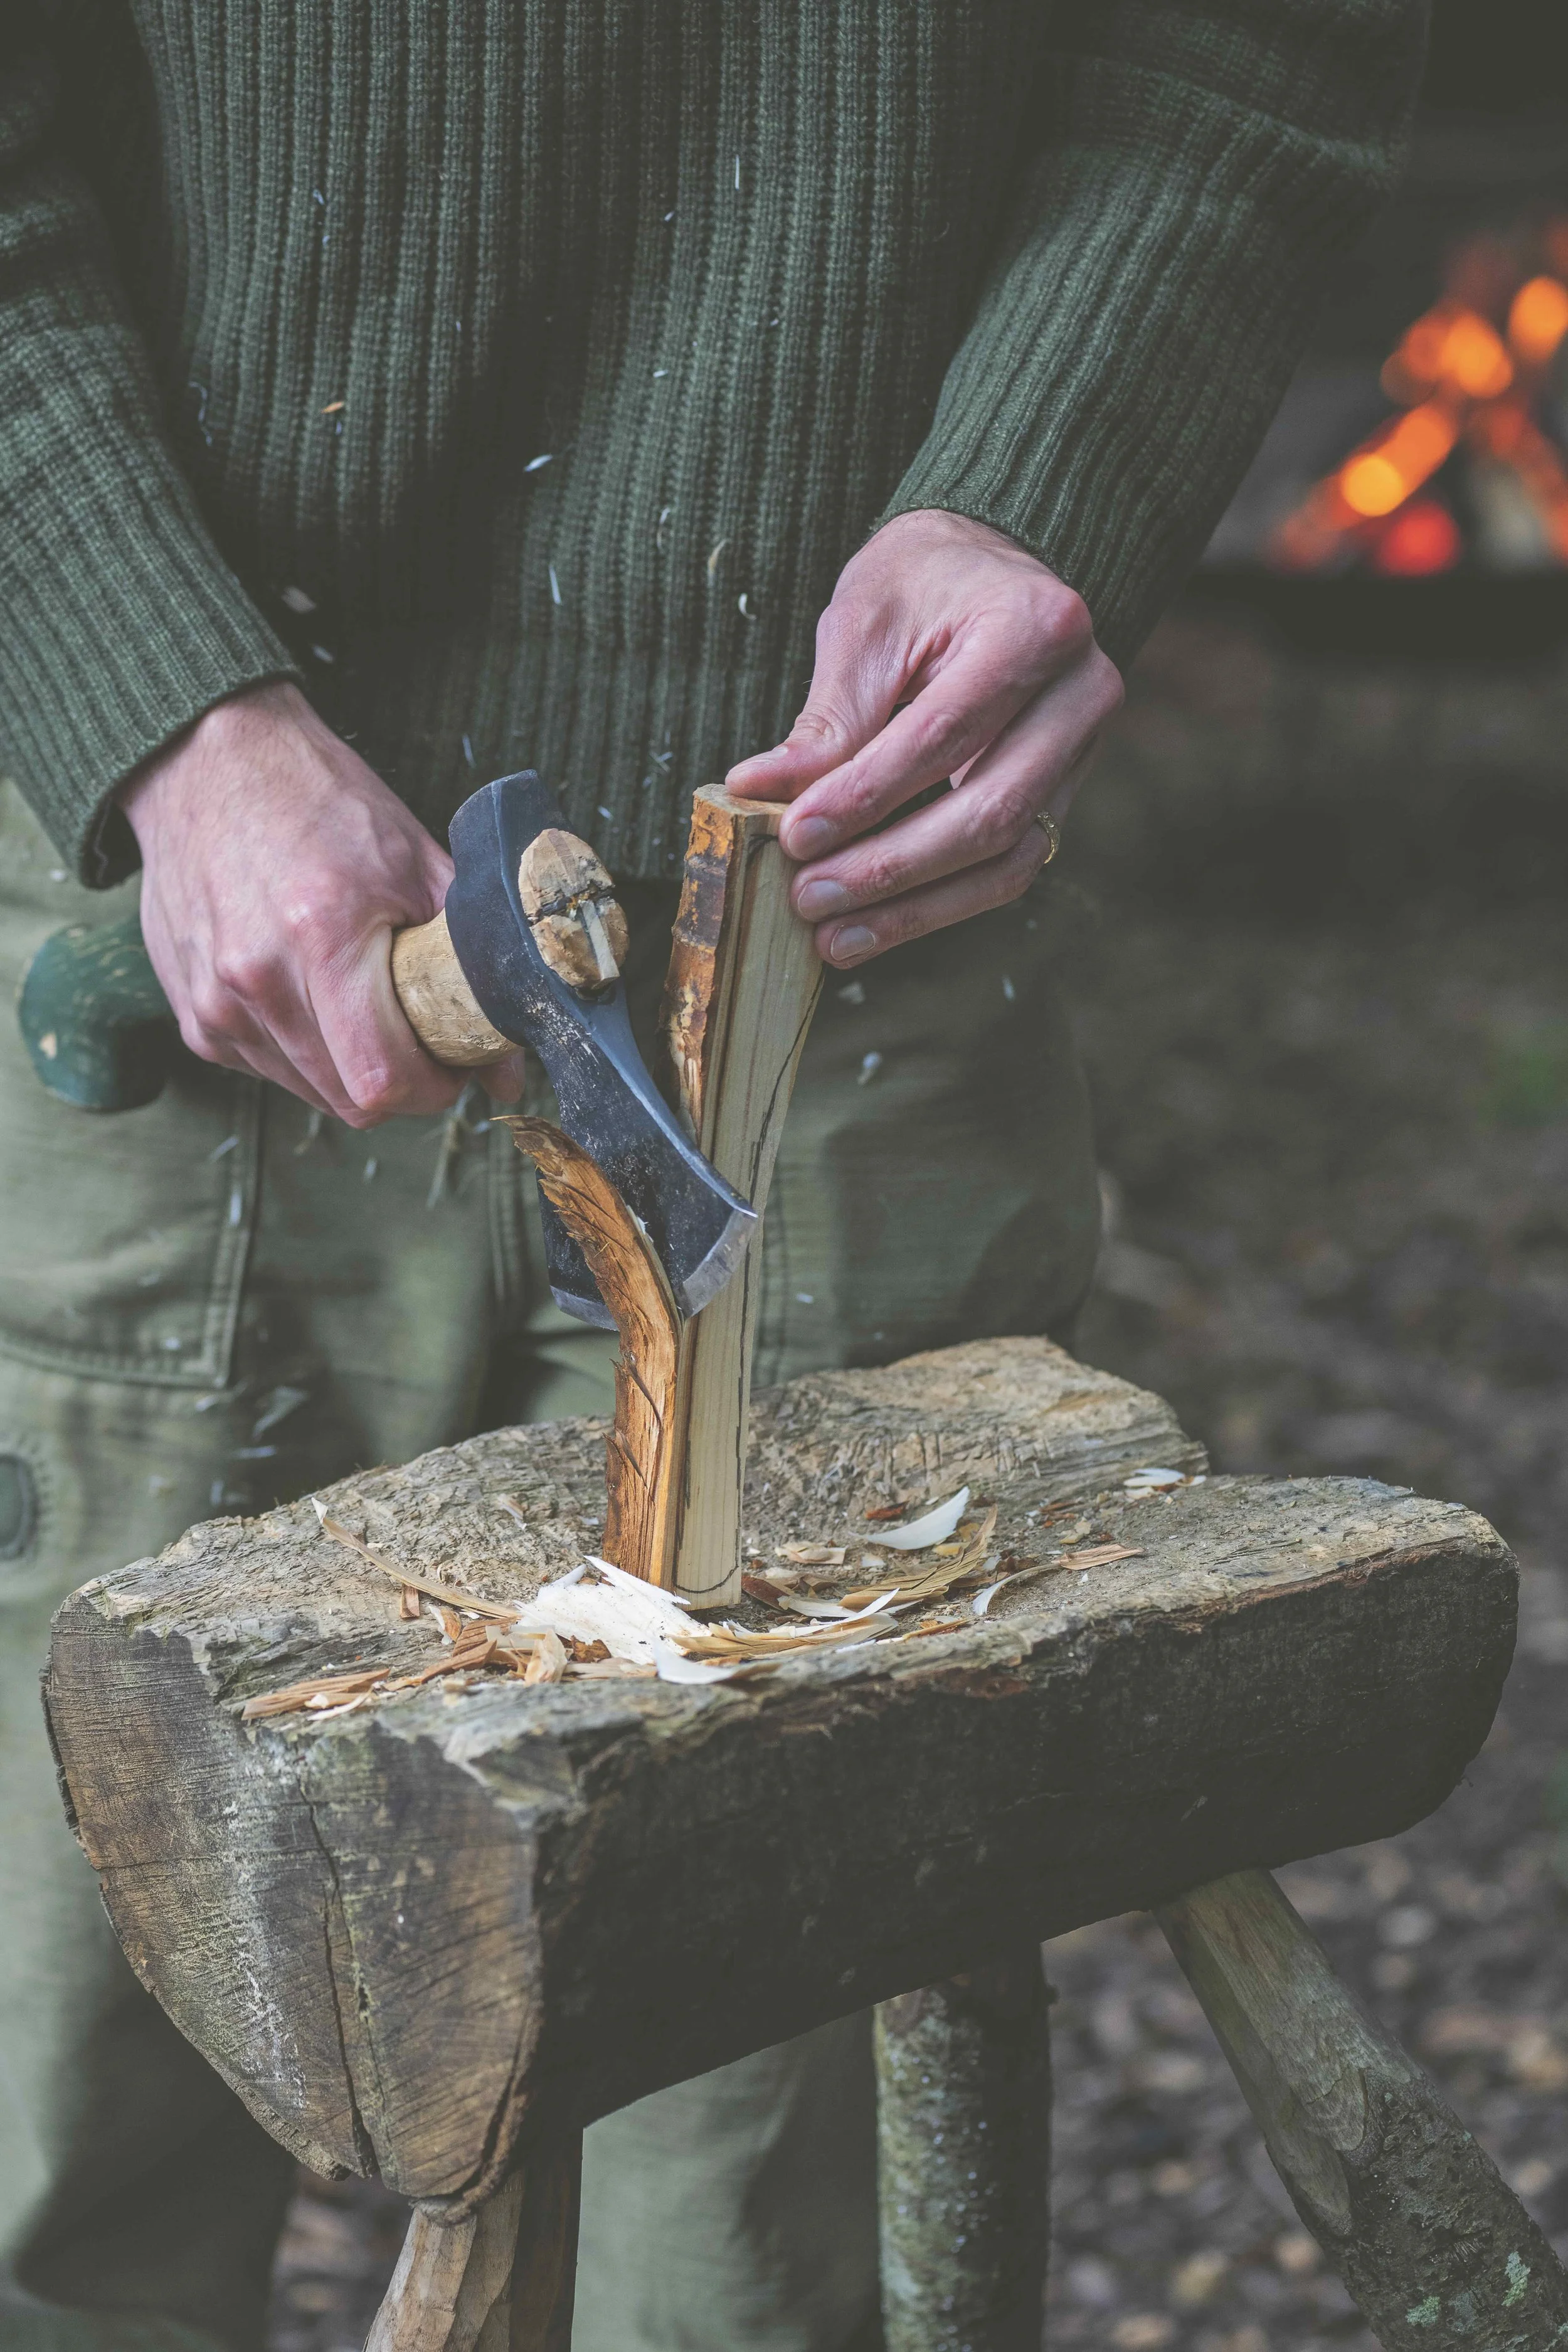
Relief cut 

Start at the bottom of the billet, tilting the material away from the axe slightly, and create 

a series of incisions at about an inch in between each other up the length of the cutting face to the halfway point. Working from the halfway point, chase the material down to the axe block to remove it, forming a taper.  

Chest lever grip 

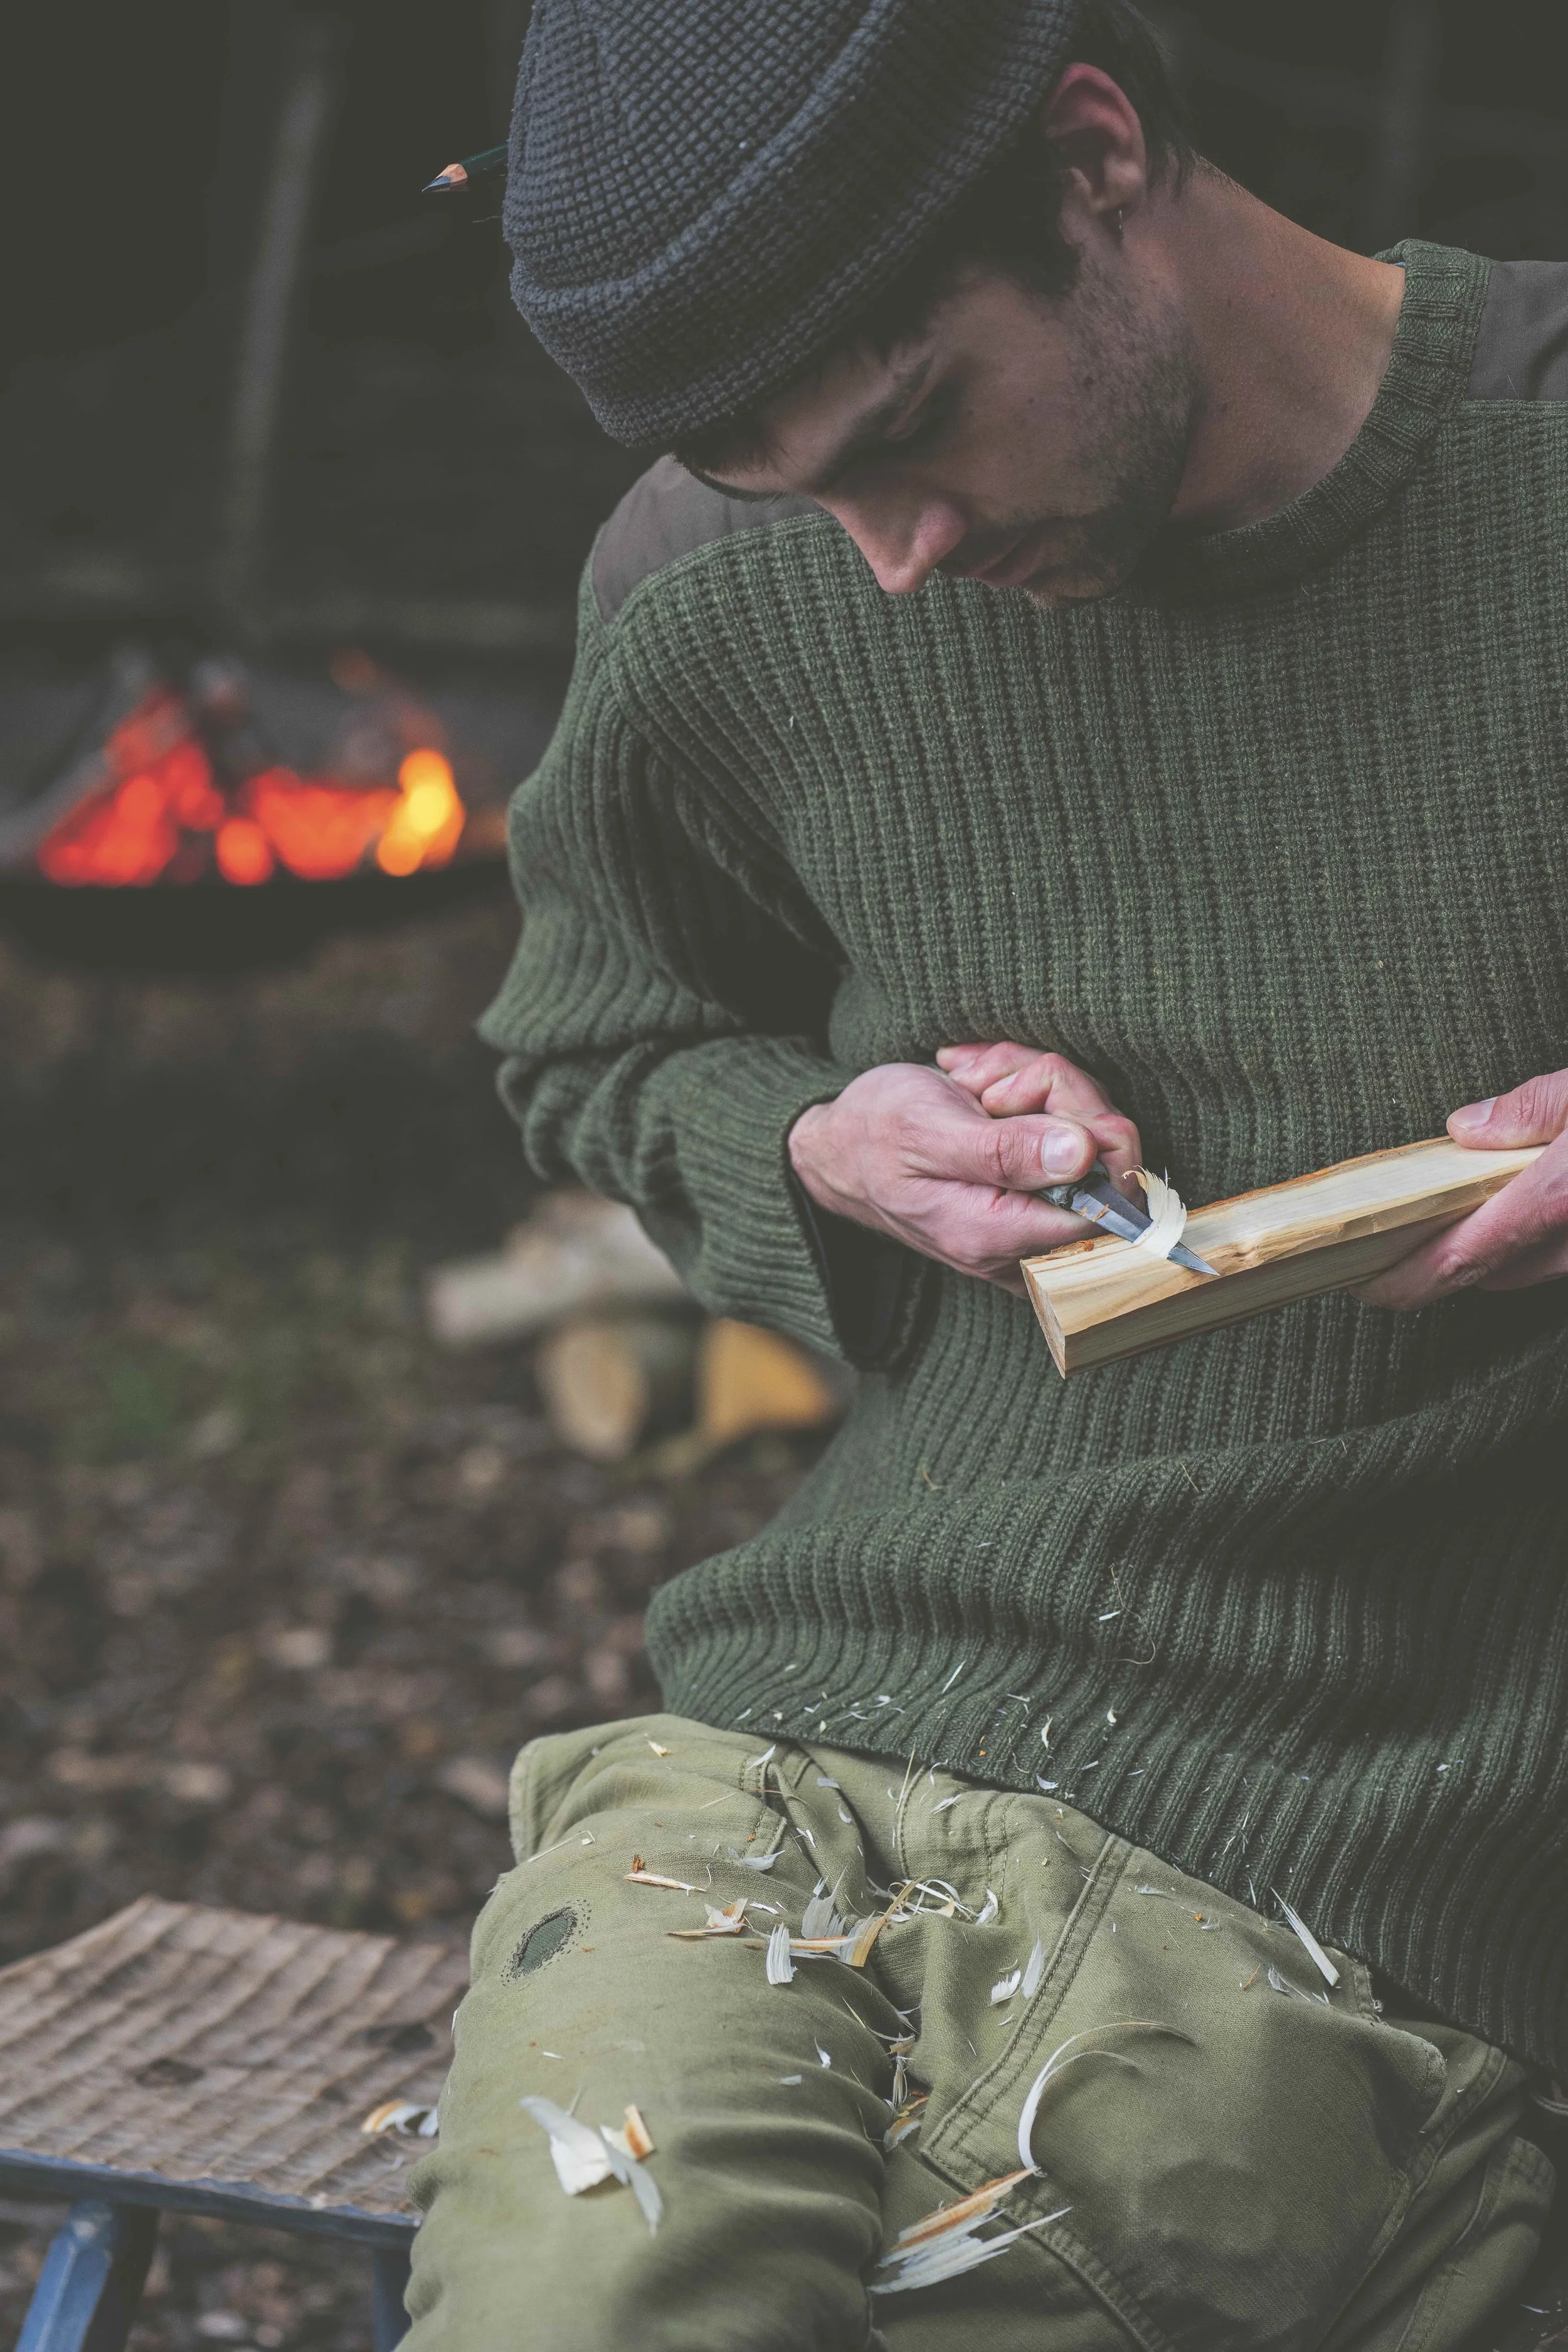
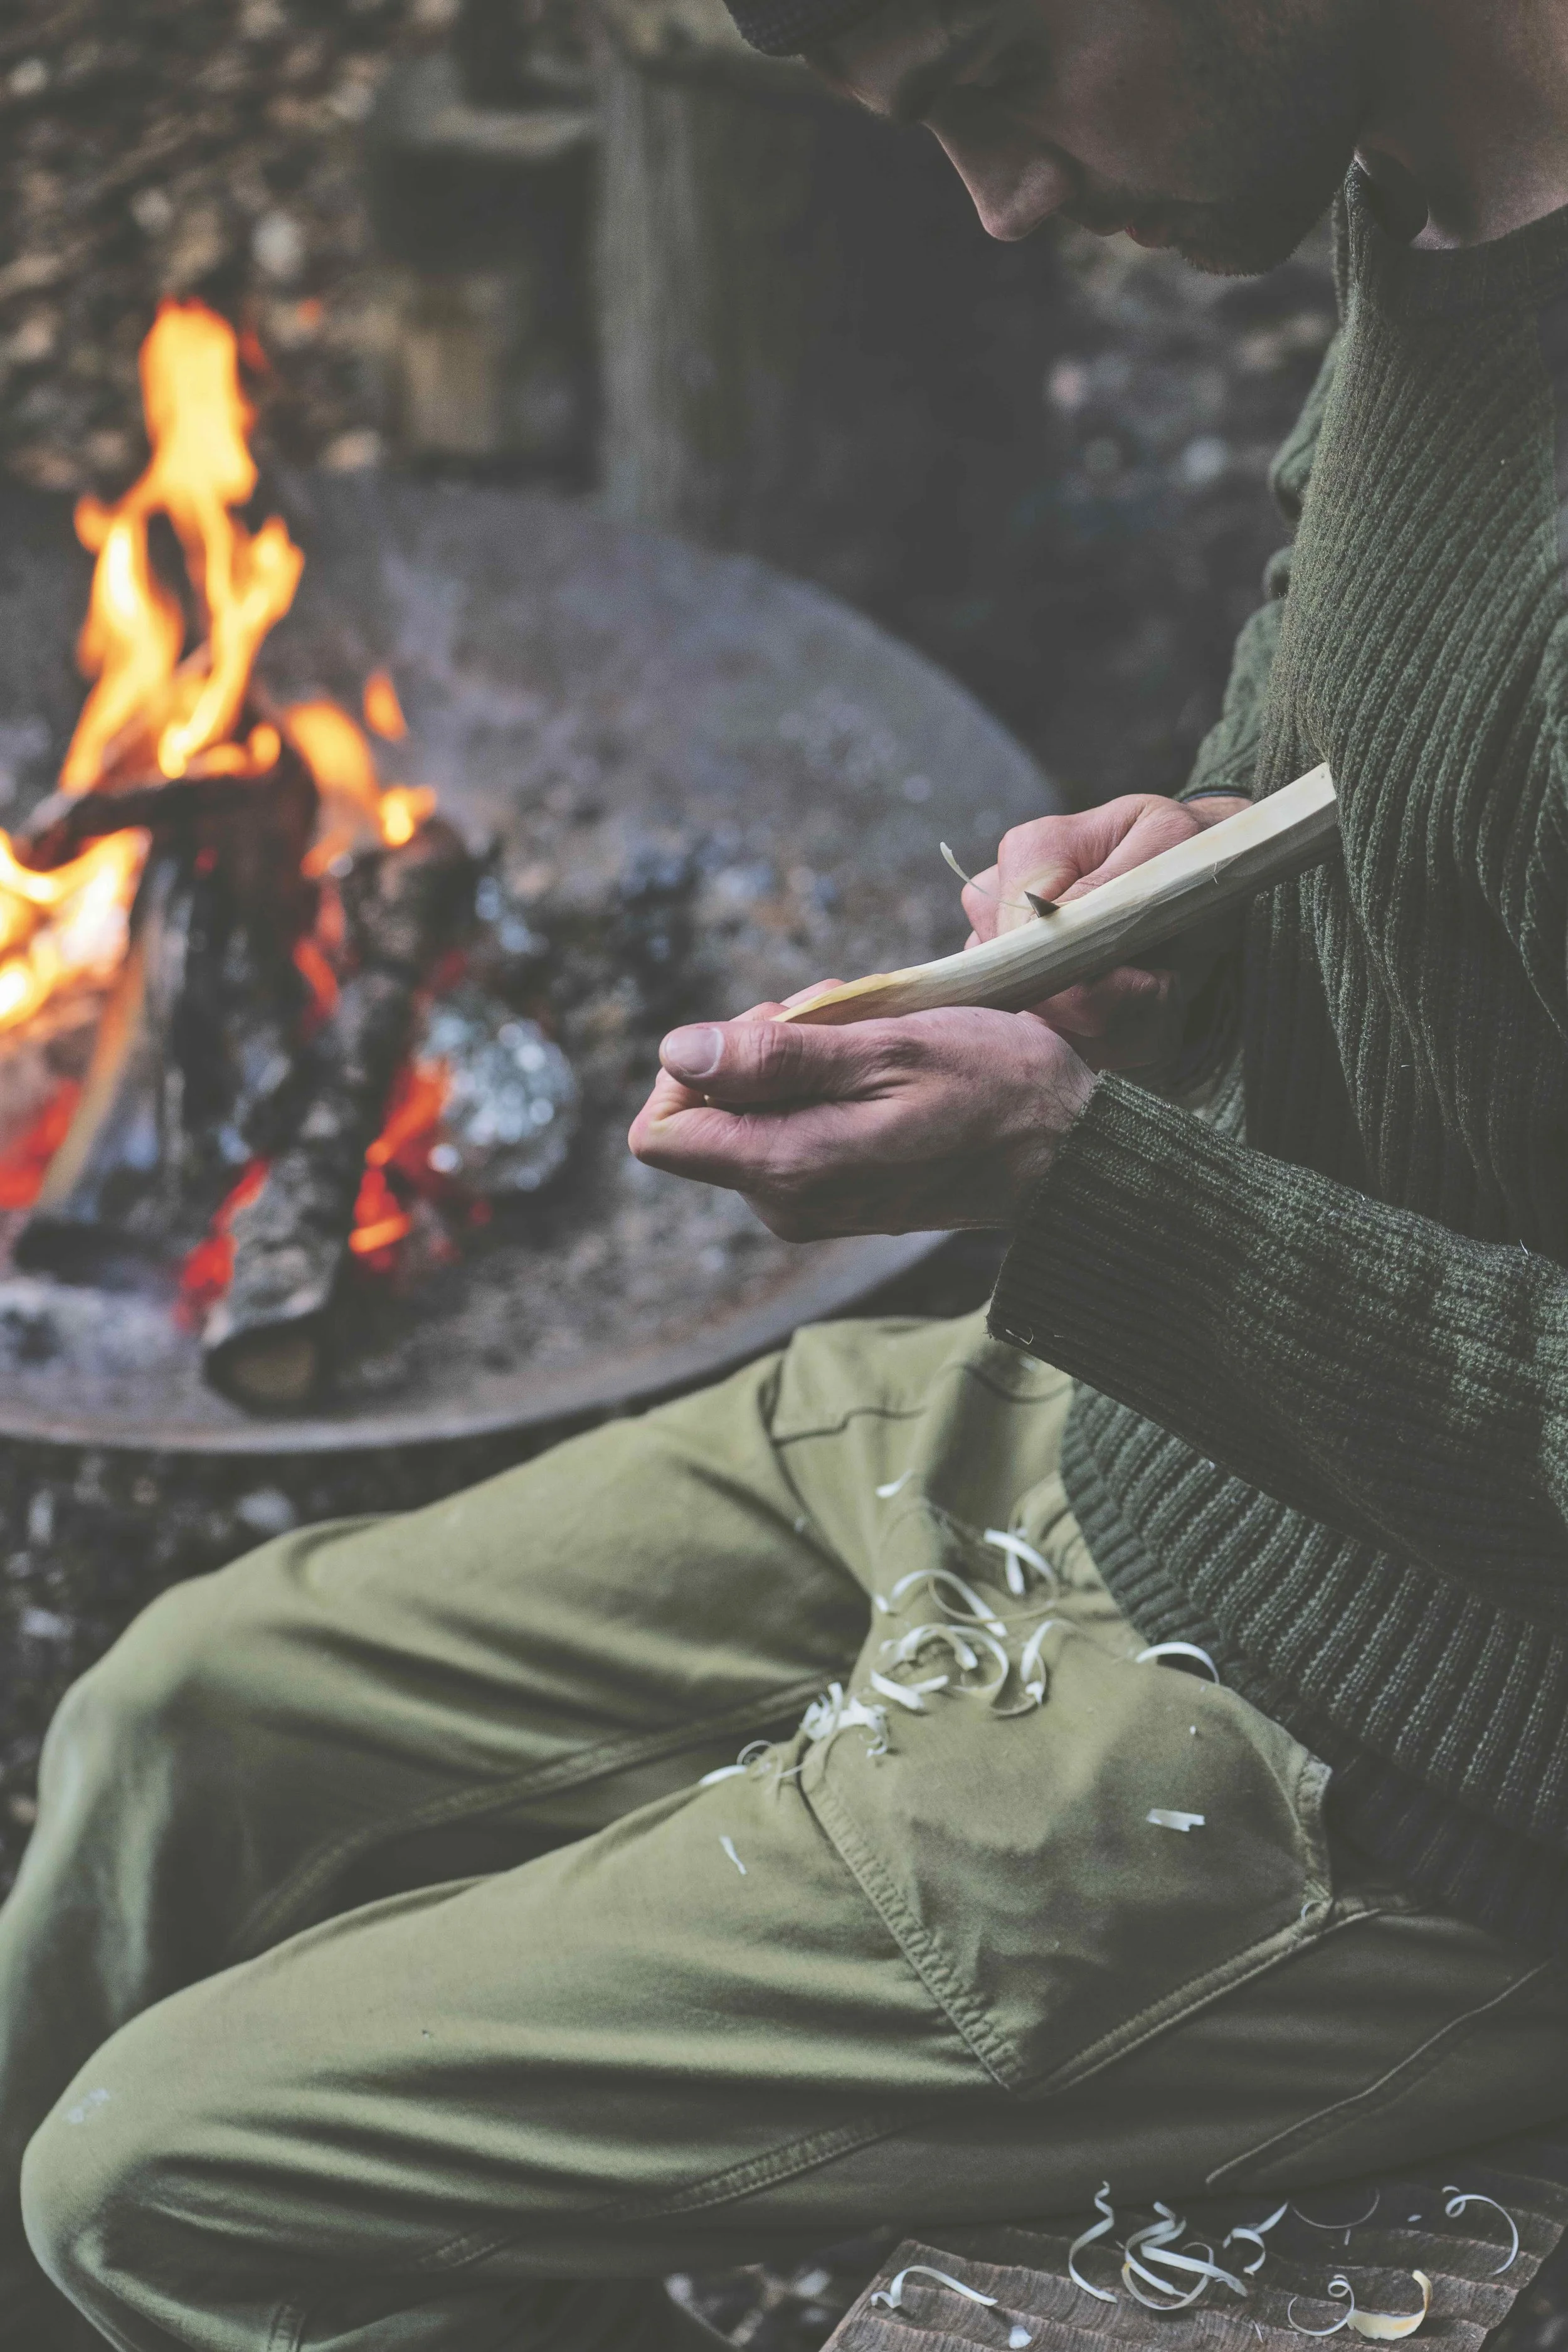
1 Begin by sitting comfortably with your back straight, hands open on your lap, palms facing upwards. Hold the knife in your dominant hand, with the blade ahead of the index finger, its cutting edge pointing away from the centre of your body. Hold the stick in your other palm, with the end you want to carve ahead of your hand. From here, close your hands, gripping the two objects from underneath. You should be able to see all of your fingernails. 

2 Cross the knife on top of the wood to form an ‘X’ shape. Bring the whole grip into your chest so that the knuckles of your little fingers are touching your ribs. Stick your arms out like wings, making a straight line from elbow to elbow. Use your chest as a lever for your hands, stemming from the articulation of your shoulders. 

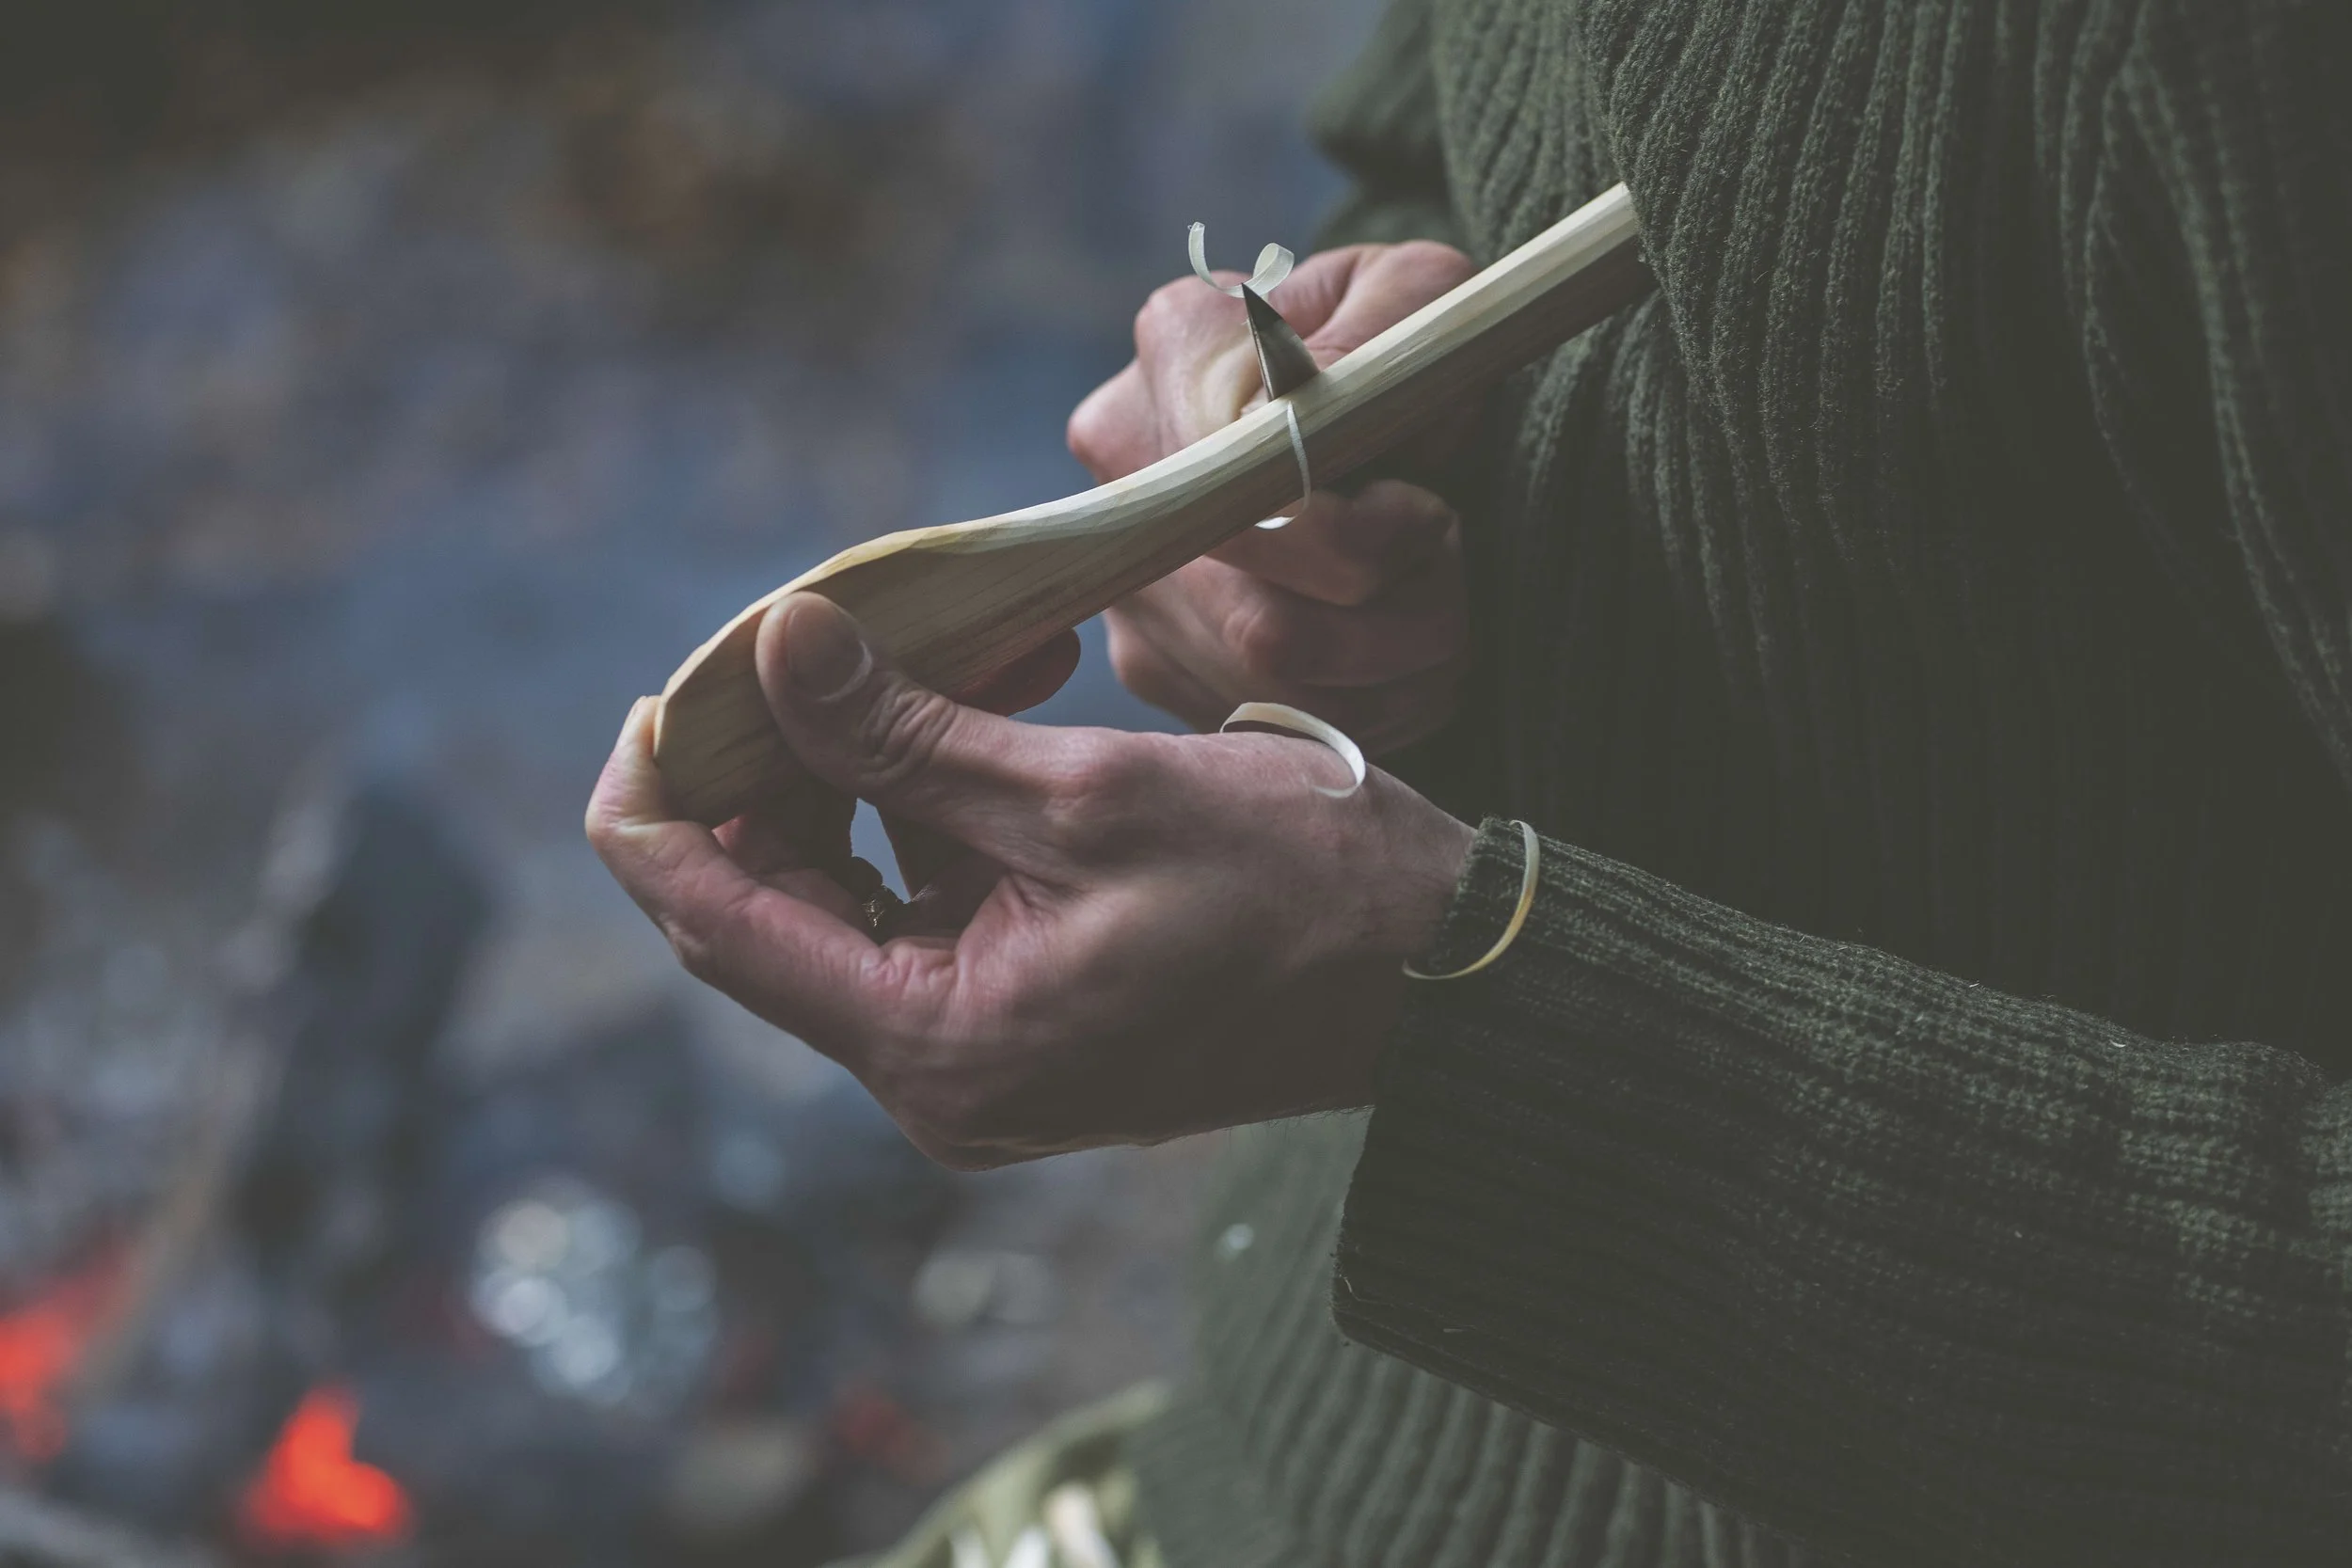
3 Bring your elbows forward slightly and dig the blade into the top of the wood until you feel resistance. Stiffen your wrists by squeezing the knife and the wood at the same time. Bring your elbows back and puff your chest out to lever a shaving away. 

4 Engage your elbows and shoulders to pivot against your chest. Rotate the piece in your hand to expose a new area to the knife. 
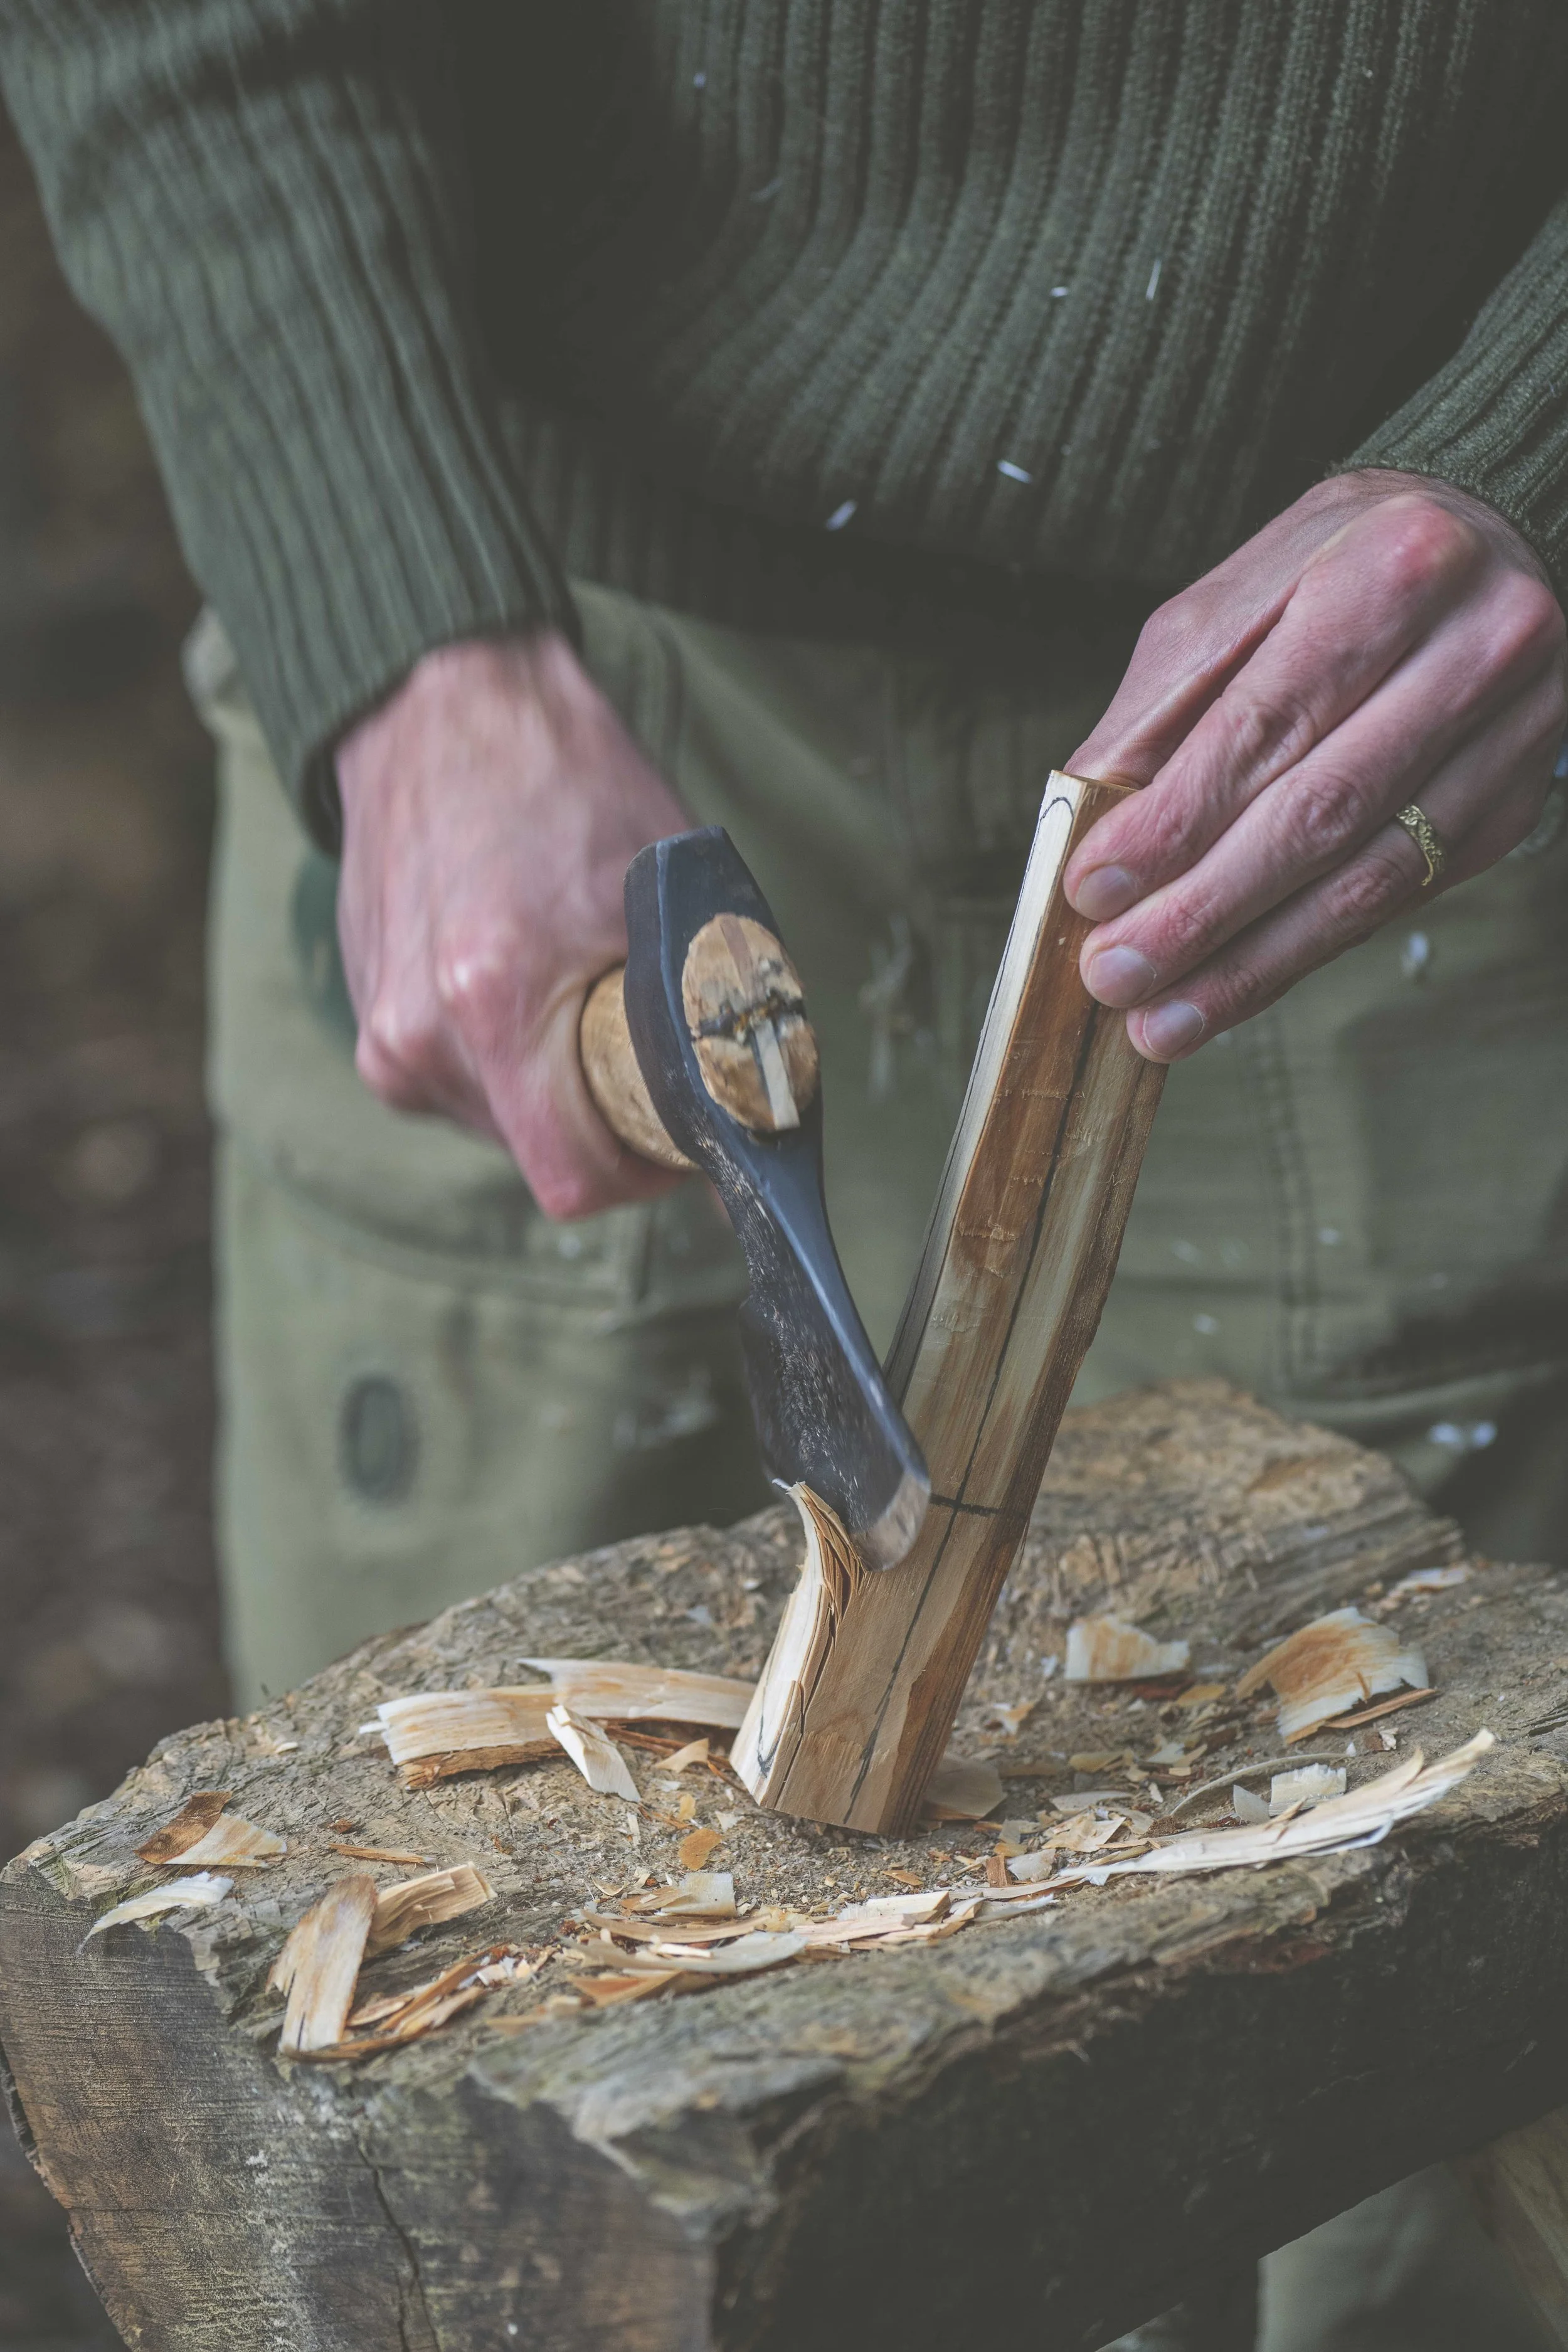
The end grain chop 

1 Hold the billet at its very end, fairly upright, tilting just slightly away from the axe. Cautiously raise the axe just a small amount beneath the level of your hand, then swing the axe firmly into the axe block, aiming to remove the very end corner of the billet. 

2 Once you have removed the initial chop, drop the hand holding the billet slowly, gradually arcing it further from the axe to increase the angle of the incision, and repeat the same axe chop. Like a second hand on a clock, continue to arc the billet away to round the end. The more chopping intervals you add to the arc, the more fluid the rounding will be. 

The power grip 

1 In a seated position, place your knees and feet together, closing the legs. You will be carving the wood off to one side of your lap. Hold the knife in your dominant hand. In your non-dominant hand, hold the wood at one end and tilt it down towards the ground, across your lap. It is important that the wood is below the thigh for safety. Hold the knife in a full grip, forming a clenched fist. The blade should be facing towards the ground when held to your side, to meet the wood. 

2 The power from this grip comes from the movement of the shoulder. To engage it fully, 

keep your dominant arm straight, with your elbow locked, squeezing the fist lightly so that the only moving part of the body is your shoulder. 

3 Introduce the bevel edge to the side of the wood and find the knife’s ‘bite point’ where it 

wants to begin cutting. Once you have found the bite, tilt the tip of the knife slightly up towards the sky to encourage a slice and, with a shrug, drop the shoulder to begin slowly driving the knife through the bark, revealing a shaving. 

4 Once your shaving has been made, retract your shoulder towards your ear, twisting the piece of wood in your non-dominant hand to expose a new, untouched section. Repeat. 

5 To remove material within the portion that you’re holding, simply spin the stick around, hold the other end, and repeat the grip steps. 

Thumb Push Grip 

Hold the stick in your non-dominant hand in a position where you can reach the spiked end to push the knife away with your thumb. Now, as if you are sharpening a pencil, use your thumb to guide the back of the knife onto the wood. For safety and comfort, push the knife at the end of the handle. For safety, the thumb push grip should always be directed pushing away from you, and not towards. 

Apple peeler grip 

Firmly hold the stick upright in your nondominant hand, exposing the blunt end. The focus here is on your dominant, knife hand moving the knife back and forth as if to peel an apple. This motion should free up your thumb, which can serve as an anchor, safely latching on to the side of the stick, providing purchase for the knife to carve through the wood. 

Pull grip 

1 In your non-dominant hand, bring the wood to a comfortable point at your sternum, pinching the end firmly with the fingertips for support. In your dominant hand, form a closed fist around the knife handle, blade pointing upwards with the cutting edge facing towards you, as if you're looking directly down the barrel of the knife. 

2 Transfer your thumb to the other side of the knife handle. Position the knife upright to the outward facing side, beneath your fingertips. Your nondominant hand should always be the farthest point away and the knife shouldn’t ever be positioned ahead of your fingers. Angle the knife so that the tip is directed away. 

3 Draw the knife back gradually, revealing a gentle spiral like a ribbon shaving. The knife’s pace is regulated, being naturally slowed by your body, with the tip always upright and angled away, all while the wood shields your non-dominant hand. Focus on applying a steady, consistent movement, drawing back from the elbow, brushing your forearm against your hip. Look down the knife’s edge. Focus on the angle with which the bevel is being introduced to the wood.  

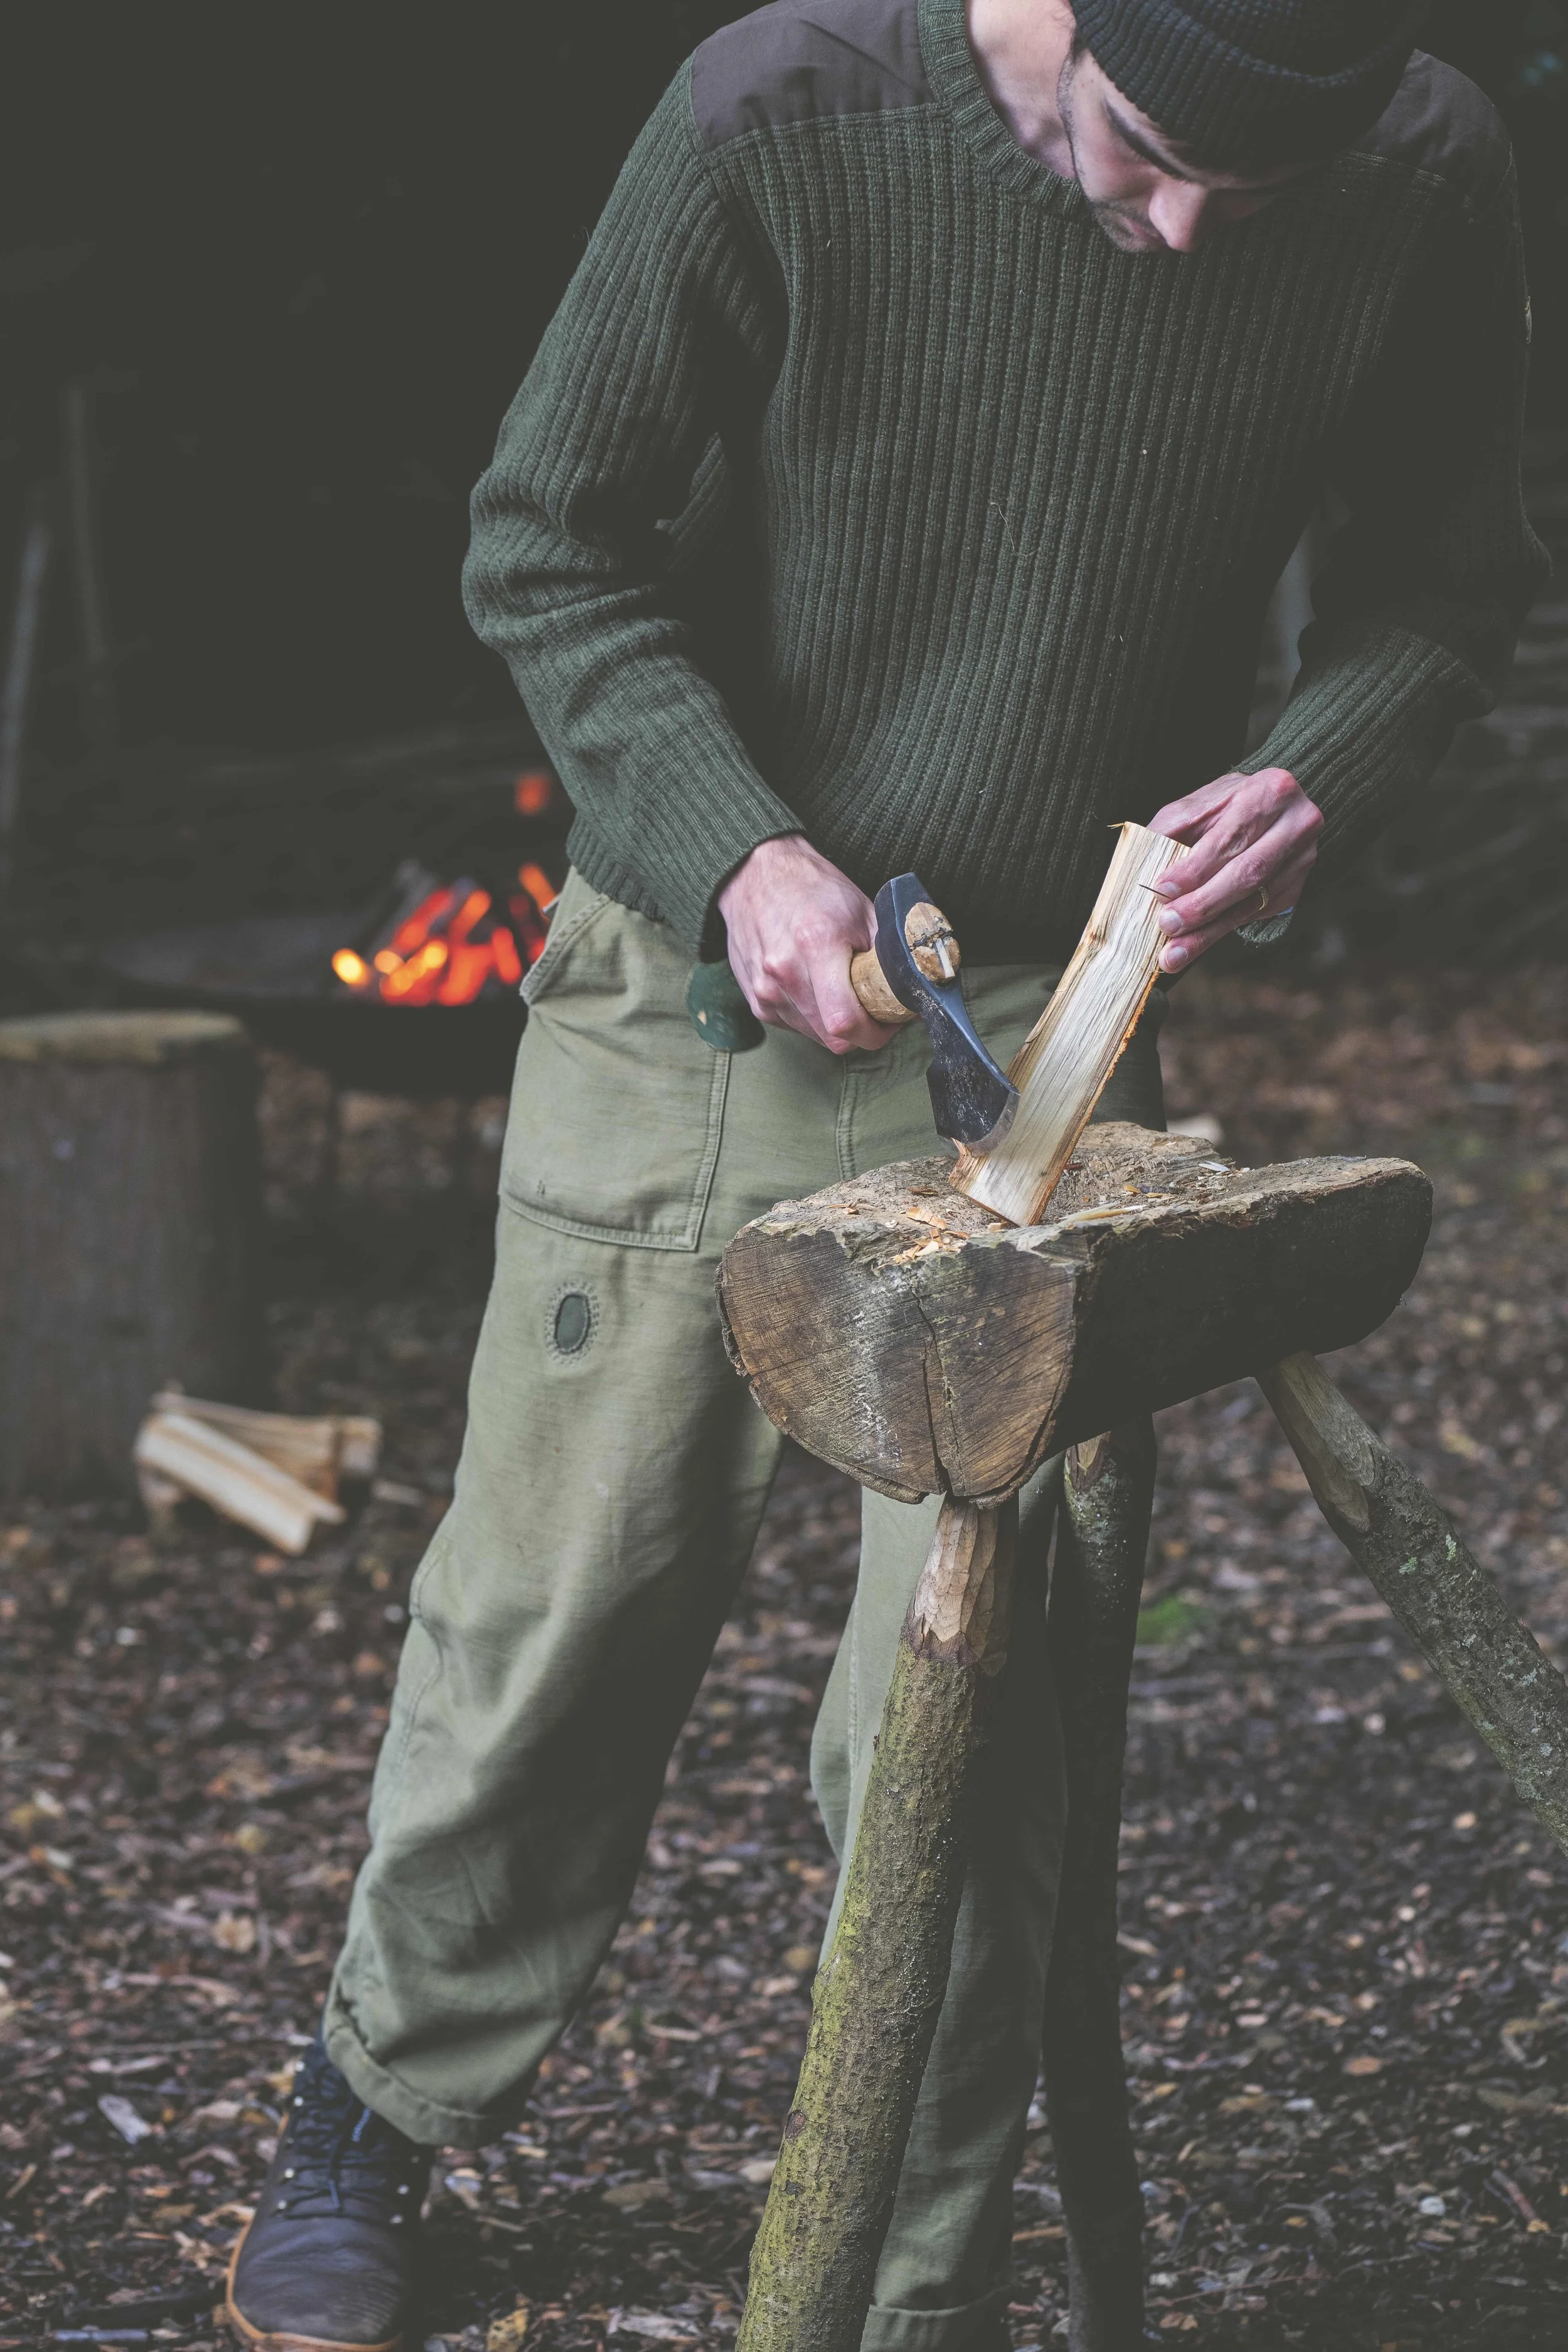
Taken from The Green-Wood Carver: Slow Woodcraft for Beginners by Samuel Alexander (Skittledog). Photography: Charles Emerson 

More from our blog…

Featured
Burnt orange cocktail.jpeg
Nov 22, 2025
Tipple | Burnt Orange Cocktail
Nov 22, 2025
Nov 22, 2025
IMG_5638.jpeg
Nov 18, 2025
How to | Solve an Agatha Christie Novel
Nov 18, 2025
Nov 18, 2025
Community Sauna Baths HW Site Credit_ Liz Seabrook 3(1).jpeg
Nov 15, 2025
The Rules | Sauna
Nov 15, 2025
Nov 15, 2025

More projects for your weekend…

Featured
Butter Spreader main.jpeg
Oct 25, 2025
Project | Whittle a Butter Spreader
Oct 25, 2025
Oct 25, 2025
Whittling Alamy (1).jpeg
Apr 26, 2025
Crafting | How to Whittle
Apr 26, 2025
Apr 26, 2025
LemongrassChickenRedCurryCoconutSauce.jpg
Aug 23, 2023
Recipe | Tandoor Lemon Chicken with Mango & Coriander Salad
Aug 23, 2023
Aug 23, 2023
In Making Tags issue 161, whittling, weekend project
Comment

Image: Adobe Stock

DJ: Frances Ambler

Playlist | Herbs & Spices

David Parker October 15, 2025

Full of tasty tunes, our latest playlist is inspired by our November 2025 issue, SPICE.

Have a listen on Spotify here.
You can browse all our playlists now.

In playlist Tags Playlist, herbs, spices, issue 161
Comment

Competition | Win Derwent Art Materials

Iona Bower October 15, 2025

Satisfying and mindful, drawing is a great pastime. Have a go at our step-by-step sketch and you could win prizes

With plenty of warm, cosy evenings ahead, it’s natural to want to turn to cherished hobbies to see you through the hibernation months, or perhaps you fancy trying your hand at something new. If you’ve been inspired to give drawing a go, or would simply like to improve your skills, then scroll down for a step-by-step guide on how to sketch a bumblebee, created by our friends at Derwent.

Remember, there’s no expectation to produce any artistic masterpieces, this is simply an exercise in putting coloured pencil – or whatever materials you have to hand – to paper and giving it a go.
You may be surprised with the outcome, or you might find that it’s the ideal way to fill a quiet afternoon with something mindful and creative.

If find you are inspired by sketching and would like to share your bumblebee drawing when it’s finished, then Derwent are offering incredible art prizes for their favourites.

Simply upload your artwork or send in your original drawing* and you could win Derwent art products, including the new Drawing Pencils 72 tin, featuring pencils with a beautifully soft core and nature inspired colours – including 48 brand new shades. Great for keeping you creative over winter.

For more info, visit: derwentart.com or follow on Insta: @derwentartofficial

What you could win

First Prize: Drawing pencils 72 tin; Inktense pencils 72 tin; Sketching & drawing A3 paper pad; Pencil wrap; Battery-operated eraser; Twin hole sharpener; Derwent push button waterbrush assorted set – worth £450

Second prize: Drawing pencils 72 tin; Graphic pencils 24 tin; Sketching & drawing A3 paper pad; Battery-operated eraser; Twin hole sharpener – worth £270

Third prize: Drawing pencils 72 tin; Sketching & drawing A4 paper pad, Twin hole sharpener – worth £205

How to draw a bumblebee

You will need:

Paper

Coloured pencils – we used Derwent Drawing pencils in shades Mist, Sunflower, Apricot, Sepia Red
and Ivory Black


1 Using the template above, lightly sketch the outline of your bumblebee. Using a gentle circular motion, lay down a light base layer of grey (Mist) on the wings and bottom.

2 Next, use yellow (Sunflower) to fill in the stripes and edges of the legs. Overlap the yellow onto the grey at the bottom, and where the yellow meets the edges of the body. Create a fluffy look by moving your pencil from the inside to the outside in flicking motions. Add a few strokes of yellow to the wings where they overlap the body to suggest transparency.

3 Add flicks of orange (Apricot) and red (Sepia Red) along the edges of the yellow where it’ll meet the black stripes to give the appearance of fur. You can overlap into where the black will be to give an extra fluffy look.

4 Cover the remaining body and legs in grey, using a circular motion to give an even layer. Then add flicks at the edges of the body for a fluffy look. This creates a stronger, deeper tone when you add the black and helps to lessen the white of the paper beneath.

5 Using black (Ivory Black), add flick motions on top of the grey for the fur. If you’re nervous, start off gently, then apply stronger pressure as you get into your stride. You could leave a few lighter areas showing the grey to give the impression of sunlight catching the fur.

6 With a freshly-sharpened black pencil, draw in the antennas and lightly outline the wings and add
in veins. You can retrace over these veins to give a darker tone. You could also try adding a few strokes along the edges of the veins to add a little shading.

7 Share your sketch (see How to Enter, below, and you could win one of the art prizes above.

How to enter

For your chance to win Derwent art materials, upload a copy of your drawing by clicking the button below by the closing date of 7 January 2026. Alternatively, you can post physical artwork* to:
FAO Derwent, Millennium House, 65 Walton Street, Aylesbury, Buckinghamshire HP21 7QG.

Upload your artwork

Terms & conditions

The competition closes at 11.59pm on 7 January 2026. One winner and two runners up will be selected from all entries received and notified soon after. *All postal entries will become the property
of Derwent upon receipt and will not be returned. Subject to availability. The winners cannot transfer the prizes or swap them for cash. Details of our full terms and conditions are on p125 and online at icebergpress.co.uk/comprules. Competition Sponsor is ACCO UK Limited t/a Derwent.

In Competition Tags issue 161, competition
2 Comments
Featured
  Buy,   download  or  subscribe   See the sample of our latest issue  here   Order  our new Celebrations Anthology   Order a copy of  Flourish 4 , our new wellbeing bookazine   Listen to  our podcast  – Small Ways to Live Well  Wear our  Slapda
Aug 29, 2025
Aug 29, 2025

Buy, download or subscribe

See the sample of our latest issue here

Order our new Celebrations Anthology

Order a copy of Flourish 4, our new wellbeing bookazine 

Listen to our podcast – Small Ways to Live Well

Wear our Slapdash Patches and show your support for ‘good enough’

Aug 29, 2025
Join our Newsletter
Name
Email *

We respect your privacy and won't share your data.

email marketing by activecampaign
facebook-unauth pinterest spotify instagram
  • Subscriber Login
  • Stockists
  • Advertise
  • Contact

The Simple Things is published by Iceberg Press

The Simple Things

Taking time to live well

We celebrate slowing down, enjoying what you have, making the most of where you live, enjoying the company of of friends and family, and feeding them well. We like to grow some of our own vegetables, visit local markets, rummage for vintage finds, and decorate our home with the plunder. We love being outdoors and enjoy the satisfaction that comes with a job well done.

facebook-unauth pinterest spotify instagram