The Simple Things

Taking time to live well
  • Home
  • Subscribe
  • SHOP
  • Newsletter
  • About
  • Work with us
  • Home
  • Subscribe
  • SHOP
  • Newsletter
  • About
  • Work with us

Blog

Taking Time to Live Well

  • All
  • Chalkboard
  • Christmas
  • Competition
  • could do
  • Eating
  • Escape
  • Escaping
  • Fresh
  • Fun
  • gardening
  • Gathered
  • Gathering
  • Growing
  • Haikus
  • Interview
  • Living
  • Looking back
  • Magazine
  • magical creatures
  • Making
  • Miscellany
  • My Neighbourhood
  • Nature
  • Nest
  • Nesting
  • outing
  • playlist
  • Reader event
  • Reader offer
  • Shop
  • Sponsored post
  • Sunday Best
  • Think
  • Uncategorized
  • Wellbeing
  • Wisdom

Make | Dip Dye Candles

Iona Bower October 27, 2024

Illustration: Christina Carpenter

This simple project will bring light and colour to dark days now the evenings are longer

You will need: two empty food tins; plain taper candles; old crayons (or new ones, paper coverings removed and broken up) in two colours; old candle stumps or wax pellets from a craft shop.

1. Put the candle stubs or wax pellets and some broken-up crayons in each of the tins; one colour per tin. Blue candles with yellow and hot pink dips look great, but do as you please. The higher the ratio of crayons to wax, the deeper the colour.

2. Stand the tins in a pan of water and bring to the boil, stirring. Once melted together, take the tins out and stand on a heatproof surface.

3. Dip one end of your candle into one of the colours and the other end into the other colour. Shake off any excess and hold until the wax begins to harden. Place the dipped candles on greaseproof paper until completely hard.

The kitchen table project above is taken from our November Almanac pages by Iona Bower, which each month feature seasonal things to note and notice, plan and do.

Buy this month's The Simple Things - buy, download or subscribe

More candles for dark days…

Featured
Dip Dye Candles.jpg
Oct 27, 2024
Make | Dip Dye Candles
Oct 27, 2024
Oct 27, 2024
Kay Prestney candles.jpg
Nov 18, 2023
Project | Paint Your Own Candles
Nov 18, 2023
Nov 18, 2023
Back cover.jpg
Sep 7, 2023
September | Things to Appreciate
Sep 7, 2023
Sep 7, 2023

More from our blog…

Featured
Water Boatman.jpg
May 24, 2025
Nature | Pond-Dipping for Grown-ups
May 24, 2025
May 24, 2025
RS2832_iStock-1278591330.jpg
May 23, 2025
Sponsored Post | Get your family active with Youth Sport Trust
May 23, 2025
May 23, 2025
Screenshot 2025-05-21 at 08.52.06.png
May 21, 2025
Playlist | Great Heights
May 21, 2025
May 21, 2025
In Making Tags issue 159, candles, craft
Comment

Make | A Macrame Dog Lead

Iona Bower September 18, 2024

Give your pup some extra flair while keeping them safe and secure on walks. If you’re looking for a project where you can comfortably sit while working, this is a great one to tackle.  


You will need: 

14.6m of 5mm braided cotton cord in off-white/natural color 

13.4m of 5mm braided cotton cord in color of your choice  

Swivel snap hook (approximately 70mm long) – we got ours from trimmingshop.co.uk 

Clipboard 

Measuring tape 

Scissors 


Cut List: 

1 x 13.4m long, of 5mm braided cotton cord in Mustard Yellow (or color of your choice) 

1 x 13.4m long, of 5mm braided cotton cord in off-white/natural color 

1 x 122cm long, of 5mm braided cotton cord in off-white/natural color 


1 Attach the snap hook to a clip board. Take the 13.4m piece of colored cord and use the Bundling Cord technique to bundle up one end until there is about 3m of cord remaining. Measure 2.4m from the remaining end, and fold the cord in half at that point. Create a Reverse Lark’s Head Knot around your snap hook, ensuring that the bundled end is on the outside of your snap hook and the 2.4m end is on the inside. 

2 Repeat step 1 with the 13.4m length of off-white cord. Make sure that when attaching to the snap hook, the shorter ends of both pieces of cord are in the center. These two cords will be our filler cords for the entire project. 

3 Take the left cord and create a loose “4” shape over the second cord. Wrap it behind that cord, and pull the bundle through the loop created. Tighten this knot so it sits right below the Reverse Lark’s Head Knots created in steps 1 and 2. 

4 Repeat by creating a loose “4” shape again with that same cord, but this time cross it over both center cords, wrap it behind these two center cords and pull the bundle through the loop created. Tighten to the knot above. 

5 Repeat steps 3 and 4, but this time create a loose backward “4” shape with your farthest right cord. Take the right cord and cross it over the cord closest to it. Wrap it behind that cord, pull the bundle through the loop created and tighten. Do the same with both center cords just as you did on the left. 

6 Continue this pattern by alternating the left cord and the right cord as your working cords all the way down for 1.5m. Adjust the lead on your clipboard as necessary. Pull cord from each bundle as needed so you have a comfortable amount of cord to work with. 

7 Once this first section of knots measures at 1.5m in length, it is time to create the handle of your leash. Measure 5cm down from your last knot and create a Square Knot using the same working cords. From there, continue making Square Knots until this section of Square Knots measures 38cm in length. 

8 Remove the leash from the clipboard and fold this section of Square Knots in half. You will see the handle start to form. 

9 Take the two filler cords and feed them through the center of the 5cm opening you created. 

10 Using your working cords, create Square Knots around all six cords until you hit the section of knots below. 

11 Take the 122cm three-strand off-white piece of cord and tie a Gathering Knot around this most recent section of Square Knots. 

12 Make sure this knot is nice and tight! Once you feel it is secure, cut off all the ends as close to the Gathering Knot as possible. You can also use the tip of your scissors to help push any excess ends into your Gathering Knot for a cleaner look. 

 You can find more instructions on how to create all these knots in our October issue, where you can also find instructions on how to make a macrame plant pot holder.

Taken from The Complete Beginner’s Guide To Macramé by Alisha Ing (Page Street Publishing)

More from our blog…

Featured
Water Boatman.jpg
May 24, 2025
Nature | Pond-Dipping for Grown-ups
May 24, 2025
May 24, 2025
RS2832_iStock-1278591330.jpg
May 23, 2025
Sponsored Post | Get your family active with Youth Sport Trust
May 23, 2025
May 23, 2025
Screenshot 2025-05-21 at 08.52.06.png
May 21, 2025
Playlist | Great Heights
May 21, 2025
May 21, 2025

More things to make…

Featured
Dip Dye Candles.jpg
Oct 27, 2024
Make | Dip Dye Candles
Oct 27, 2024
Oct 27, 2024
LaylasLeash.jpg
Sep 18, 2024
Make | A Macrame Dog Lead
Sep 18, 2024
Sep 18, 2024
EGGShell-tealights-the-simple-things.png
Apr 10, 2023
Eggshell tea lights
Apr 10, 2023
Apr 10, 2023
In Making Tags macrame, craft
Comment
Illustration: Kavel Rafferty

Illustration: Kavel Rafferty

Eggshell tea lights

Lottie Storey April 10, 2023

A smashing make to light up a long weekend - and you can use the eggs themselves for a leisurely breakfast

YOU WILL NEED: 
Empty eggshells
Candle wax (or leftover bits from old candles)
Old saucepan
Egg carton
Wicks (try hobbycraft.co.uk)

1 Clean the eggshells in soapy water and let dry.

2 Heat the wax in an old pan over a low heat until it melts. Take off the heat.

3 With the eggshells held in their carton, carefully pour the wax into the shells.

4 As soon as the wax starts to become solid, stick a piece of wick of about 10cm length into the centre of each eggshell, so that it reaches the bottom.

5 Leave to harden, occasionally wiggling the wick into the middle. The wax should take a couple of hours to harden completely.

This was originally published in the March 2018 issue of The Simple Things. Get hold of your copy of this month's issue - buy, download or subscribe


More eggspiration…

Featured
TST154_KitchTherapy_Dyed Eggs - Simple Things - Kitchen Therapy April - Kym Grimshaw -5.jpeg
Apr 17, 2025
Make | Naturally Dyed Eggs
Apr 17, 2025
Apr 17, 2025
Alamy Full English.jpg
Feb 24, 2024
Breakfast Rules | How To Do a Full English
Feb 24, 2024
Feb 24, 2024
Mar 14, 2021
Recipe: Goose egg lemon curd
Mar 14, 2021
Mar 14, 2021

From the April issue…

Featured
Nature Table.jpg
Apr 22, 2023
April | Nature Table
Apr 22, 2023
Apr 22, 2023
Hedgehog pic.jpg
Apr 18, 2023
Nature | Surprising Things About Hedgehogs
Apr 18, 2023
Apr 18, 2023
Radish Slammers.jpg
Apr 15, 2023
Idea | Radish Slammers
Apr 15, 2023
Apr 15, 2023
In Miscellany Tags march, issue 69, miscellany, easter, egg cup, craft, making
Comment

Make | A Macrame Bottle Holder

Iona Bower March 16, 2022

Knot your way to a knotty, natty carrier for your water bottle, leaving you hands free… perhaps to do some more macrame?

All you need to make this cross-body bottle carrier is to master a few simple knots, and you’re away. Everything you need to know, including the knot techniques are in our instructions and all the equipment you need is the rope, some tape and a little patience. Put aside an afternoon on a long weekend to create your bottle holder, or maybe make it your project for April and do a little every day.

If you’re not too TIED UP (sorry) this month, you might also like to make the macrame bag that’s featured in our April issue. Turn to page 106 to find the instructions.

Download the instructions for the macrame water bottle here.


More weekend projects…

Featured
LemongrassChickenRedCurryCoconutSauce.jpg
Aug 23, 2023
Recipe | Tandoor Lemon Chicken with Mango & Coriander Salad
Aug 23, 2023
Aug 23, 2023
Folk enamel tumbler.jpg
Aug 5, 2023
Make | Folk art enamelware
Aug 5, 2023
Aug 5, 2023
Lavender eye pillow.jpg
Jul 22, 2023
Make | A Soothing Lavender Eye Pillow
Jul 22, 2023
Jul 22, 2023

More from our blog…

Featured
Water Boatman.jpg
May 24, 2025
Nature | Pond-Dipping for Grown-ups
May 24, 2025
May 24, 2025
RS2832_iStock-1278591330.jpg
May 23, 2025
Sponsored Post | Get your family active with Youth Sport Trust
May 23, 2025
May 23, 2025
Screenshot 2025-05-21 at 08.52.06.png
May 21, 2025
Playlist | Great Heights
May 21, 2025
May 21, 2025
In Making Tags issue 118, macrame, weekend project, make, makes, craft
Comment
cactus embroidery.jpg

Make | Embroidery Hoop Templates

Iona Bower May 20, 2021
notebook embroidery.jpg

These sweet embroidery projects from Love Embroidery magazine are featured in our June issue. You’ll find all the instructions beginning on page 102 and you can buy the issue from our online store. But first you will need the templates. Download them below and get stitching.
Project: Jen Smith and Miriam Polak

Desert Dunes hoop

Notebook cover

Buy this month's The Simple Things - buy, download or subscribe
For more patterns, ideas and inspiration pick up a copy of Love Embroidery

More makes and things to do…

Featured
Dip Dye Candles.jpg
Oct 27, 2024
Make | Dip Dye Candles
Oct 27, 2024
Oct 27, 2024
LaylasLeash.jpg
Sep 18, 2024
Make | A Macrame Dog Lead
Sep 18, 2024
Sep 18, 2024
EGGShell-tealights-the-simple-things.png
Apr 10, 2023
Eggshell tea lights
Apr 10, 2023
Apr 10, 2023

More from our June issue…

Featured
Water Boatman.jpg
May 24, 2025
Nature | Pond-Dipping for Grown-ups
May 24, 2025
May 24, 2025
RS2832_iStock-1278591330.jpg
May 23, 2025
Sponsored Post | Get your family active with Youth Sport Trust
May 23, 2025
May 23, 2025
Screenshot 2025-05-21 at 08.52.06.png
May 21, 2025
Playlist | Great Heights
May 21, 2025
May 21, 2025
In Making Tags issue 108, embroidery, craft, crafternoon
1 Comment
Photography: Joe McIntyre

Photography: Joe McIntyre

Make | Candle Holder

Iona Bower January 9, 2021

Light your way to bed with this easy-to-make, no-kiln-required clay candle holder

This elegant candle holder is really easy to make with just a couple of inexpensive craft purchases. It’s one of three candle holder makes created by our talented Simple Things duo, Karen Dunn and Joe McIntyre. You can find the instructions for the other two in our January issue to add a bit of glow to dark January evenings.

You will need:

Air-drying clay
Rolling pin
Craft knife
Ruler, paper, pencil and scissors
Water
White acrylic paint
Clear matte varnish, optional (we used Mod Podge)

How to make:

1 Roll out your air-drying clay so it’s around 5mm thick. Next, draw a circle on your paper (9cm diameter – you can use a mug or tin to draw around if you don’t have a compass). Then draw a 12 x 1.5cm and a 30 x 1.5cm strip and cut out.Place your templates on top of your clay and cut around them with your craft knife. Cut two of the 12cm strips. If your clay is quite wet, leave it to dry out for around 30 mins.

2 Next, score the outside edge of your circle of clay with a craft knife and add a fingertip of water. Wrap the longest of your clay strips around the outside edge and press firmly against the sides. Next, score across the join and smooth together with your fingertips

3 Take one of your smaller strips and in the middle of the clay base create a smaller circle with the strip (make sure this is bigger than the base of your candle as the clay will shrink as it dries). Once you have made a ring with the strip of clay, score the bottom, add a fingertip of water and press the edge of the strip down gently to attach in the middle of the base.

4 Take your final strip of clay and lay it across the base of the circle – from the central ring to the inside edge of the outer strip of clay. Loop the strip over your finger and, using the same method as before, secure it to the outside edge. Allow the clay to dry for around 24-48 hours.

5 Once dry, paint your holder with acrylic paint. Then, when completely dry, cover with a layer of matte varnish for a protective finish.

Buy this month's The Simple Things - buy, download or subscribe

More from our January issue…

Featured
Back cover.JPG
Jan 27, 2021
January | a final thought
Jan 27, 2021
Jan 27, 2021
Seaweed alamy.jpg
Jan 16, 2021
Nature | Seaweed Weather Forecasting
Jan 16, 2021
Jan 16, 2021
Tinker and Fix_June20_114.jpg
Jan 12, 2021
Organise | an excellent toolbox
Jan 12, 2021
Jan 12, 2021

More things to make on winter afternoons…

Featured
Lavender eye pillow.jpg
Jul 22, 2023
Make | A Soothing Lavender Eye Pillow
Jul 22, 2023
Jul 22, 2023
Modern Crochet Style PAGES2.PRESS 60.jpg
Apr 19, 2023
Weekend Project | Crocheted fruit placemats
Apr 19, 2023
Apr 19, 2023
bottle6.jpg
Mar 16, 2022
Make | A Macrame Bottle Holder
Mar 16, 2022
Mar 16, 2022


In Making Tags issue 103, Issue 103, candles, make, makes, craft, crafts, crafternoon
Comment
Knitting .jpg

Astounding facts | knitting

Iona Bower October 27, 2019

Tales of woolly wonder that will provide you with a good yarn

We’ve been celebrating all things wool-related in our ‘Cosy’ November issue. It’s got blankets for snuggling (including some with dogs on), a short story about knitting and a retrospective on how wool has shaped British history, from Viking socks to knitted bikinis. And we thought we’d share with you some of the wonderful woolly facts we discovered along the way. 

  1. The record for the longest knitted scarf stands at 4,565.46 metres. That’s nearly three miles. It was knitted by Helge Johansen of Oslo, Norway, and took him 30 years. We’re concerned about how he kept warm for those three decades before the scarf was finished. 

  2. The largest number of people to be knitting together in one room is 3,083 and the record was achieved by the Women’s Institute (naturally) in The Royal Albert Hall in 2012.

  3. The fastest hand-knitted ‘sheep-to-jumper’ item was made in 4 hours 45 minutes and 53 seconds by a team in Swalmen, Netherlands in 2017. We don’t know how this was done and we don’t wish to, as we can’t bear to spoil the mental image of someone clicking their needles, taking wool directly off an ever-decreasing sheep. 

  4. The world’s largest knitting needles were made by an art student in Wiltshire. They measured 4.42m long and had a diameter of 9.01cm. To claim the world record, the needles had to be capable of knitting ten stitches and ten rows of yarn.

  5. Slow TV in Norway once broadcast a knitting marathon lasting 13 hours, which was watched by 1.3 million viewers.

Get hold of your copy of this month's The Simple Things - buy, download or subscribe

More knitting inspiration…

Featured
Woolly Mahoosive.jpg
Dec 15, 2022
Learn something new | Arm Knitting
Dec 15, 2022
Dec 15, 2022
weather scarf.jpeg
Feb 15, 2022
How to | Make a Thread Journal
Feb 15, 2022
Feb 15, 2022
Oct 25, 2020
Yarn Bomber's Toolkit
Oct 25, 2020
Oct 25, 2020

More from our November issue…

Featured
bookshop.jpg
Jun 23, 2020
Four fictional bookshops
Jun 23, 2020
Jun 23, 2020
Inclusive Trade.JPG
May 11, 2020
Competition | Win £100 to shop ethically
May 11, 2020
May 11, 2020
October back cover.JPG
Nov 19, 2019
November | a final thought
Nov 19, 2019
Nov 19, 2019
In Making Tags November, knitting, wool, craft
Comment
Illustration: Kavel Rafferty

Illustration: Kavel Rafferty

How to | build a dry stone wall

Iona Bower September 1, 2019

Yearning to impress with a traditional craft? Hold our tea. We’ve got just the thing.

Obviously there’s a tiny bit more to the ancient craft of dry stone walling, or we’d all be building them, but here’s a simple explanation of the basics. Maybe keep your first attempts low and slow. The Simple Things accepts no responsibility for broken toes caused by collapsing granite.

• Source stones from a quarry, or ask at a gravel or sand pit. You want a mix of sizes.
• Dig a trench. Put down your first layer, using the largest stones.
• Use more biggies to make your ‘wall head’ ends. You’re actually building two walls in a standing up ‘A’ shape, wider at the bottom than the top, linked by ‘through’ stones.
• Carefully build up layers on both sides of the base, going from largest stones to smallest upwards. Place stones lengthways, keeping the layer as even in height as possible. Each stone should overlap a gap in the layer below (like in a brick wall) Add smaller rocks to fill in.
• Roughly every metre, add long ‘through’ stones to link both sides of the wall.
• Finish up with large, flat stones placed upright as ‘copping’ or ‘capping’ stones.

If that has whetted your appetite and you’d like to learn more, visit The Dry Stone Walling Association’s website where you can sign up to residential courses in dry stone walling.

You’ll find more miscellaneous fun and facts in our Miscellany pages of the September issue, in shops now.

Get hold of your copy of this month's The Simple Things - buy, download or subscribe

More ‘how-to’s to do

Featured
knitting.jpg
Jan 9, 2019
How to: get started with knitting
Jan 9, 2019
Jan 9, 2019
Jan 13, 2017
How to make egg box firelighters
Jan 13, 2017
Jan 13, 2017
Craft yourself a piglet tea towel
May 26, 2012
Craft yourself a piglet tea towel
May 26, 2012
May 26, 2012

More from our September issue…

Featured
back cover.JPG
Sep 24, 2019
September | a final thought
Sep 24, 2019
Sep 24, 2019
Coastal Path.jpg
Sep 21, 2019
Walking on the edge of land
Sep 21, 2019
Sep 21, 2019
Tiny Books Rachel Hazell.jpg
Sep 18, 2019
In praise of | teeny, tiny books
Sep 18, 2019
Sep 18, 2019
In Miscellany Tags issue 87, September, How to, countryside, craft
Comment
Photography: Heather Birnie

Photography: Heather Birnie

How to: get started with knitting

Iona Bower January 9, 2019

If you’ve never picked up the needles, here’s how to click-clack your way to knitting knowhow

Knitting is one of those skills that looks terrifying until you’ve tried it. We’ve put together a brief guide on how to get started. If you’re inspired to try more, buy our January issue (in shops now) in which knitting guru Helen Hickman of Nellie and Eve has devised two chunky wool projects to knit on big needles (including the chunky cushion, pictured), ideal for knitting novices or stitching queens who fancy a quick and simple project.

How to cast on

1 Create a slip knot on your left needle and insert the point of the right needle through the knot from front to back (so needles are crossed).

2 Take the end of the yarn and wrap it clockwise over the top of the right needle (behind the left). Keeping the end of the wrapped yarn in your right hand, pull the right needle towards you, bringing the needle tip in front of and above the left needle: this creates a loop on the right needle.

3 Move the right needle to the tip of the left one and transfer the new loop across to the left needle (as you do this, the needle tips should be pointing at each other, not parallel).

4 Adjust the loop size by pulling the end of the yarn. You should now have two loops on the left needle.

5 Inserting your right needle into the new loop, repeat the process until you have the number of stitches required.

Knit stitch

Garter stitch is when all rows are in knit stitch, rather than alternated with rows of purl. The needle with the cast- on stitches should be in your left hand and the yarn at the back of the work.

1 Insert the right needle through the first stitch on the left needle, from front to back (so the two needles are crossed).

2 Take the end of the yarn and wrap it clockwise over the top of the right needle (behind the left needle). Keeping the end of the wrapped yarn in your right hand, pull the right needle towards you, bringing the needle tip in front of and above the left needle: this creates a loop on the right needle.

3 Release the old stitch off the left needle.

4 Repeat steps 1 to 3, until all stitches are on the right needle.

5 Next, swap the needles around and repeat steps above.

This will all make sense if you visit nellieandeve.co.uk/events/videos

Get hold of your copy of this month's The Simple Things - buy, download or subscribe

More simple makes for craft beginners…

Featured
Lavender eye pillow.jpg
Jul 22, 2023
Make | A Soothing Lavender Eye Pillow
Jul 22, 2023
Jul 22, 2023
Modern Crochet Style PAGES2.PRESS 60.jpg
Apr 19, 2023
Weekend Project | Crocheted fruit placemats
Apr 19, 2023
Apr 19, 2023
bottle6.jpg
Mar 16, 2022
Make | A Macrame Bottle Holder
Mar 16, 2022
Mar 16, 2022

More from our January issue…

Featured
SIM79.CHALKBOARD_ST Back Jan19_01.JPG
Jan 29, 2019
January: a final thought
Jan 29, 2019
Jan 29, 2019
Up Helly Aa.jpg
Jan 28, 2019
How to: Party like a Viking
Jan 28, 2019
Jan 28, 2019
cabbage.jpg
Jan 26, 2019
Cabbage: a prince among brassica
Jan 26, 2019
Jan 26, 2019
In Making Tags issue 79, January, knitting, knits, makes, craft, how to make
Comment
Go Wild Kites B&W.png

Build and fly a kite

Lottie Storey March 18, 2018

For first-time kite makers, the diamond is a classic design and the simplest to build

1 Find a thick plastic bag at least 50cm wide and 1 metre tall. Lay it out, open end at the bottom. Starting just below the bag’s top-left corner, mark three dots for the top, bottom, and right- hand corners of your kite.
2 Connect the dots using a ruler and pen. Cut along these two lines on the bag; set aside off- cuts. Open bag out to reveal your sail’s outline. 
3 Place a length of 5mm diameter hardwood dowel down the sail’s centre line, lining it up with the top sail corner. Saw off at bottom and fix to the bag with installation tape. Do the same for the other dowel, horizontally.
4 Pierce a hole where the dowels cross. Thread with flying line (ideally nylon) through this hole and secure around the cross of the dowels.
5 Using plastic off-cuts, make the tail, roughly 5cm wide and five times as long as the kite. Tie one end around the base of the vertical spar. 

Adapted from The Wild Book: Outdoor Activities to Unleash Your Inner Child by David Scarfe (Trapeze)

  Buy ,  download  or  subscribe   See the sample of our latest issue  here   Buy a copy of our latest anthology:  A Year of Celebrations   Buy a copy of  Flourish 2 , our wellbeing bookazine  Listen to  our podcast  - Small Ways to Live Well

Get hold of your copy of this month's The Simple Things - buy, download or subscribe

View the sampler here.


More from the March issue:

Featured
EGGShell-tealights-the-simple-things.png
Apr 10, 2023
Eggshell tea lights
Apr 10, 2023
Apr 10, 2023
anna-jimenez-calaf-64616-unsplash.jpg
Mar 20, 2021
You know spring has properly arrived when...
Mar 20, 2021
Mar 20, 2021
SIM69.WHATITREASURE_J Hitt What I Treasure Recipe Book Image.JPG
Mar 26, 2018
What I treasure | My hand-written recipe book
Mar 26, 2018
Mar 26, 2018

More Miscellany:

Featured
9.new years final.png
Dec 31, 2024
How to | Make a Could-Do List Happen
Dec 31, 2024
Dec 31, 2024
EGGShell-tealights-the-simple-things.png
Apr 10, 2023
Eggshell tea lights
Apr 10, 2023
Apr 10, 2023
3.mistltoe FINAL.png
Dec 27, 2022
Christmas | Why do we kiss under the mistletoe?
Dec 27, 2022
Dec 27, 2022
In Miscellany Tags march, issue 69, miscellany, craft, making, kite
Comment
GNCCF22.JPG

Reader offer | Great Northern Contemporary Craft Fair

Lottie Storey October 1, 2017

This year the award-winning Great Northern Contemporary Craft Fair celebrates its tenth anniversary and takes place from 12 -15 October at its new home of Upper Campfield Market, in Manchester city centre.

GNCCF23.JPG

Buy and commission outstanding contemporary craft & design from 150 designer-makers, all selected for their excellence, from fine jewellery and fashion accessories to functional and statement pieces for the home. As well as a unique shopping experience, the event will feature artist demonstrations and talks giving visitors the chance to learn more about the inspiration, materials, making process and stories behind the work on sale.

GNCCF04.JPG

The event will feature emerging and established makers, including those who have exhibited at the GNCCF for every one of its ten years and the curated ‘Great Northern Graduates’ will showcase best new Northern design talent to emerge from the UK’s creative courses.

The GNCCF has become a much-anticipated highlight in the North’s cultural calendar and one of the leading and most popular craft events in the UK. This not-for-profit event is supported by Arts Council England through Grant for the Arts with the aim of championing and promoting contemporary craft and designer-makers in the North.

GNCCF14.JPG

We’ve teamed up with the Great Northern Contemporary Craft Fair to offer 2-4-1 tickets to our readers to this unique shopping and cultural event.

Great Northern Contemporary Craft Fair
Thursday 12 – Sunday 15 October 2017

Upper Campfield Market, Manchester

Ticket prices: In advance £6.50 (£5.50 concs)* / On the door £7.50 (£6.50 concs) 

www.greatnorthernevents.co.uk
www.facebook.com/GNCCF / @GNCCF 

For advance tickets please visit: https://www.eventbrite.co.uk/e/great-northern-contemporary-craft-fair-2017-tickets-36794223513

Exclusive code for 2-4-1 tickets for readers of The Simple Things: GNCCFST241

*Eventbrite booking fee applies to advance ticket bookings.

In Reader offer Tags reader offer, craft
Comment
Photograph: Jonathan Cherry

Photograph: Jonathan Cherry

Weekend project | Post-it reminders

Lottie Storey September 30, 2017

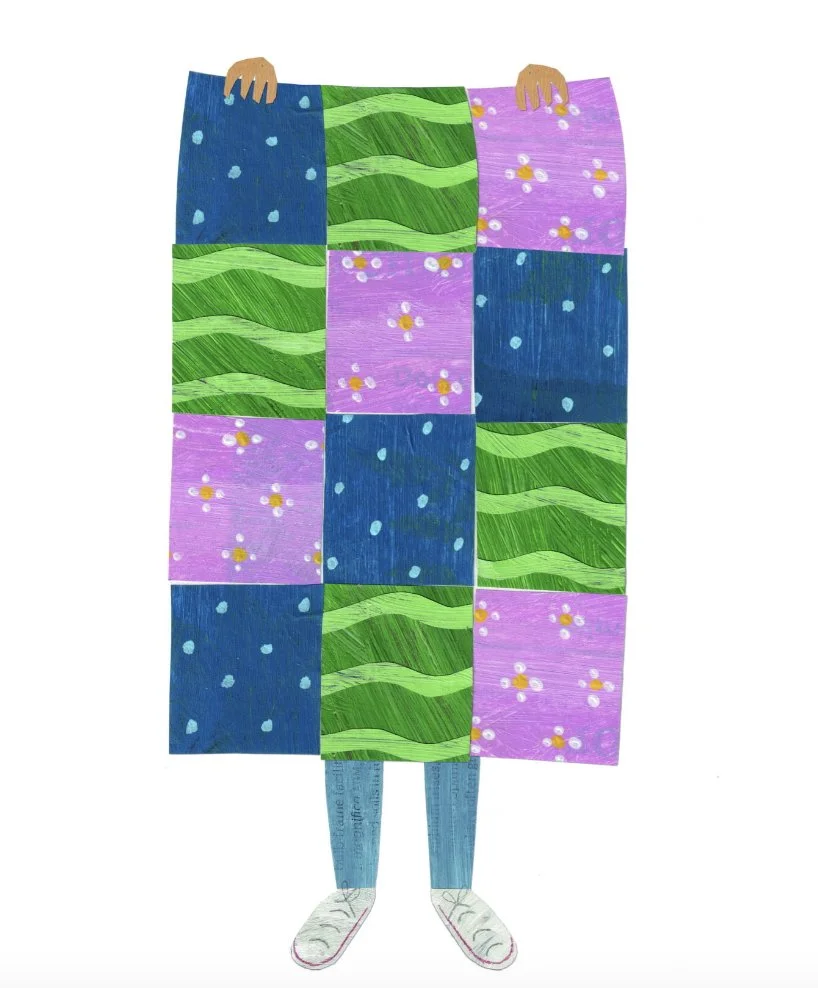
This sewing project by Sarah Corbett reinvents the Post-it as a form of activism, giving a moment to pause and reflect

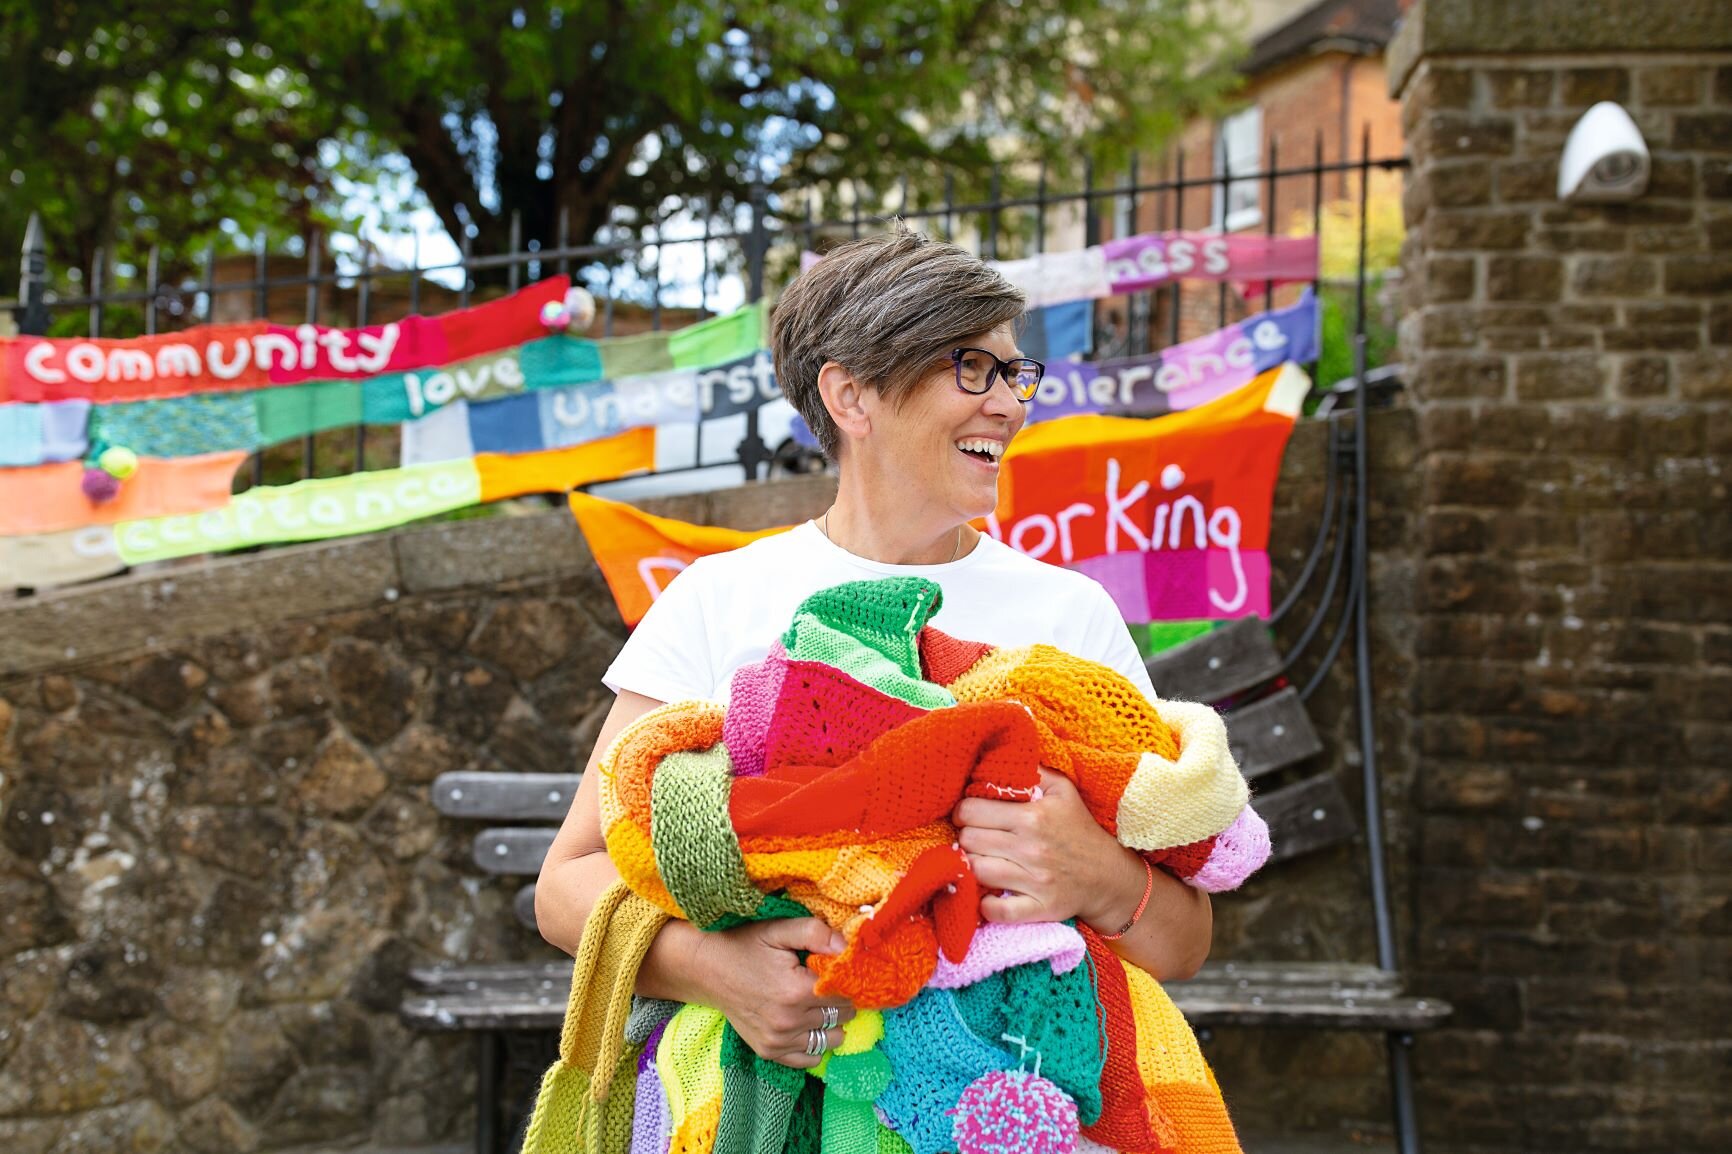
You may have been spurred into action by Sarah Corbett’s wisdom on page 34 of October's The Simple Things. If so, this project is a way of trying out a little craftivism (activism using craft) for yourself. Inspired by the simplicity of the Post-it Note, it was created as part of Bystander Revolution, a global anti-bullying initiative (bystanderrevolution.org). We’re so used to living and acting quickly, but a physical object like a Post-it Note can take us out of auto-pilot and remind us to stop and think. These are stitched rather than scrawled on, the act of hand-stitching bringing an opportunity to really consider our words and action, while the #crafterthought questions help to focus reflection on the message being created. You could keep your embroidered sticky notes or give them as gifts – or display them in your office, park or local café for people to see.

#CRAFTERTHOUGHTS

  • If I was being bullied, how would I want people to help me?
  • How can I show love to a bully to help them stop bullying others?
  • Using my talents and voice, how can I be part of the Bystander Revolution? 

Post-it reminders

GIVE YOUR WORDS WEIGHT WITH THESE PERMANENT POST-ITS

You will need

Post-it Notes
Biro or fabric invisible ink pen
Thin cotton fabric, ideally in Post-it Note colours
Black embroidery thread
Embroidery needle, ideally size 5–7
Embroidery hoop (not essential)
Bondaweb
Felt fabric, ideally in Post-it Note colours
Fabric scissors

1 Use a biro to write your message on a Post-it Note. Use one of the ideas opposite or come up with your own. Use the biro or fabric invisible ink pen to trace the message onto your cotton fabric (you can use a light box, or place it against a window or the light of
your computer screen to see the message through it).

2 Cut a finger-to-shoulder length of thread, thread your embroidery needle and embroider your message using a simple back stitch, with the help of an embroidery hoop, if you like. Use six strands of thread for thick words and two or three strands for smaller messages in thinner pen.

3 Cut out a piece of Bondaweb a little larger than your Post-it Note shape, and iron onto the back of your cotton fabric.

4 Place your Post-it Note on the back of your fabric, over the Bondaweb in the position you want your fabric Post-it, and cut around with fabric scissors to the shape and size of the real Post-it note.

5 Peel off your Bondaweb, then place the cotton, Bondaweb side facing out, onto your piece of felt fabric.

6 Heat your iron to low. Put your felt and cotton Post-it under a towel and briefly iron so the fabrics fuse. Cut your felt to the same size as the cotton square.

Place your handmade Post-it Note messages where they will have the most impact. Share your process and final piece online with followers or friends. You can tag @craftivists on Instagram or Twitter, or share on the Facebook page Craftivist Collective to encourage others to take part.

Project courtesy of craftivist-collective.com 

Get hold of your copy of this month's The Simple Things - buy, download or subscribe

View the sampler here


More from the October issue:

Featured
SIM64.GATHERING_SimpleThingsNov17_Autumn Lunch_29.png
Nov 14, 2020
Recipe | Lamb hotpot and mustardy greens
Nov 14, 2020
Nov 14, 2020
freestocks-org-62592.jpg
Oct 31, 2020
Halloween | Simple spells
Oct 31, 2020
Oct 31, 2020
Dec-17-Subs-page-image3_jwretA.png
Nov 29, 2017
Christmas | Giftwrapped subscriptions to The Simple Things
Nov 29, 2017
Nov 29, 2017

More weekend projects:

Featured
LemongrassChickenRedCurryCoconutSauce.jpg
Aug 23, 2023
Recipe | Tandoor Lemon Chicken with Mango & Coriander Salad
Aug 23, 2023
Aug 23, 2023
Folk enamel tumbler.jpg
Aug 5, 2023
Make | Folk art enamelware
Aug 5, 2023
Aug 5, 2023
Lavender eye pillow.jpg
Jul 22, 2023
Make | A Soothing Lavender Eye Pillow
Jul 22, 2023
Jul 22, 2023
In Making Tags issue 64, october, weekend project, craft, craftivism, activism
Comment

Christmas: Make papercut star decorations for your tree

Lottie Storey November 21, 2016

If paper chains feel passe and you're a bit bored with your baubles, try a DIY papercut tree decoration for a feelgood festive craft

The appeal of papercutting is the simple satisfaction of creating something from nothing. Starting literally with a blank sheet of paper, a drawing can become an intricate work of art. And like many other creative pursuits, it’s a meditative process, requiring your full attention.

Papercut artist Poppy Chancellor says, “We all need time to be artistic. It’s good for your brain and soul. There is something very soothing in this art of taking your time. When you patiently follow the lines with the knife, you will start to see elegant artistry emerge from a single sheet of paper. The hours slip away and all those daily worries start to dim. You don’t need much skill to cut along a suggested line but practice and patience are essential. Anyone with a scalpel and a steady hand can give it a try.”

If you’ve tried cutting a few designs, the next step is to draw your own, either by hand or digitally (just remember to flip your image once you are done and trace or print this mirror image on to the back of your chosen paper). Start by following paper artists and other creatives on social media to feed your mind. Share your own creations online and ask for feedback.

From Roman statues to Greyhound buses, there seems no subject too obscure or too tricky for papercutting. But some things are easier than others; Poppy’s drawn us a beginner’s papercut star tree decoration*, for example – well, it is Christmas!

This beautiful 3D Christmas scene is practically a paper sculpture and not a project for beginners. But see where having a go at our paper star template could take you (find it in the December issue of The Simple Things). You can also download her paper snowflake design. We’d love to see pics of them hung on your tree @simplethingsmag

Our template design features in Poppy’s book Cut it Out! 30 Designs to Cut Out and Keep (Virgin Books). 


More from the December issue:

Featured
Nov 30, 2023
Christmas: Choosing the tree
Nov 30, 2023
Nov 30, 2023
Dec 25, 2021
Christmas crackers: How to wear a paper hat plus six awful cracker jokes
Dec 25, 2021
Dec 25, 2021
Dec 24, 2021
Christmas recipe: Mulled white wine
Dec 24, 2021
Dec 24, 2021

More projects to make:

Featured
TEA COSY JUMPER.jpg
Jan 25, 2025
How to | Make a Tea Cosy from an Old Jumper
Jan 25, 2025
Jan 25, 2025
Wellbeing.jpg
Feb 11, 2024
Make | Kitchen Face Masks
Feb 11, 2024
Feb 11, 2024
AdobeStock_276831672_Preview.jpg
Oct 23, 2023
Project | Make Seed Bombs
Oct 23, 2023
Oct 23, 2023
  Buy ,  download  or  subscribe   See the sample of our latest issue  here   Buy a copy of our latest anthology:  A Year of Celebrations   Buy a copy of  Flourish 2 , our wellbeing bookazine  Listen to  our podcast  - Small Ways to Live Well

Get hold of your copy of this month's The Simple Things - buy, download or subscribe

View the sampler here


In Making, Christmas Tags issue 54, december, craft, papercraft, christmas, christmas decorations, christmas tree
Comment

Make: A macrame planter

Lottie Storey January 20, 2016


Projects to perk up the plant life in every corner of your home

Creative gardening need not be restricted to outdoors. Or, indeed, to off-the-shelf plant pots. Making a hanging plant holder is a craftier way to display greenery, and a great project for anyone finding themselves low on either time or space. 

The ancient craft of macramé was a hit with the Victorians, although it’s most associated with 1970s homespun style. Plant hangers are back, given a colourful – and, dare we say, tasteful – makeover. You can, of course, buy one (see page 8 of February’s The Simple Things), if all that knotting brings back painful memories. 


Hanging plant holder

 
You will need: 
textile yarn* 
scissors
2 plant pots, ideally already containing a plant


1 Cut five pieces of the textile yarn, each of about 4m long, and one more of about 40cm (you can adjust the measurements to your desired length).
2 Fold each of the longer pieces of yarn in half. Group all the folds together, then create a loop by wrapping the smaller piece of yarn around the grouped threads several times and tying firmly (A). 
3 Divide the 10 pieces of hanging yarn into five pairs (B). 
4 About 20cm below the top loop, take the first two threads and knot them together. Repeat for each of the pairs (C). 
5 Then, take the right hand thread from the first pair and, further down, knot it with the left hand thread from the second pair. Repeat for each thread until each piece of thread is tied to another (D). 
6 Repeat the process down the length of the yarn. The bigger you make the gap between the knots, the more space you’ll have for the pot, but you’ll need to make the knots closer together to hold the bottom of the pot. 
7 Test for size with your plant pot, before tying a secure knot underneath the pot with the threads. 
8 To add a second pot, repeat under the bottom knot using exactly the same knotting system. 
9 Finish with a large knot containing all the yarn and neaten the ends with scissors.

Project by Laetitia Lazerges, a Paris-based pattern designer who blogs at www.vertcerise.com and www.doityvette.fr. She has also written several DIY books and sells bright and fun paper goods on Etsy at www.vertceriseshop.etsy.com.


Read more:

From the February issue

Think posts

Mindfulness posts

In Making Tags make, project, issue 44, february, craft, planters, House plants
1 Comment

October's The Simple Things PLUS pressed leaves craft ideas

Lottie Storey September 29, 2015

On sale now, October's The Simple Things is all about the FORAGE. With such a beautiful cover, we've been inspired to get outside, hunt for colourful leaves and put them to crafty use. 

Try one of the ideas from our pressed leaves Pinterest board and let us know how you get on - share your pictures with us on Twitter, Instagram or Facebook.

Follow The Simple Things's board Pressed leaves on Pinterest.

Read more:

From the October issue

Make a homemade reed diffuser

Pinterest ideas


October's The Simple Things is on sale - buy, download or subscribe now.

In Magazine, Making Tags cover reveal, october, issue 40, pinterest, autumn leaves, autumn, craft
Comment
no-fence-.jpg

Making: Upcycled jeans runner

lsykes June 10, 2014

Give an al fresco meal the stylish setting it deserves. Turn a picnic into an occasion with our upcycled jeans runner project. Ditch the saccharine sweeness of picnic pastels, and add a contemporary edge to your outdoor table instead. Just rummage for old jeans and begin. Make the denim runner to whatever size your table dictates.

Supplies

Old pair of jeans Fabric scissors Sewing machine Thread

1. Cut the legs off a pair of jeans (as far up towards the crotch as possible) using fabric scissors.

upcycled jeans

2. Cut down the inside-leg seam to open each leg out and then iron them.

3. Now hem each edge using your sewing machine.

upcycled jeans

4. Hem the cut edge at the end of one of the jean pieces, then hand-sew or machine-sew it on top of the other piece.


Project by interiors journalist, Heather Young, who blogs about her enviably stylish and crafty life at Growing Spaces.

For two more midsummer table makes, turn to page 40 of June's The Simple Things. Buy or download your copy now.

In Living, Making Tags craft, DIY, garden, interior design, outdoors
Comment
Kirstie-Allsopp-pic-4.jpg

Kirstie Allsopp presents The Handmade Fair

lstorey April 2, 2014

We are delighted to announce that we’ve teamed up with Kirstie Allsopp and Hobbycraft to bring you The Handmade Fair, coming this September to Hampton Court Palace!

Join The Handmade Fair mailing list to get all the latest updates and for access to the ticket pre-sale.

In Sponsored post Tags craft, event, exclusive
Comment
Etsynestpage.jpg

The Simple Things Etsy Pages

Future Admin September 18, 2013

Discovering and curating our favourite things through NEW Etsy Pages.

Nesting curated by The Simple Things on Etsy
Above: our favourite ways to NEST…
When Etsy asked us to be one of the first UK Partners selected to curate our finds through Etsy Pages we were thrilled. At The Simple Things we constantly use Etsy to source talented designer-makers to showcase in the pages of our magazine.
You can now follow our inspiration boards via Etsy Pages. Use them for gift ideas and trend-watching or as a starting point to make your own discoveries. Just click and you're taken directly to the item and seller featured!
Here's a look at some of our Etsy Pages. We will be constantly updating so be sure to visit regularly…

//

Simple Style curated by The Simple Things on Etsy
Above: our favourite ways to SIMPLE STYLE

//

Thinking curated by The Simple Things on Etsy
Above: our favourite ways to THINK

//

In Eating, Escaping, Growing, Living, Making, Uncategorized Tags books, craft, Etsy, fashion, for the home, interior design, shop, Shop Love
Comment
iphone4_gathered.jpg

Love to Craft? Try Gathered by Mollie Makes

Future Admin July 6, 2013

Gathered by Mollie Makes is your weekly fix of quick craft ideas to make and enjoy available on the iPad - and now the iPhone too! Each week inside the magazine you can expect:

• Two exclusive craft projects • Interviews with designer-makers • A roundup of our favourite things, including vintage treats, our book of the week, buyers’ guides, plus more • Videos to inspire you and your work • A free, downloadable wallpaper for iPhone and iPad

Gathered by Mollie Makes costs £1.49 an issue, or you can subscribe for a 1-month (£2.99) or 1-year (£19.99) and, if you subscribe to a 1-month or more you get 5 FREE issues!

Try Gathered by Mollie Makes now and get crafting over the weekend!

In Making Tags Apple, craft, design, digital magazine, DIY, Gathered, iPad, iPhone, special offer
Comment
Sponsored_The-Amazings.jpg

Sponsored post: Learn a new skill for free with The Amazings

Future Admin June 24, 2013

Have you heard of The Amazings? It’s an online platform for skill-sharing, where older teachers (over 50s, AKA ‘Amazings’) teach the younger generation skills for life. Whether that’s carpentry, crochet or jewellery making.Classes have been running in London for over a year now but the exciting news is The Amazings has recently launched online craft classes, meaning you can take part from anywhere in the world.

There are currently 8 online classes available , and you can choose from: Make Your Own Natural Beauty Products Retro Hair Dos Make A Mosaic Flower Pot Make an Heirloom Patchwork Quilt How to Make an Altered Book Upcycle a Man’s Shirt into a Summer Dress Make a Butterfly Pendant From Silver Metal Clay Loom Knit Your Own Beanie and Bobble Hat

Normally classes start from £8 but for a limited time you can get your first class for free if you sign up using this link.

New classes will be added every week and a little birdy told us there’s going to be a Big Knitting class, Wet Felting class and Millinery class coming up soon, so be sure to keep an eye out!

In Living, Making Tags craft, experts, featured, free, online classes, special offer, Sponsored story
Comment
  • Blog
  • Older
  • Newer
Featured
  Buy ,  download  or  subscribe   See the sample of our latest issue  here   Buy a copy of our latest anthology:  A Year of Celebrations   Buy a copy of  Flourish 2 , our wellbeing bookazine  Listen to  our podcast  - Small Ways to Live Well
Feb 27, 2025
Feb 27, 2025

Buy, download or subscribe

See the sample of our latest issue here

Buy a copy of our latest anthology: A Year of Celebrations

Buy a copy of Flourish 2, our wellbeing bookazine

Listen to our podcast - Small Ways to Live Well

Feb 27, 2025
Join our Newsletter
Name
Email *

We respect your privacy and won't share your data.

email marketing by activecampaign
facebook-unauth twitter pinterest spotify instagram
  • Subscriber Login
  • Stockists
  • Advertise
  • Contact

The Simple Things is published by Iceberg Press

The Simple Things

Taking time to live well

We celebrate slowing down, enjoying what you have, making the most of where you live, enjoying the company of of friends and family, and feeding them well. We like to grow some of our own vegetables, visit local markets, rummage for vintage finds, and decorate our home with the plunder. We love being outdoors and enjoy the satisfaction that comes with a job well done.

facebook-unauth twitter pinterest spotify instagram