Pick up a pen, pick up a paintbrush. Listen at thesimplethings.com/blog/creativityplaylist
Get hold of your copy of this month's The Simple Things - buy, download or subscribe
More of our playlists…
Featured

Blog
Taking Time to Live Well

DJ: Frances Ambler. Illustration: Anneliese Klos
Pick up a pen, pick up a paintbrush. Listen at thesimplethings.com/blog/creativityplaylist
Get hold of your copy of this month's The Simple Things - buy, download or subscribe

Image: Shutterstock
See your design printed for all readers of The Simple Things to enjoy
We know it’s only October and generally at The Simple Things we don’t like to even mention Christmas until at least after Bonfire Night. But this year we wanted to invite you to bring a bit of extra joy to the giving process by designing a gift tag for others to use and to share.
We’ll turn our favourite designs into a sheet of actual gift tags in the December issue so everyone can enjoy your handiwork.
Download the gift tag template here.
You can print it and draw on it directly, or use a computer to help you design it, or any other creative means that you have at your fingertips.
Email us a PDF or jpeg of your design with your name and phone number to
thesimplethings@iceberg press.co.uk, marked Gift Tag Competition, or post it to The Simple Things, Iceberg Press, Exchange Workspace, 1 Matthews Yard, Off Surrey Street, Croydon, CR0 1UH. You have until 23 October. Good luck!
Get hold of your copy of this month's The Simple Things - buy, download or subscribe
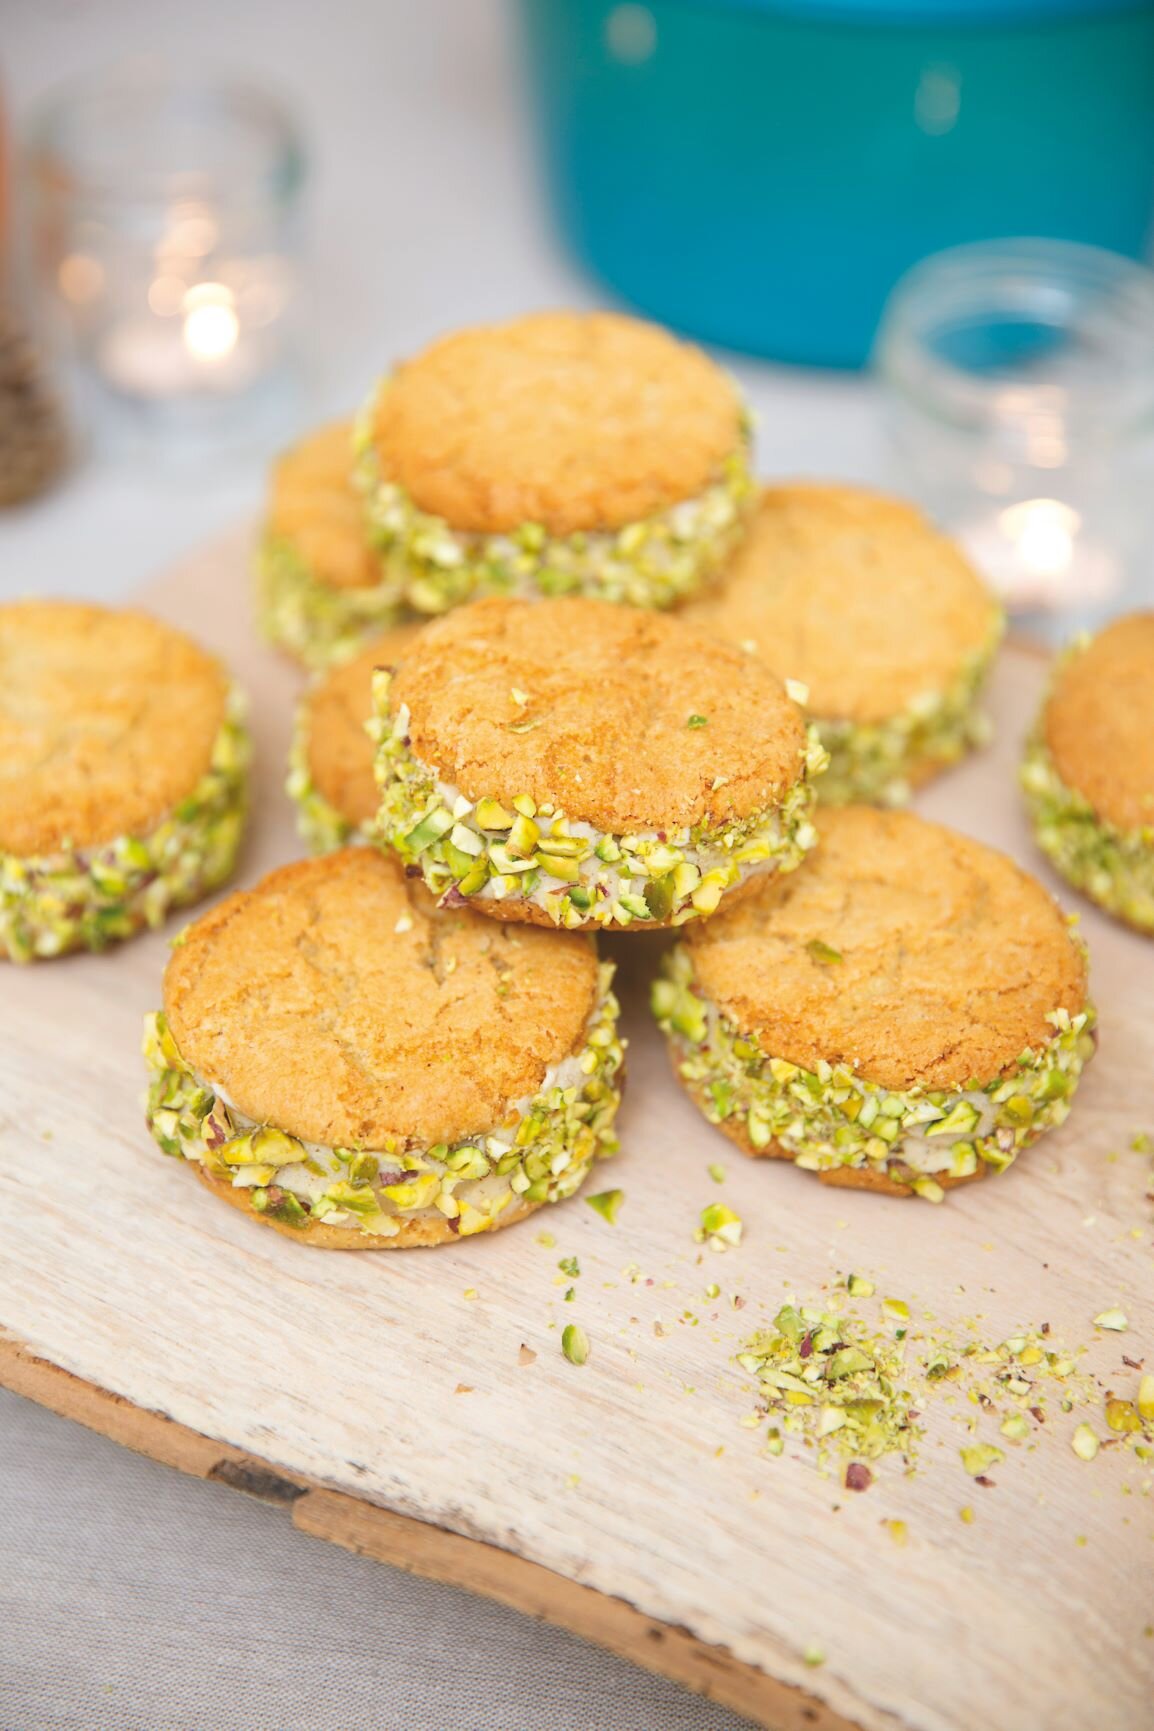
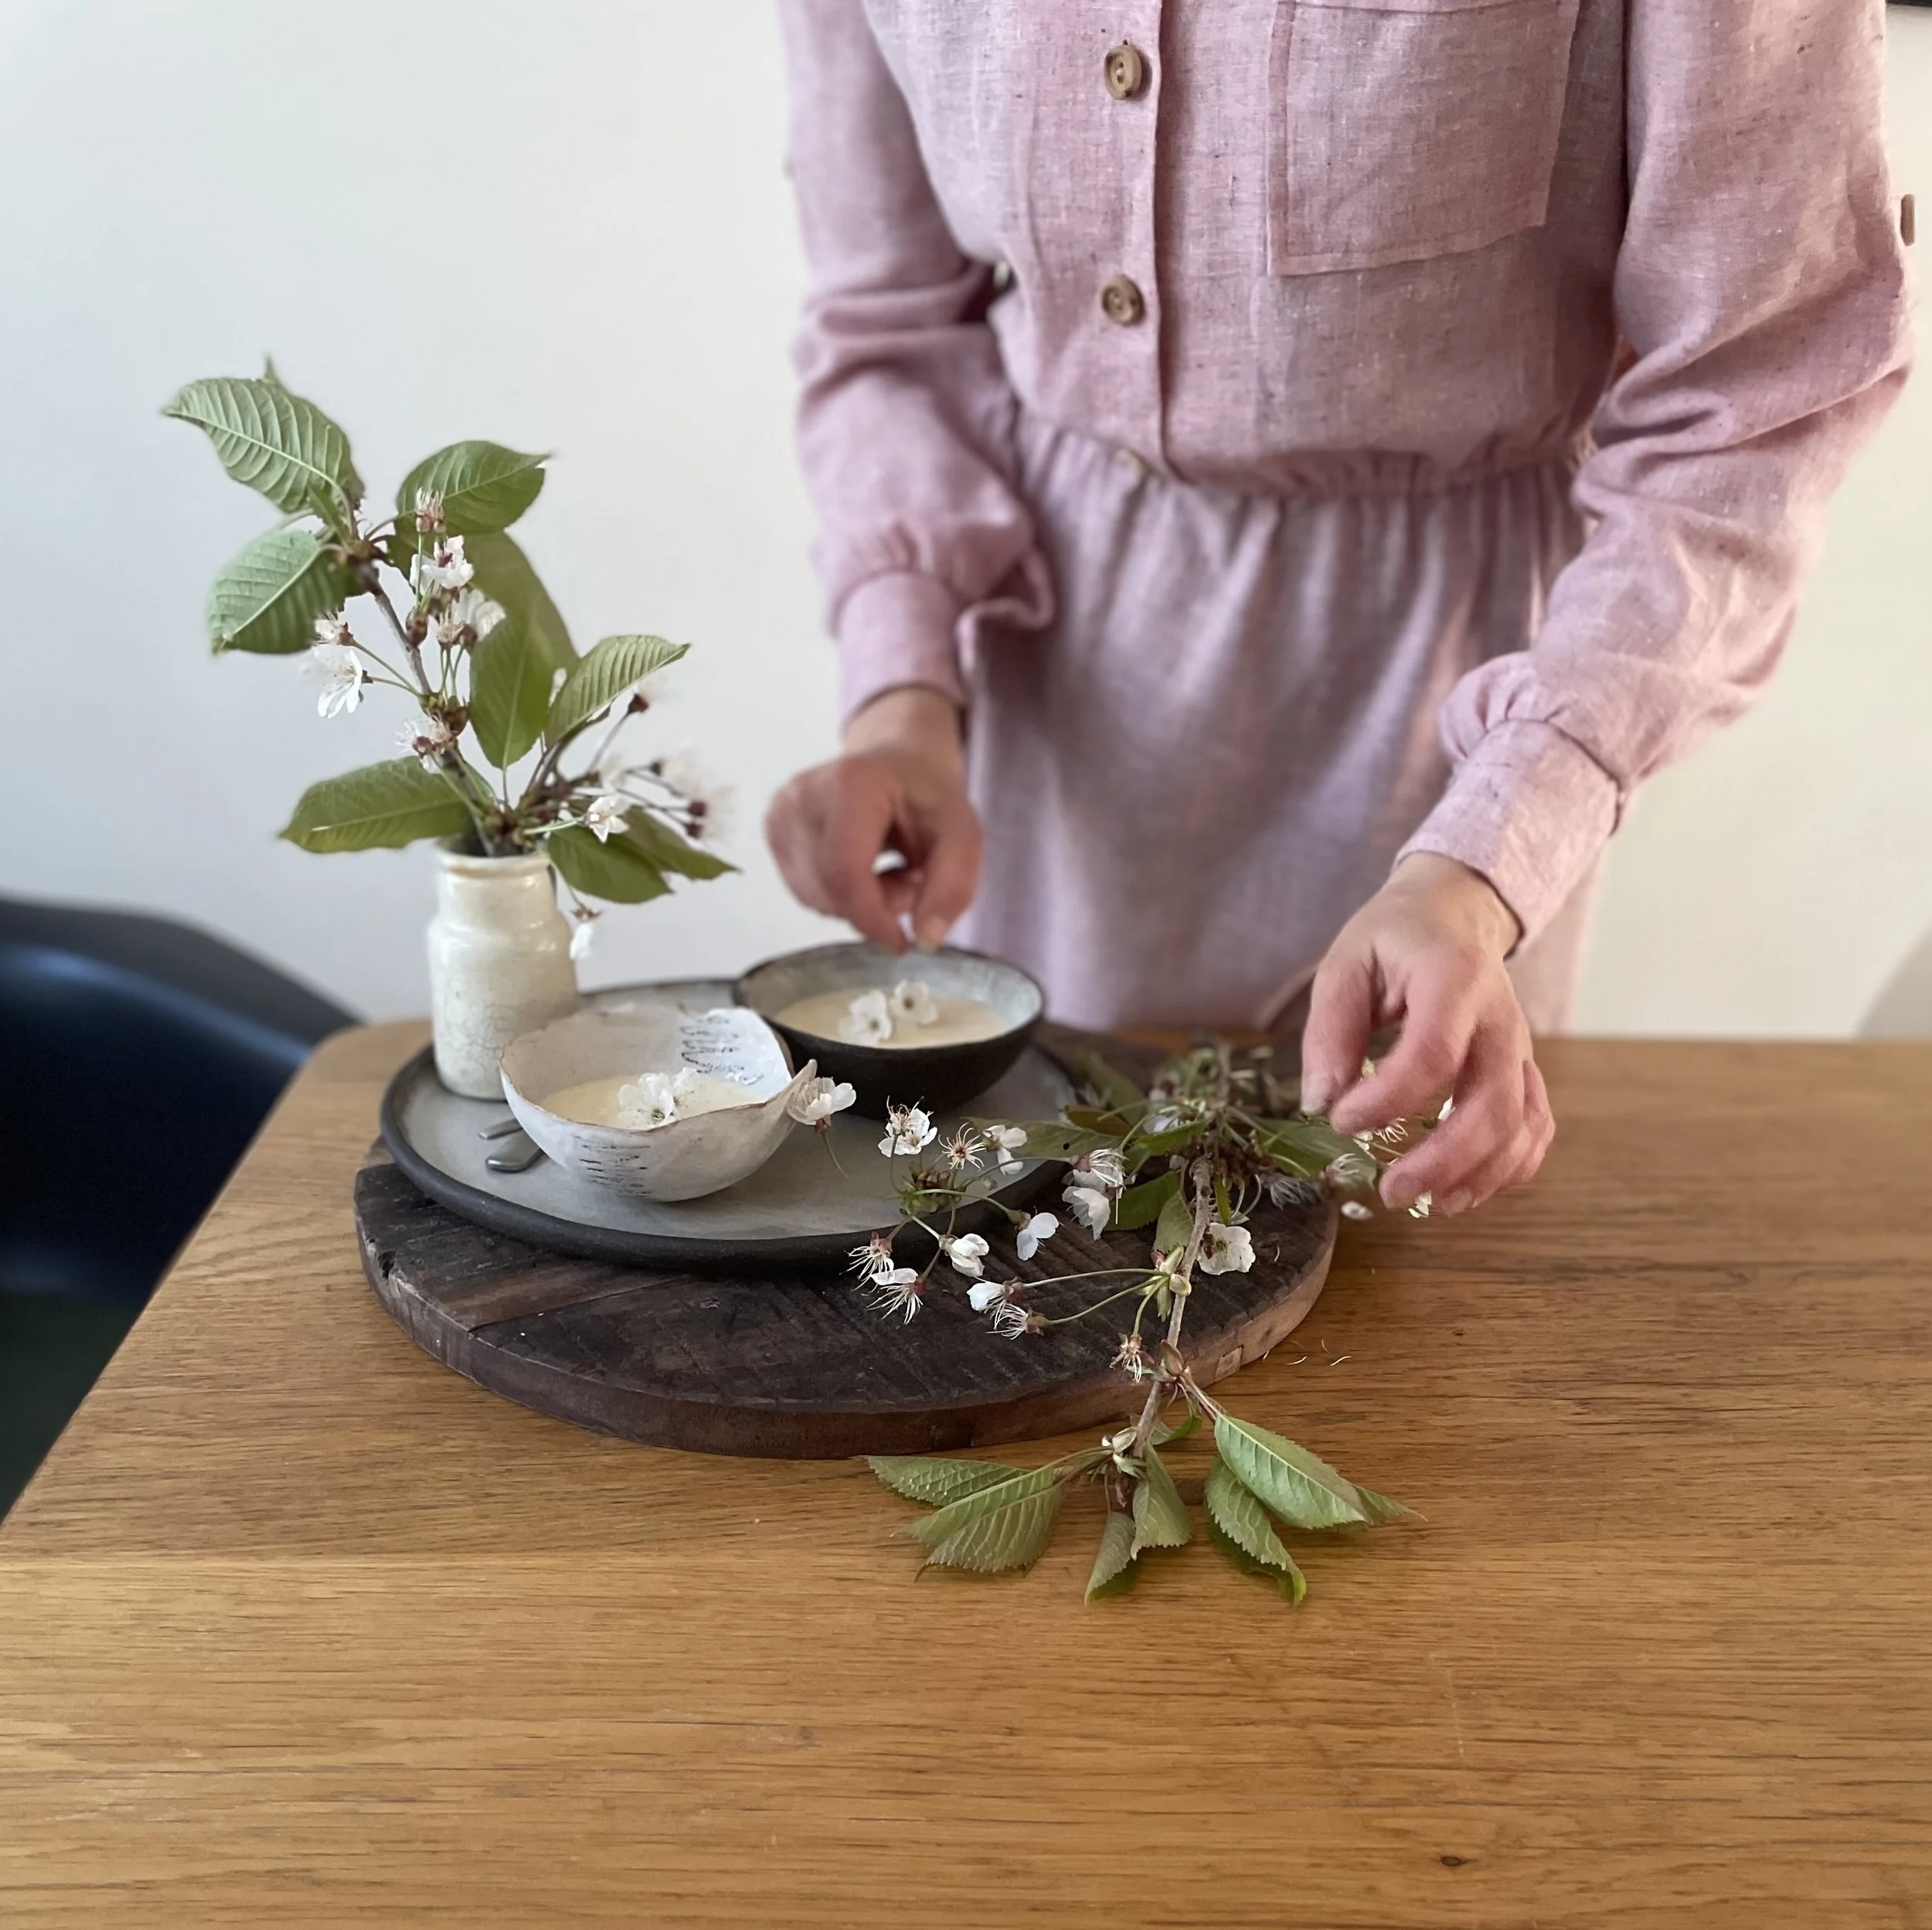
Photography: Jonathan Cherry. Recipe: Bex Long. Styling: Gemma Cherry
Crunchy, spicy biscuits ideal for eating with pumpkin ice cream
Our October issue has a very special ‘gathering’ feature with recipes for a pumpkin party. It’s got everything from autumnal salads to a fabulously moreish sausage roll and even a pumpkin beer keg. But we have made a date to create the pumpkin ice cream sandwiches pictured above - sweet pumpkin ice cream squidged between ginger snaps and rolled in pistachios. Who says ice cream is for summer?
You can make them using any shop-bought ginger snaps but if you fancy going the whole hog, you can make the ginger snaps using the recipe below.
Makes 24
225g plain flour
1 tsp baking powder
1 tsp bicarbonate of soda
1 tbsp ground ginger
Pinch of salt
120g unsalted butter
120g caster sugar
5 tbsp (75g) golden syrup
1 Preheat oven to 180C/Fan 160C/Gas 4. Line 2 baking trays with greaseproof
paper.
2 Sift the flour, baking powder, bicarbonate of soda, ginger and salt into a large
bowl. Cut the butter into cubes and rub into the flour until the mixture
resembles fine breadcrumbs.
3 Stir in the sugar. Add the golden syrup and mix together well. Bring it all
together with your hands to make a smooth ball of dough.
4 Break off small walnut-sized pieces, roll into balls and place on the lined
baking trays. Allow space between each ball as they will spread during cooking.
5 Bake for 10-15 mins until the ginger snaps have spread and turned golden
brown.
6 Leave to cool for 5 mins on the baking trays before using a spatula to
carefully move them to wire racks to cool completely.
Don’t forget to buy the October ‘create’ issue for the rest of the recipes for our pumpkin party.
Get hold of your copy of this month's The Simple Things - buy, download or subscribe

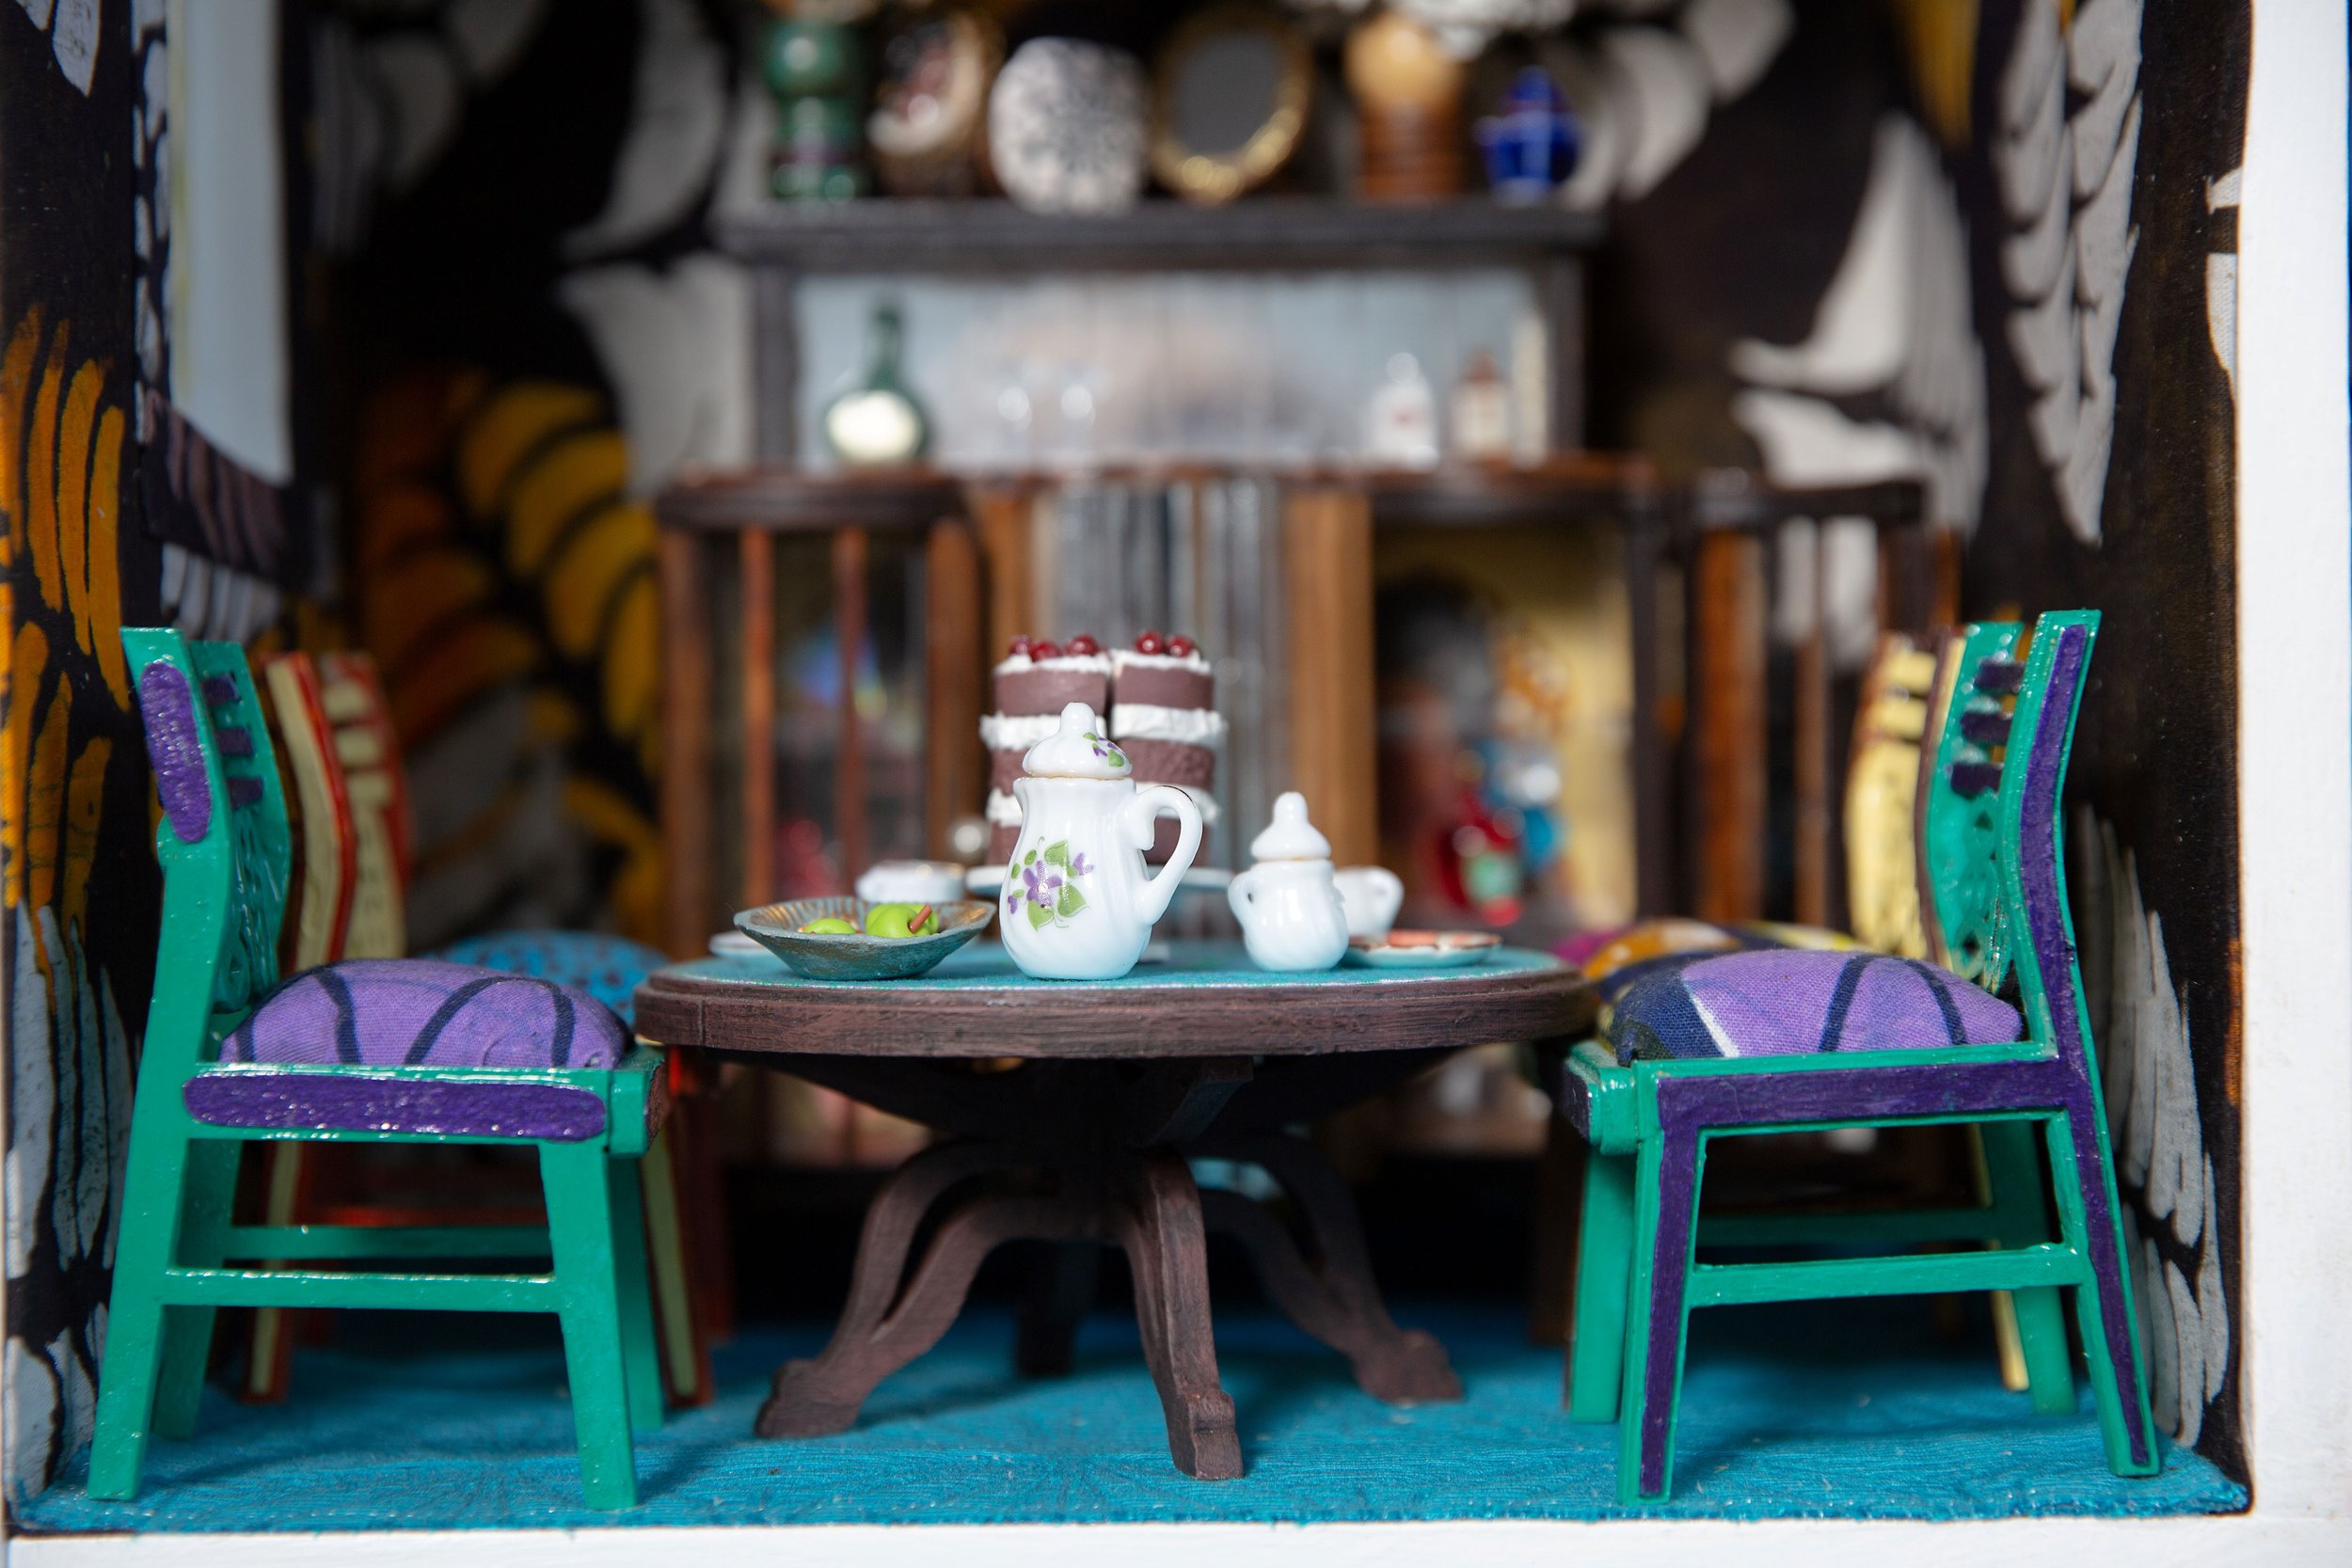
Find your bi-focals. Who could resist a teeny, tiny, elf-sized book?
Hands up who DIDN’T, at least once in their childhood, try to write a teeny tiny book? We thought not. It’s a rite of passage, like making perfume from rose petals that smelt like drains and building a den from old wood and rusty nails in the garden that collapsed on top of you and gave your mother an attack of the vapours.
We were reminded of the joy of making a tiny book as we put together the Weekend Project, Booksmarts, for our September issue. (Pick up a copy of our ‘Begin’ issue in the shops this week and learn how to make various tiny books yourself.) The project is by The Travelling Book Binder, Rachel Hazell, who has many more similar projects in her book Bound: 15 Beautiful Bookbinding Projects (Kyle Books) and extolls the excitement of making something three-dimensional out of a bundle of old paper.
Being able to write a story is an amazing talent, but having the ability to create a story from nothing and immediately transform it into a physical thing that can be held and shared by others is simply magical.
It reminded us of seeing the Bronte children’s teeny tiny books years ago at the Bronte Parsonage Museum in Haworth. The elfin-sized novels with stories that looked like they had been penned by fairies are spellbinding to see in the flesh. Particularly, perhaps if you saw them as a child, or through a child’s eyes. These tiny manuscripts, unlinke the later Bronte novels, were never penned to be read, and certainly not by mere grown-ups whose shoddy eyesight and sausage fingers would barely be able to turn the pages and read the words. They were written by the Bronte children for their own, and no one else’s, pleasure. So they’re without pretence, uninhibited by any perceived lack of skill or concern to impress.
Many of the stories follow the rise of two pretend worlds: Angria (penned by Charlotte and Branwell) and Gondal (written by Emily and Anne). Before that, the children wrote about the part-fictional, part-reality-based Glass Town, as well as many miscellaneous stories. Some have been uploaded by Harvard University and they can be read (squinted at) online here. They’re well worth an afternoon’s browsing with a cup of tea when you have a moment.
And if you’re inspired to pen your own nano-novel, The Bronte Parsonage Museum has kindly made its own printable, which you can download to help you get started. Click here for the printable.
Happy tiny crafting.
Get hold of your copy of this month's The Simple Things - buy, download or subscribe

A splash of pampering Himalayan Pink Salt Bath Soak and Body Wash makes any bath or shower an event
As autumn makes an appearance the idea of a long soak seems suddenly very appealing. JASON Pink Salt 2 in 1 Foaming Bath Soak and Body Wash is a luxuriously nourishing cleansing product formulated to soothe both body and mind. Its delicate blend of essential oils is just the boost you need whether you’re in the shower preparing to tackle the day ahead or winding down in the bath for the evening. The ingredients include:
Lavender oil: relaxing and refreshing when you need a moment of calm.
Bergamot fruit oil: a zesty aroma that’s energising and uplifting.
Clary sage oil: said to help bring a youthful appearance to the skin.
Himalayan pink salt: used in a variety of wellbeing practices from sole water to pink salt lamps, the salt is rich in minerals including soothing magnesium and hydrating potassium to help soothe away physical and mental tensions.
Now all you need to do is decide between bath and shower. Pour a generous amount into a warm bath as it runs, or apply to damp skin with a wash cloth or shower pouffe and massage gently over your body.
You can buy a bottle of this new indulgent bath & body and get 20% off your first purchase by using the code SIMPLE20. Just click here. Happy bathing!


Stay together, ladies and gents! We’re off on a tour of some of Britain’s best kept cathedral secrets
We’re so lucky to have some of the world’s best cathedrals on our doorsteps. Almost every town in Britain has a cathedral within striking distance and nearly all have their own peculiarities and curiosities to explore, from secret passages and underground tunnels to irreverent carvings and ancient graffiti. Here are a few to look out for to get you started next time you’re exploring a cathedral near you...
At Westminster Cathedral, make your way to the Henry VII chapel where you can see a statue of St Wilgefortis, a female saint best known for her flowing beard. Not something you see every day. It’s said that St Wilgefortis prayed for God to make her unattractive to her husband, and, overnight, she grew the luxuriant beard.
The strong of stomach will be fascinated by the West facade of Lincoln Cathedral. The building is best known for its carvings of the Lincoln Imp but look up at its Western exterior and there are some altogether more impish goings on to be seen… Among them fornicators being punished by having their, ahem, fornicatory equipment eaten by wyverns, and devils torturing sinners by pulling their hair. Ouch!
Look up, but with caution in the cloisters of Norwich Cathedral, where there are hundreds of beautifully carved bosses on the ceiling - including one of a naked man defecating on the people below.
Sneak a peek under the seats in the choir stalls of Wells Cathedral and you’ll find dragons eating their own tails.
At St Magnus’ Cathedral in Kirkwall, Orkney, 12th century graffiti artists have been at work. Have a look at the pillars in the interior of the building and you may spot waves, boats, harpoons and fish hooks.
Have a careful look at the stained glass in Gloucester Cathedral. A window that dates back to 1350 depicts the earliest image of golf! Thankfully, 14th century golfers hadn’t yet discovered Pringle sweaters or lairy trousers, which might have proved too much for the stained glass artists.
We were inspired to seek out these cathedral secrets after we read Walkie Talkie, our ‘outings’ feature in our September issue on how to get the most out of walking tours. Before you fill your Thermos and don your rucksack, pop to the shops and buy a copy of September’s’Begin’ issue for more inspiration.
Get hold of your copy of this month's The Simple Things - buy, download or subscribe

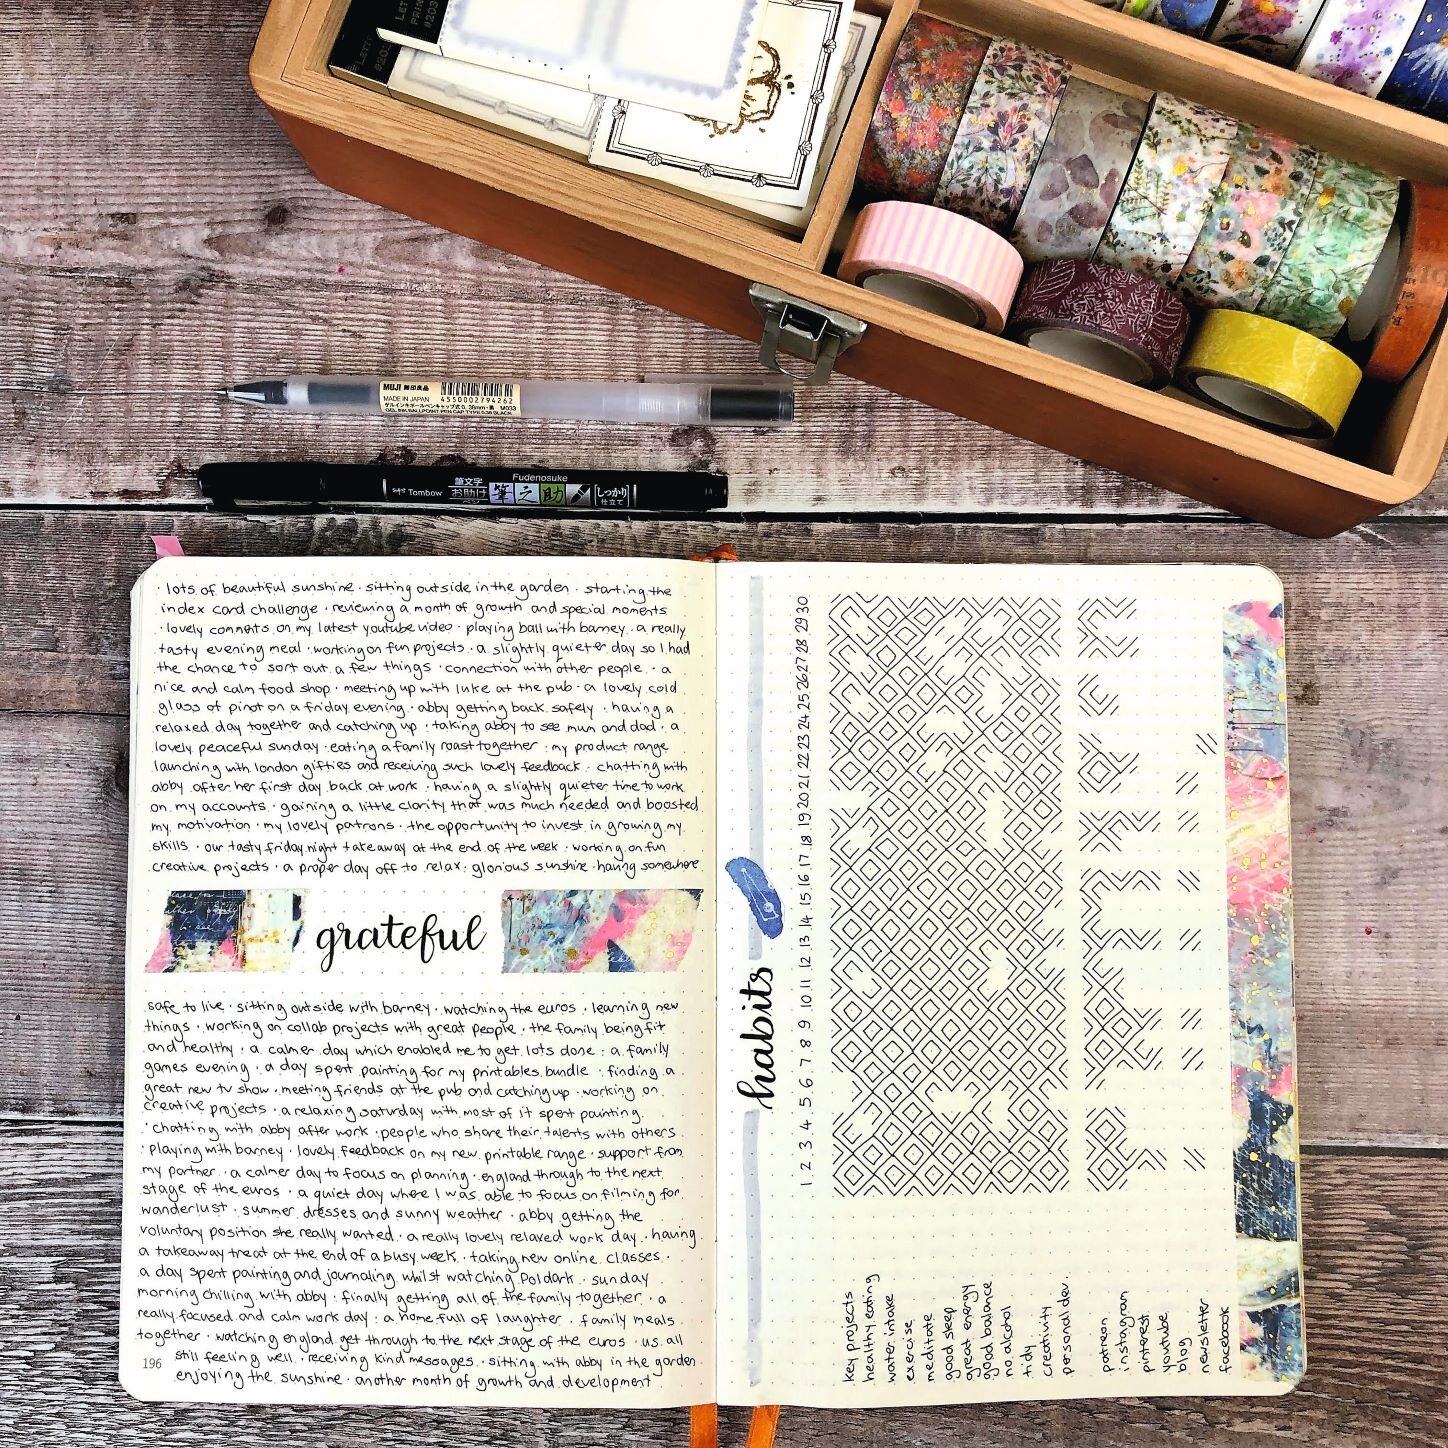
September means new pens and pencils and lots more goodies besides. We’re reminiscing about stationery we have known and loved
There’s something deliciously lovely about a new notebook, a set of matching pencils, or a virgin rubber, isn’t there? As adults we still think of September as a time to stock up and treat ourselves to a few new things for our workspaces. It must be a hangover from our school days. The last week of the summer holidays was always a melancholy few days, with the prospect of early mornings, uniforms and trigonometry looming, as memories of long days in the sunshine faded. But there was one small chink of light… the promise of new stationery to be purchased before the start of term.
Of course there were the necessary, but slightly boring items to be bought - set squares, protractors and HB pencils… Even boring stationery items are nice when they’re new though, aren’t they?
But the main stationery event of the summer was always the buying of the novelty stationery items. If your heart doesn’t beat a little faster to this day at the thought of a four-colour Bic biro, you may be missing part of your soul. And they were just the start…
Tintin pens that erased ink as if by magic (and left a strange yellow patch on the paper that could only be written over in biro); smelly rubbers (that would later be banned from most schools following a rumour that a rather dim child ate one); double-ended coloured pencils, giving you twice the colouring joy. The stationery aisle of John Menzies (or wherever your parents took you for your back-to-school shop) was an Aladdin’s cave of treasures.
The lucky few among us had parents who would indulge such whims as pop-out pencil cases - the ones with ten or so tiny compartments that popped out on a spring (and would likely be broken by half term). Oh to be a girl that had a special compartment for her rubber and pencil sharpener, let alone a tiny slot in the lid in which to store your lessons timetable and slide-out sections for felt-tip pens… All of which gadgetry ensured there was little room for any actual stationery inside, but that was beside the point.
Luckier still were those of us who had been to France over the summer and had the opportunity to buy ridiculously cheap and incredibly chic French stationery in hypermarches on the continent. Brightly coloured rubberised Naf Naf pencil cases and Chipie notebooks with squared <swoons> paper, marked out these most fortunate children with their covetable lives.
But the wonderful thing about stationery is that there was something for every budget and every taste. If you didn’t have a pop-out pencil case, you could still bring a bit of colour and magic to your (inferior, ordinary) pencil case, with a pink-haired troll pencil topper, a Pepsi Cola rubber (King of all the scented rubbers) or the simple addition of a few ‘googly eye’ stickers to the exterior of your Pukka jotter.
Stationery is as covetable today as ever, with chains such as Paperchase and Smiggle enchanting the youth of today with garish, scented, ever fluffier, furrier and zanier stationery. We’d like to say that ours were the glory days but really, any company that is helping bring the frisson of brand new pens and pencils to another generation, easing them gently into a new school term is ok by us. Viva, fancy stationery!
Do you remember particularly lovely stationery items from your childhood? Share your memories with us in the comments below.
Get hold of your copy of this month's The Simple Things - buy, download or subscribe
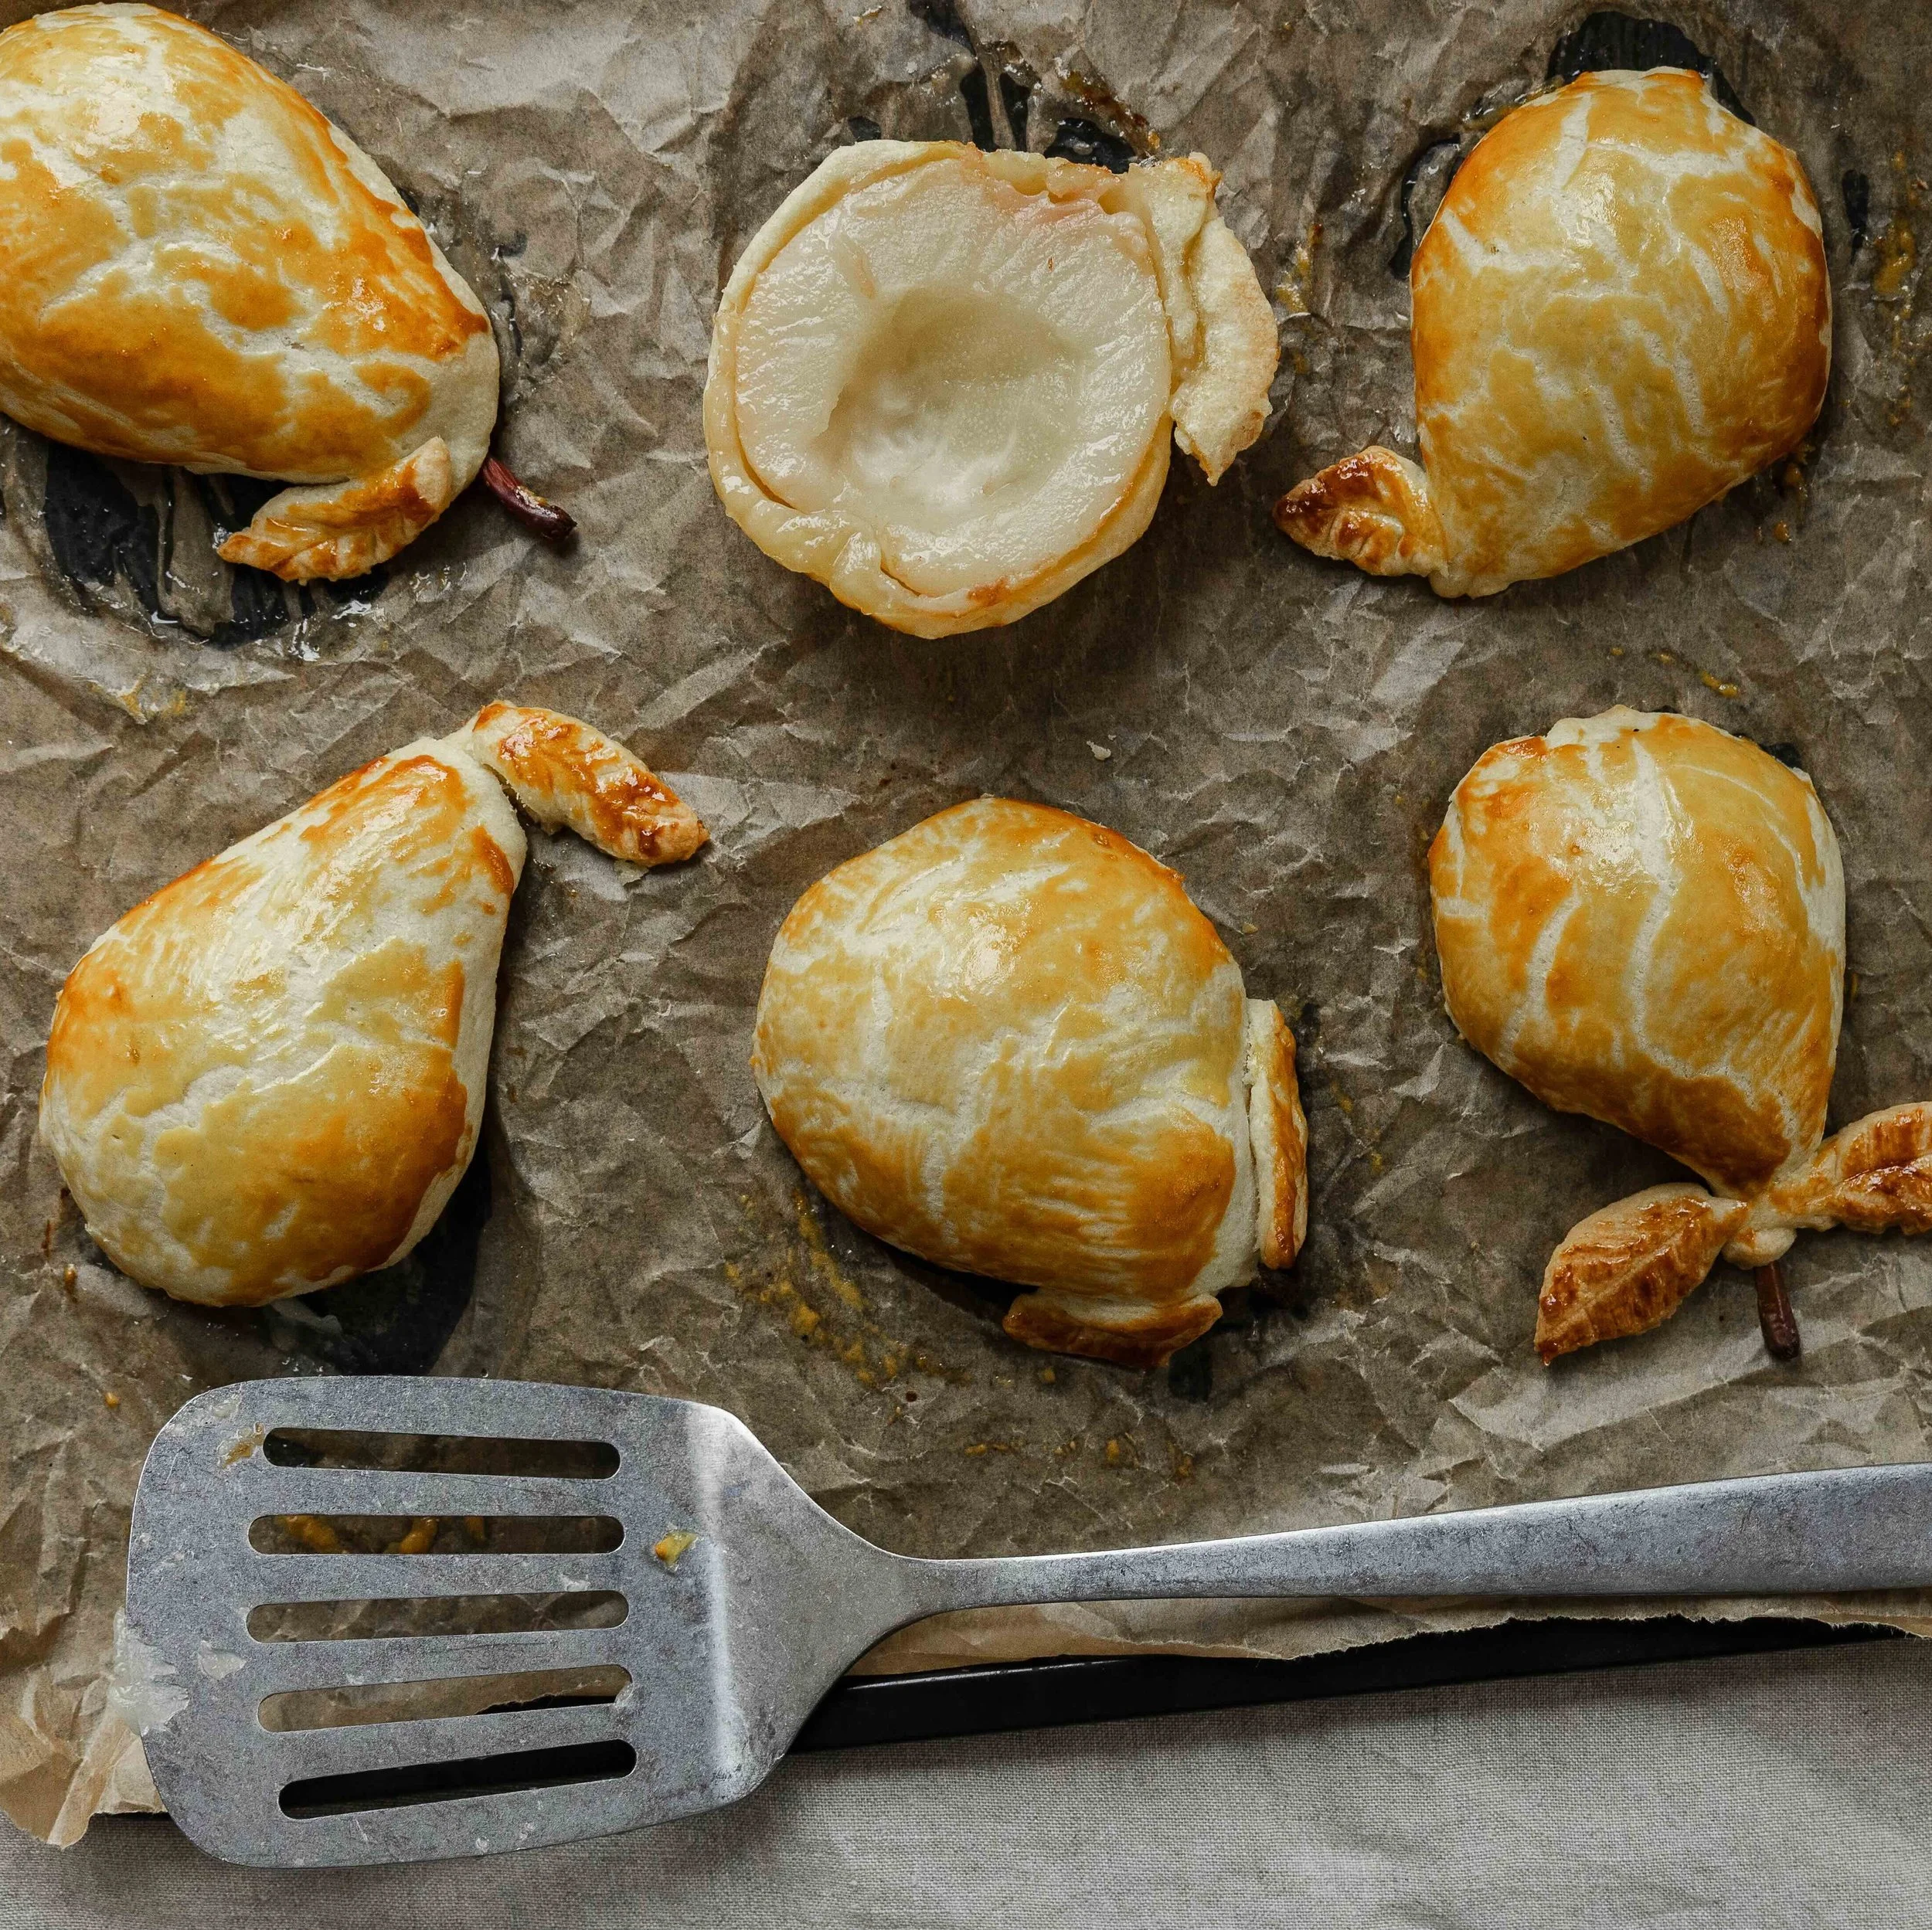
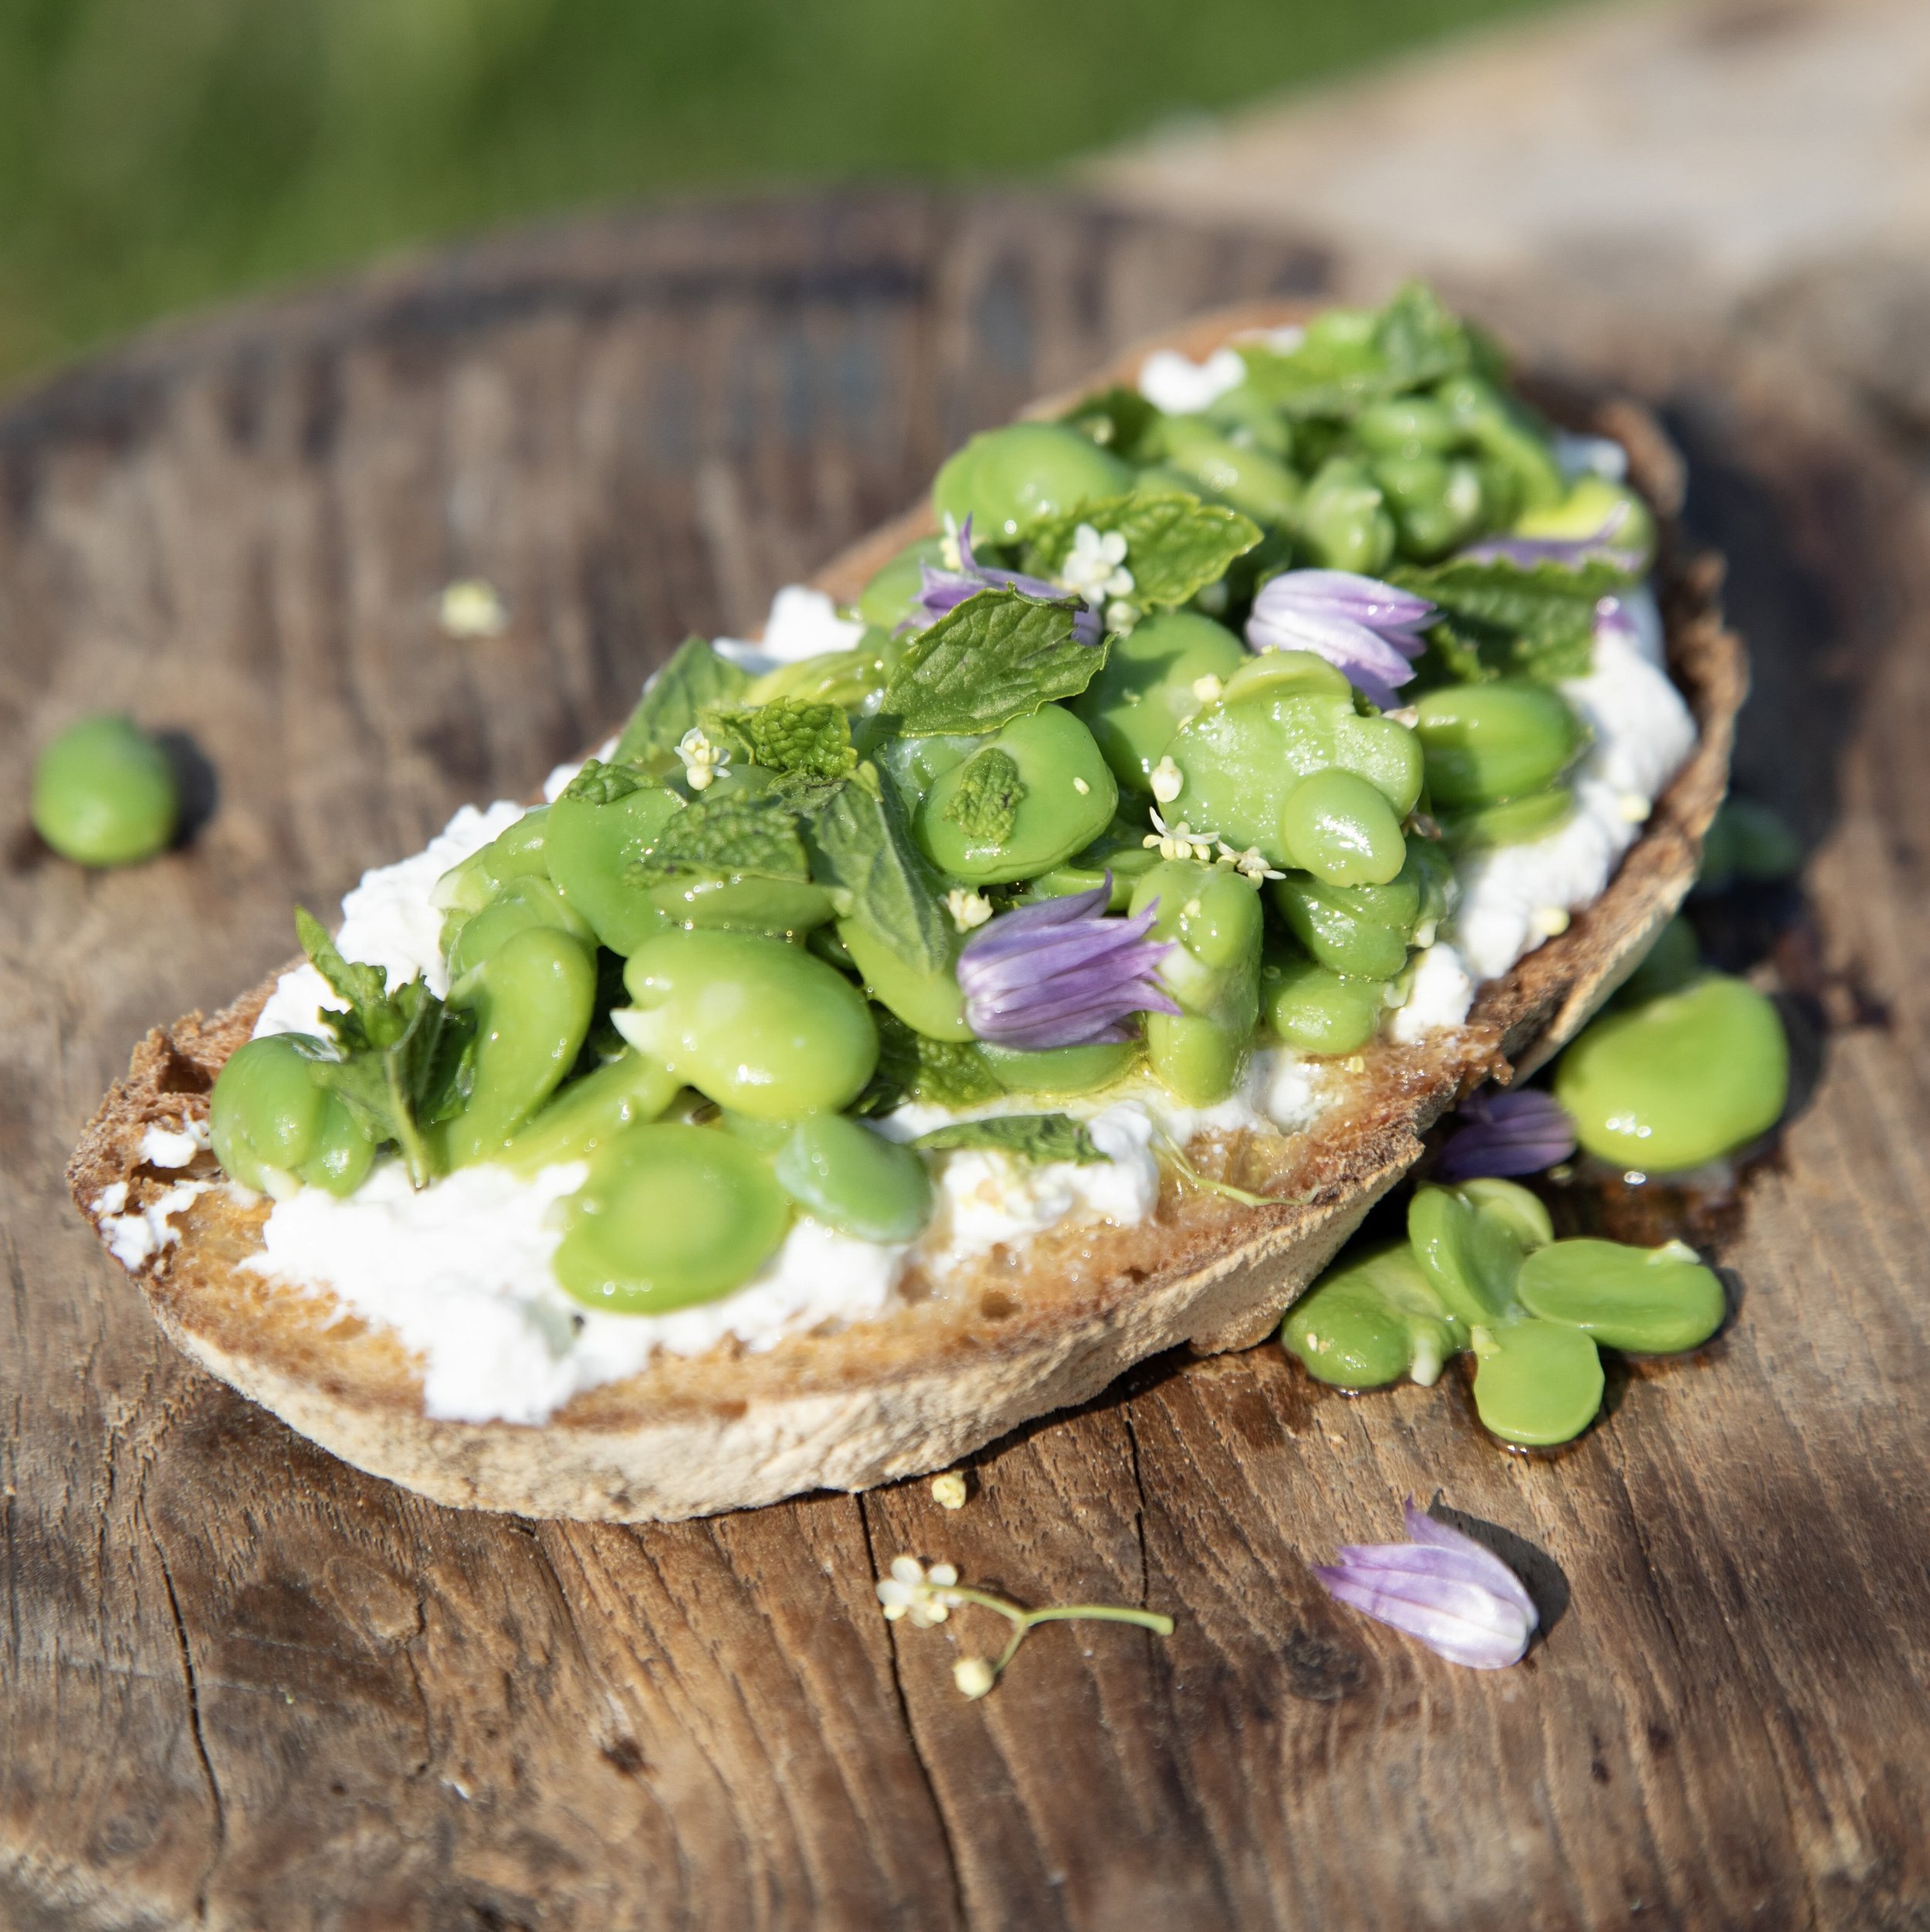
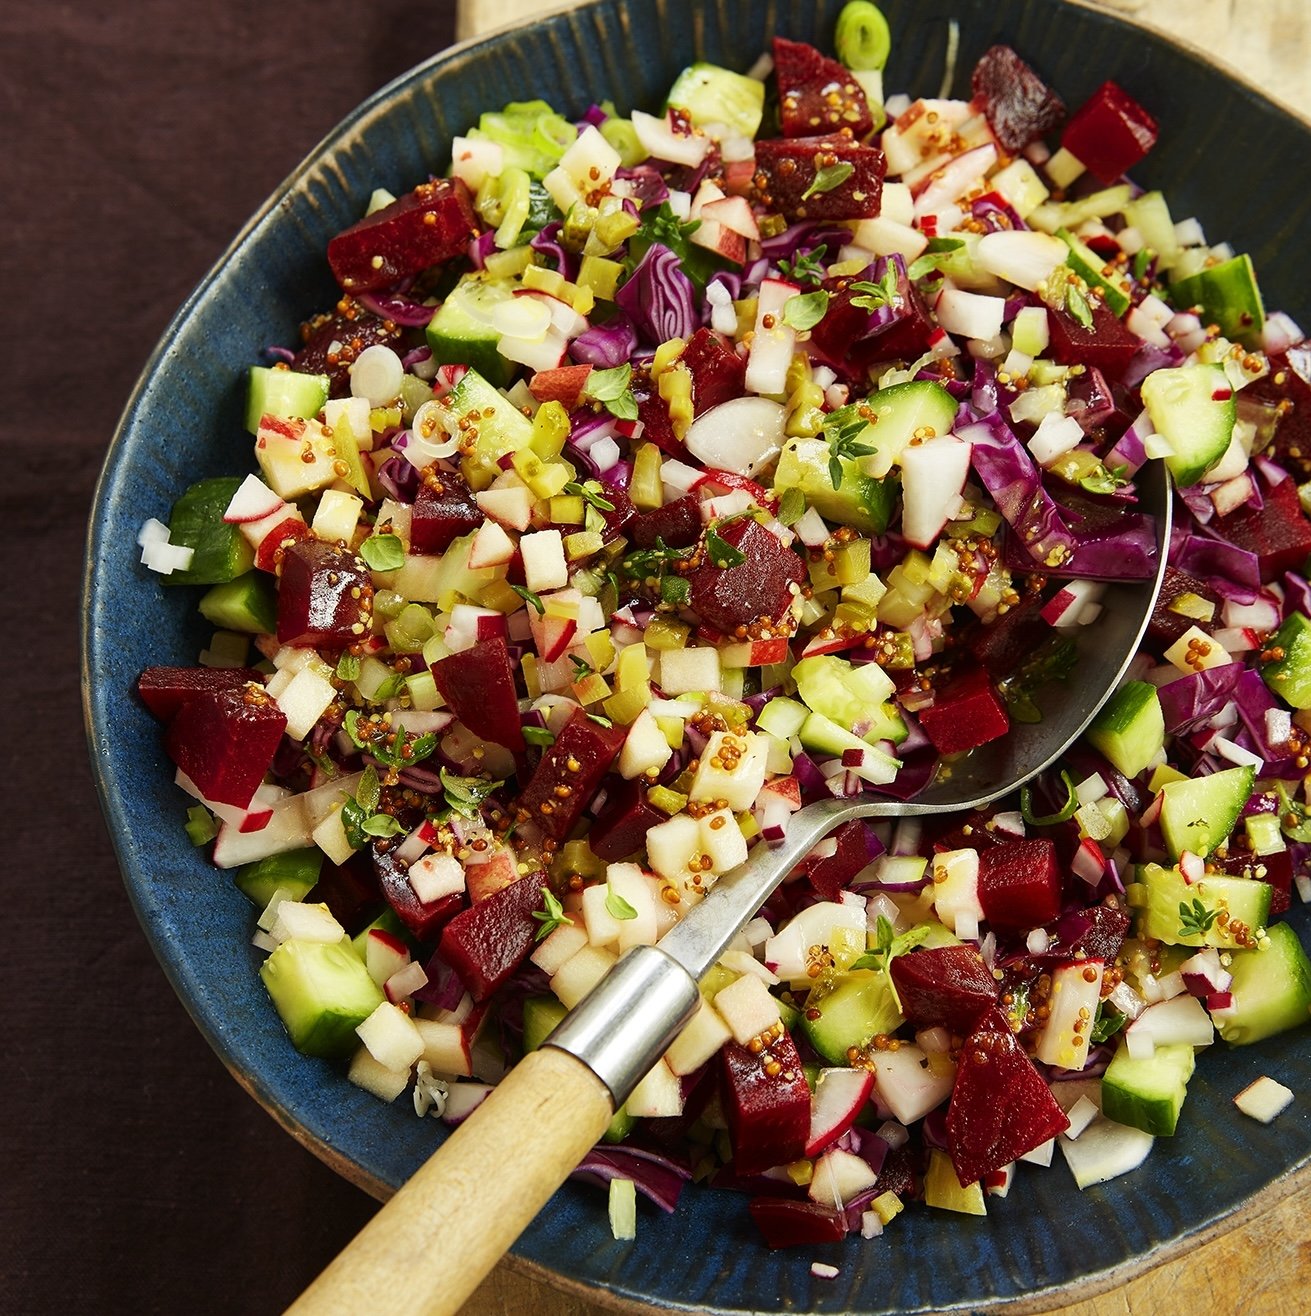
Eating out in the wild this month? Why pack a salad when you can scour hedgerows for woodland treats?
Al fresco dinners take on a new, more exciting element in early autumn. You can still enjoy mild days and longer evenings but also bring out more robust flavours and warming dishes that just shout ‘Autumn’ at you.
In our September issue, we have a very special ‘gathering’ feature we’ve called Into The Woods, with recipes by Rachel de Thample. It’s all about cooking over a fire and making the most of the great outdoors before the days become shorter, with everything from koftas and flatbreads to pear crumble and apple hot toddies. We particularly liked this simple Wild September Salad, which you can serve as part of this campfire feast or at any late summer, early autumn picnic. Just find your way to a likely looking hedgerow and see what nature has provided.
Yarrow Feathery leaves resembling camomile – delicious aniseed flavour.
Alkanet Use the smaller, newer leaves and pretty blue flowers, which taste like cucumber.
Three-cornered leek Looks like wild garlic, tastes like wild garlic, but its triangular stems enjoy a late flush in early autumn.
Wild rocket Resembles farmed rocket, although the leaves range from greyish green to dark green. Smells peppery.
Shepherd’s purse Its tiny love-heartlike seed pods have a nice punchy, mustardy flavour.
Wood sorrel Small clover-like leaves, only smaller and tinged bronze; lemony tasting.
(There’s a good hedgerow food guide at wildfooduk.com.) Wash freshly picked leaves well, then pat dry with kitchen towel. Tumble together in a large bowl to mix and either pack into flatbreads or serve as a side with a drizzle of extra virgin olive oil.
Get hold of your copy of this month's The Simple Things - buy, download or subscribe

Photography: Nassima Rothacker
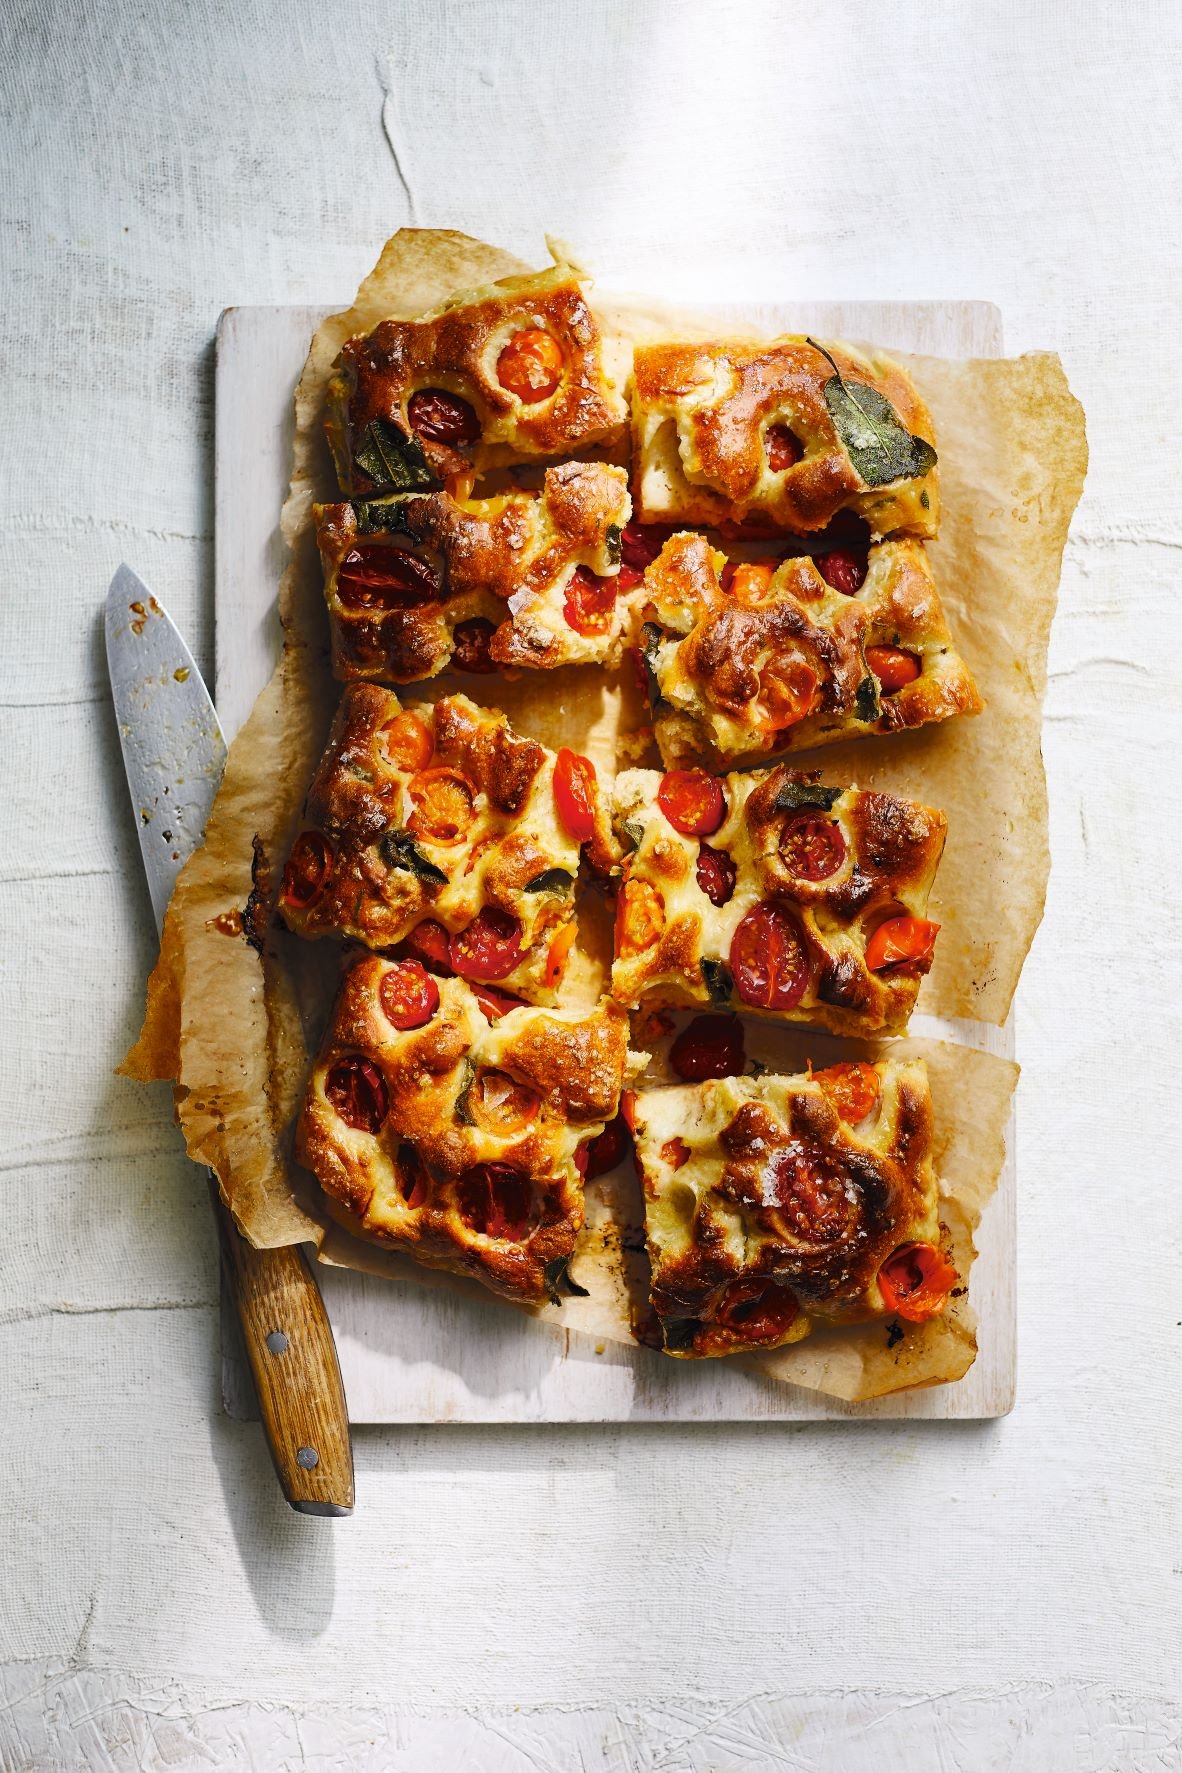
This month marks Sourdough September and we can’t think of much that’s more worth celebrating
As summer draws to a close our minds turn to home comforts, particularly those that involve flowery hands and warm smells emanating from ovens. For our September ‘Begin’ issue, we visited Sourdough School to begin finding out from sourdough guru Vanessa Kimbell how to make that delicious, crusty, chewy bread. You can read all about it on p22 of the issue. To give you a flavour, though, we’ve posted one of Vanessa’s simple sourdough recipes here. Don’t say we aren’t good to you. You can find out lots more about sourdough at The Sourdough School.
Allow yourself about 3 –4 hours for the dough to be mixed, folded and shaped ready to place in the coldest part of the fridge to prove overnight.(If you are new to bread making, you can, instead of shaping the dough and putting it into a banneton, grease a 2lb bread tin liberally with butter, let the dough rise in it overnight in the fridge and then bake as per the recipe instructions below.)
Equipment:
A large mixing bowl
A round cane banneton
2 clean tea towels
A Dutch oven or La Cloche
A large heatproof pan, a sharp knife or ‘lame’ to slash the dough with
Ingredients:
300g water
100g sourdough leaven (made with your starter)*
100g of stoneground organic wholemeal flour
400g organic strong white flour
10g fine sea salt mixed with 15g of cold water
25g rice flour mixed with 25g of stone ground white flour (for dusting your banneton)
Semolina to dust the bottom of the baking surface
Makes 1 loaf
Late afternoon
In a large bowl whisk your water and starter and mix well. Add all the flour and mix until all the ingredients come together into a large ball.
Cover with a clean damp cloth and let the dough rest on the side in the kitchen for between 30 mins and 2 hours – this what bakers call Autolyse
Add the salt mixed with the water and dimple your fingers into the dough to allow the salty water and salt to distribute evenly throughout the dough. Leave for 10 mins.
Next lift and fold your dough over, do a quarter turn of your bowl and repeat 3 more times. Repeat 3 times at 30 min intervals with a final 15 min rest at the end.
Shape the dough lightly into a ball then place into a round banneton dusted with flour (If you don’t have a banneton then use a clean tea towel dusted with flour inside a colander). Dust the top with flour, then cover with a damp tea-towel
Leave your dough to one side until it is 50% bigger then transfer to the fridge , and leave to prove there for 8 – 12 hours.
The following morning
The next morning preheat your oven to 220°C for at least 30 mins before you are ready to bake. Place your cloche or baking stone in the oven and a large pan of boiling water underneath (or use a Dutch oven). The hydration helps form a beautiful crust.
Once the oven is up to full heat, carefully remove the baking stone from the oven, taking care not to burn yourself, dust with a fine layer of semolina, which stops the bread sticking, then put your dough onto the baking stone and slash the top with your blade. This decides where the bread will tear as it rises. Bake for an hour.
Turn the heat down to 180°C (and remove the lid if you are using a Dutch oven) and bake for another 10 -15 mins. You need to choose just how dark you like your crust but I suggest you bake until it is a dark brown – it tastes much better.
Storage
Sourdough is really best left to cool completely before slicing and is even better if left for a day to let the full flavour develop. Once your sourdough has cooled, store in a linen or cotton bread bag, or wrapped in a clean tea towel. If you don’t like a crunchy crust on your sourdough bread, simply wrap your bread in a clean tea towel whilst it is still warm.
* To make 100g of leaven, use 1 tbsp of sourdough starter, 40g of water and 40g of strong white flour, mix well and leave, covered on the side in the kitchen in the morning. It will be lively and bubbly and ready to bake with in the evening.
Get hold of your copy of this month's The Simple Things - buy, download or subscribe

Illustration: Kavel Rafferty
Yearning to impress with a traditional craft? Hold our tea. We’ve got just the thing.
Obviously there’s a tiny bit more to the ancient craft of dry stone walling, or we’d all be building them, but here’s a simple explanation of the basics. Maybe keep your first attempts low and slow. The Simple Things accepts no responsibility for broken toes caused by collapsing granite.
• Source stones from a quarry, or ask at a gravel or sand pit. You want a mix of sizes.
• Dig a trench. Put down your first layer, using the largest stones.
• Use more biggies to make your ‘wall head’ ends. You’re actually building two walls in a standing up ‘A’ shape, wider at the bottom than the top, linked by ‘through’ stones.
• Carefully build up layers on both sides of the base, going from largest stones to smallest upwards. Place stones lengthways, keeping the layer as even in height as possible. Each stone should overlap a gap in the layer below (like in a brick wall) Add smaller rocks to fill in.
• Roughly every metre, add long ‘through’ stones to link both sides of the wall.
• Finish up with large, flat stones placed upright as ‘copping’ or ‘capping’ stones.
If that has whetted your appetite and you’d like to learn more, visit The Dry Stone Walling Association’s website where you can sign up to residential courses in dry stone walling.
You’ll find more miscellaneous fun and facts in our Miscellany pages of the September issue, in shops now.
Get hold of your copy of this month's The Simple Things - buy, download or subscribe

Photography: Kirstie Young
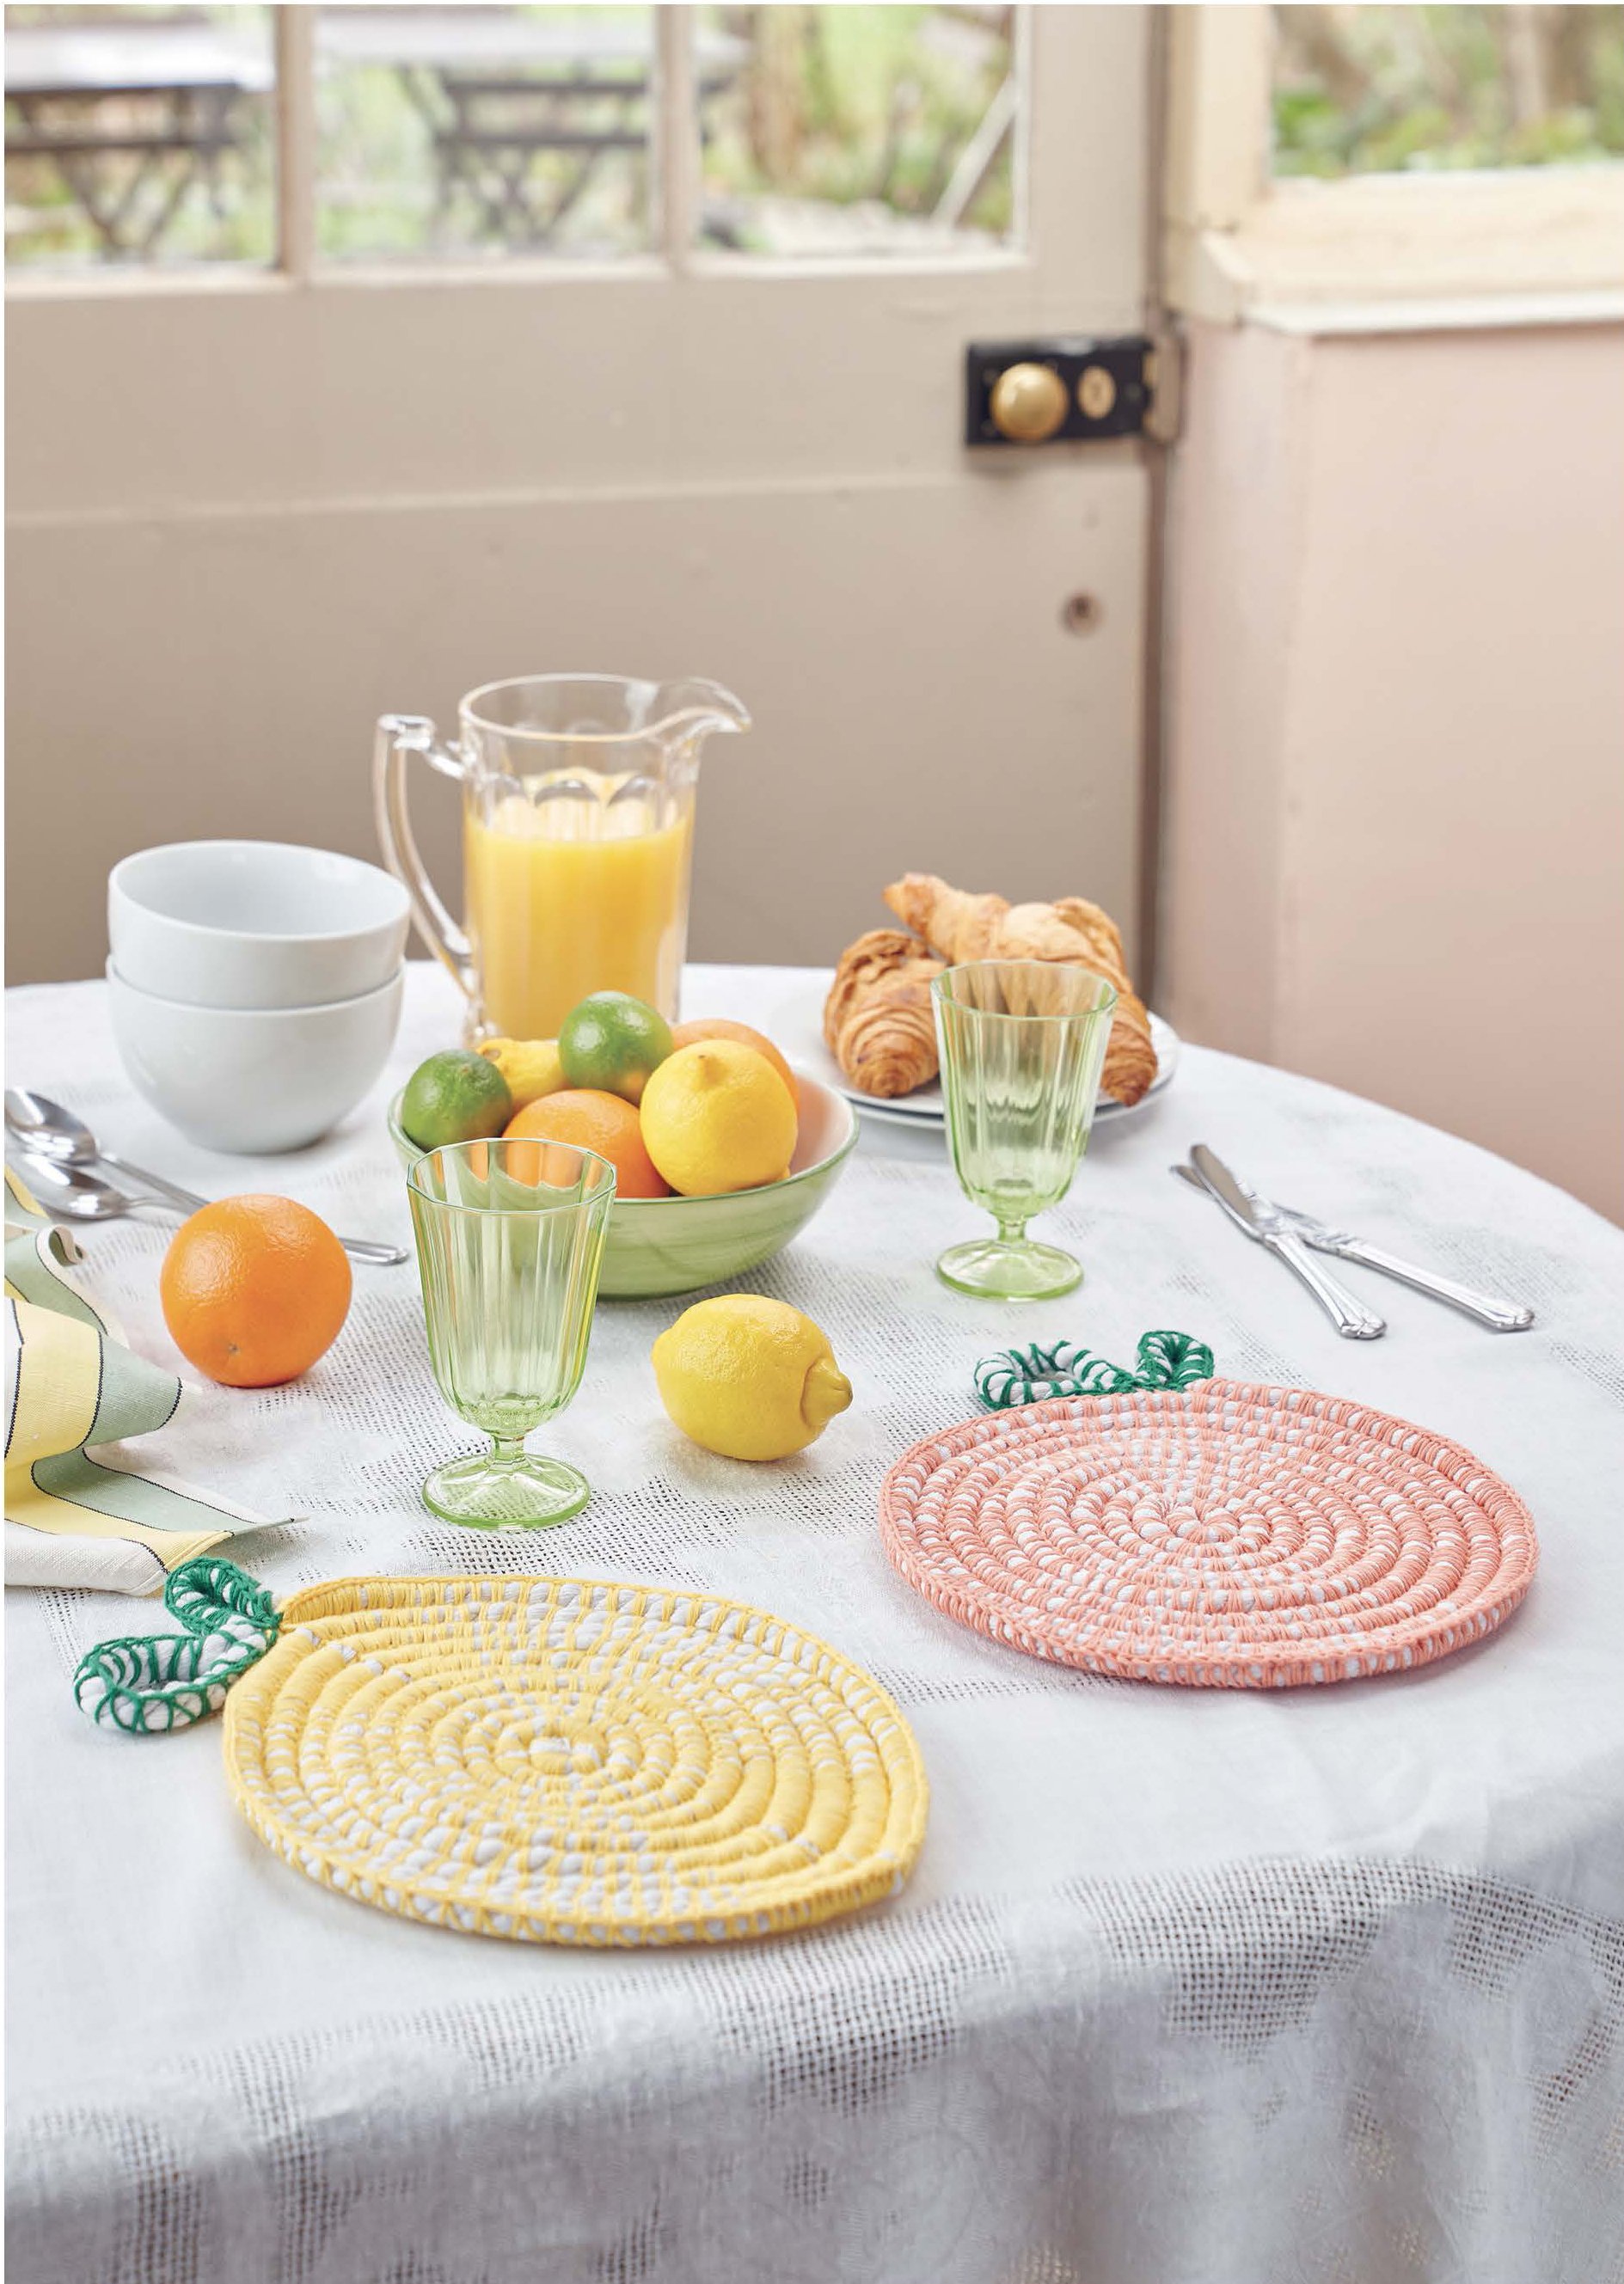
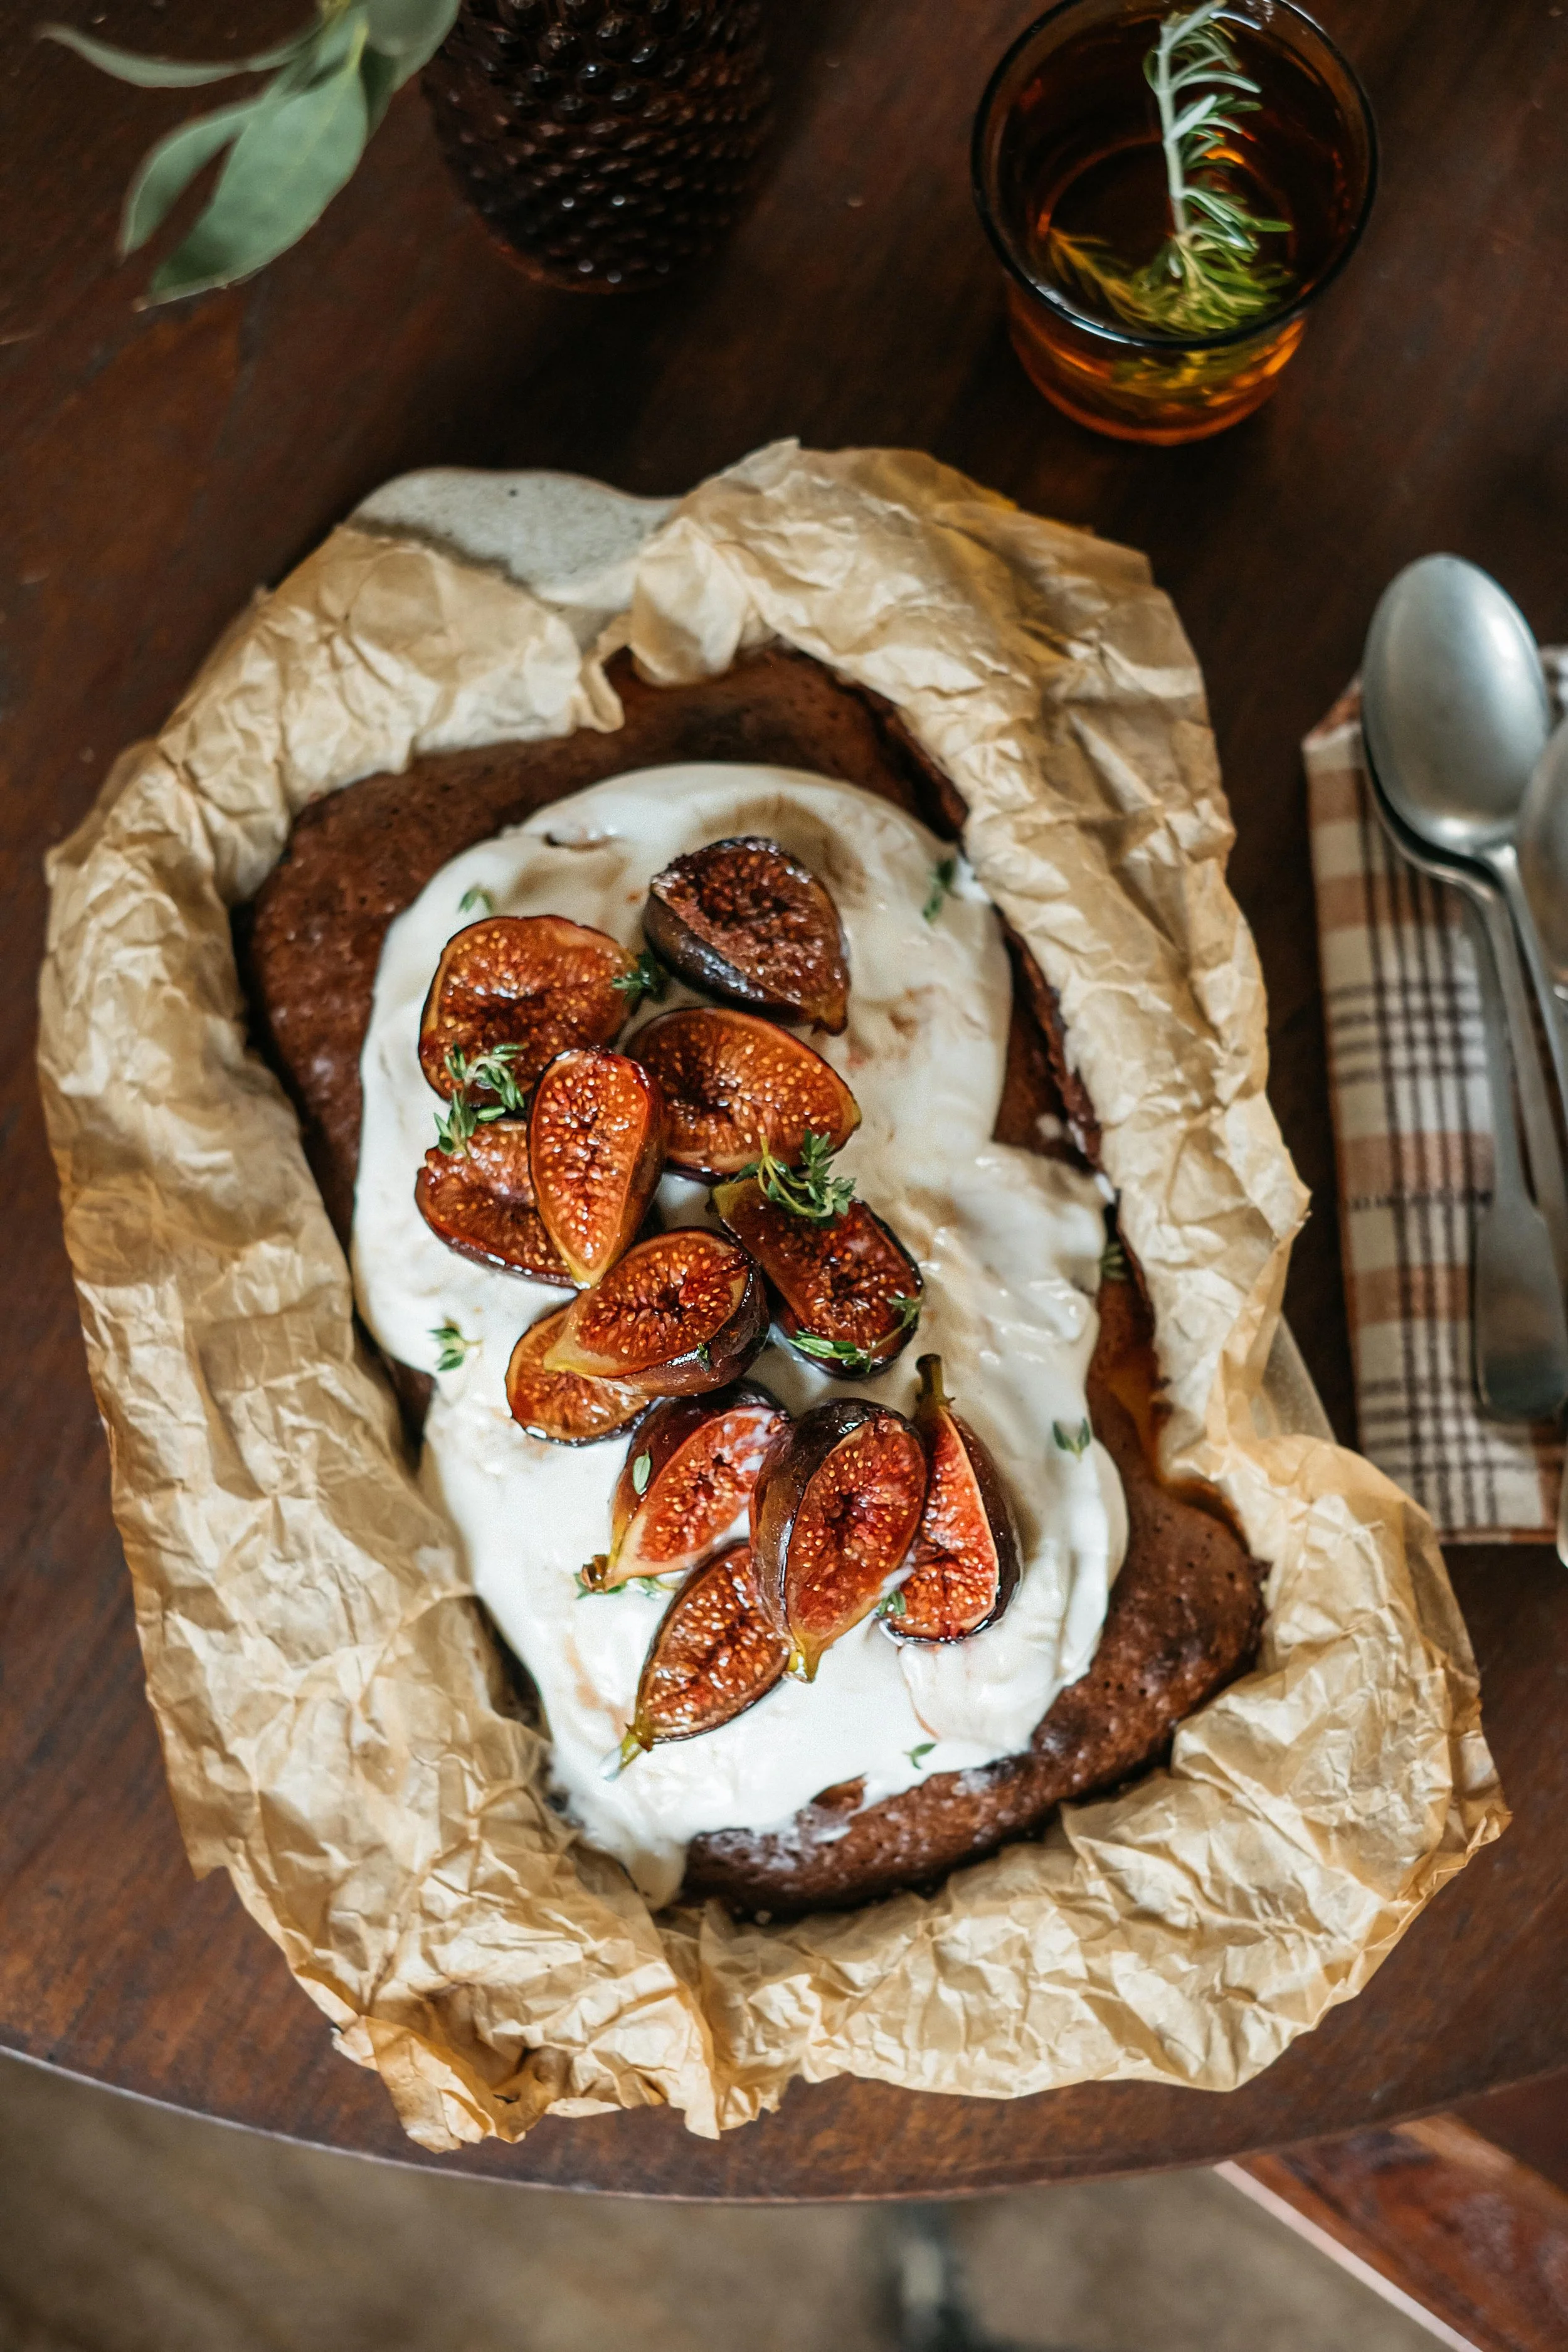
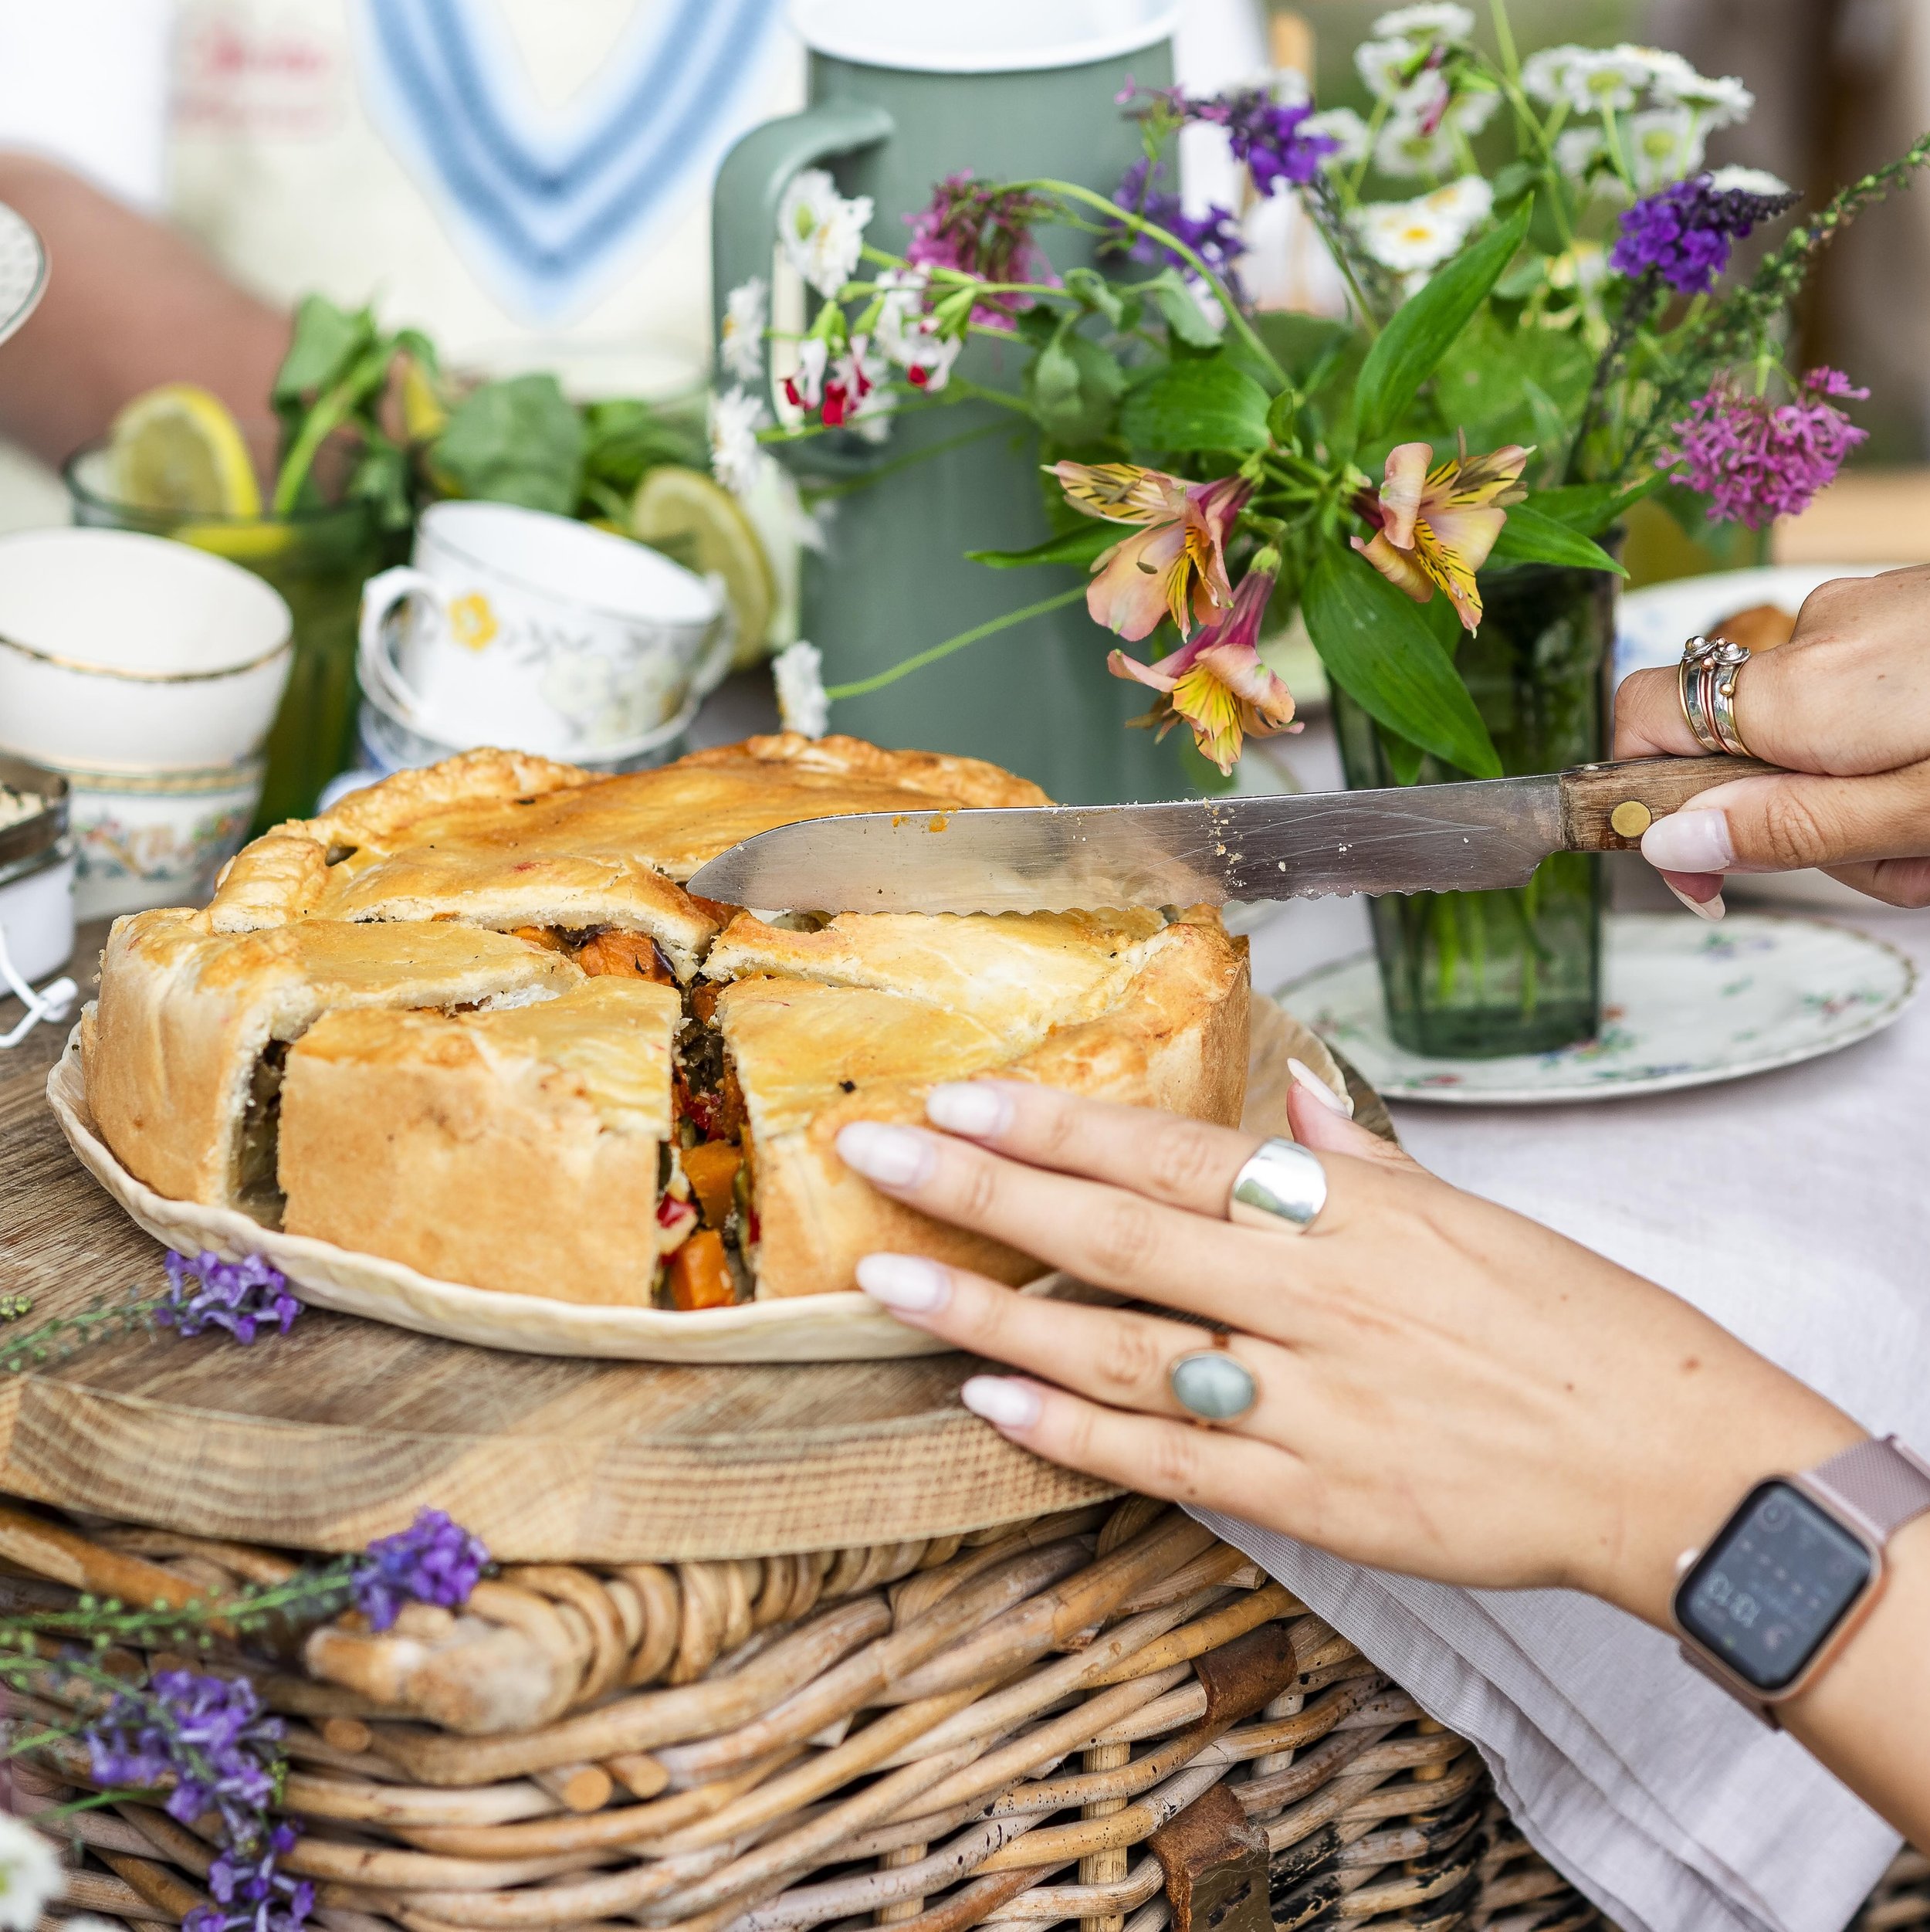
Crumble certainly has its place but if you’re looking for something a little different for your blackberry glut, look no further than this simple September starter, side or light lunch to share
This combination straddles the sweet and savoury worlds and is all the better for it. Sweet and sharp blackberries pair well with creamy goat’s cheese, thinly sliced onions tip it towards savoury while the final drizzle of honey pulls it back to a harmonious and very seasonal whole.
Makes 4
500g strong white flour
2 tsp salt
1 tsp instant yeast
1 tbsp extra virgin olive oil
½ red onion, finely sliced
2 tbsp red wine vinegar
150g soft goat’s cheese, cut into discs
400g blackberries, gently crushed with a fork
1 tbsp fresh or dried thyme
2 tbsp runny honey
1 Put the flour, salt and yeast in a large bowl. Pour over 325ml warm water and the olive oil, and mix to a soft dough. Tip out onto a floured surface and knead for 10 mins, then transfer to a clean bowl, cover with a tea towel and set aside to rise for about 2 hours, or until doubled in size.
2 Meanwhile, put the red onion in a small bowl with the vinegar, mix together and leave to marinate.
3 Once the dough has risen, set a baking tray upside down on a high shelf in the oven and preheat to 240C/Fan 220C/Gas 9.
4 Sprinkle a handful of flour on your work surface and roll out a quarter of the dough as thinly as you can. Sprinkle another handful of flour on the heated baking tray, transfer the dough to the tray and bake for 6 mins.
5 Drain the onion and pat dry with kitchen roll. Remove the flatbread from the oven and scatter over a quarter of the cheese, a quarter of the blackberries, a quarter of the onion and a quarter of the thyme. Return to the oven for about 7 mins.
6 Drizzle the flatbread with a little honey and eat immediately. Repeat with the remaining dough and ingredients to make four flatbreads. Cook’s note: If you have a special pizza oven or a pizza stone, you may be able to put the topping onto the raw dough and cook it all together, but most standard ovens won’t get hot enough to make flatbreads without soggy bottoms unless you cook the base a little first.
This recipe is by Lia Leendertz and is part of our Finders Keepers series on foraging. You can find the rest of the recipes for blackberries and elderberries in our September issue. We’ve got everything from elderberry lemonade to roast blackberry fool!
Get hold of your copy of this month's The Simple Things - buy, download or subscribe

Am I Overthinking This? by Michelle Rial (Chronicle Books)
We’ve almost reached the end of August and are already looking forward to our September issue hitting the shelves.
We’ve enjoyed ‘pausing’ and all that encompasses this issue, taking time to enjoy the things on our doorsteps we often miss, time to learn something new or try a new skill, and time to spend in simple pursuits, cooking over a fire or reading a book.
The illustration we used on our back cover struck a note with all of us at Simple Things Towers so we thought we’d share it with you in case you missed it. It’s from Am I Overthinking This? By Michelle Rial (Chronicle Books). We hope it makes you smile, too.
Goodbye August! Bring on September!
Get hold of your copy of this month's The Simple Things - buy, download or subscribe

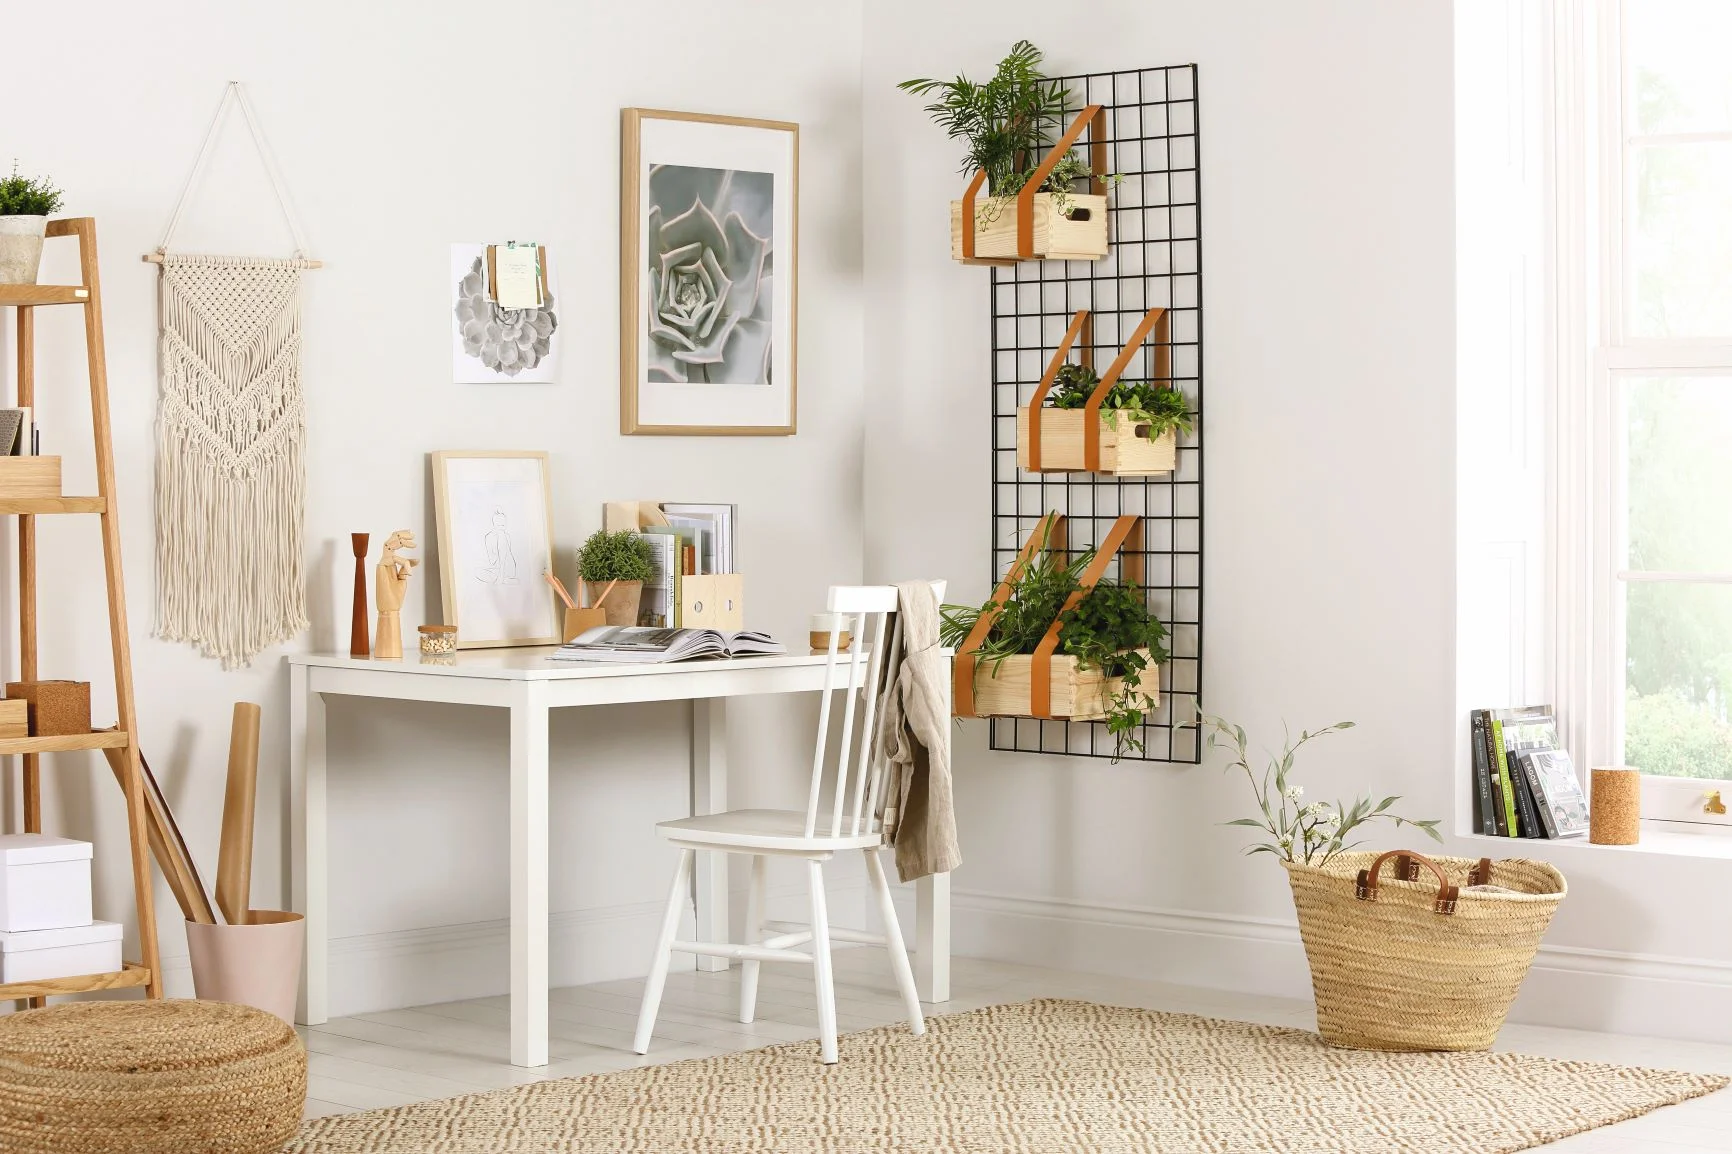
Enter our competition for the chance to give your home a new look for autumn
September is often a time of fresh starts and resolutions, prompted by the summer coming to an end. As the temperature drops, thoughts turn to indoors – so it’s a good time to make changes to the home, whether it’s introducing new cushions or a throw, or a total storage rethink. This month’s fantastic competition gives you the chance to treat your home with £500 to spend at Garden Trading. Best known for its outdoor furniture, lighting, pots and more, Garden Trading is also a great place for soft furnishings, homeware and indoor furniture.
Find the full collection at gardentrading.co.uk.
How to enter
SImply press the button below and answer the question to enter the prize draw.
Terms & conditions The competition closes at 11.59pm on 11 October 2019. A winner will be selected at random from all correct entries received and notified soon after. The winner cannot transfer the prize or swap it for cash. Details of our full terms are on page 127 and online at icebergpress.co.uk/comprules.

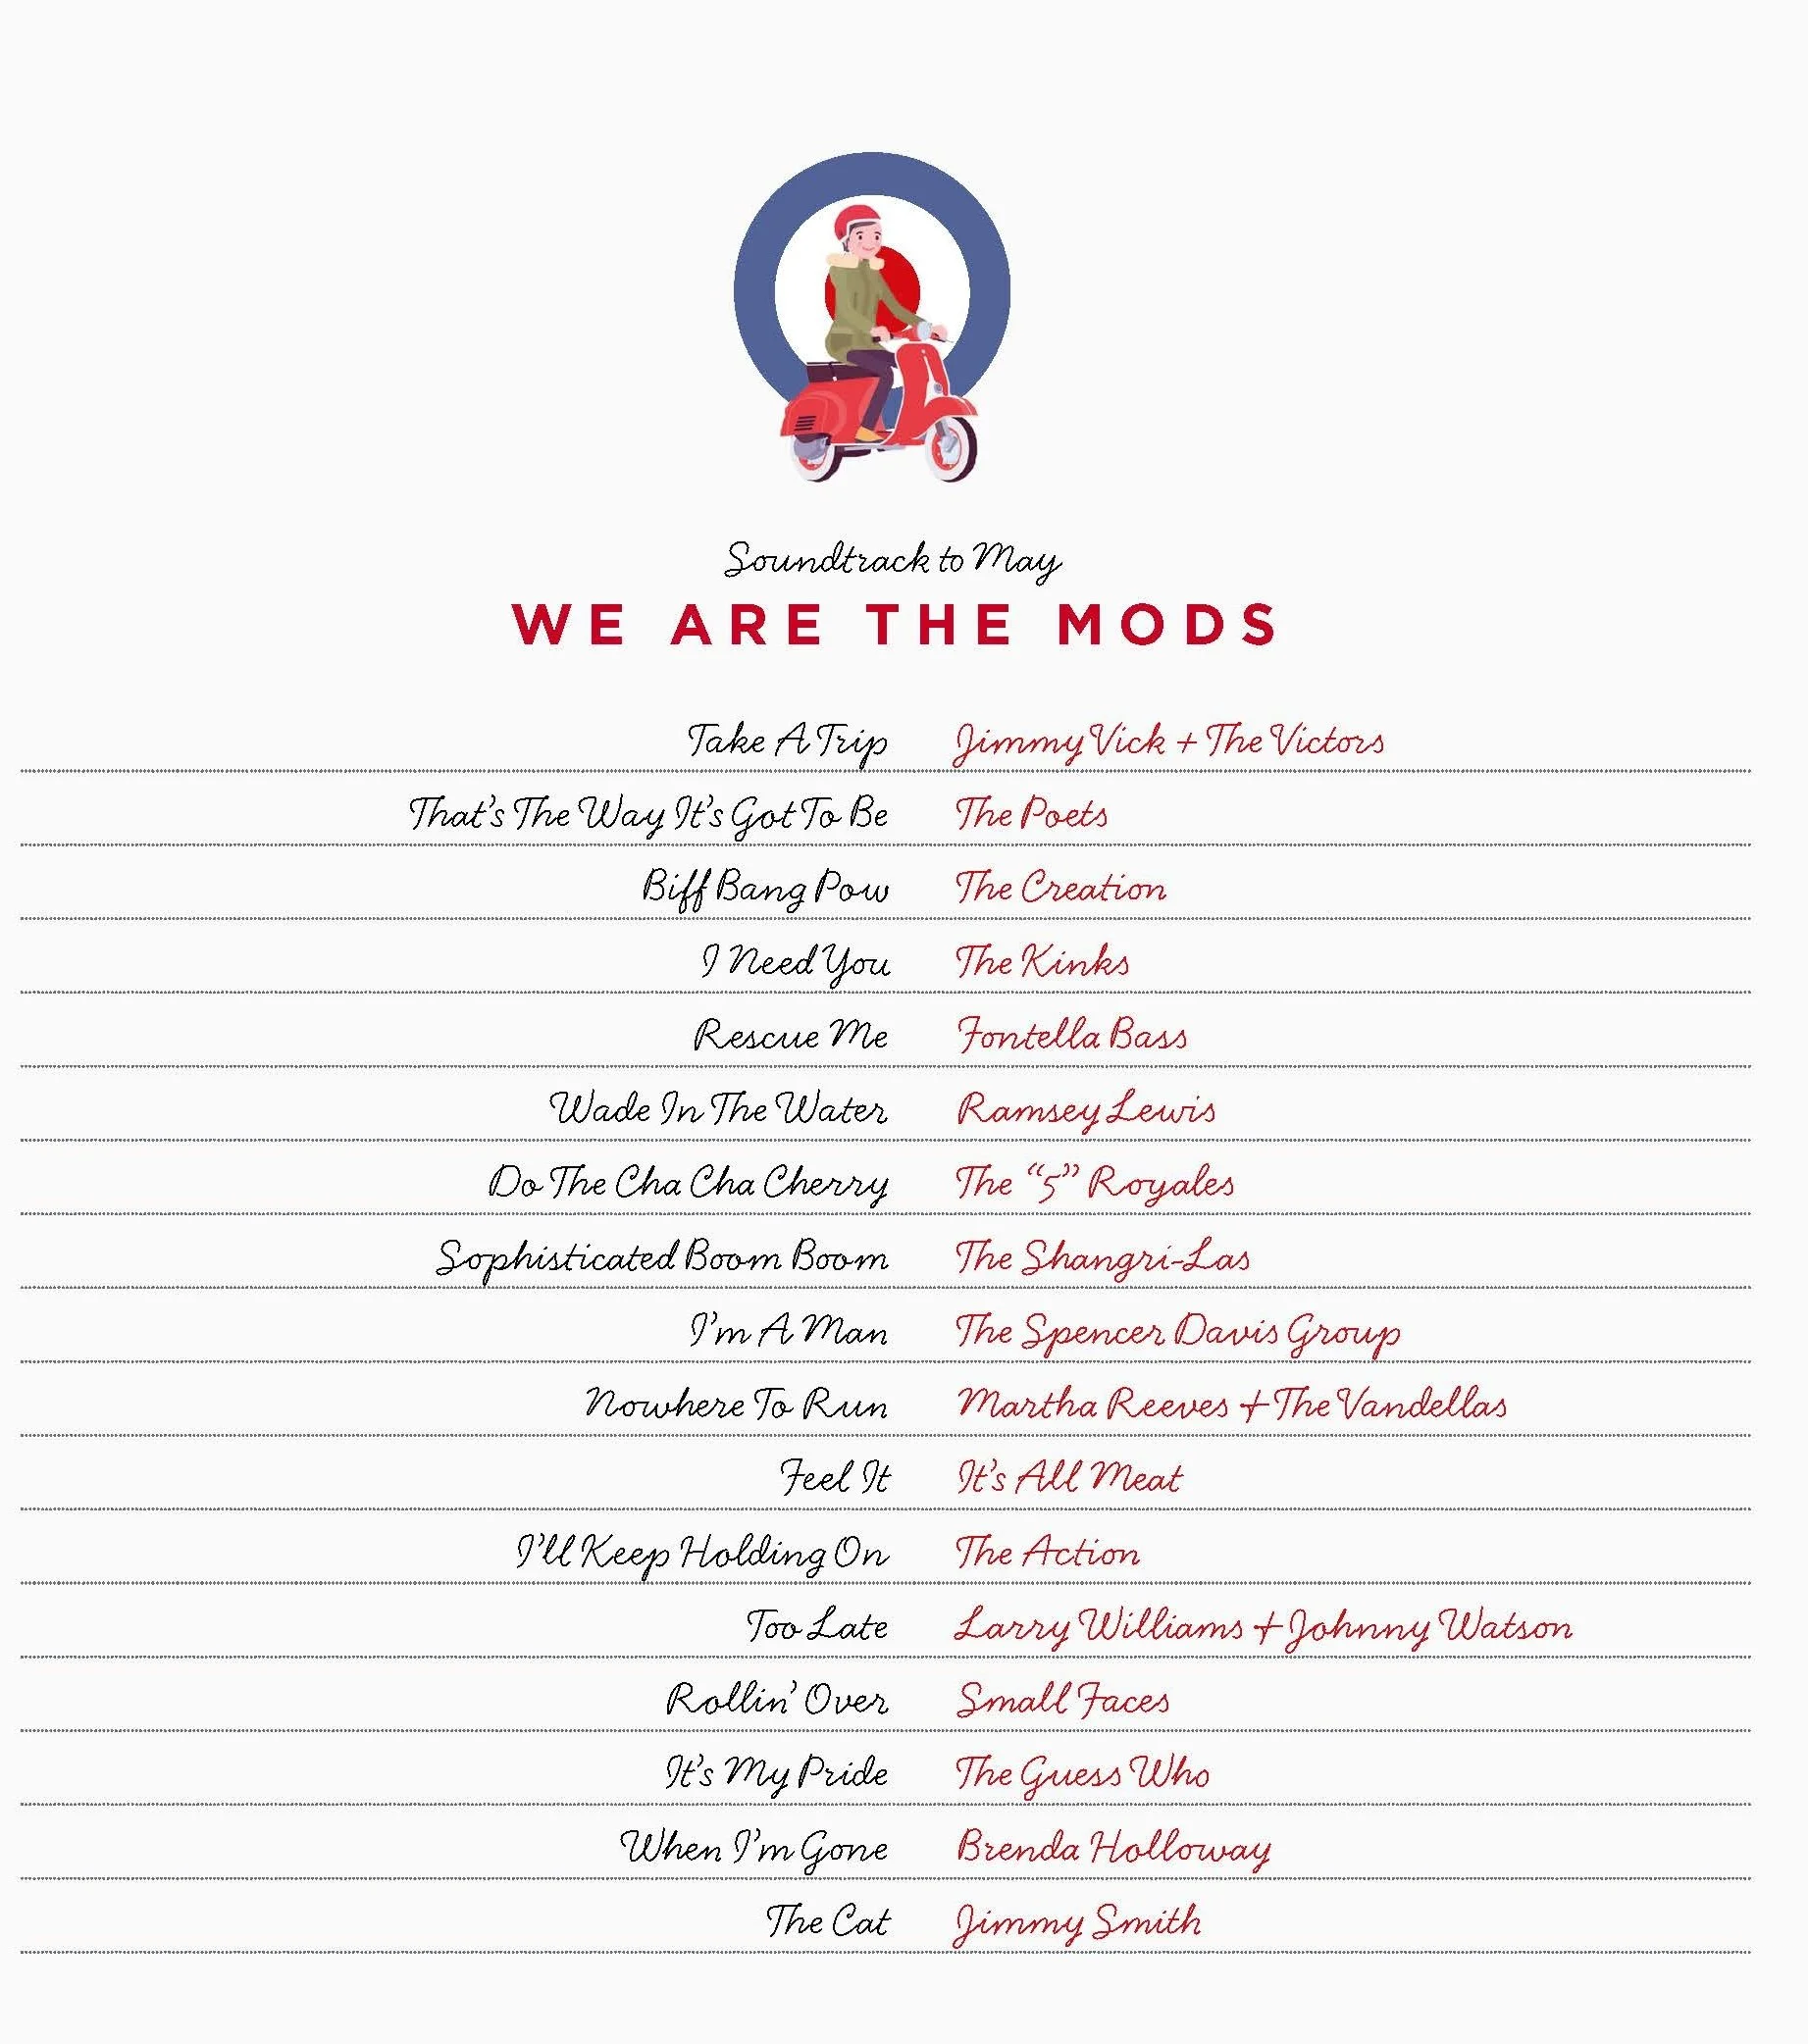
DJ: Clare Gogerty Illutration: Shutterstock
Mister postman look and see. Is there a letter in your bag for me?
Listen at thesimplethings.com/blog/lettersplaylist
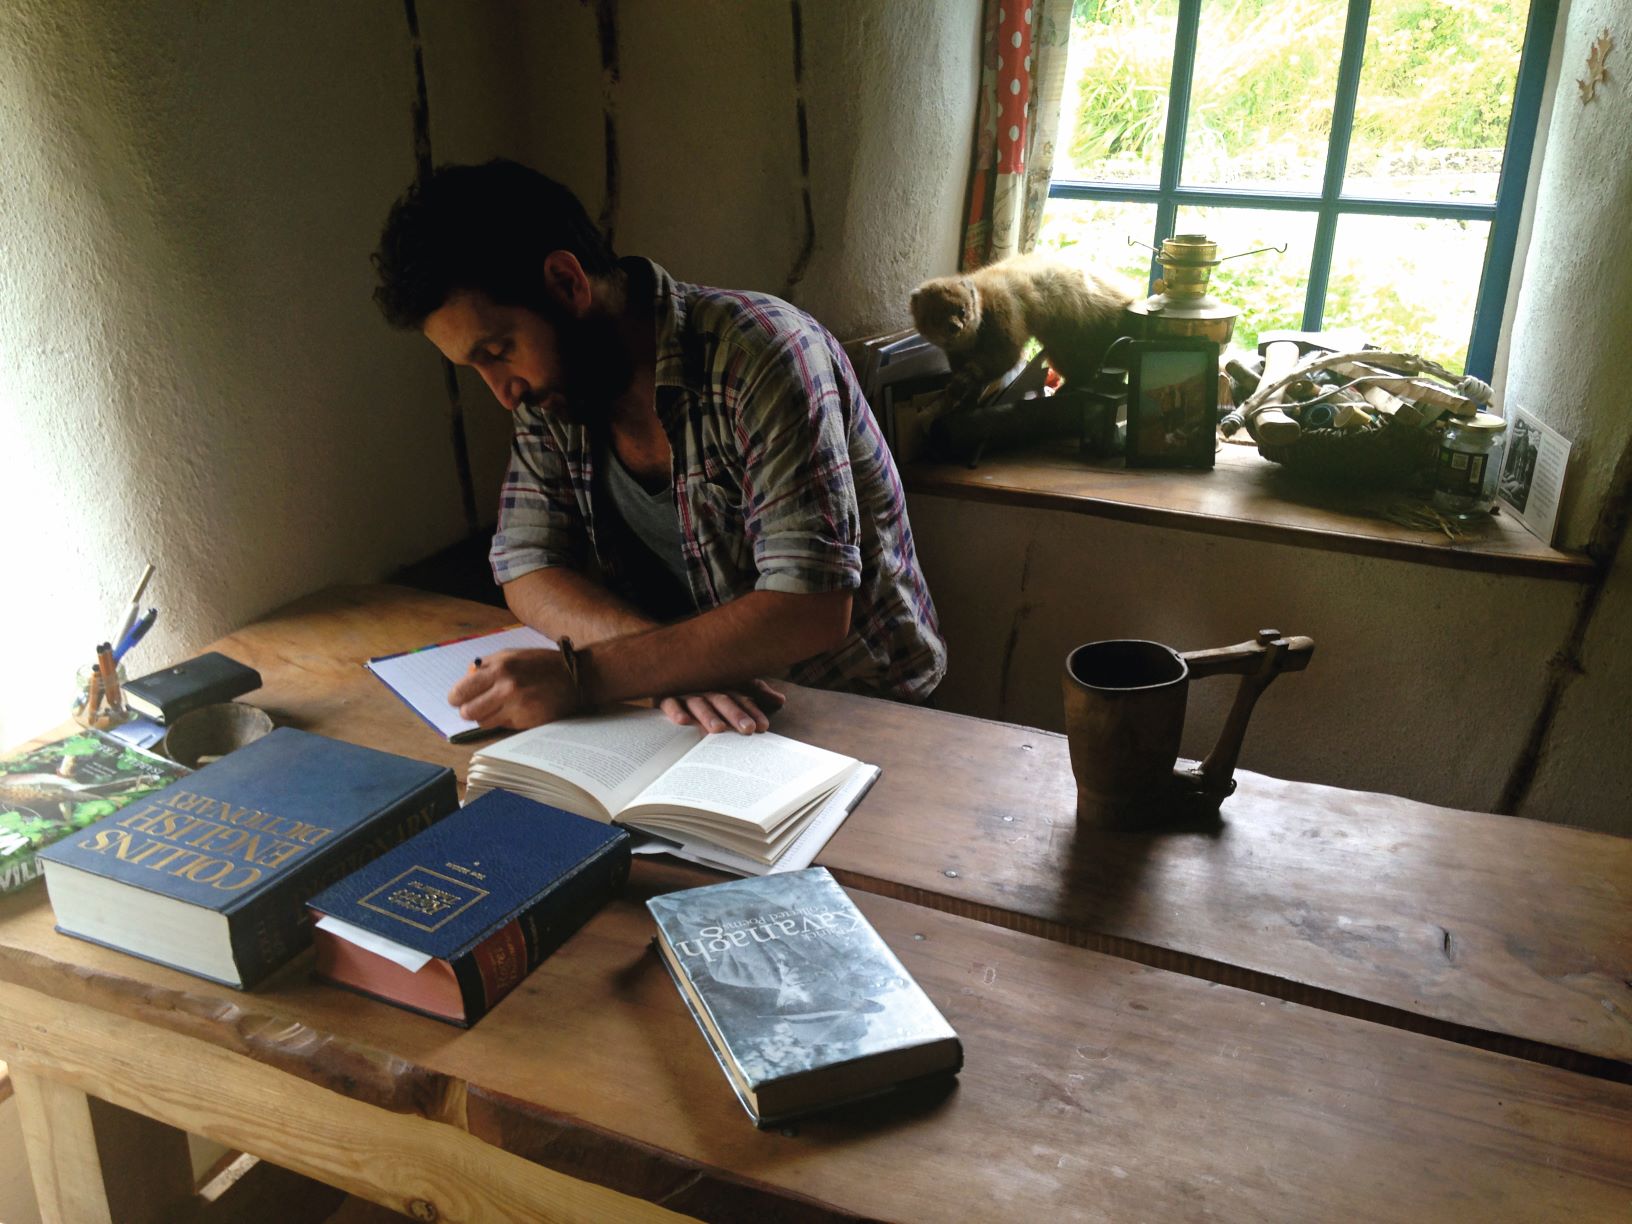
Image from The Way Home by Mark Boyle
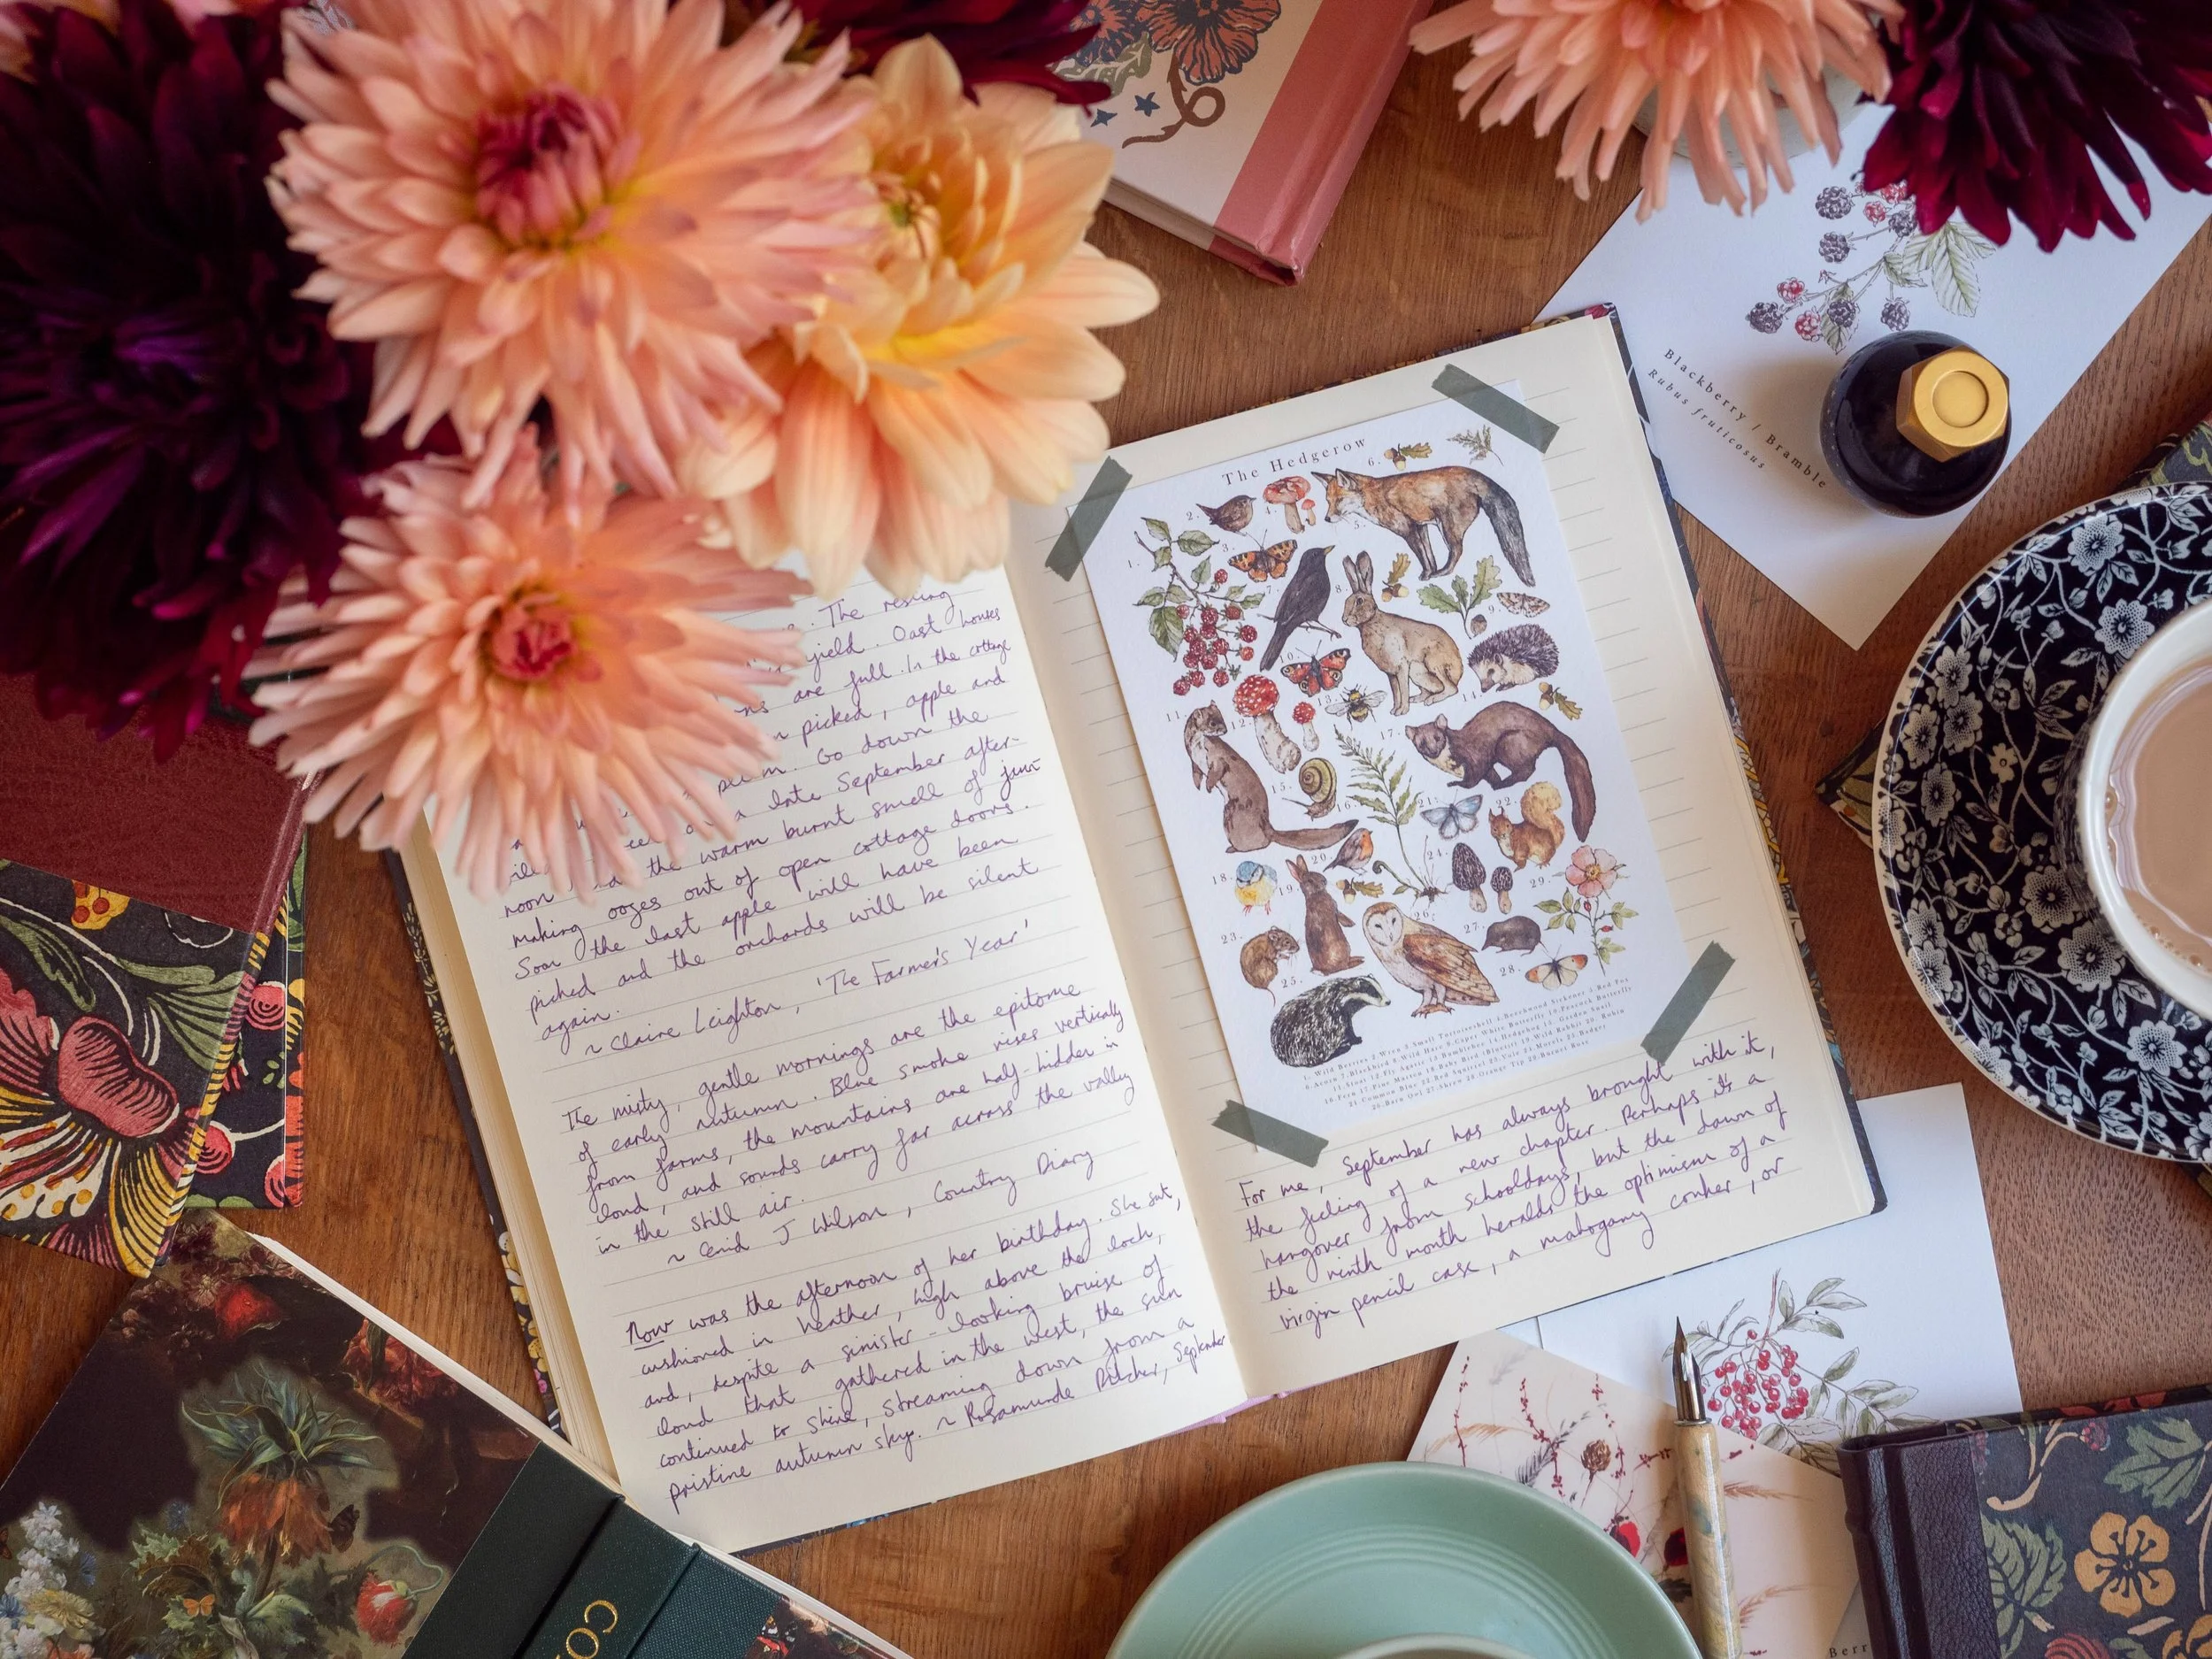
Why writing and posting a letter is a forgotten pleasure
Do you remember the last time you received a letter from a friend? We bet you do, mainly because it’s such a rare thing these days. We bet you kept it, too, and reread it several times. We live in a world of texts, emails and (worse) texts that contain only emojis, which frankly, we think of as a crime against semi colons and brackets that ought to be punishable by law.
So among all this, a letter you can unfold and hold, with actual ink, a recognisable hand, is something to treasure.
We’ve resolved to write to friends more often, rather than sending those quick texts and emails, and are hoping to spread a little of that old-school joy of receiving a letter as well as enjoy the time spent on our own, penning it.
Here are a few tips on how to write a really good letter and enjoy every moment of it.
Make the writing of a letter an event. Take your pens and paper to a coffee shop or library, or find a corner of the house or garden to escape to, and make sure you have a good hour free. You don’t have to finish the letter. Many of the best letters are written across a number of days with charming additions and edits marked on as you go. Lovely.
Get out your posh pens and paper (and pencil case, too, if you like). Nice things make the experience even more pleasurable and a lovely pen and some nice heavy paper or an interesting card to write in will ensure you use your very best handwriting, too.
Once you’ve assembled your tools and got yourself a cup of something steaming, you’re ready to write. Begin by setting out your reason for writing - you don’t want anyone panicking and suspecting there’s bad news to impart. Your reason for writing could be as simple as ‘I’ve decided to write more letters this year, and you’re my first victim!’
Draw up a mental list of things you want to tell your friend. Ask yourself what you’d tell her if you phoned her and she asked what you’d been up to. It’s easy to feel a bit self-conscious writing all this down without the usual conversational to and fro you have in a phone call or face-to-face conversation but go with it and it will start to feel more natural.
You’ll discover your natural written tone as you go but write in ‘your voice’. Use the expressions and words you would use in everyday conversation. Letters to friends should feel intimate but never formal.
Don’t feel limited by the bounds of convention - little illustrations and diagrams will raise a smile and help as set the scene, whether it’s a comical drawing of the look on the bus driver’s face when you tried to pay using your library card, or a diagram of the parking wars battlefield raging on your street. Footnotes, asides and postscripts all add fun and texture to a letter, too.
Don’t forget to include questions to your friend. This isn’t all about Me, Me, Me, remember. Let your imagination run a bit wild. It’s polite to ask after her health, job and family, but why not ask what book she’s reading now, whether she can recommend anything on TV, or simply which dead kings and queens she would invite to a fantasy dinner party.
Sign off enthusiastically. Lots of love is better than ‘best wishes’. But a ‘Yours, from HMP Holloway is always funny (unless of course it’s true). If you really like the friend, why not slip a small bar of chocolate in before sealing the envelope? (Or a visitor’s pass?)
We were inspired to write this blog by a piece in our August ‘Pause’ issue, from The Way Home: Tales From a Life Without Technology by Mark Boyle (Oneworld). Mark, who is pictured above, decided to build a cabin on his smallholding and avoid technology (so no phone calls, emails or texts). He spends every Sunday evening writing replies to all the letters he receives during the week.
Get hold of your copy of this month's The Simple Things - buy, download or subscribe

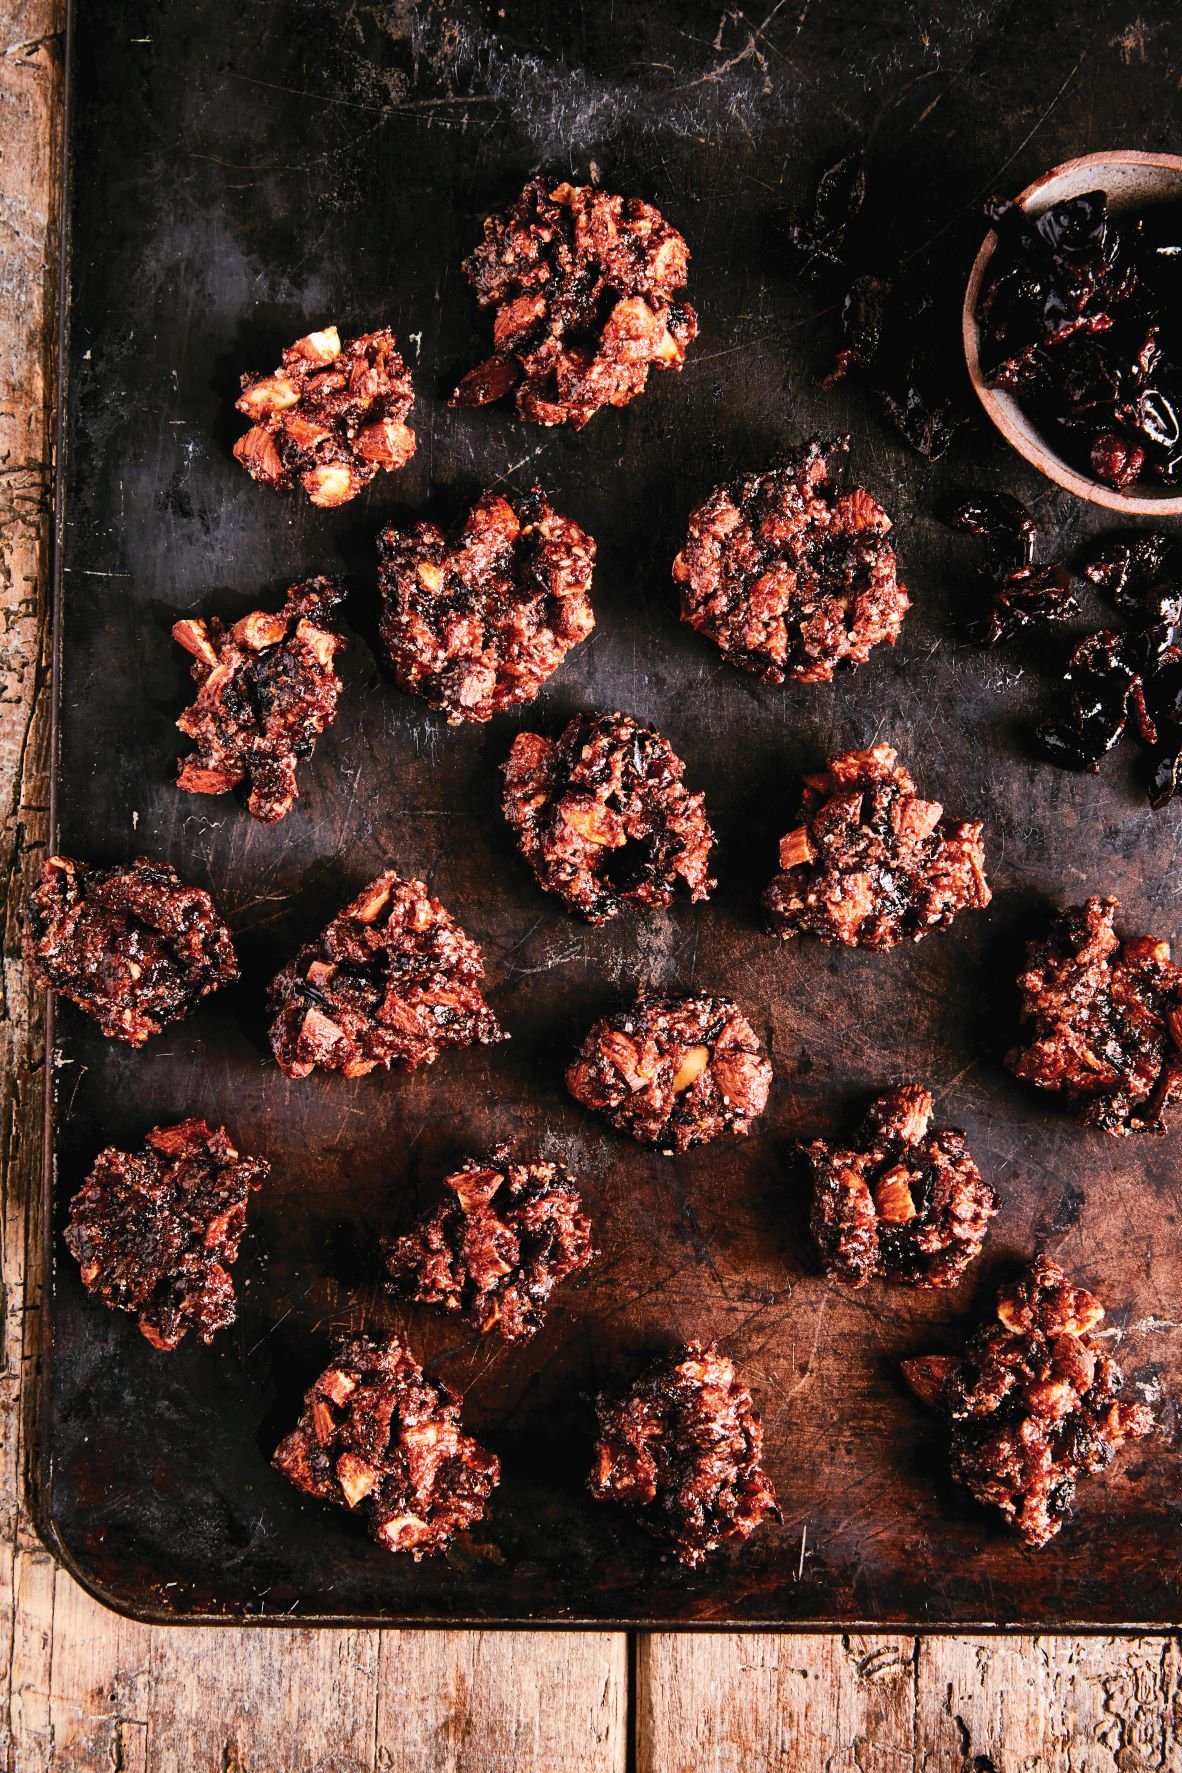
The Earth’s Crust Bakery, Castle Douglas
The joy of a good bakery, like the joy of a good bookshop, never ages. They might have become more artisan, more European, more generally fancy, but at the heart of a good bakery is that same ‘nose-pressed-to-the-glass, nostrils heady with the scent of sugar feeling that captured us as children, eyes like dinner plates and hands ready to grab.
In our August issue, we’ve featured a few of the most inspiring bakeries in the world, taken from Europe’s Best Bakeries by Sarah Guy. And we have to say it’s an awe-inspiring collection, including The Earth’s Crust Bakery at Castle Douglas, pictured above. It took us right back to our earliest memories of bakeries, and - we’re going to give away our age here - we’ve collated below a few of our favourite classic bakery goods. There’s nothing civilised about most of them. Each is a frivolous carb- and sugar-fuelled mini feast. Exactly as it should be.
Join us on a trip down memory lane. And leave us a comment at the end of the blog reminding us of any bakery goods you enjoyed as a child that we might have forgotten…
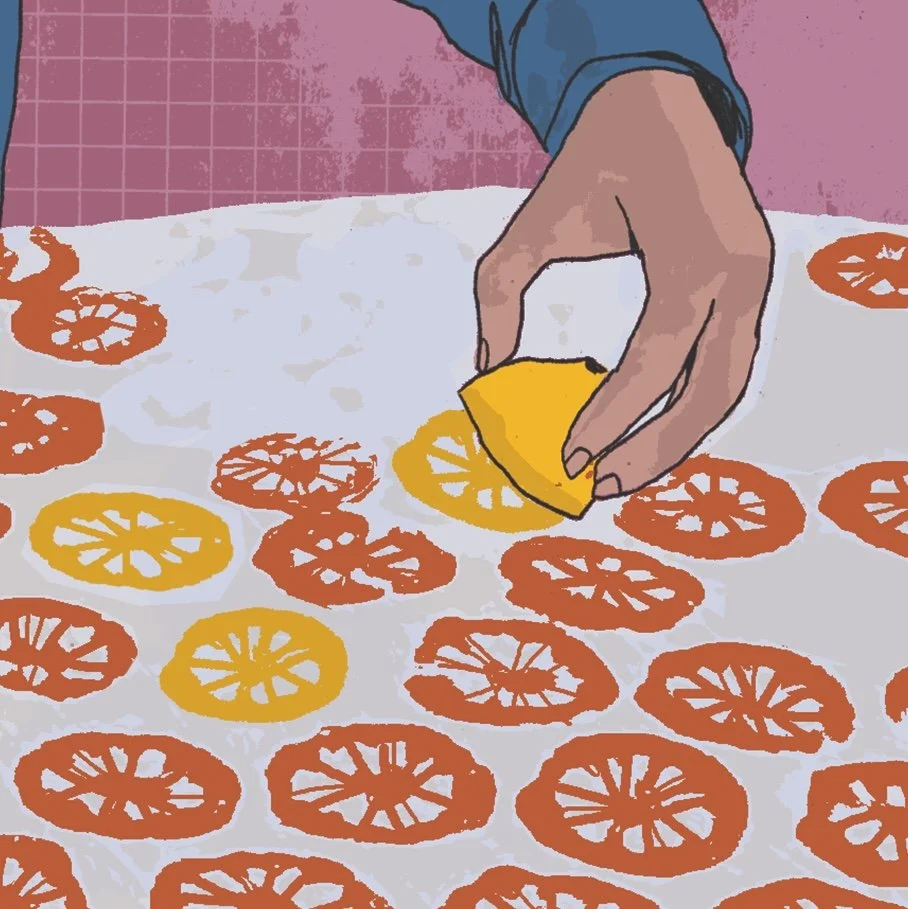
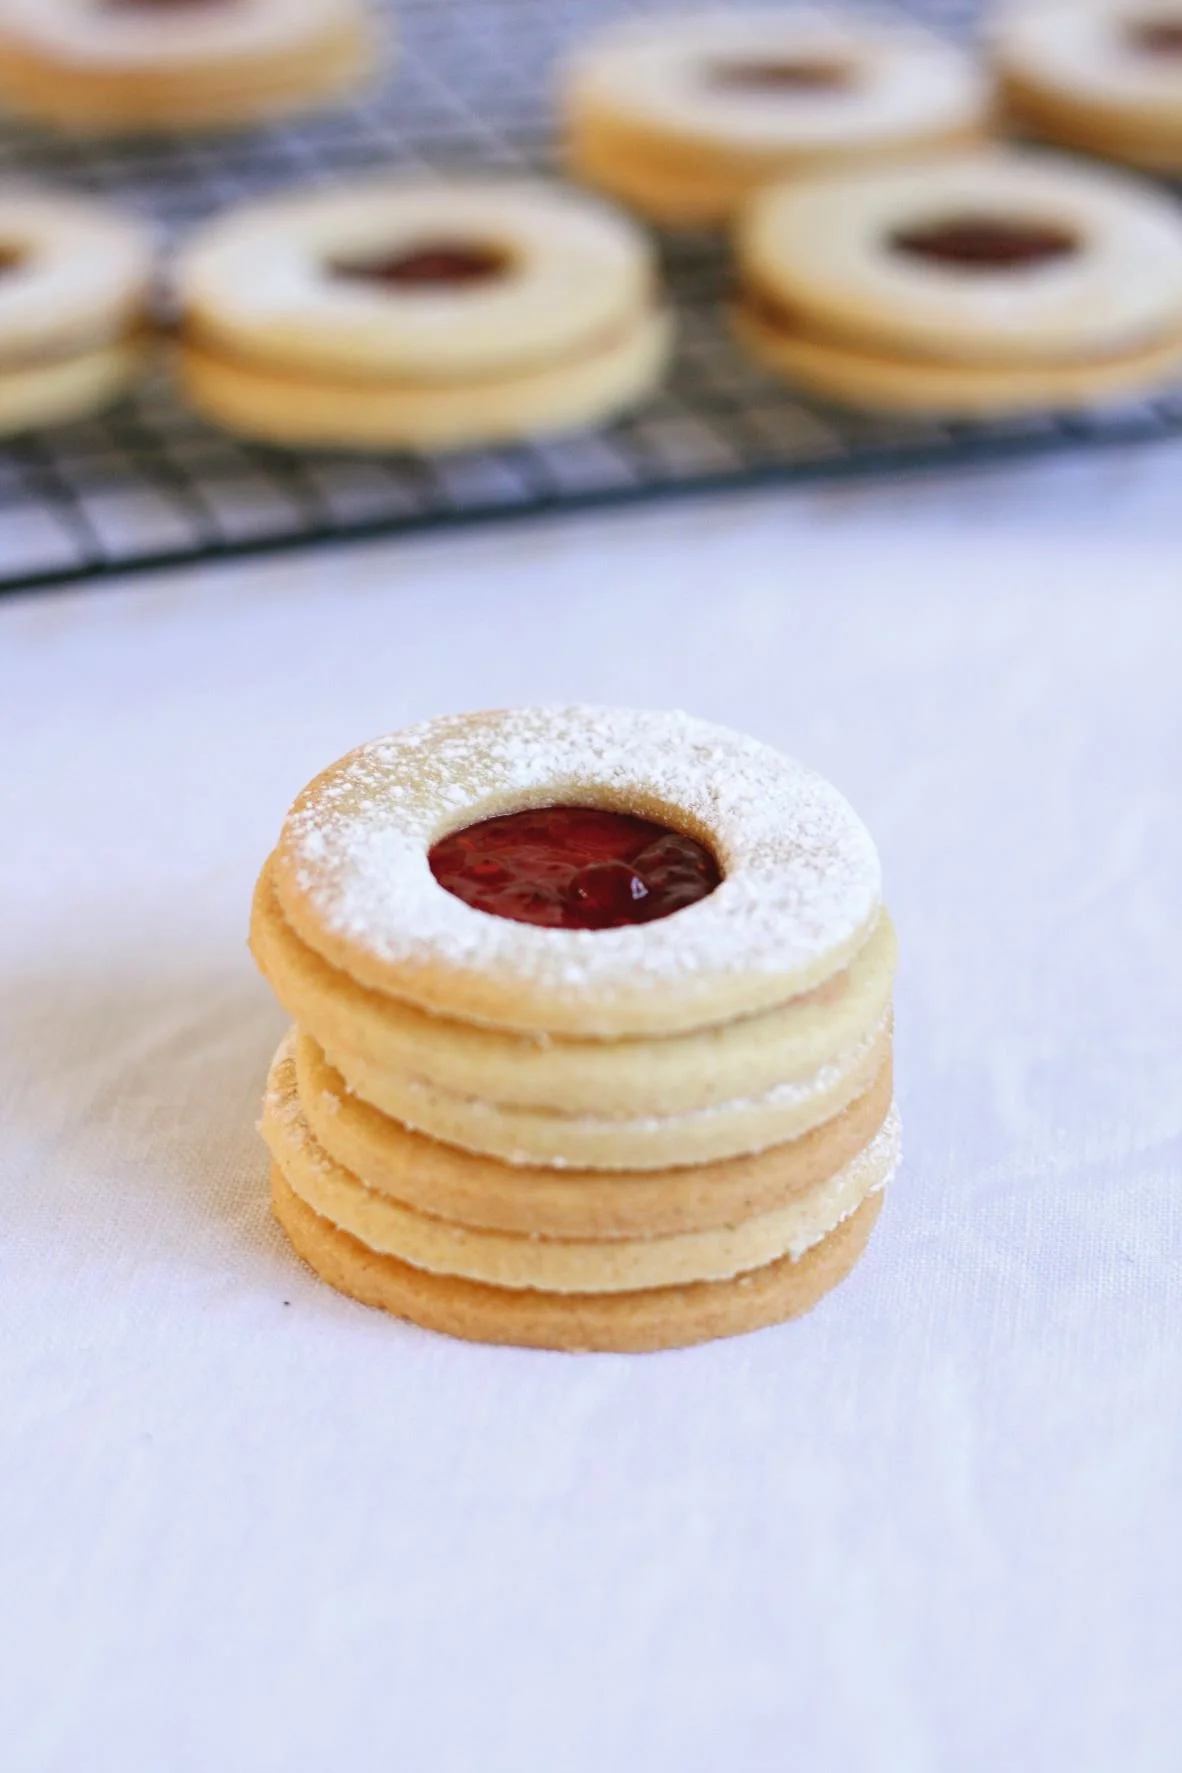
Traffic light biscuits
Oh the indulgence! Two shortbread biscuits sandwiched together, the top with three tempting holes cut out, through which oozed not one, nor two but THREE differently coloured fruit curds (red, yellow and green obviously). We still have no idea what flavour each colour was meant to denote. Presumably strawberry, lemon and… erm… lime? Apple? Green flavour? It matters not. The point was that buttery shortbread crumbling beneath your gappy-toothed bite and nearly falling to the floor, but for the curd that kept it safely anchored to the main biscuit.
Nest cakes
Mysteriously sold all year round, these Easter treats were usually assembled from Cornflakes or Shredded Wheat, crushed and mixed with melted chocolate, dolloped into paper cases and decorated with tiny eggs. And none of your posh Mini Eggs of today, oh no. These eggs were of the 1980s ‘pure sugar, encased in a shell, again of pure sugar’ variety. Just looking at them made your teeth ache. What’s not to love?
Ice cream cone ‘cakes’
We struggled to remember what the deal was here but we remember jealously coveting them, that’s for sure. Askey’s wafer cones, filled with some sort of sticky sugary goo, that bonded any two surfaces quicker than Bostick. We think it was meant to represent ice-cream. The whole thing was topped with Hundreds and Thousands - the proper sugar strands, not your modern, ball-style nonsense. We clearly remember that they were created in a rainbow colourway, with multicolured sugar strands atop a pink sugar goo and there was also a chocolate version, with a chocolate goo topped with only dark chocolate sugar strands (for the more classy and discerning eight-year-old, presumably).
Iced fingers
Take off the icing and you basically have a plain, unassuming roll, but lined up in the bakery window, iced fingers were pure joy. There’s something deliciously simple (and almost unashamedly cheeky) about icing a plain bread roll and calling it a cake. We admire this.
Meringue ghosts
Not just for Halloween, these crumbly creatures of the night seemed to be on bakery shelves all year round. Swirls of wonky meringue with chocolate drop eyes and a demeanour that would terrify an apple puff.
Sticky buns
We’re taking a very specific type of sticky here. Not your average iced bun (we’ve covered those), and not a Chelsea bun either (no glace cherries here). Proper sticky buns were simple fruit buns made sticky with some sort of mysterious glaze and tiny crystals of sugar that were inexplicably perfect cube shapes. What WERE those things? Anyway, inexplicably sticky buns were a classic and have somehow not been the same in the last 30 years at least. And we still don’t know where that mad square sugar came from. Intriguing!
Do leave us memories of your forgotten bakery goods below. We can’t wait to read them. Pick up our August issue to read more about some of the best bakeries in the world.
Get hold of your copy of this month's The Simple Things - buy, download or subscribe
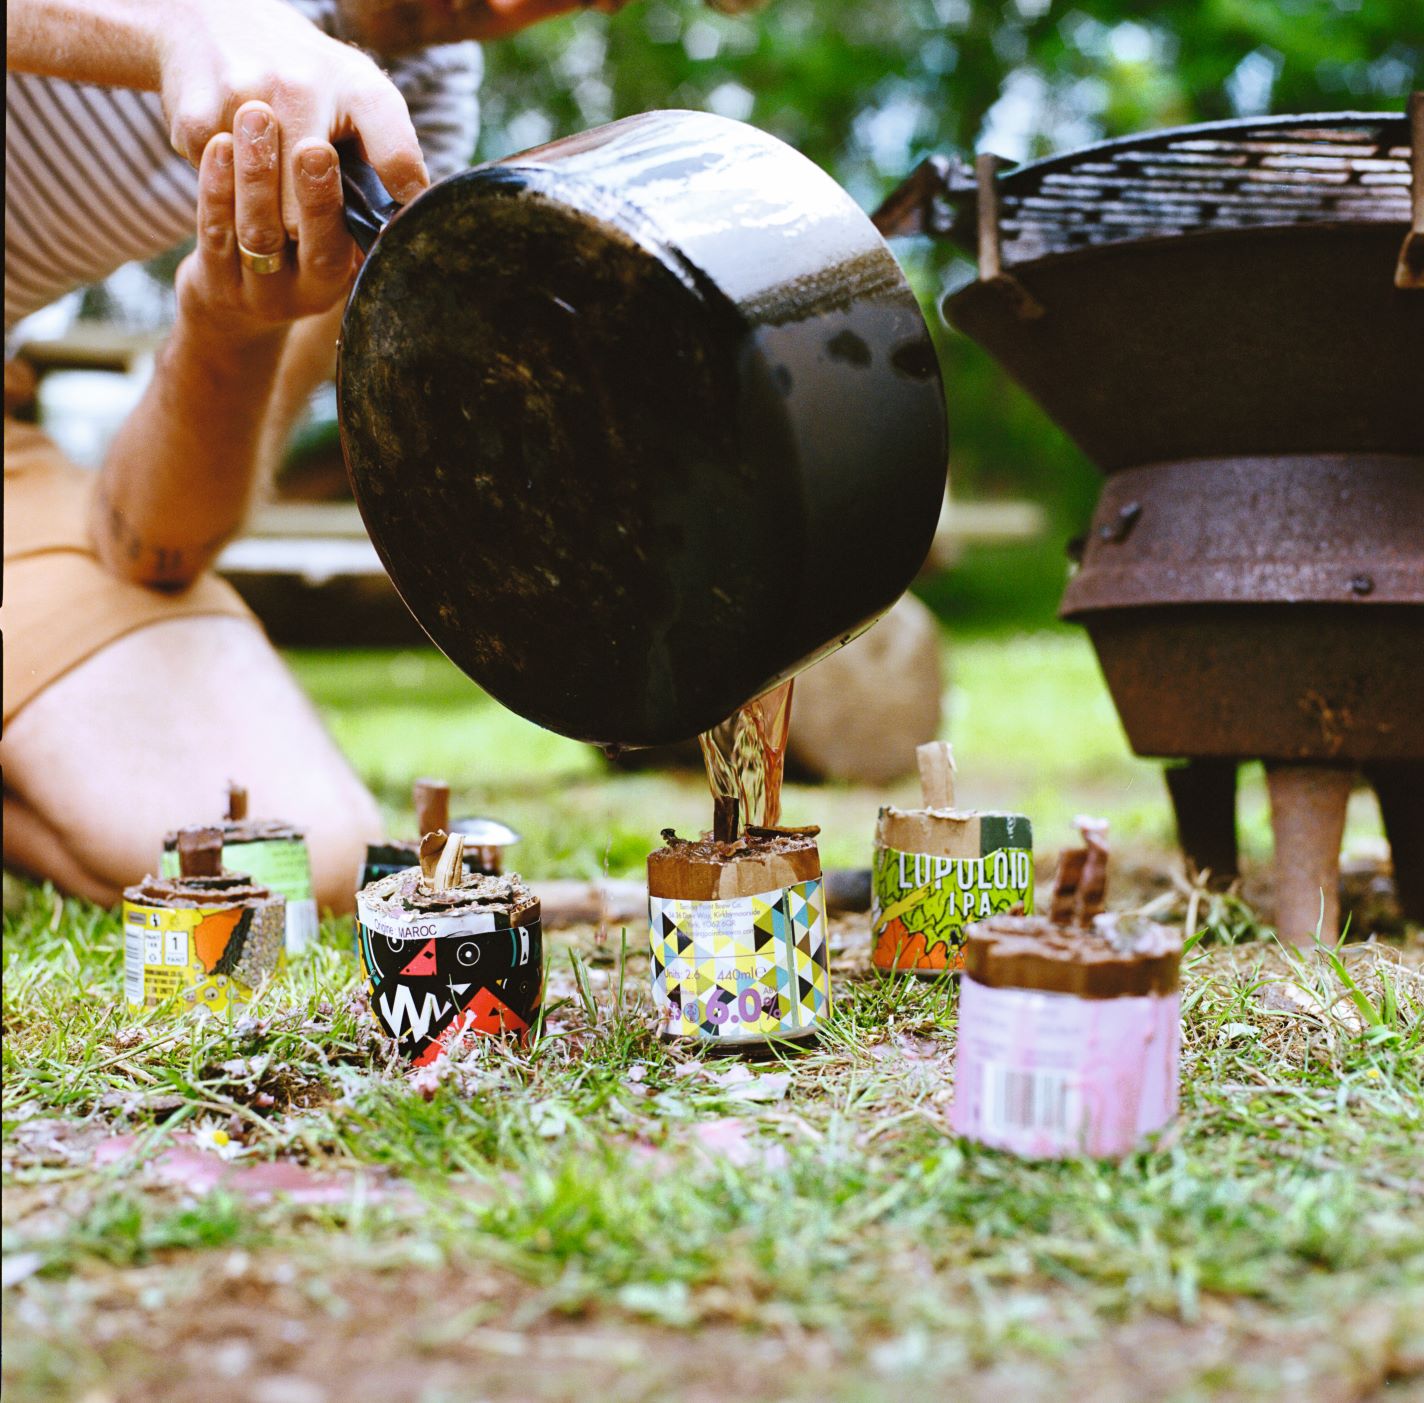
Photography: Jonathan Cherry Project: Matt Long
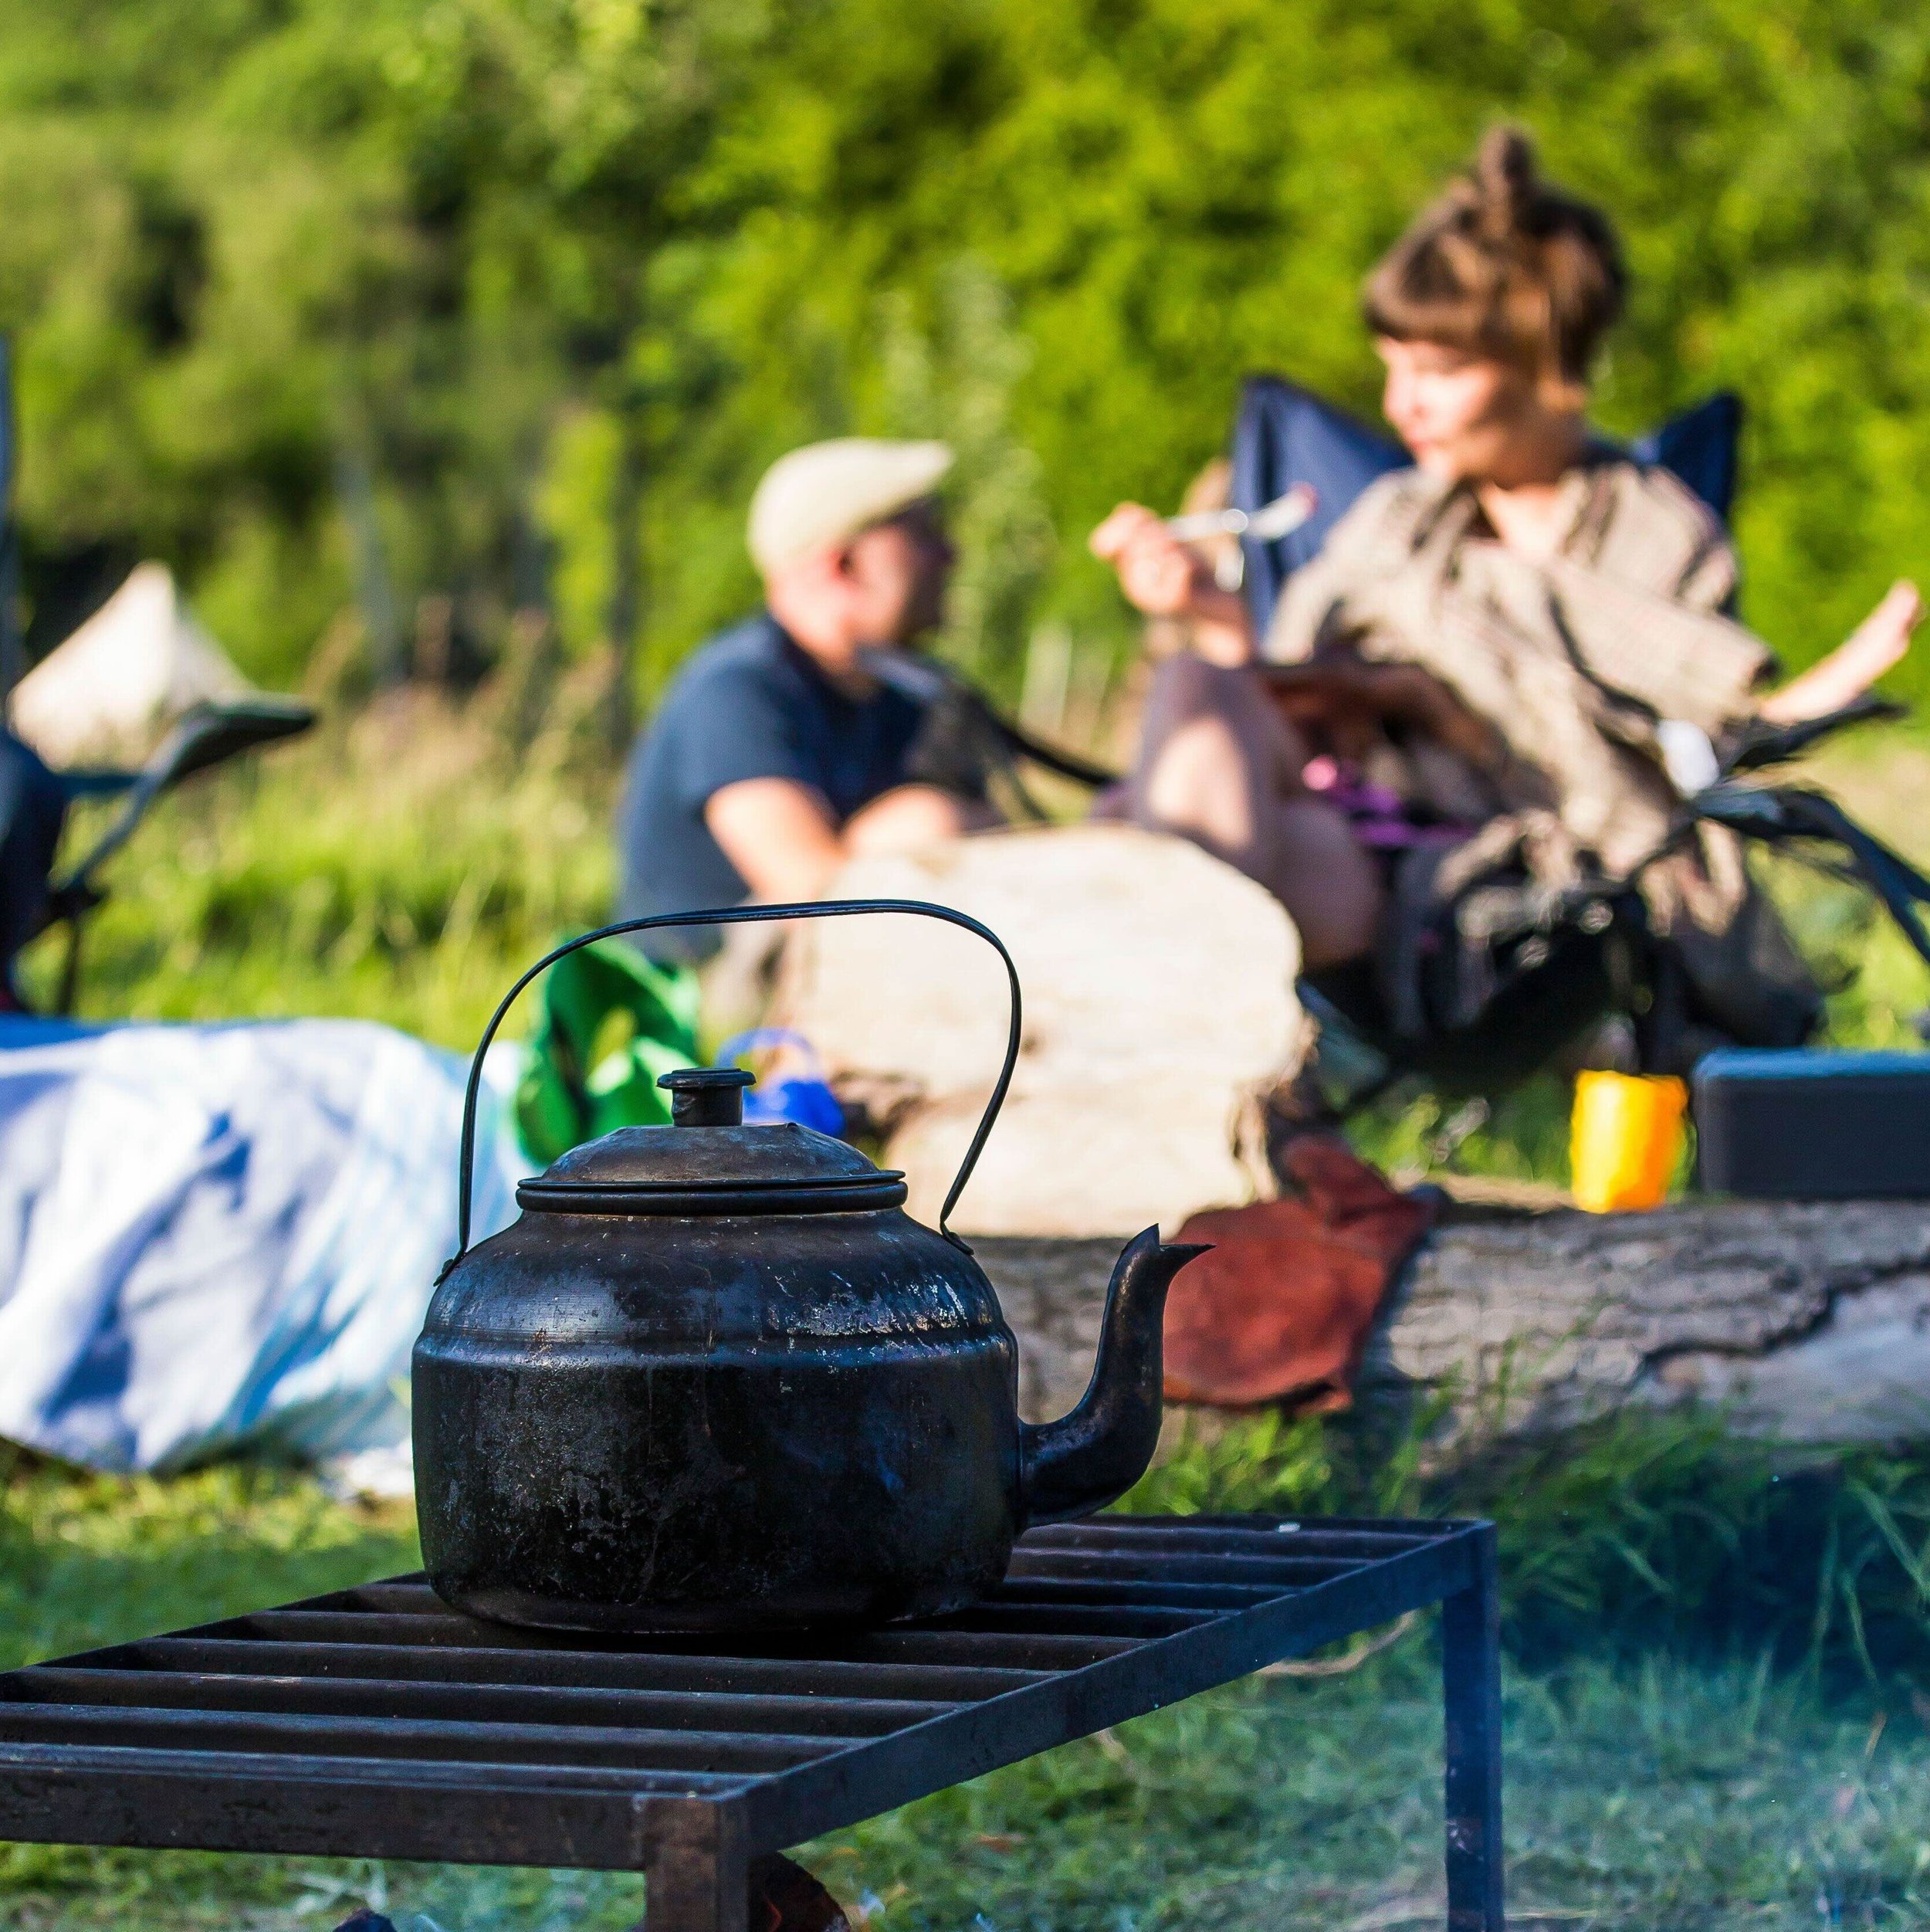
A fun make to entertain you all while camping (and make you look like Bear Grylls, too)
We loved these sweet candles made from beer cans from our August camping feature so much we had to share them here, too.
Empty beer cans
Corrugated cardboard
Saved candle stubs and/or bunch of old candles
A barbecue or firepit
Old saucepan
Stirring stick
Chopping board
Knife
Scissors
1 Using scissors, carefully cut beer cans to a height of 5cm. Keep the base of the can; recycle the top bit.
2 Cut 5cm strips of corrugated cardboard. Roll up the cardboard strips until they are roughly the same diameter as a can. Wedge the roll as tightly as possible inside the can base. Using scissors, prise a small hole in the centre of the cardboard roll. Poke a small piece of cardboard into the hole to create a ‘wick’.
3 Set a small fire in your firepit or barbecue. Chop your candles into small pieces and add them to an old saucepan. Melt the candles over a small fire until they are liquid wax, stirring regularly with a twig or stick.
4 Very carefully, pour the hot liquid wax over the cardboard rolls. Keep pouring slowly until the wax reaches the top of the beer can. Wait for a few minutes for the cardboard to soak up the hot wax and then top-up each beer can until it’s full to overflowing.
5 Allow the wax to cool completely and go solid before use. When it’s dark, light the ‘wick’ with a match. Beer can-dles burn for up to two hours and should only be used outdoors and attended.
Pick up the August issue for all the other ideas from our Under Canvas feature, from blueberry pancakes to shell garlands.
Get hold of your copy of this month's The Simple Things - buy, download or subscribe

Photography: Cristian Barnett
Learn something new with our one-minute Geography primer
All three iconic buildings, as well as the Lincolnshire market town of Stamford, were built using the beautiful, honey-coloured Clipsham Stone.
Clipsham is similar to Bath stone in that it’s an oolotic* limestone formed in the Jurassic era. It’s produced in an area around the village of Clipsham (yep, clue’s in the name) in Rutland, and the stone is known for its resilience, particularly in the acidic conditions of large cities, where smog might damage other stones. Parliament was originally built from Anston limestone from West Yorkshire but it was later replaced with the more hardy Clipsham stone, picked to be able to stand up to London’s sulphurous emissions from all the factories and houses.
Clipsham has been used in many Oxford Colleges and other notable buildings, but its earliest use was for the building of Windsor castle between 1363 and 1368. It was also used for the beautiful honeyed Georgian buildings of Stamford, home to many a British costume drama. It’s said Colin Firth lived on a diet of Clipsham stone in the early nineties.**
In our August issue, you can take a virtual tour of Stamford in our ‘My Neighbourhood’ piece. We think you’ll be searching out local B&Bs quicker than we can say ‘early Autumn weekend break’. Enjoy!
*Oolots are small, egg-shaped grains that form by gradually building up layers, the same way hailstones do.
** It isn’t.
Get hold of your copy of this month's The Simple Things - buy, download or subscribe

Illustration: Zuza Misko
Get your claws into this most summery of seaside activities
Summer time-wasting shouldn’t be the preserve of children. Rockpooling, building sandcastles and climbing trees are all noble pursuits that every adult should have the pleasure of indulging in, too. And there’s little more fun that grabbing a bucket and a line and going crabbing. Here’s how to do it properly.
A bucket
A line (you can buy proprietary crabbing lines in most buckets-and-spades shops by the sea but any bit of string or line will do. You can add your own bag for putting bait in using an old washing tablet bag, washed out and something tied on for a weight). Never use a line with a hook on.
Some tasty crab bait. Bacon is good - they especially love the rind - or sardines
A net
A lovely picnic lunch
A friend (optional)
Crabs like tidal waters and you need somewhere you can drop your line easily, such as a quayside. A nice spot where you can sit and dangle your legs over the harbour wall is always lovely. If you’re likely to get over-excited, look for a location with a waist-height wall that might prevent you enjoying a wild swim on the same day.
Check locally that crabbing is allowed or ask the harbour master so you don’t irritate local fishermen.
Pop down to the water’s edge with your bucket and fill the bucket with sea water. Crabs do not like tap water.
Add a couple of big rocks and a bit of seaweed, if you can find it, to give the crabs a bit of shade and somewhere to hide while they’re in your bucket. Keep the bucket in shade while you have the crabs in there, too.
Tie some bait onto your line or put it in the net bag. Large bacon lardons are crab favourites, particularly the rindy bits.
Drop your line into the water, sit down and make yourself comfortable.
If you feel any tugging, very gently pull up your line. If you can see any crabs hanging on enjoying a snack, scoop your net underneath them so they don’t drop off and transfer them to your bucket.
Never have more than ten crabs in the bucket at the time - they get on each others’ nerves a bit. If any start fighting, put them back in at once.
When you’ve got a few in there you can sit down and watch them scuttling around sideways, peering out at you and generally getting on with their crabby business. They’re fascinating crustaceany creatures. You can give them names, pick them up, either with one finger on the top of the shell and one on the bottom, or holding them either side of the shell, to have a good look at them, and get to know them a bit better, but obviously be gentle and don’t have them hanging about in your hands too long.
Try not to leave your crabs in the bucket longer than ten minutes. When it’s time to put them back always go down to the water’s edge. Throwing them over the quayside will stress them out and they could even be hurt. At the water’s edge, tip them out gently onto the sand or rocks and watch them scuttle back into the water.
Change your water before dropping your line again to ensure there’s plenty of oxygen in it for your next catch.
Gone Crabbing is a shop in Burnham Deepdale, Norfolk, which has a useful crabbing guide on its website. you by Googling ‘where to go crabbing near me’. You’ll be surprised how many spots there are at your nearest stretch of coast or estuary.
In our August issue, we are appreciating the crab in our regular Magical Creatures slot. Pick up a copy in shops now. And if all that crabbing has made you hungry, we have a delicious recipe for crab burgers in the same issue. Probably best to buy your crab meat locally. It seems rude to eat something you’ve shared a pleasant afternoon with.
Get hold of your copy of this month's The Simple Things - buy, download or subscribe

Photography: Sasha Gil
Because this purple veg box staple has been a stranger too long
You might think you know all there is to know about aubergines, but we’d warrant you are wrong. This large purple BERRY (yes, who knew?) brings a little med cheer to any summer dining table or barbecue, and we thought we’d share a few little known facts about it.
1 So, yes, it’s a berry, botanically speaking, but one of the nightshade family, like potatoes and tomatoes. Technically nightshades are poisonous but you’d have to eat an awful lot of the aubergines themselves and the leaves to do yourself any harm beyond a mild tummy ache brought on my overindulgence.
2 At various times aubergines have been believed to cause madness. In 13th-Century Italy it was believed to tip people into insanity and in India in the 19th Century it was noted that madness was more common in summer when aubergines were in season… Nothing to do with the heat, then?
3 Aubergines contain more nicotine than any other plant (with the possible exception of the tobacco plant). However, they aren’t dangerous, or even addictive (though they are very moreish, we find).
4 Aubergines consist of 95% water and half their volume is air.
5 Traditionally, in China, as part of her dowry, a woman must have at least 12 aubergine recipes at her fingertips before her wedding day. This sounds eminently sensible to us, unless you like to eat a LOT of ratatouille.
The picture above is of Miso-Caramel Aubergines from Jackfruit & Blue Ginger (Murdoch Books), recipe and photography by Sasha Gill. You can find the recipe in our August issue, which is on sale now.
Get hold of your copy of this month's The Simple Things - buy, download or subscribe
We celebrate slowing down, enjoying what you have, making the most of where you live, enjoying the company of of friends and family, and feeding them well. We like to grow some of our own vegetables, visit local markets, rummage for vintage finds, and decorate our home with the plunder. We love being outdoors and enjoy the satisfaction that comes with a job well done.