The Simple Things

Taking time to live well
  • Home
  • Subscribe
  • SHOP
  • Newsletter
  • About
  • Work with us
  • Home
  • Subscribe
  • SHOP
  • Newsletter
  • About
  • Work with us

Blog

Taking Time to Live Well

  • All
  • Chalkboard
  • Christmas
  • Competition
  • could do
  • Eating
  • Escape
  • Escaping
  • Fresh
  • Fun
  • gardening
  • Gathered
  • Gathering
  • Growing
  • Haikus
  • Interview
  • Living
  • Looking back
  • Magazine
  • magical creatures
  • Making
  • Miscellany
  • My Neighbourhood
  • Nature
  • Nest
  • Nesting
  • outing
  • playlist
  • Reader event
  • Reader offer
  • Shop
  • Sponsored post
  • Sunday Best
  • Think
  • Uncategorized
  • Wellbeing
  • Wisdom

Moon planting | Biodynamic gardening

Lottie Storey June 5, 2017

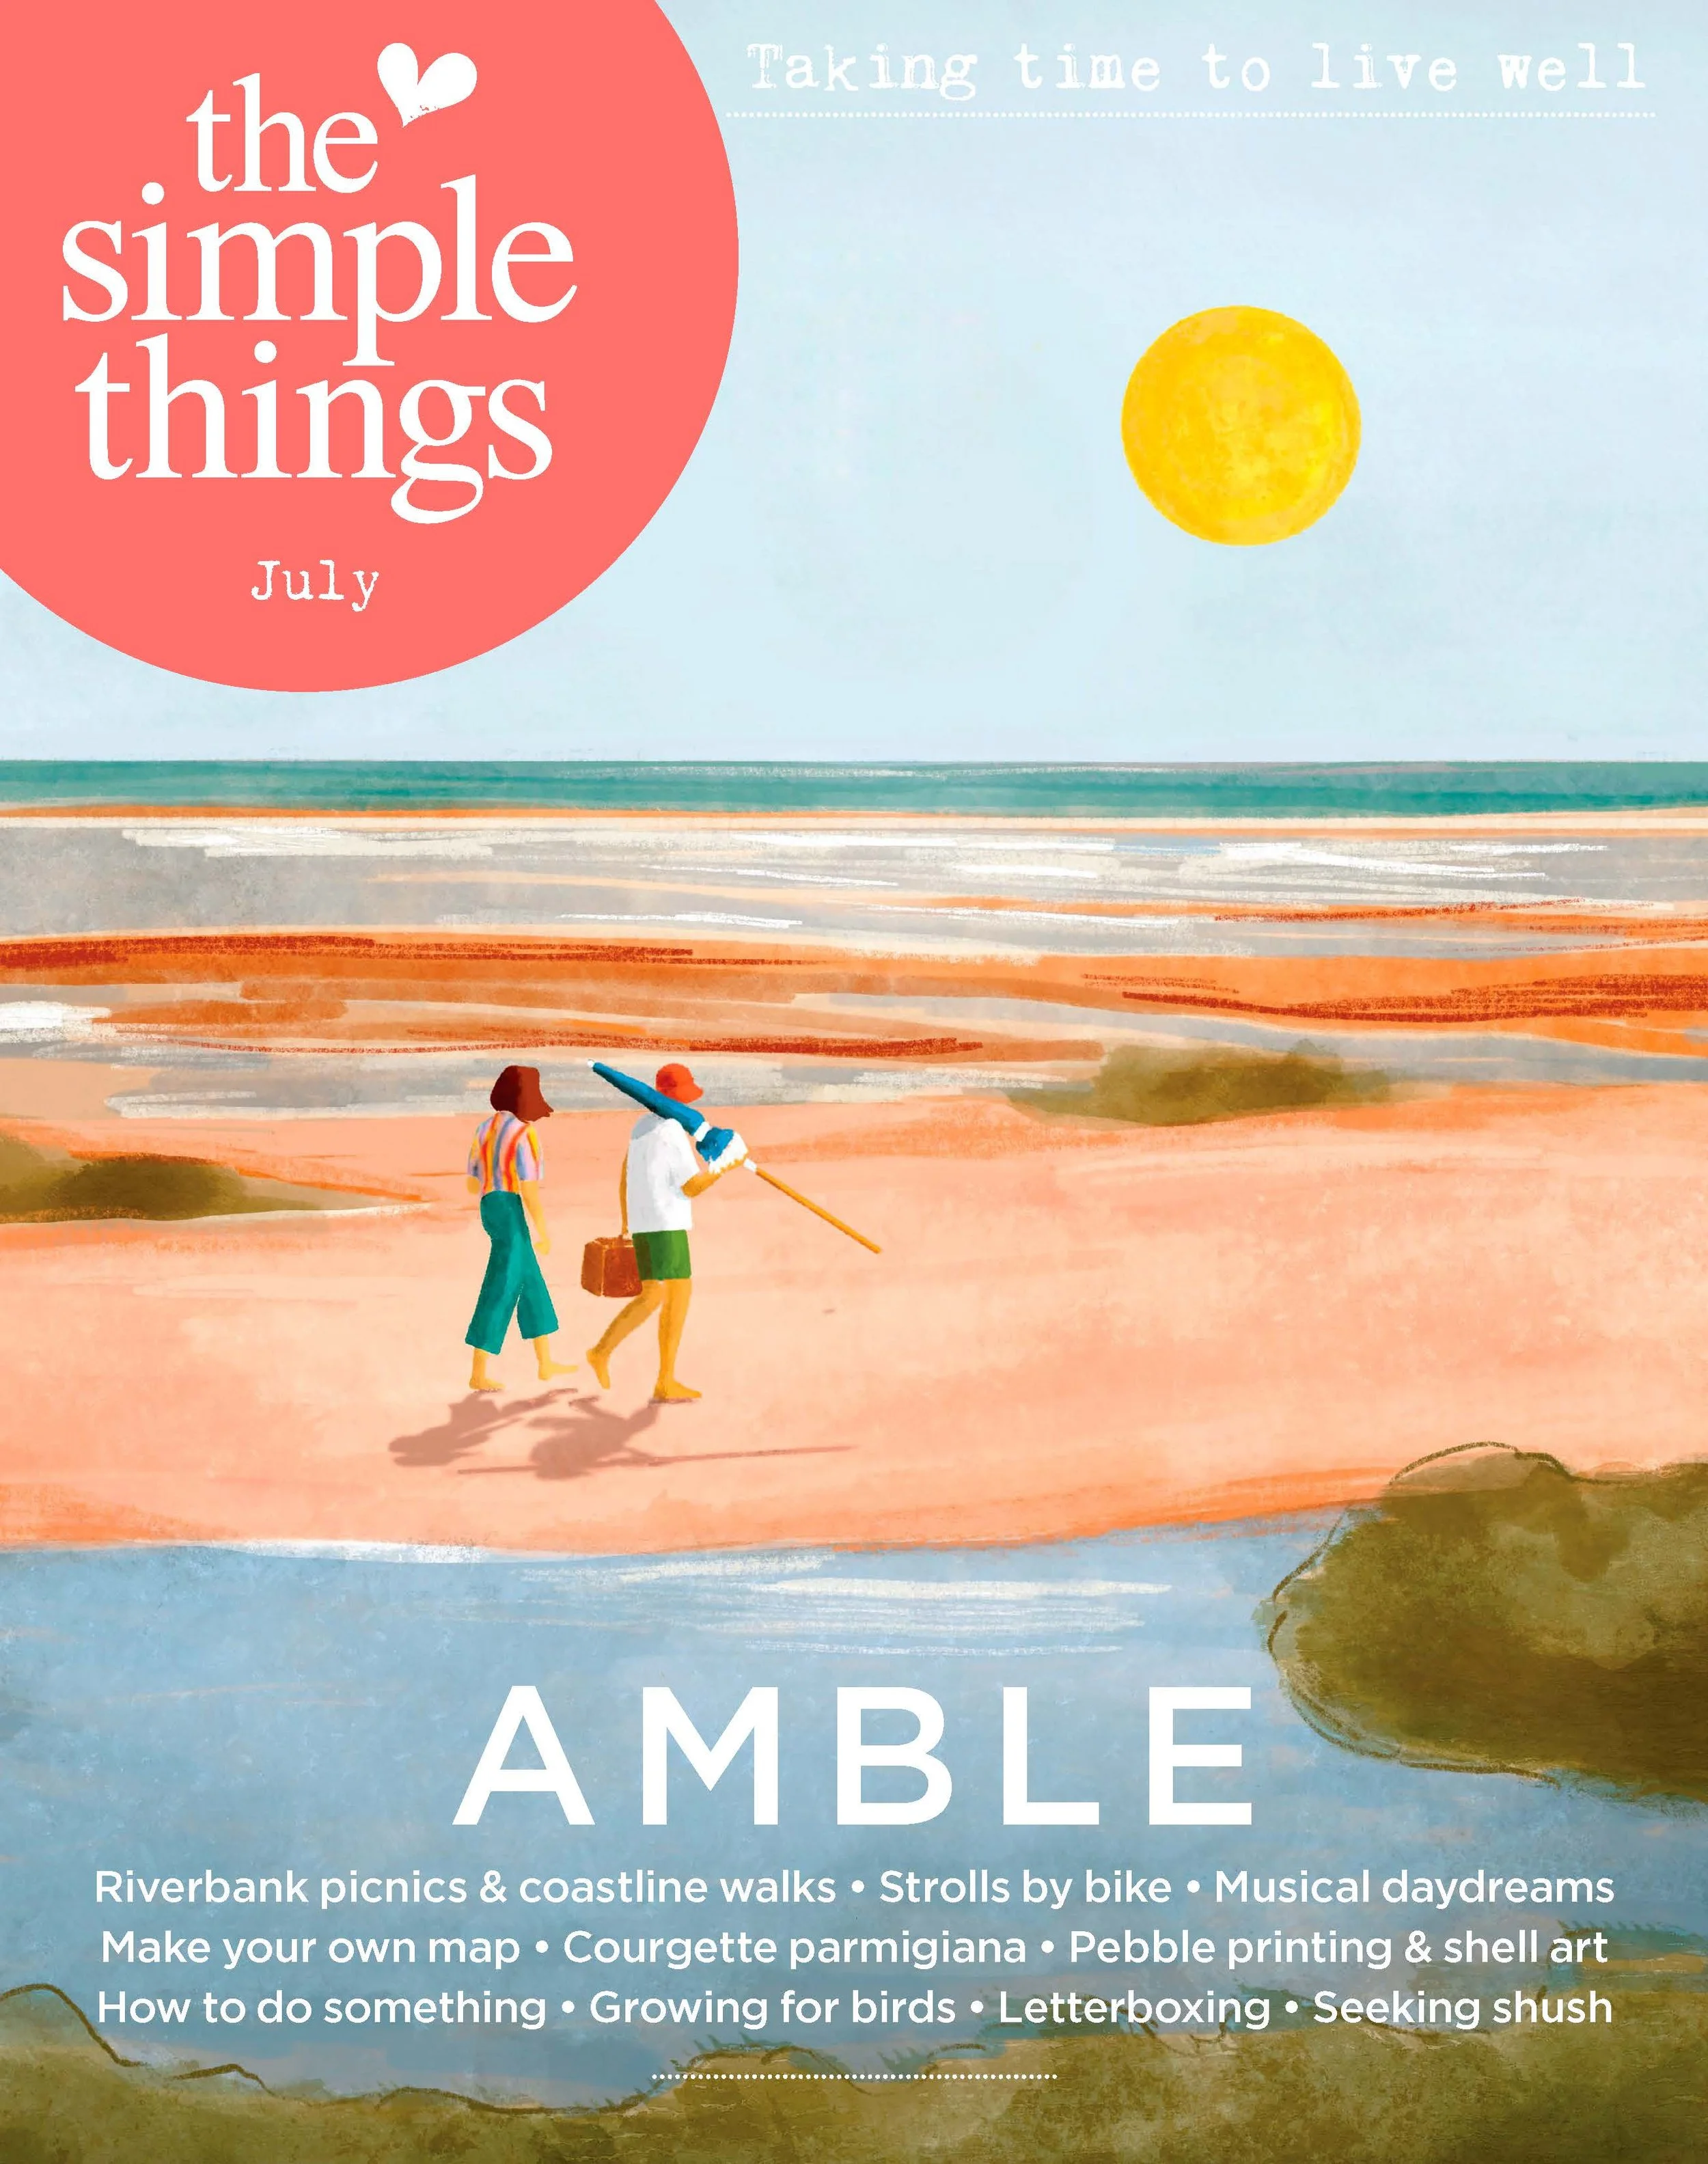
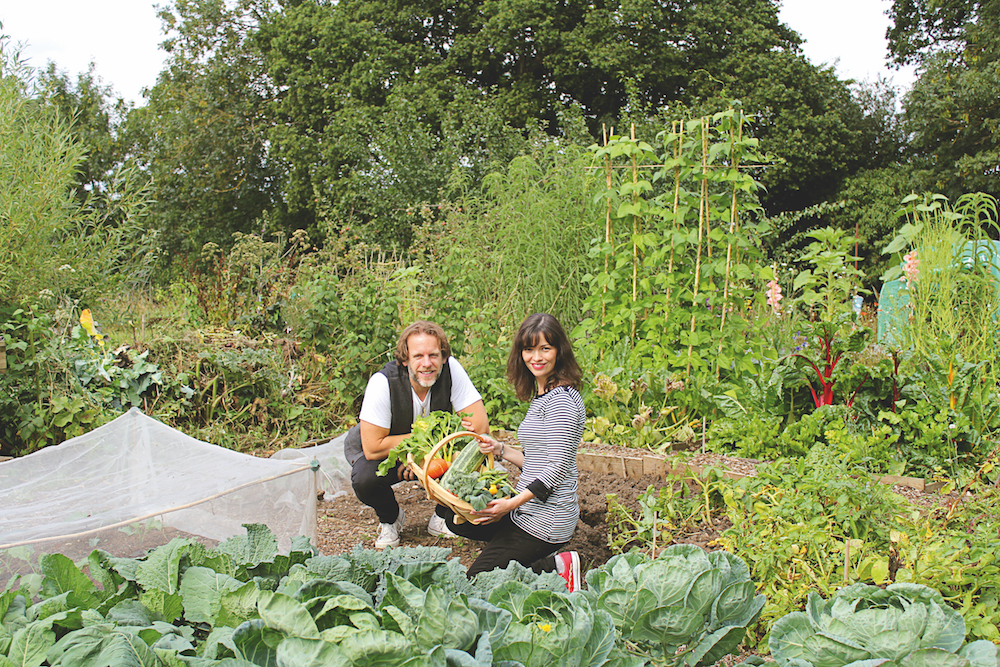
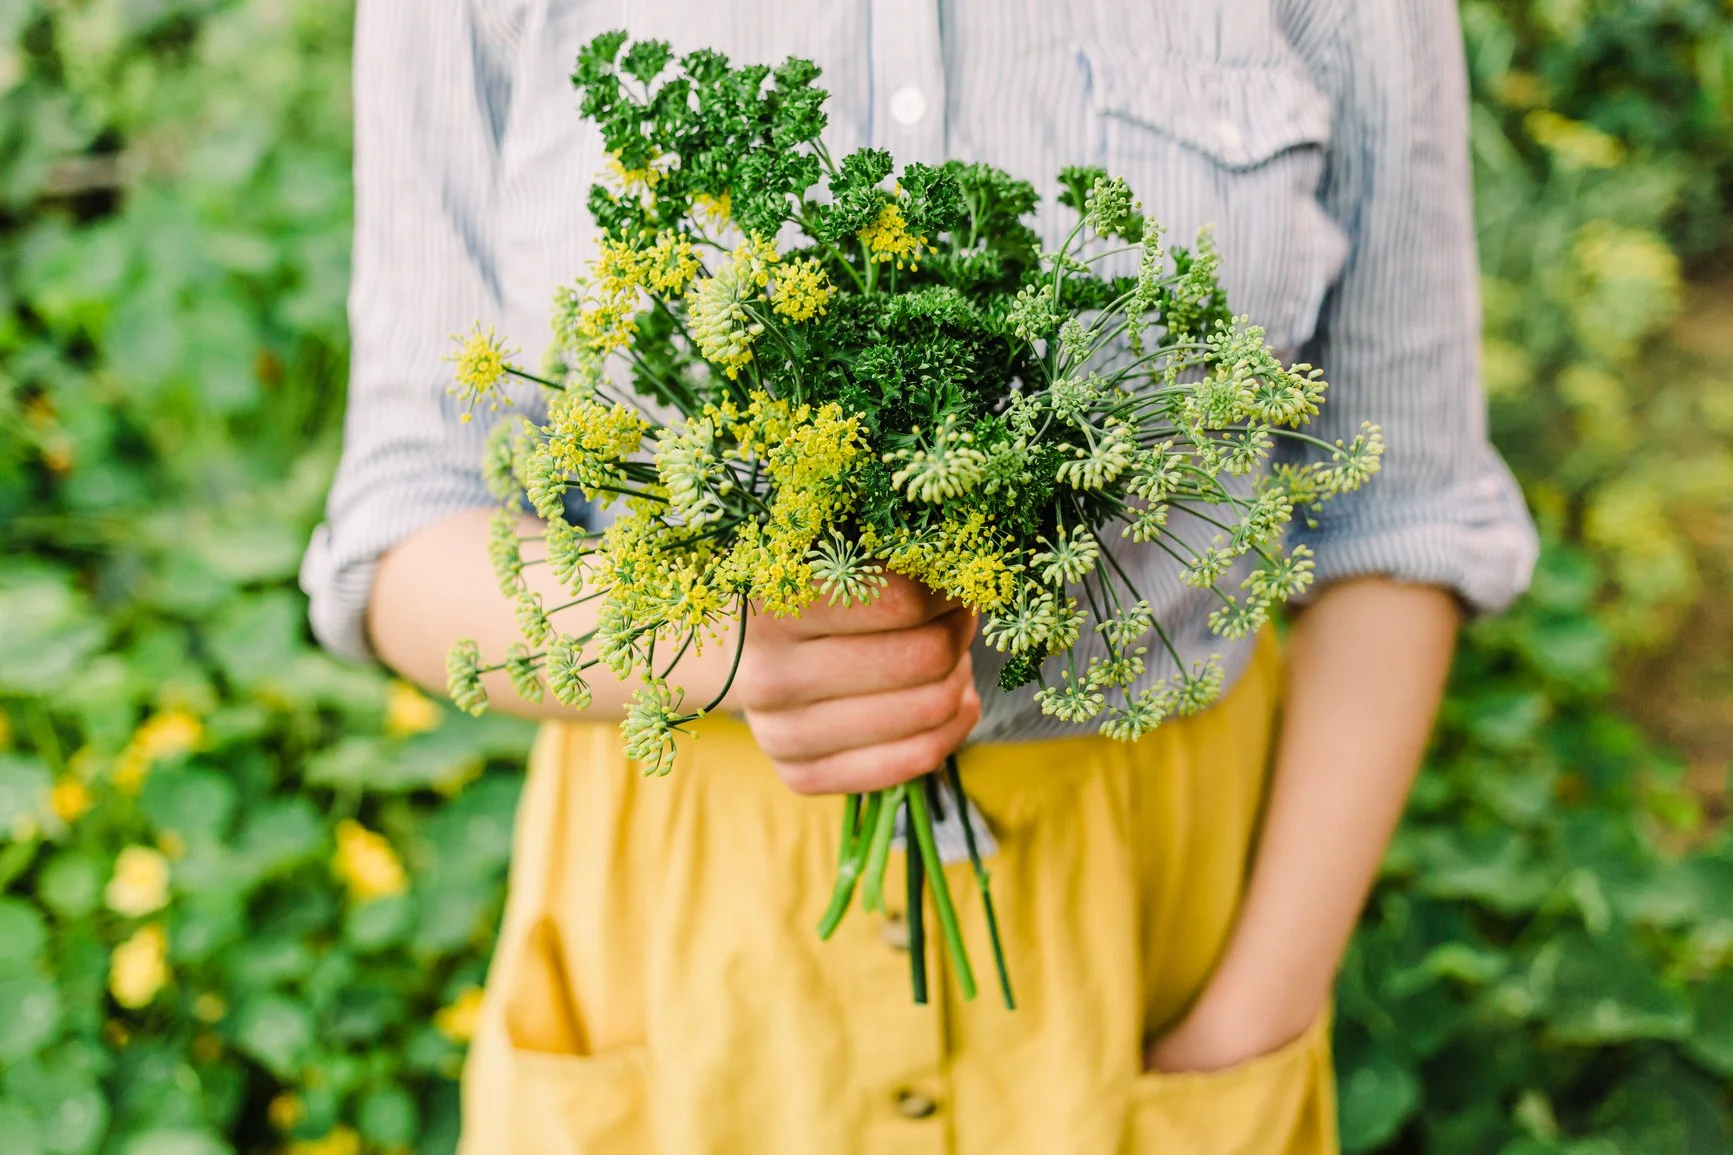
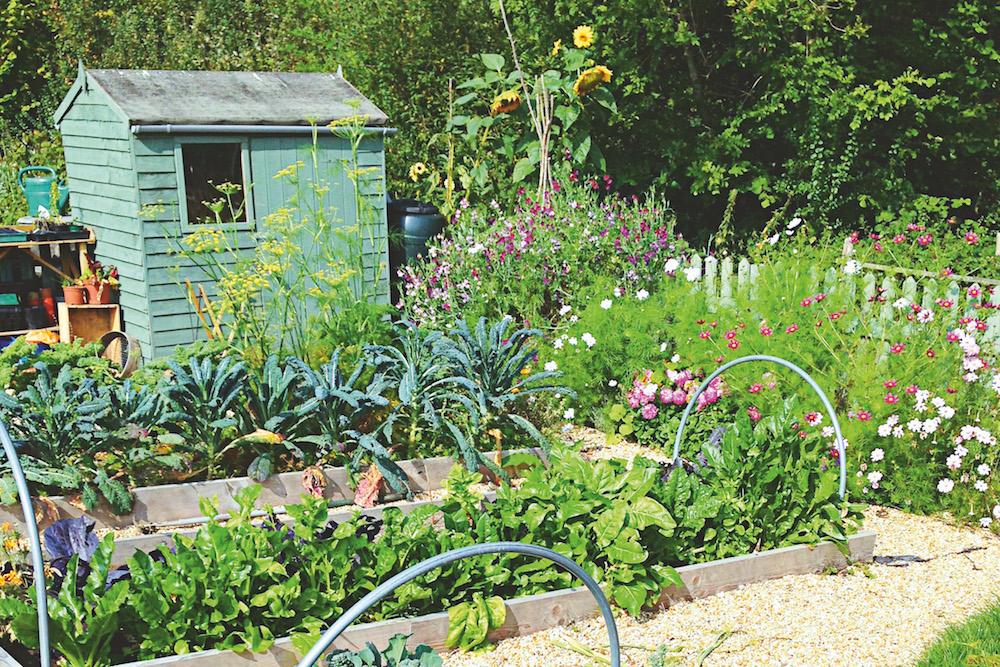
Planting with the moon needn’t be a space odyssey. A little know-how goes a long way. Hear how Kate Turner and Will Heap grow biodynamic fruit and veg and raise free-range hens on their allotment - turn to page 112 of June's The Simple Things for more and read on for the biodynamic basics

Biodynamic gardening is similar to organic gardening in that they both work in harmony with nature, but biodynamic growing goes one step further. In a nutshell, soil fertility is enhanced with specific herb, flower and mineral preparations, and fruit and veg are grown according to the rhythms of the planets and moon. Crop rotation, rich compost and companion planting are also used to produce food that is stronger, tastier and has a higher yield. The basic premise is that you put more into the garden than you take out. We love gardening this way and have seen some great results, but it’s not meant to be a dogma and we don’t get bogged down by it. For us, the allotment will always be about the simple pleasure of getting our hands dirty and the joy of eating our own veg.

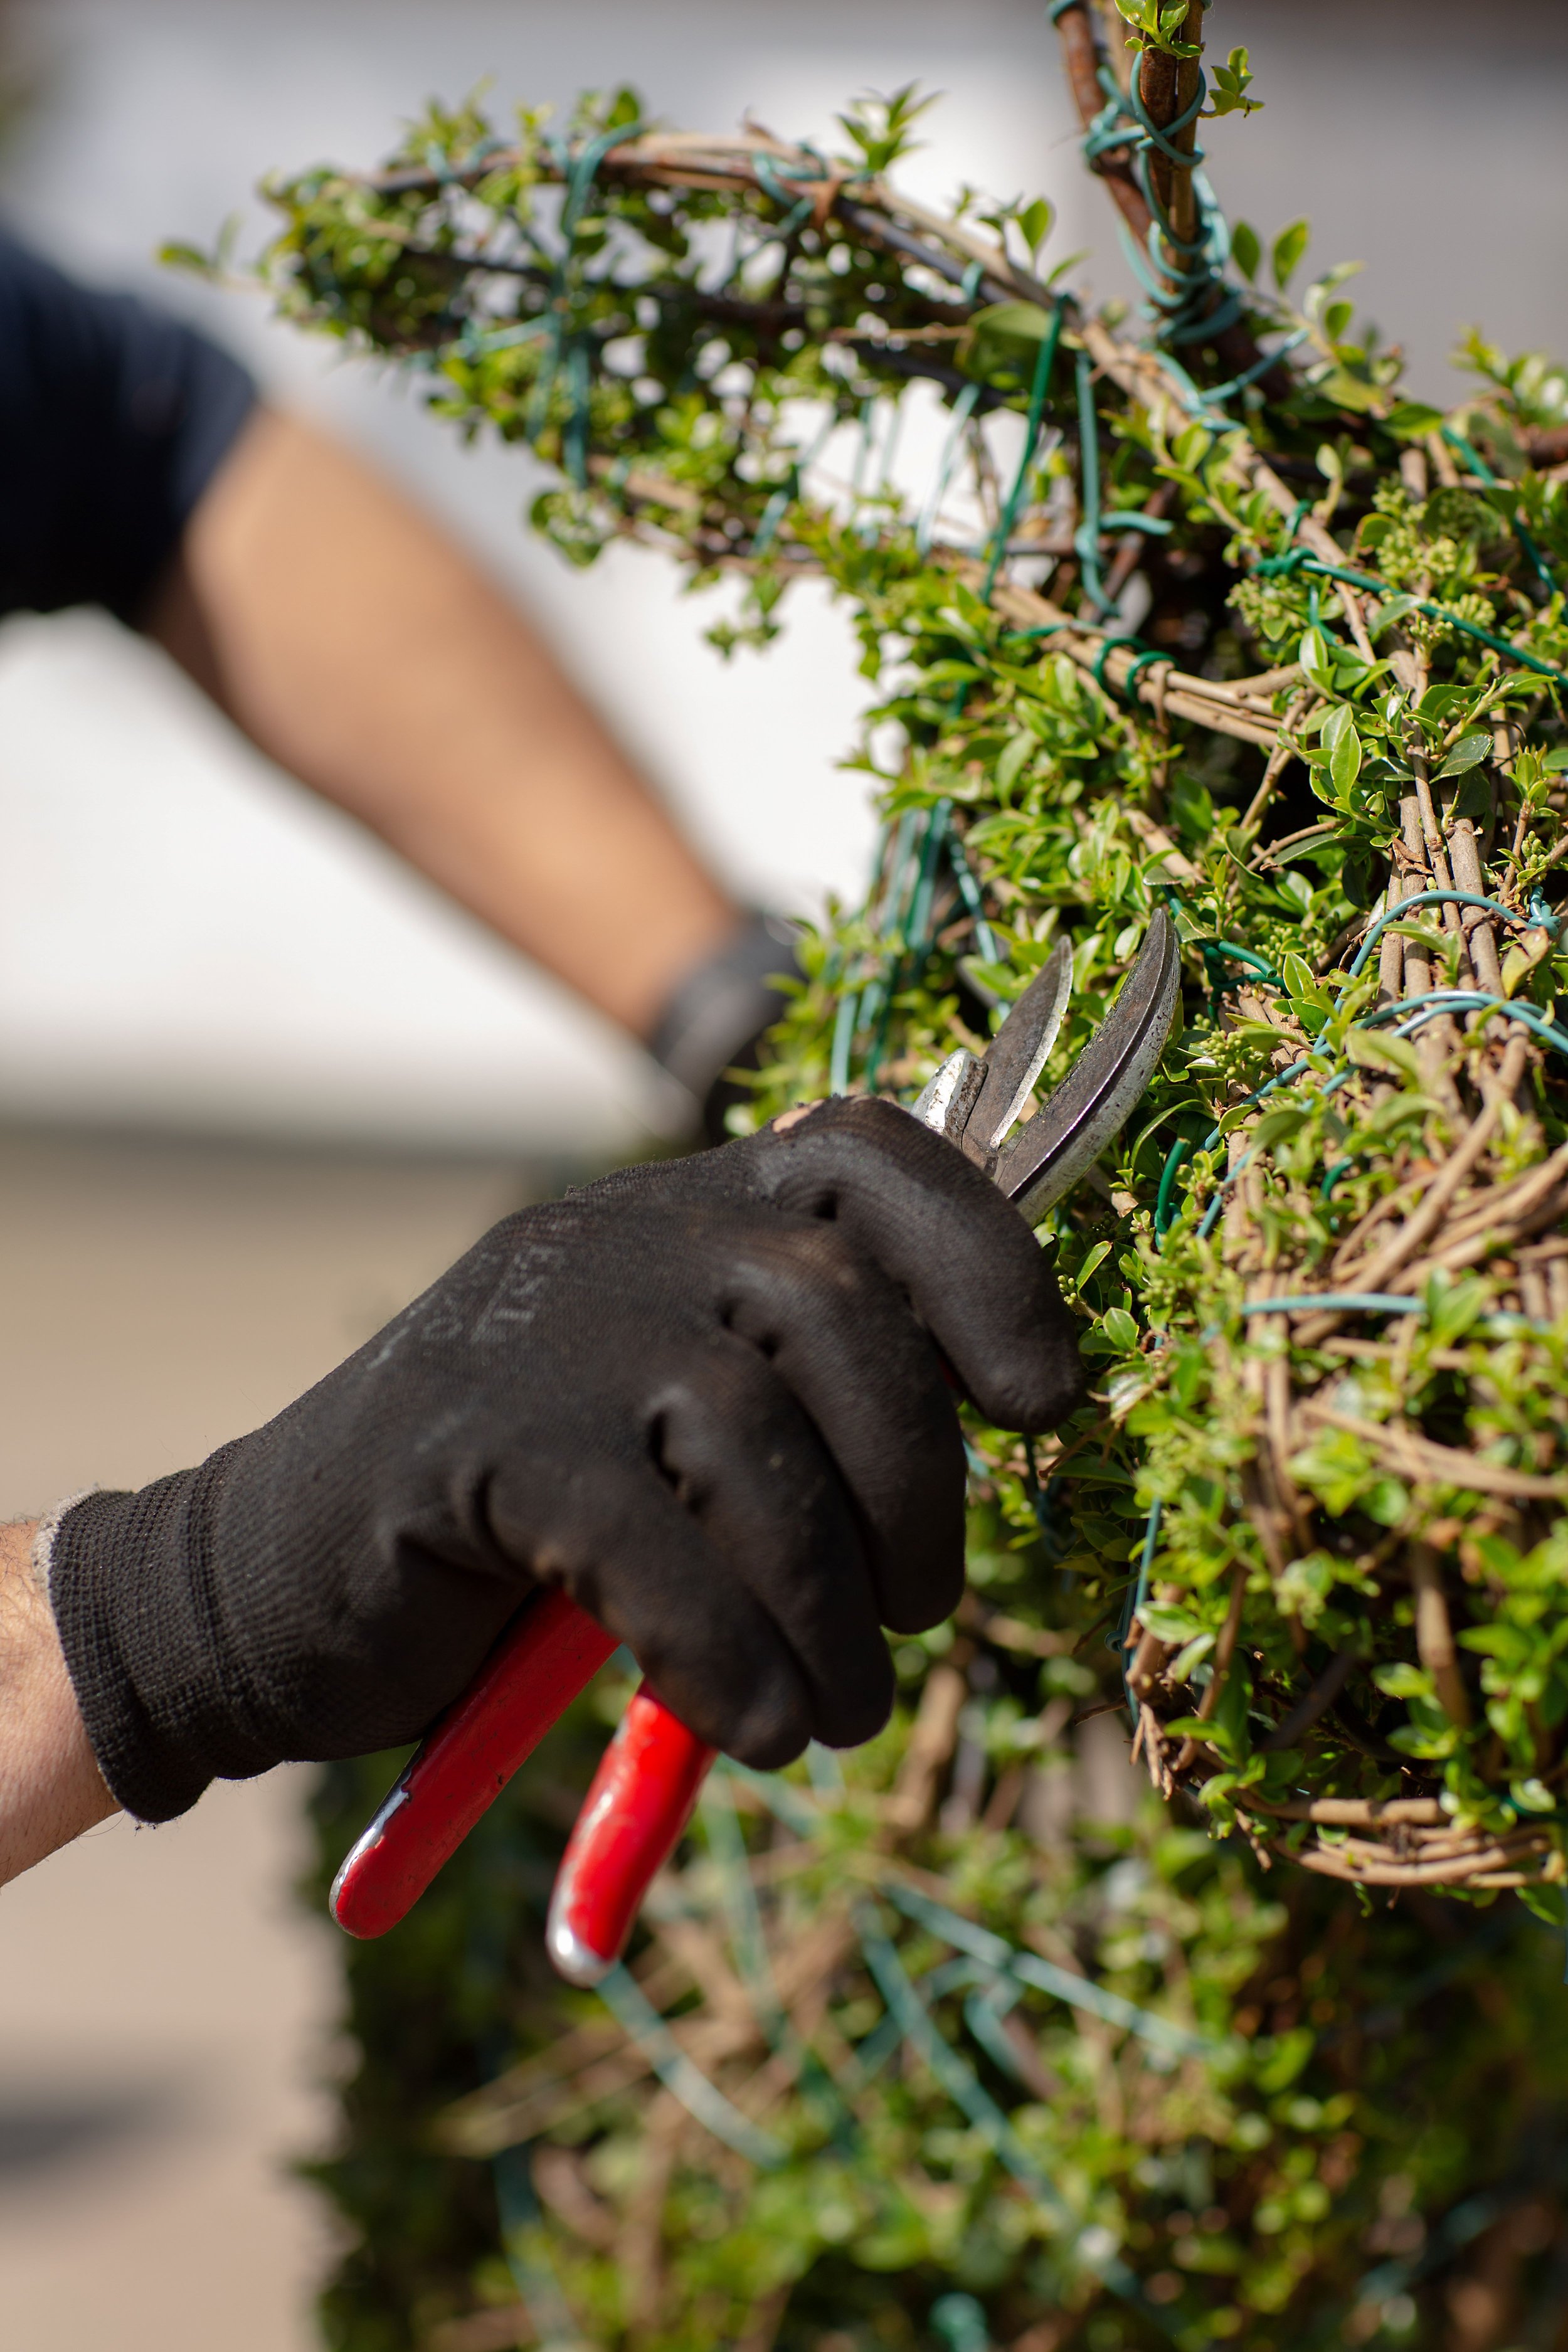
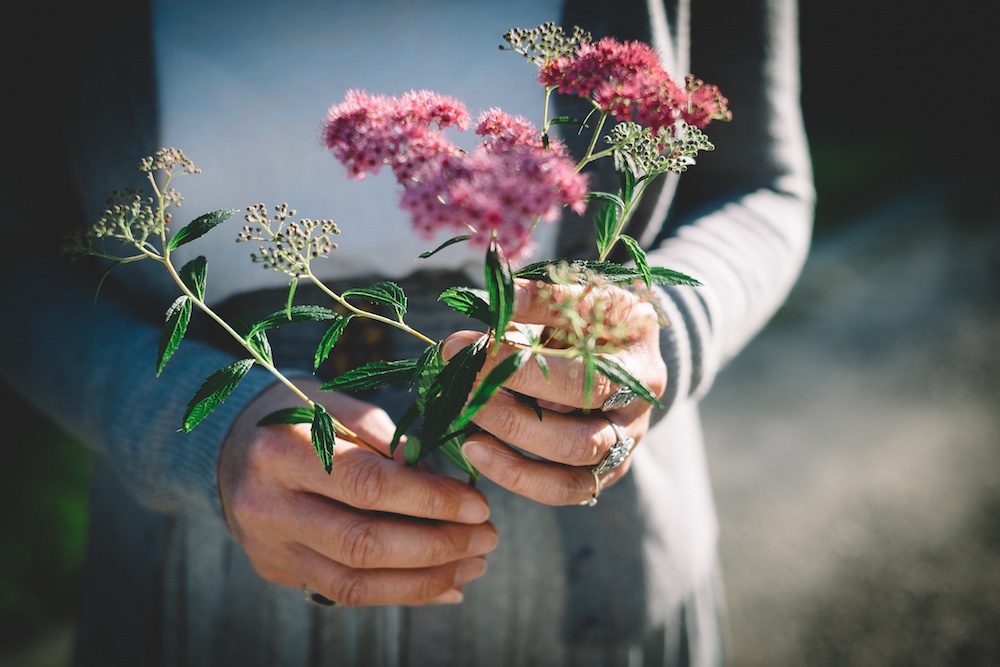
THE‘PREPS’: biodynamic preparations are specially formulated natural remedies that have various jobs to do around the garden. Yarrow, chamomile, nettle, oak bark, dandelion, valerian, equisetum, horn manure and horn silica preparations help to enliven the soil and increase the vitality of your crops. Make them yourself or buy ready- made from the Biodynamic Association UK.

MOON GARDENING: you don’t need to be an astronomer to garden by the moon – biodynamic gardening calendars are available to guide you. They suggest the best times to do allotment jobs, such as planting and pruning when the moon is descending, or harvesting when the moon is ascending. Sowing seeds just before the full moon is always a winner on our allotment.

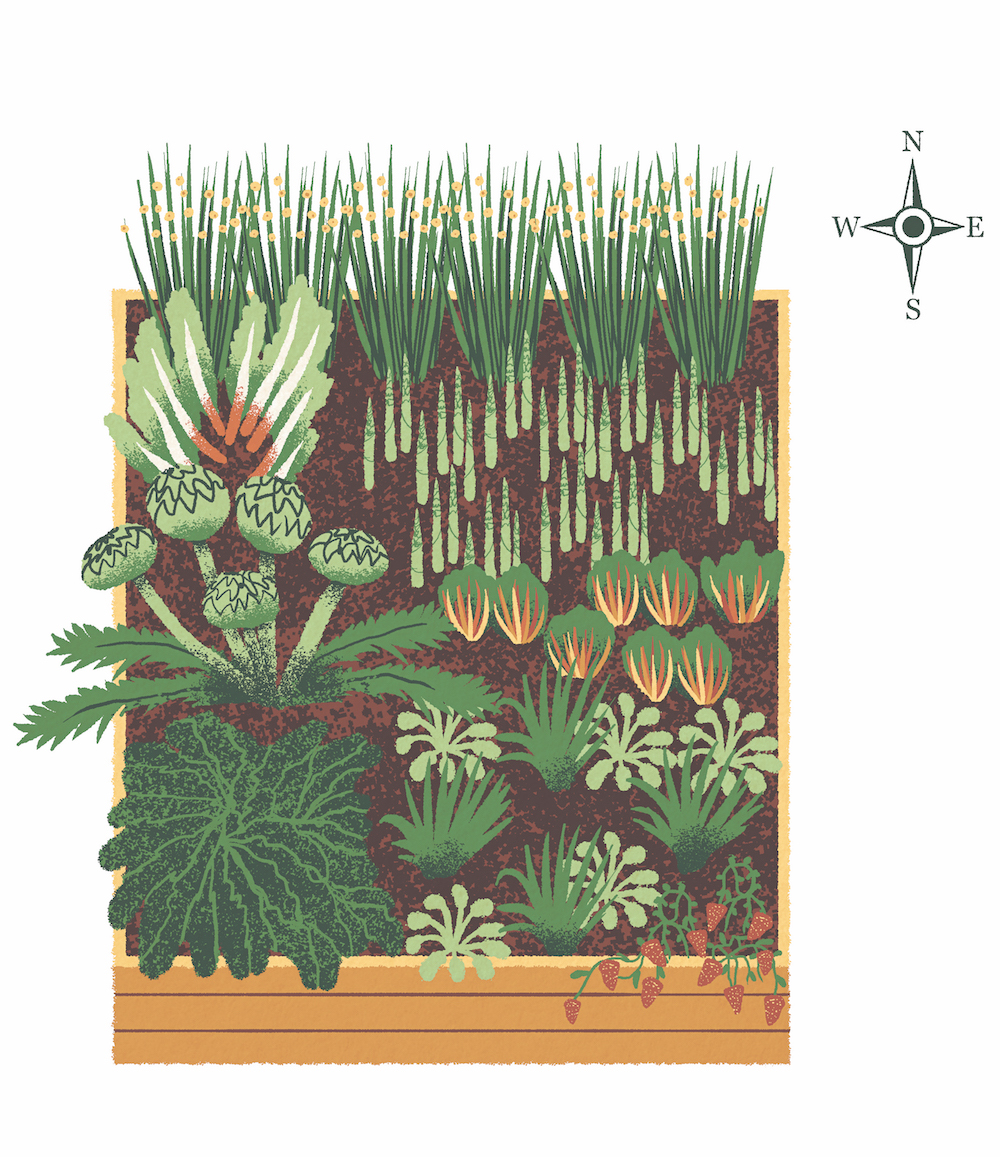
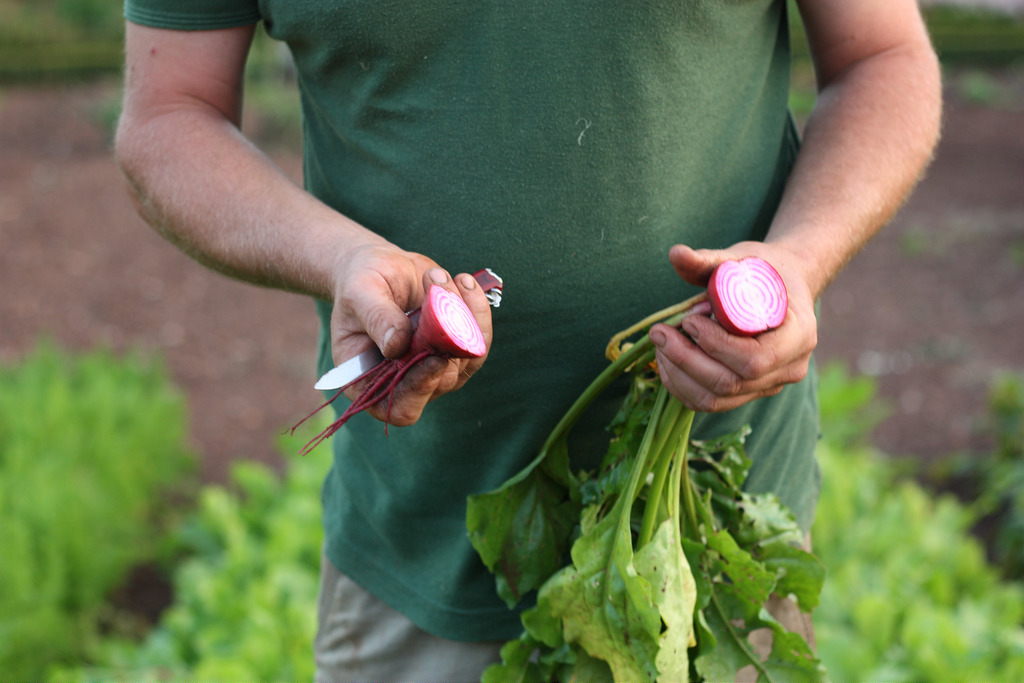
CROP ROTATION: we rotate on a four-yearly cycle based on groupings of leaf, root, fruit and flower, each representing the part of the plant that we want to enhance and eat.

COMPOST: an amazing way to enrich your soil, literally putting back what you’ve taken out. Adding biodynamic preparations to your compost heap is also the most effective way of getting their benefits into your garden and onto your plate.
 
CPP: short for ‘cowpat pit’ and a brilliant natural fertiliser. We have a sunken half- barrel in the corner of our allotment that we fill with cowpats from a local farm. Add the preparations and cover; let it quietly rot down before using anywhere and everywhere on the allotment.

COMPANION PLANTING: widely used in both organic and biodynamic gardening to discourage pests and disease (see The Simple Things Issue 59). Try planting nasturtiums with broad beans to lure blackfly away from the crop, or chives with carrots to discourage carrot fly.

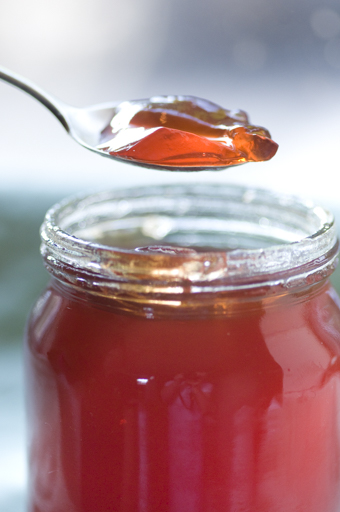
LIQUID TEAS AND NATURAL FERTILISERS: simple plant-based sprays to boost the health of your crops and stimulate growth. Submerge a sack of comfrey and nettle leaves in a water butt to create a potent (and very smelly) liquid fertiliser.

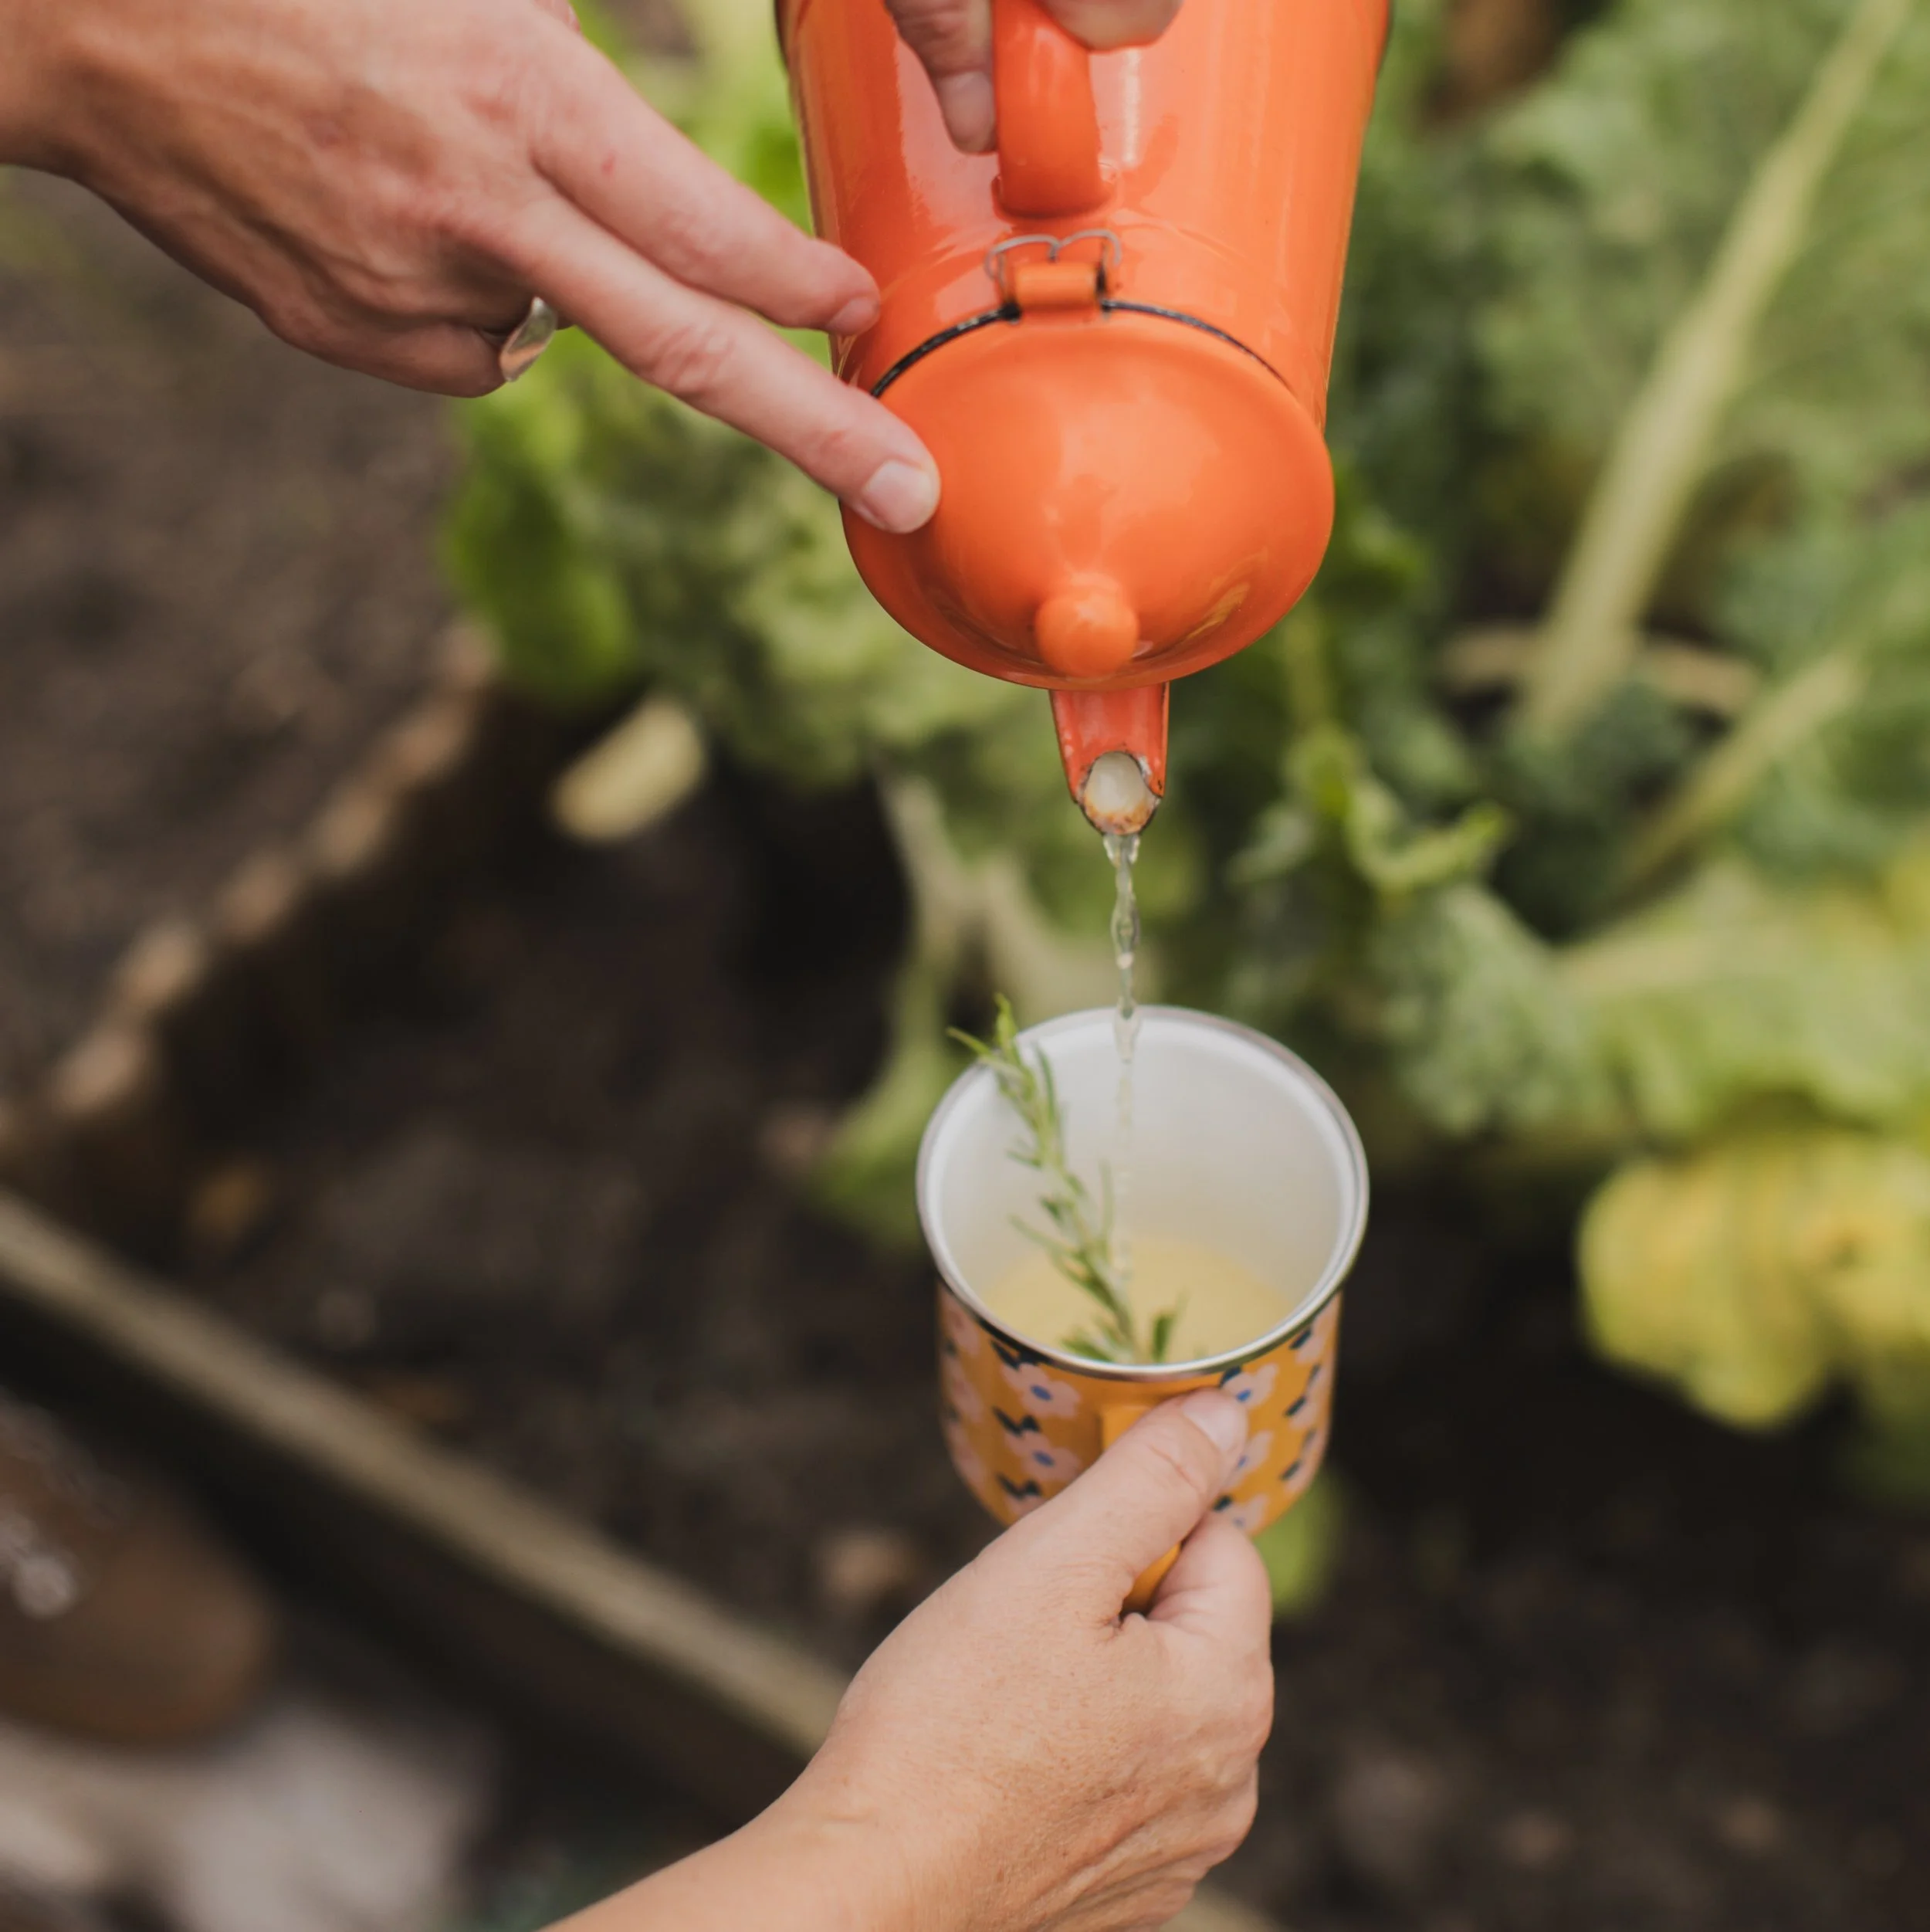
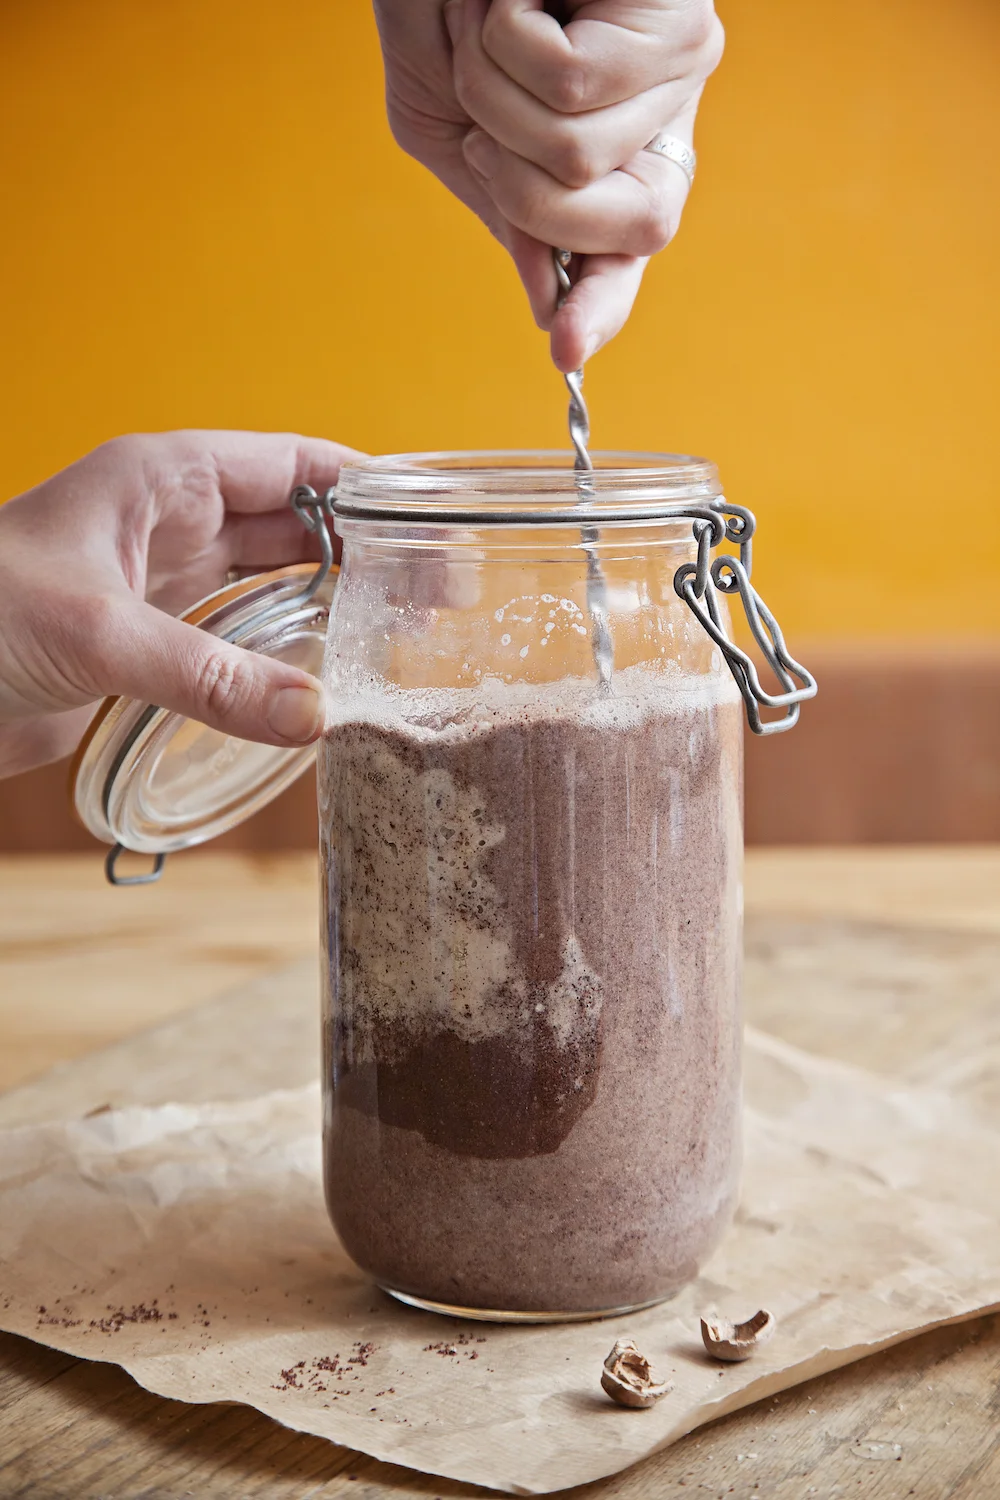
DYNAMISING LIQUIDS: vigorously stirring liquid manures and plant ‘teas’ into a vortex before use is thought to enhance the vitality of the liquid and strengthen the benefits for your plants. Our children love to see who can create the biggest whirlpool in the bucket!
 

HELP AT HAND

The Biodynamic Association UK: Great for advice and ready-made preparations.

Calendars: The Maria Thun Biodynamic Calendar is the most comprehensive. lunarorganics.com sells a simple version with a booklet to help get you started.

Biodynamic seeds: Stormy Hall and the Seed Co-operative produce top-quality open-pollinated seeds.

Books:
Biodynamic Gardening by DK, featuring advice from Kate and Will.
The Biodynamic Year by Maria Thun (Temple Lodge Publishing).
Biodynamic Gardening for Health and Taste by Hilary Wright (Floris).
Gardening with the Moon & Stars by Elen Sentier (Earth Books).
 

More from the June issue:

Featured
Feb 17, 2019
Small acts of kindness
Feb 17, 2019
Feb 17, 2019
Jun 27, 2017
Recipe | Gooseberry cake
Jun 27, 2017
Jun 27, 2017
Jun 26, 2017
Mindful moments | Download a chatterbox to colour in
Jun 26, 2017
Jun 26, 2017

More allotment inspiration:

Featured
Allotment Shed.jpg
May 14, 2024
Outdoors | Allotment Sheds
May 14, 2024
May 14, 2024
Rainbow Carrot & Beetroot Tart.jpg
Feb 7, 2023
Recipe | Rainbow Carrot & Beetroot Tart
Feb 7, 2023
Feb 7, 2023
What I treasure.jpg
Jun 9, 2019
What I treasure | My allotment
Jun 9, 2019
Jun 9, 2019
  Buy ,  download  or  subscribe   See the sample of our latest issue  here   Buy a copy of our latest anthology:  A Year of Celebrations   Buy a copy of  Flourish 2 , our wellbeing bookazine  Listen to  our podcast  - Small Ways to Live Well

Get hold of your copy of this month's The Simple Things - buy, download or subscribe

View the sampler here


In Growing, gardening Tags issue 60, june, allotment, biodynamic, growing, gardening
Comment
Illustration: Joe Snow

Illustration: Joe Snow

Garden hacks | Make a colander hanging basket

Lottie Storey May 27, 2017

An old colander can be turned into a nifty hanging home for dry-loving plants

YOU WILL NEED: 
Water-permeable liner
Scissors
Old metal or plastic colander
Strong ropes or chains
Hooks strong enough to hold a container of plants and water (try your garden centre) – one per hanging basket
Compost
Water-retaining crystals
Slow-release fertiliser
Container friendly plants such as herbs, ivy or succulents

1 Cut the liner to fit snugly in the colander, then attach your rope or chains.
2 Screw your hook into where you’re hanging the colander from. 
3 Combine your compost with the crystals and fertiliser.
4 A little compost goes in the bottom of the colander, before you position your plants. Then secure around the plant roots with more compost.
5 Hang it up, and make sure to keep it well watered.


More from the May issue:

Featured
May 29, 2017
Recipe | Smoked trout, cucumber and coconut salad with dosa
May 29, 2017
May 29, 2017
May 27, 2017
Garden hacks | Make a colander hanging basket
May 27, 2017
May 27, 2017
May 26, 2017
Recipe | Picnic Pies
May 26, 2017
May 26, 2017

More gardening inspiration:

Featured
SIM82.MISCELLANY_Tomatoes.jpg
Mar 31, 2019
Make: an upcycled hanging tomato planter
Mar 31, 2019
Mar 31, 2019
SIM76-home-hacks-heater.jpg
Sep 27, 2018
Home hacks | Make a terracotta heater
Sep 27, 2018
Sep 27, 2018
75Herb-self-watering.png
Aug 30, 2018
Garden hacks | Make a self-watering herb garden
Aug 30, 2018
Aug 30, 2018
  Buy ,  download  or  subscribe   See the sample of our latest issue  here   Buy a copy of our latest anthology:  A Year of Celebrations   Buy a copy of  Flourish 2 , our wellbeing bookazine  Listen to  our podcast  - Small Ways to Live Well

Get hold of your copy of this month's The Simple Things - buy, download or subscribe

View the sampler here

In gardening, Growing Tags garden hacks, issue 59, may, gardening, makes
Comment
Photography: Kirstie Young

Photography: Kirstie Young

Recipe: Rhubarb & sweet cicely shrub with Aperol

Lottie Storey May 16, 2017

With fragrant leaves and flavour-bomb seeds, sweet cicely is as tasty as it is easy to grow. On page 45 of May’s The Simple Things, Lia Leendertz proves sweet cicely’s worth in delicious salads, puds and aperitifs

A shrub is an old method of preserving fruit by boiling it with vinegar and sugar, creating a sharp concentrated syrup that is hugely refreshing topped up with soda water, or used in a cocktail, as here. Rhubarb and sweet cicely are natural friends, the sweet cicely bringing out the fruit’s sweetness.

Rhubarb & sweet cicely shrub with Aperol

To make the shrub:
Makes about 500ml
250ml white wine vinegar
200g granulated sugar
1kg rhubarb, chopped into pieces
A handful of sweet cicely leaves, roughly chopped

1 Put the vinegar and the sugar into a large saucepan and heat gently, stirring, until the sugar is dissolved. 
2 Add the rhubarb and simmer until the fruit has disintegrated and the liquid is pink. Remove from the heat, add the sweet cicely leaves, and stir. 
3 Allow to cool and then strain the mixture through a muslin into a sterilised jar.

To make the Aperol cocktail:
Rhubarb and sweet cicely shrub
Aperol
Soda water

Put a couple of ice cubes into a tall glass. Fill a third of the glass with the rhubarb and sweet cicely shrub and the next third with Aperol, then top up with soda water.


More from the May issue:

Featured
May 29, 2017
Recipe | Smoked trout, cucumber and coconut salad with dosa
May 29, 2017
May 29, 2017
May 27, 2017
Garden hacks | Make a colander hanging basket
May 27, 2017
May 27, 2017
May 26, 2017
Recipe | Picnic Pies
May 26, 2017
May 26, 2017

More cocktail recipes:

Featured
Jun 21, 2025
Recipe: A wild midsummer cocktail
Jun 21, 2025
Jun 21, 2025
Dec 21, 2024
Solstice Tipple: Clementine Cocktails
Dec 21, 2024
Dec 21, 2024
Peach gin and tonics.jpg
Sep 4, 2021
Tipple | Peach Gin and Tonics
Sep 4, 2021
Sep 4, 2021
  Buy ,  download  or  subscribe   See the sample of our latest issue  here   Buy a copy of our latest anthology:  A Year of Celebrations   Buy a copy of  Flourish 2 , our wellbeing bookazine  Listen to  our podcast  - Small Ways to Live Well

Get hold of your copy of this month's The Simple Things - buy, download or subscribe

View the sampler here

In Eating, Growing Tags issue 59, may, cocktail recipes, the herbery, sweet cicely, rhubarb, aperol
Comment
Illustration: RACHEL WARNE 

Illustration: RACHEL WARNE 

Growing: Edible perennials plan

Lottie Storey April 19, 2017

Even if your garden is really tiny, it can still produce an abundance of delicious food. All you need is a planter and a plan.

We’ve all been there; you get lots of seeds you fancy but are not sure when, where or how to plant them, so you just stick them in soil, water, and hope for the best. If you don’t succeed, it can be hard to work out why.

Some plants grow well together, others don’t. Some crops will need other plants to give them shelter and support to grow to their best, others prefer open space and to be left alone to get on with it.

With natural planting, you create a diverse pocket of wildlife in an urban space and one that will provide rich tastes, colours and textures.

If you follow the simple planting plans on page 105 of May's The Simple Things, you’ll realise how easy growing your own food can be. They are designed for 1 sq m raised beds but are scaleable and feature plants that work well together, as nature intended. If you don’t like a particular vegetable then replace it with something similar that likes the same conditions. The plans allow you to grow several crops at different heights, each of which provide symbiotic benefits, resulting in more food. This means less watering, no digging, few weeds and no chemicals. Result! 

Below is a plan for edible perennials. 

PLAN 4

Perennial possibilities

If you don’t have a lot of time, or just think that growing annuals is a bit of a waste of energy, then you could grow plants that keep going for years and years, and indeed only get better over time.


Plot make-up

·      At least 4-6 hours of full sun

·      Water every other day

·      1-2 hours a week of your time

·      Eating your veg within 25-30 days


Plants you’ll be growing


A word of advice…

Consider using a portion of your plot for perennial crops, which live for a long time so you’ll only need to plant them once to get harvests for many years. They’ll also need less watering once they’re established, as they will develop more extensive root systems than annual or biennial crops. Some of these vegetables, such as the artichokes and asparagus, will actually need a few years to establish before you can harvest them, but after that they will go on and on. Others, cavolo nero and rainbow chard, for example, should provide you with a crop within a season, but they are perennial so they should see you through many years. Fruit trees, like a delicious apple or pear, are a good perennial choice as they keep producing year after year. I'd suggest either going with rhubarb or a dwarf fruit tree. Even if you don’t have a lot of space you can grow these – choose a dwarf tree, place it in any container and it will fruit for you. Other fruit, such as strawberries, are perennial too and won’t need much attention either.


Taken from The City Grower by Matt Franks (Kyle Books) 

More from the May issue:

Featured
May 29, 2017
Recipe | Smoked trout, cucumber and coconut salad with dosa
May 29, 2017
May 29, 2017
May 27, 2017
Garden hacks | Make a colander hanging basket
May 27, 2017
May 27, 2017
May 26, 2017
Recipe | Picnic Pies
May 26, 2017
May 26, 2017

More veg growing ideas:

Featured
Allotment Shed.jpg
May 14, 2024
Outdoors | Allotment Sheds
May 14, 2024
May 14, 2024
Rainbow Carrot & Beetroot Tart.jpg
Feb 7, 2023
Recipe | Rainbow Carrot & Beetroot Tart
Feb 7, 2023
Feb 7, 2023
What I treasure.jpg
Jun 9, 2019
What I treasure | My allotment
Jun 9, 2019
Jun 9, 2019
  Buy ,  download  or  subscribe   See the sample of our latest issue  here   Buy a copy of our latest anthology:  A Year of Celebrations   Buy a copy of  Flourish 2 , our wellbeing bookazine  Listen to  our podcast  - Small Ways to Live Well

Get hold of your copy of this month's The Simple Things - buy, download or subscribe

View the sampler here

In Growing Tags issue 59, may, allotment, vegetables, growing, gardening
Comment
Words and photography: Agents of Field

Words and photography: Agents of Field

Growing: A city allotment

Lottie Storey March 30, 2017

Bloggers and enthusiastic veg growers, Ade and Sophie Sellars tell us about the joys of harvesting their own and life on their plot

Sophie and Ade took on their allotment three years ago to grow more veg. Little did they know that it would change their lives. Sophie used to organise film shoots but now writes about gardening and cooking, and Ade used to work in TV but is now a photographer and horticulturalist. Together they produce a blog Agents of Field, which won Blog of the Year 2016.

“If you are interested in taking on an allotment, contact your local council and see what the situation is. You might be lucky like us, and not have to wait. But even if you do have to wait, try growing things at home first. We still grow herbs and berries in our back garden, along with rhubarb, which we grow in pots. You can easily grow tomatoes on a sunny balcony, and a windowsill is great for herbs and microgreens.

“In January, when there was the big furore over the salad shortage because adverse weather conditions had affected supplies from Spain, Sophie planted some pea shoots on the windowsill in our living room, and we were harvesting our own salad three weeks later.

“Don’t be discouraged if something fails, there’s always the following year to try it again. I’ve grown most vegetables by now, to be honest, but it’s always exciting to try something new. See what takes your fancy and give it a go!

“We’ve had our allotment for three years, and it has become such a central part of our lives. I jokily refer to it as my ‘fortress of solitude’ – it’s where I go when I want to escape the bustle of London life. It’s taught me so much, and I have a real passion for growing things now, something I wasn’t remotely interested in only a few years ago.

“Since taking on the allotment, we’ve launched an award-winning gardening and food blog, I’ve retrained in horticulture with the RHS at Capel Manor and Regent’s Park, and I’m now embarking on a new career in garden writing and photography. It’s totally changed my life and I love it!”

Turn to page 108 of April’s The Simple Things for more of Sophie and Ade’s allotment advice, plus their recipe for Rhubarb and banana squares.


More from the April issue:

Featured
Apr 2, 2021
Recipe: Hot Cross Bun Cakes
Apr 2, 2021
Apr 2, 2021
Apr 6, 2019
Recipe: Wild garlic soup
Apr 6, 2019
Apr 6, 2019
Apr 24, 2017
Escape: Rainy day adventures
Apr 24, 2017
Apr 24, 2017

More allotment inspiration:

Featured
Allotment Shed.jpg
May 14, 2024
Outdoors | Allotment Sheds
May 14, 2024
May 14, 2024
Rainbow Carrot & Beetroot Tart.jpg
Feb 7, 2023
Recipe | Rainbow Carrot & Beetroot Tart
Feb 7, 2023
Feb 7, 2023
What I treasure.jpg
Jun 9, 2019
What I treasure | My allotment
Jun 9, 2019
Jun 9, 2019
  Buy ,  download  or  subscribe   See the sample of our latest issue  here   Buy a copy of our latest anthology:  A Year of Celebrations   Buy a copy of  Flourish 2 , our wellbeing bookazine  Listen to  our podcast  - Small Ways to Live Well

Get hold of your copy of this month's The Simple Things - buy, download or subscribe

View the sampler here

In Growing Tags issue 58, april, gardening, growing, allotment
Comment
Illustration: Joe Snow

Illustration: Joe Snow

Garden hacks: DIY seed tapes

Lottie Storey March 19, 2017

Seed tapes – biodegradable strips with the seeds spaced at regular intervals – make planting a little easier. Simply bury the tape rather than faffing with fiddly individual seeds. Make your own and put aside for planting later.

YOU WILL NEED:
biodegradable unbleached loo roll
3 tbsp unbleached flour
1.5 tbsp water
toothpick
small spoon
pen
ruler
seeds

1 Pull off a few lengths of the loo roll. 
2 Fold in half length-wise to create a fold line. Unfold.
3 Mix flour and water into a paste. 
4 Dip the toothpick into the glue paste, before dabbing onto a seed. 
5 Place the seeds into the middle of the paper on the fold, spaced per the packet instructions.
6 Once all seeds are in place, paste along the paper edge with the spoon, before refolding to seal. 
7 Roll up, then store somewhere cool and dry in a sealed container. To plant, prepare the soil, according to packet instructions, and unfurl the tape. Cover over with soil and give it a good water.


More from the March issue:

Featured
Mar 21, 2017
March issue: One day left to buy!
Mar 21, 2017
Mar 21, 2017
Mar 19, 2017
Garden hacks: DIY seed tapes
Mar 19, 2017
Mar 19, 2017
Mar 17, 2017
How to stop procrastinating
Mar 17, 2017
Mar 17, 2017

More Garden hacks:

Featured
Allotment Shed.jpg
May 14, 2024
Outdoors | Allotment Sheds
May 14, 2024
May 14, 2024
Kale 2.jpg
Jan 31, 2023
Veg | In Praise of Kale
Jan 31, 2023
Jan 31, 2023
Recipe: January dauphinoise
Jan 21, 2023
Recipe: January dauphinoise
Jan 21, 2023
Jan 21, 2023
  Buy ,  download  or  subscribe   See the sample of our latest issue  here   Buy a copy of our latest anthology:  A Year of Celebrations   Buy a copy of  Flourish 2 , our wellbeing bookazine  Listen to  our podcast  - Small Ways to Live Well

Get hold of your copy of this month's The Simple Things - buy, download or subscribe

View the sampler here

In Growing Tags issue 57, march, seeds, growing, garden hacks
Comment
Photography: Kirstie Young

Photography: Kirstie Young

The Herbery: A grower's guide

Lottie Storey March 6, 2017

In a new series, Lia Leendertz picks herbs from her garden to cook in her kitchen. Could it be simpler? To begin, try these unusual ways with herbs:

  • Plucking the leaves and chopping them into food is not the only way you can use herbs: when you grow your own, other possibilities open up.
  • Many herbs have edible flowers that taste like a slightly honeyed version of the leaf. Basil, oregano and thyme flowers are all ambiguous enough to use as garnishes for sweet or savoury food, and chive, dill and sage flowers are beautiful scattered over savoury dishes and salads.
  • Make use of seeds, particularly in their young and green stages, when they are like nothing you will ever be able to buy. Green coriander seeds in particular are pungent little flavour bombs and green fennel seeds are sweet, crunchy and aniseedy.
  • Buy a packet of seeds (or, even better, collect your own) and you can sow them thickly and harvest within a week or so as micro leaves, to provide little punchy and flavourful garnishes. Basil, dill, chervil, fennel and chive all make excellent micro greens.


Turn to page 33 of March’s The Simple Things for more advice on what to grow and where.

More from the March issue:

Featured
Mar 21, 2017
March issue: One day left to buy!
Mar 21, 2017
Mar 21, 2017
Mar 19, 2017
Garden hacks: DIY seed tapes
Mar 19, 2017
Mar 19, 2017
Mar 17, 2017
How to stop procrastinating
Mar 17, 2017
Mar 17, 2017

More gardening ideas:

Featured
Allotment Shed.jpg
May 14, 2024
Outdoors | Allotment Sheds
May 14, 2024
May 14, 2024
Kale 2.jpg
Jan 31, 2023
Veg | In Praise of Kale
Jan 31, 2023
Jan 31, 2023
Recipe: January dauphinoise
Jan 21, 2023
Recipe: January dauphinoise
Jan 21, 2023
Jan 21, 2023
  Buy ,  download  or  subscribe   See the sample of our latest issue  here   Buy a copy of our latest anthology:  A Year of Celebrations   Buy a copy of  Flourish 2 , our wellbeing bookazine  Listen to  our podcast  - Small Ways to Live Well

Get hold of your copy of this month's The Simple Things - buy, download or subscribe

View the sampler here

In Growing Tags issue 57, march, herbs, Growing herbs, gardening, herb garden
1 Comment
Image: Annie Spratt, Unsplash

Image: Annie Spratt, Unsplash

Give it a grow: Raspberries

Lottie Storey February 6, 2017

WHY WOULD I?

Plant now, and you’ll be enjoying the fruits of your labour by summer – raspberry canes will produce fruit from their first year, and even more the next. They prefer sun, but do well in shade, too. You can also try them in large (60cm diameter) containers.

WHEN DO I PLANT THEM?

Any time from November to March for summer fruiting raspberries, if there’s no frost and the soil isn’t waterlogged. Plant each cane 60cm apart, about 8cm deep. In a container, plant a few cm from the side, equally spaced, and ensure they’re kept well watered. 

HOW DO I KEEP THEM ALIVE?

Make sure soil is never too dry or too waterlogged. In spring, add a layer of manure around the base of the canes and you can water them with tomato feed as they fruit. In late autumn cut every cane that has borne fruit that year to about 25cm from the ground. It’s upsetting now, but will make for a more fruitful bush next summer. 
 

More from the February issue:

Featured
Mar 29, 2017
Competition: Win with Nature's Path Organic cereals
Mar 29, 2017
Mar 29, 2017
Feb 21, 2017
Make: Skin-boosting body butter
Feb 21, 2017
Feb 21, 2017
Unknown_jwret.jpg
Feb 20, 2017
Recipe: Feelgood fish fingers
Feb 20, 2017
Feb 20, 2017

More Give it a grow posts:

Featured
Feb 6, 2017
Give it a grow: Raspberries
Feb 6, 2017
Feb 6, 2017
Nov 18, 2016
Give it a grow: Bare-root climbing roses
Nov 18, 2016
Nov 18, 2016
Oct 3, 2016
Give it a Grow: Pilea Pepermioides
Oct 3, 2016
Oct 3, 2016
  Buy ,  download  or  subscribe   See the sample of our latest issue  here   Buy a copy of our latest anthology:  A Year of Celebrations   Buy a copy of  Flourish 2 , our wellbeing bookazine  Listen to  our podcast  - Small Ways to Live Well

Get hold of your copy of this month's The Simple Things - buy, download or subscribe

View the sampler here

In Growing, Miscellany Tags issue 56, february, give it a grow, fruit, raspberries, gardening
Comment
Image: Unsplash

Image: Unsplash

Give it a grow: Bare-root climbing roses

Lottie Storey November 18, 2016

WHAT IS IT?

No surprises here – it’s a perennial plant with exposed roots. Available from autumn to mid-spring, often by mail order, plants are dug up while dormant, roots washed, then shipped. 

WHY WOULD YOU?

Once in the ground, bare-root are exactly the same as container-grown plants, only cheaper. As this is the traditional way to plant roses, you’ll also and more varieties. The key thing is to soak the roots as soon as you can, before planting (if the ground is frozen or waterlogged, plant them temporarily in pots). The planting hole should be deep and wide enough to ensure roots aren’t bent or broken and are covered by at least a centimetre of soil. 

WHY WOULDN’T YOU? 

Perhaps if you were shopping in spring or summer, when only container-grown are available. 

WHICH VARIETY?

With hundreds to choose from, picking the best is a tall order. Rosa ‘Gertrude Jekyll’, a scented shrub variety (pictured above), was once voted the Nation’s Favourite. The RHS suggests ‘Madame Alfred Carriere’ for a north wall or shady spot; ‘Paul’s Himalayan Musk’ to clamber into trees, and ‘Pink Perpetue’ for covering pillars and trellis.


More from the November issue:

Featured
Nov 29, 2016
Escape: Island Adventure
Nov 29, 2016
Nov 29, 2016
Nov 21, 2016
Escape: British road movies
Nov 21, 2016
Nov 21, 2016
Nov 20, 2016
Fall asleep with a dream and wake up with a purpose
Nov 20, 2016
Nov 20, 2016

More Give it a grow posts:

Featured
Feb 6, 2017
Give it a grow: Raspberries
Feb 6, 2017
Feb 6, 2017
Nov 18, 2016
Give it a grow: Bare-root climbing roses
Nov 18, 2016
Nov 18, 2016
Oct 3, 2016
Give it a Grow: Pilea Pepermioides
Oct 3, 2016
Oct 3, 2016
  Buy ,  download  or  subscribe   See the sample of our latest issue  here   Buy a copy of our latest anthology:  A Year of Celebrations   Buy a copy of  Flourish 2 , our wellbeing bookazine  Listen to  our podcast  - Small Ways to Live Well

Get hold of your copy of this month's The Simple Things - buy, download or subscribe

View the sampler here

In Growing, Miscellany Tags issue 53, november, give it a grow, roses
Comment

Nourishing chickpea and turmeric face mask

Lottie Storey October 14, 2016

This mask is tempting to eat, but refrain from doing so and let your skin soak up all the goodness. 

Great for skin that's had a bit too much sun – and you’re likely to find all of the ingredients in your kitchen cupboards. 

You’ll need:
1 tbsp chickpea flour (gram flour) 
2 tsp almond oil
2 tsp honey
2 tsp lemon juice
1 tsp ground turmeric

1 Mix together all the ingredients and stir well to form a paste.

2 Apply a thick layer onto clean skin and rest for 15 minutes before rinsing off the mask with tepid water.

(Don’t worry about turmeric colouring your face; the mask washes off easily without a trace.)

Extract from All Natural Beauty: Organic & Homemade Beauty Products by Karin Berndl and Nici Hofer (Hardie Grant)


More from the October issue:

Featured
Oct 25, 2016
The tallest oak was once just a nut that held its ground
Oct 25, 2016
Oct 25, 2016
Oct 24, 2016
How to make a corn dolly
Oct 24, 2016
Oct 24, 2016
Oct 19, 2016
Be a kitchen witch!
Oct 19, 2016
Oct 19, 2016

More natural remedies:

Featured
Wellbeing.jpg
Feb 11, 2024
Make | Kitchen Face Masks
Feb 11, 2024
Feb 11, 2024
Bathsalts make 2.jpg
Oct 30, 2022
Make | Homemade Bath Salts
Oct 30, 2022
Oct 30, 2022
Rosemary Coconut Scalp .jpg
Feb 6, 2021
Make | Rosemary, Peppermint and Lemon Scalp Rub
Feb 6, 2021
Feb 6, 2021
  Buy ,  download  or  subscribe   See the sample of our latest issue  here   Buy a copy of our latest anthology:  A Year of Celebrations   Buy a copy of  Flourish 2 , our wellbeing bookazine  Listen to  our podcast  - Small Ways to Live Well

Get hold of your copy of this month's The Simple Things - buy, download or subscribe

View the sampler here

In Growing, Making Tags issue 52, october, natural skincare
Comment
Image: Auf der Mammiladen 

Image: Auf der Mammiladen 

Give it a Grow: Pilea Pepermioides

Lottie Storey October 3, 2016

WHAT IS IT?

A rather trendy leafy houseplant that, until fairly recently, caused a bit of a brew-ha-ha in the horticultural world because none of the experts knew what it was called. For years it had regularly appeared at Royal Botanic Gardens Kew’s help desk to be identified by mystified members of the public. It wasn’t until the late 1970s that it got a name, when Kew botanist Wessel Marais suggested that it was a Chinese species of Pilea. It now has several common names, including the Chinese money plant, the missionary plant and the pancake plant.

WHY WOULD YOU?

It has a rather appealing story attached to it: the plant was introduced to Europe in 1946 by a Norwegian missionary who had been travelling in the Chinese province of Yunming. Making the most of the plant’s easy-growing nature, he gave cuttings to friends and family in Norway, who in turn passed it on to friends in Sweden, then the UK and so on. It’s easy to grow, needing indirect light, good drainage and an occasional drink when the soil is dry.

WHY WOULDN’T YOU?

It can be hard to find a plant because more often than not, it’s ‘passed on’ rather than sold via nurseries. Try eBay. 


More from the October issue:

Featured
Oct 25, 2016
The tallest oak was once just a nut that held its ground
Oct 25, 2016
Oct 25, 2016
Oct 24, 2016
How to make a corn dolly
Oct 24, 2016
Oct 24, 2016
Oct 19, 2016
Be a kitchen witch!
Oct 19, 2016
Oct 19, 2016

More Give it a Grow posts:

Featured
Feb 6, 2017
Give it a grow: Raspberries
Feb 6, 2017
Feb 6, 2017
Nov 18, 2016
Give it a grow: Bare-root climbing roses
Nov 18, 2016
Nov 18, 2016
Oct 3, 2016
Give it a Grow: Pilea Pepermioides
Oct 3, 2016
Oct 3, 2016
  Buy ,  download  or  subscribe   See the sample of our latest issue  here   Buy a copy of our latest anthology:  A Year of Celebrations   Buy a copy of  Flourish 2 , our wellbeing bookazine  Listen to  our podcast  - Small Ways to Live Well

Get hold of your copy of this month's The Simple Things - buy, download or subscribe

View the sampler here

In gardening, Growing, Miscellany Tags issue 52, october, give it a grow, pilea, houseplant, House plants
Comment
Image: Kirstie Young

Image: Kirstie Young

How to stop your plants getting thirsty

Lottie Storey July 20, 2016

A recycled plastic water bottle is a good way to ensure plants won't wilt in the summer sunshine. While herbaceous plants, annuals and crops in your garden will be crying out for a drink in the summer, chances are you will be out and about making the most of the gorgeous weather.

Most delicate or container-grown plants will cope with a decent glug every morning (before the sun gets too strong and can burn wet leaves) or in the late afternoon, but left any longer, can experience problems. The solution is fairly simple - once you've quenched your own thirst with a bottle of water, save it and use it to ensure your plants don't suffer in the sun.

1. Use a 1-litre plastic bottle if possible, though 500ml is fine too. Wash it out if it's had any liquid other than water in it and replace the lid.

2. Remove the bottom of the bottle with scissors.

3. Pierce a hole in the lid with a skewer to allow water to slowly drip out.

4. Dig a hole next to the plant or container you want to keep hydrated. Make it deep enough for the water to directly reach the plant's roots (but be careful not to disturb them). 

5. Insert the bottle lid first and backfill the soil around the bottle. The end of the bottle should stand proud of the ground, or soil if in the container. 

6. Fill with water and keep an eye on it; fill as and when needed for happy plants.


More from the August issue:

Featured
Aug 27, 2016
Wellbeing: How to embrace idleness
Aug 27, 2016
Aug 27, 2016
Aug 18, 2016
Recipe: Raspberry, apricot and orange ice lollies
Aug 18, 2016
Aug 18, 2016
Aug 16, 2016
Competition: Win one of three natural skincare hampers from MOA worth £110
Aug 16, 2016
Aug 16, 2016

Read more gardening posts:

Featured
Topiary for cloud pruninng.jpg
Jul 20, 2023
Try Out | Cloud Pruning
Jul 20, 2023
Jul 20, 2023
Chrystallized Rose Petals-3168.jpg
Jun 18, 2022
Tasting notes | Roses
Jun 18, 2022
Jun 18, 2022
5 min gardening getty.jpg
Mar 18, 2020
5-minute gardening
Mar 18, 2020
Mar 18, 2020
  Buy ,  download  or  subscribe   See the sample of our latest issue  here   Buy a copy of our latest anthology:  A Year of Celebrations   Buy a copy of  Flourish 2 , our wellbeing bookazine  Listen to  our podcast  - Small Ways to Live Well

Get hold of your copy of this month's The Simple Things - buy, download or subscribe

View the sampler here

In Growing Tags issue 50, august, indoor gardening
Comment
Image: Getty

Image: Getty

Gardening: How to attract butterflies

Lottie Storey July 6, 2016

Plant a few pollen-rich flowers in your garden and watch it come alive with butterflies and bees

Turn to page 108 of July's The Simple Things for our feature on how to open a nectar bar in your garden, and follow the ideas below.

1. Leave a few fallen fruits on the ground. In late summer, butterflies, such as the Red Admiral and Painted Lady, will feed on fruit juices in fallen over-ripe pears, plums and apples.

2. Avoid pesticides. If you’re struggling with pests, you can make your own organic sprays (see Issue 48 for recipes) that won’t harm insects or the environment.

3. Don’t forget caterpillars. Stinging nettles, thistles, holly and ivy are good sources of food and act as hosts on which butterflies lay their eggs. 


Read more from the July issue:

Featured
Jul 25, 2016
Escape: Sand, sea, surf
Jul 25, 2016
Jul 25, 2016
Jul 19, 2016
The Simple Things letterpress print
Jul 19, 2016
Jul 19, 2016
Jul 15, 2016
Dogs in blankets with Laughing Dog
Jul 15, 2016
Jul 15, 2016

More gardening posts:

Featured
Allotment Shed.jpg
May 14, 2024
Outdoors | Allotment Sheds
May 14, 2024
May 14, 2024
Kale 2.jpg
Jan 31, 2023
Veg | In Praise of Kale
Jan 31, 2023
Jan 31, 2023
Recipe: January dauphinoise
Jan 21, 2023
Recipe: January dauphinoise
Jan 21, 2023
Jan 21, 2023
  Buy ,  download  or  subscribe   See the sample of our latest issue  here   Buy a copy of our latest anthology:  A Year of Celebrations   Buy a copy of  Flourish 2 , our wellbeing bookazine  Listen to  our podcast  - Small Ways to Live Well

Get hold of your copy of this month's The Simple Things - buy, download or subscribe

View the sampler here


In Growing, gardening Tags issue 49, july, gardening, growing, butterflies, wildlife
Comment
Image: Lottie Storey

Image: Lottie Storey

Give it a grow: Beetroot

Lottie Storey July 4, 2016

WHY GROW THEM?

Don’t let the memory of eating that tasteless, shop-bought pickled beetroot put you off growing this wonderful vegetable. Try it roasted, blended (check out Ottolenghi’s incredible puréed beetroot with yoghurt & za’atar recipe) or raw to enjoy its delicious, earthy flavour, as well as benefit from all the vitamins packed within. It’s also one of those crops that can be harvested early as a baby vegetable, or left in the ground to grow to any size between a golf and a tennis ball.

WHEN TO SOW?

Sarah Raven recommends soaking seeds in warm water for half an hour before sowing in the veg patch or container. For a constant supply, sow every three to four weeks from March to July in a sunny spot and good soil. Sow thinly, so crops have a chance to form juicy bulbs, in rows about 30cm apart. You can sow more densely and pick the leaves as a tender, tasty salad crop.

WHEN TO HARVEST?

Crops are ready about 12 weeks after sowing, though pick earlier for a smaller, sweeter crop.

WHICH ONE?

‘Burpees Golden’ for its colour, ‘Chioggia’ to delight diners with its candy stripes, ‘Albinia Vereduna’, which is white so won’t stain hands and ‘Boltardy’, which, as it sounds, is bolt resistant. 

Read more from the July issue:

Featured
Jul 25, 2016
Escape: Sand, sea, surf
Jul 25, 2016
Jul 25, 2016
Jul 19, 2016
The Simple Things letterpress print
Jul 19, 2016
Jul 19, 2016
Jul 15, 2016
Dogs in blankets with Laughing Dog
Jul 15, 2016
Jul 15, 2016

More gardening posts:

Featured
Allotment Shed.jpg
May 14, 2024
Outdoors | Allotment Sheds
May 14, 2024
May 14, 2024
Kale 2.jpg
Jan 31, 2023
Veg | In Praise of Kale
Jan 31, 2023
Jan 31, 2023
Recipe: January dauphinoise
Jan 21, 2023
Recipe: January dauphinoise
Jan 21, 2023
Jan 21, 2023
  Buy ,  download  or  subscribe   See the sample of our latest issue  here   Buy a copy of our latest anthology:  A Year of Celebrations   Buy a copy of  Flourish 2 , our wellbeing bookazine  Listen to  our podcast  - Small Ways to Live Well

Get hold of your copy of this month's The Simple Things - buy, download or subscribe

View the sampler here

In Growing, Miscellany Tags gardening, issue 49, july, vegetables, allotment, give it a grow
Comment
Recipe: Lia Leendertz, photography: Kirstie Young

Recipe: Lia Leendertz, photography: Kirstie Young

Recipe: Lavender lemonade

Lottie Storey June 13, 2016

A refreshing, sweetly herbal fizzy drink for the moment the lavender is at its most fragrant, just as the flowers are starting to open. Add a shot of gin for an adult version.

Makes 6 glasses

500ml water
200g caster sugar
10 lavender flower heads, plus more for decoration
12 lemons
fizzy water

1 Place the water, sugar and lavender flowers into a saucepan and heat gently until the sugar dissolves. Simmer very gently for ten minutes, before removing from the heat and leaving to cool completely. Transfer to a jug or jar, lavender flowers and all, and chill.

2 When you are ready to serve, squeeze the lemons into a jug, tip in the lavender syrup and top up with fizzy water, aiming for about a third of each ingredient. Serve over ice with a lavender stalk and a piece of lemon. 

For more of Lia Leendertz's Seed to Stove midsummer menu, including Gravadlax with dill yoghurt and crispbreads, Latvian midsummer cheese, and Strawberry, apricot and cherry shortcake, turn to page 24 of June's The Simple Things.


More from the June issue:

Featured
Jun 19, 2016
Don't mind that roses have thorns, be glad that thorns have roses
Jun 19, 2016
Jun 19, 2016
Jun 13, 2016
Recipe: Lavender lemonade
Jun 13, 2016
Jun 13, 2016
Jun 8, 2016
Gardening: Make your own organic fertiliser
Jun 8, 2016
Jun 8, 2016


Read more Seed to Stove recipes:

Featured
sun bread.jpg
Dec 21, 2021
Bake: sun bread for Yule
Dec 21, 2021
Dec 21, 2021
May 2, 2021
Recipe: Wild garlic bannocks with asparagus pesto
May 2, 2021
May 2, 2021
Jul 25, 2020
Recipe: Deep-fried courgette flowers with broad bean, pea and mint puree and basil pesto
Jul 25, 2020
Jul 25, 2020
  Buy ,  download  or  subscribe   See the sample of our latest issue  here   Buy a copy of our latest anthology:  A Year of Celebrations   Buy a copy of  Flourish 2 , our wellbeing bookazine  Listen to  our podcast  - Small Ways to Live Well

Get hold of your copy of this month's The Simple Things - buy, download or subscribe

View the sampler here

In Eating, Growing Tags seed to stove, issue 48, june, lemonade, drink, recipe, lavender
Comment

Kate Turner’s Henkeeping Factsheet

Lottie Storey May 18, 2016

For a taste of the good life and your own freshly-laid eggs on the doorstep, keeping chickents can be great fun and is surprisingly simple, says Kate Turner. 

Kate Turner is an allotment gardener, forager, recipe writer and author, who wrote this month’s henkeeping feature on page 48 of June's The Simple Things. She loves growing organic veg and raising ‘free-range’ children. Read more at about her flock at homegrownkate.com and read on for her tips on keeping hens.

Becoming a henkeeper

1. Choosing a chicken

There are so many fabulous breeds to choose from, all with different looks and personalities to boot. Start by looking through books, poultry magazines or online to get an idea of what you like and then contact a local breeder or poultry society or go to an agricultural show to take a look.

It’s worth considering whether you want hybrid, pure or rare breeds and what size chicken you’re after. Hybrids are cross-bred for high egg production (250-300 a year) and live for around three to five years. Pure breeds are a single breed and usually live longer (six to 12 years). They won’t lay quite as many eggs as hybrids (anything from 50-250 depending on the breed), but they do come in an incredible array of colours, characters, shapes and sizes. Rare breeds are pure breeds whose numbers are low, so keeping rare breeds helps preserve that species, which is great.

It’s also worth considering what size chicken you’re after. Do you have the space for large hens or would you prefer a little bantam flock? A cockerel or ladies only? Start with two to three chickens and go from there. Most hens are very family friendly, easy to care for and a real joy to have in the garden.

2. The coop and run

While we use an ‘open’ coop and a battery-powered electric fence to protect our flock, there are lots of other options to suit all situations and budgets. If you’re tight on space an ‘A’ frame, ark or Eglu might suit – these portable frames incorporate coop and run and can be moved around your garden to make the most of fresh grass, usually housing two to four smaller hens.

You can convert an old shed into a brilliant chicken house, buy a gypsy caravan hen house on wheels or even recycle a metal bed frame and a waterproof canvas sheet! At night, each hen will need around 20cm of perching space in the coop and the more space you can give your chickens to roam during the day, the better. Once your chosen coop is up and running, you’ll need to keep it clean – ‘mucking out’ once a week is usually fine.

3. Food and water

Fresh water should always be available, with or without the addition of apple cider vinegar, and food needs to be offered once or twice a day – the main meal in the morning and a treat in the afternoon works well. We don’t leave food out permanently because it can attract unwanted ‘guests’, plus we enjoy going to the allotment to feed our chickens.

As a rule of thumb, a double-handful of food is about right for each hen, but you’ll get a feel for what suits your flock. You could just feed them organic layers pellets and some mixed grain as a treat, but they will really appreciate kitchen scraps, foraged nuts, berries and weeds. We also make an occasional ‘green mash’ that is packed with nutrients, which they adore. In addition they need a little ‘grit’ for healthy digestion and hard eggshells.

4. Natural remedies

A fresh-air, free-range lifestyle is always the best way to ensure good health, but there are also some really useful natural products for your chickens. Diatomaceous earth is a very fine dust made from tiny fossilised water plants that mites and parasites loathe. Every few months we puff it into the nooks and crannies of their coop, their favourite dust-bathing spots, even into their food. Verm-x is another great herbal product for deterring parasites.

Once a month, we dish out the pellets and they must taste delicious because our hens love them! Daily Hen Health is a fabulous vitamin and mineral-rich addition to their water, containing apple cider vinegar and a mixture of herbs, seaweed and garlic - we just add a little to their water whenever we change it. And finally, plain and simple wood ash – a brilliant addition to dust-bathing spots, especially in the winter months.

5. The moult and hen-pecking

Once a year towards the end of summer your lovely fluffy hen will lose many of her feathers and lay fewer eggs. This is called the moult and is perfectly normal, although it can look quite alarming. Your hen is simply replacing her old feathers in a process that can take six to 12 weeks. Hen-pecking can be equally alarming and is also pretty normal when introducing new chickens to your flock. Expect a bit of argy-bargy as the hens decide who’s the boss and what the ‘pecking-order’ is. Introducing new hens at night can help – put them straight on the perch with the roosting flock and they may wake up none the wiser.


READING & SUPPLIES

There are lots of publications and websites out there offering advice on keeping chickens. These are some of my favourites:

Books

The Illustrated Guide to Chickens by Celia Lewis (a gorgeously illustrated & practical guide to keeping chickens)

Chickens by Suzie Baldwin (a comprehensive book covering everything you need to know)

The Complete Herbal Handbook for Farm & Stable by Juliette de Bairacli Levy (a natural chicken keeping bible)

Collins Pocket Guide: Wild Flowers (a handy pocketbook for identifying wild herbs & weeds)


Specialist magazines

·      Practical Poultry

·      Country Smallholding

·      Fancy Fowl

·      Your Chickens


Websites for coops, fencing, food & herbs, plus UK agricultural shows:

Coops

www.flytesofancy.co.uk

www.omlet.co.uk

www.greenfrogdesigns.co.uk

www.smithssectionalbuildings.co.uk


Food/Herbs/Treatments

www.organicfeed.co.uk

www.hiltonherbs.com

www.verm-x.com

www.diatomretail.co.uk


Fencing

www.countrystoredirect.com

www.rappa.co.uk


Agricultural Shows

www.ukcountyshows.co.uk


General info

www.poultryclub.org (lots of info about pure breeds )

www.rarepoultrysociety.co.uk (protects & promotes rare breeds)

www.rbst.org.uk (Rare breeds survival trust. Lots of info)

www.bhwt.org.uk (British hen welfare trust – rehomes hybrid commercial layers)

www.feathersite.com (US-based and a bit clunky, but loads of infophotos about all breeds)


Read more from the June issue:

Featured
Jun 19, 2016
Don't mind that roses have thorns, be glad that thorns have roses
Jun 19, 2016
Jun 19, 2016
Jun 13, 2016
Recipe: Lavender lemonade
Jun 13, 2016
Jun 13, 2016
Jun 8, 2016
Gardening: Make your own organic fertiliser
Jun 8, 2016
Jun 8, 2016
  Buy ,  download  or  subscribe   See the sample of our latest issue  here   Buy a copy of our latest anthology:  A Year of Celebrations   Buy a copy of  Flourish 2 , our wellbeing bookazine  Listen to  our podcast  - Small Ways to Live Well

Get hold of your copy of this month's The Simple Things - buy, download or subscribe

View the sampler here


In Nest, Living, Growing Tags henkeeping, hens, chickens, issue 48, june
Comment

Give it a grow: Spring onions

Lottie Storey April 27, 2016


WHY GROW THEM? 

Easy and fast- growing, spring onions are also very versatile. They make a great addition to the veg patch, work well squeezed in between ornamental plants in a herbaceous border and are very happy in containers. Just make sure they have some sunshine and are in well-drained soil. 

WHEN TO SOW? 

If you want to be able to enjoy fresh spring onions over the summer, start them off in April and sow every three weeks. There’s no need to start seeds off in small pots, pop them in a prepared channel about 2cm deep – you can make this with the edge of your trowel. It’s important to rake the soil first, removing any weeds, so that it’s a fine, crumbly texture and the seeds can settle into the soil rather than falling in between large lumps.

WHEN TO HARVEST? 

Ready in just eight weeks. You’ll get small, but deliciously sweet, crops if you sow in July. Sow in August and September to overwinter for early spring pickings.

WHICH ONE? 

‘White Lisbon’ is a crisp, tasty traditional variety but for something a bit different, Sarah Raven recommends ‘North Holland Blood Red’ for its flavour, looks and excellent value for money,as it will bulk up to the size of a red onion if left in the ground.


Read more:

Featured
Glimmers.jpeg
Feb 18, 2025
Wellbeing | Eye Spy Glimmers
Feb 18, 2025
Feb 18, 2025
Maypole .jpg
May 6, 2024
Folk | The Magic of Maypole Ribbons
May 6, 2024
May 6, 2024
Screenshot 2024-02-22 at 15.42.26.png
Feb 22, 2024
Listen | Time after time playlist
Feb 22, 2024
Feb 22, 2024

From the April issue

Gardening posts

Herb posts


  Buy ,  download  or  subscribe   See the sample of our latest issue  here   Buy a copy of our latest anthology:  A Year of Celebrations   Buy a copy of  Flourish 2 , our wellbeing bookazine  Listen to  our podcast  - Small Ways to Live Well

Get hold of your copy of this month's The Simple Things - buy, download or subscribe

View the sampler here

In Growing Tags issue 46, april, growing, gardening, spring onions, give it a grow
Comment

Outdoor project: Plan and plant a living wall

David Parker March 7, 2016

Succulents look great huddled together in a living wall, and they’re low maintenance too.

As natives to all sorts of arid areas around the world, succulents have developed fascinating plant shapes, leaf forms and unique colours. This uniqueness gives them an otherworldly appearance that works remarkably well in a living wall. If planted in a moveable system, they can easily be shifted indoors in colder weather so the living wall can be enjoyed all year.


What you need

Plants - these work well in vertical gardens: 
Burro’s Tail (Sedum morganianum) 
Hens-and-chicks (Sempervivum tectorum or Echeveria elegans) 
Jade plant (Crassula ovata) 
Medicine plant (Aloe vera)
Pink vygie (Lampranthus blandus) 
Plush plant (Echiveria pulvinata) 
Senecio (Senecio Spp)
Stonecrop (Sedum acre)

Tools
1 living wall planter (Try Minigarden, £42.99, from Garden Beet, www.gardenbeet.com)
Screwdriver and screws
Tape measure
Spirit level
Cactus or succulent soil mix
Organic fertiliser
Trowel


What you do

1. Use a trowel to fill the planter with soil mix.
2. Measure an appropriate amount of organic fertilizer into the soil; mix well. 
3. Plant the succulents carefully into the soil, being gentle to prevent stem breakage.
4. Water well.
5. Hang the planter on the wall, according the manufacturer’s instructions.


How to care for your vertical garden

Watering: succulents are drought tolerant, but they appreciate generous summer watering. Let the soil dry out between waterings. Overwatered plants can be mushy, discolored, rotted, and limp; leaves will often turn white, completely losing their colour. Under-watered plants will stop growing, turn brown in spots, and then drop their leaves. Consistent, even waterings with time to dry out in between drinks will ensure a healthy plant.
Temperature: these tough plants can thrive at temperatures as low as 5C at night, but prefer day temperatures in the range of 20–30C and average nightly temperatures no lower than 10–12C. This makes them excellent candidates for most balconies or patios during the summer.
Light: bright, even light is best as succulents scorch when in direct sun, and turn leggy when out of it. Many walls, fences, and gates have bright light conditions without direct light, making them an excellent location for succulents.
Drainage: plants in quick-draining soil made for cactus and succulents. If you cannot find this, mix one part potting soil, one part perlite, and one part course builder’s sand in a bucket. 
Feed: fertilise during the summer with an organic fertiliser recommended for cactus or succulents.


Where to buy

Most garden centres sell succulents. Surreal Succulents (www.surrealsucculents.co.uk) has a good selection of echeveria, sedum and crassula, from £3.95 per plant, which can be ordered online. Also try Easy Cactus (www.easycactus.co.uk), which sells various succulents including echeveria and crassula.

Adapted from Grow a Living Wall by Shawna Coronado (Quarto, £16.99)


Read more:

More gardening posts

More projects

More interiors


  Buy ,  download  or  subscribe   See the sample of our latest issue  here   Buy a copy of our latest anthology:  A Year of Celebrations   Buy a copy of  Flourish 2 , our wellbeing bookazine  Listen to  our podcast  - Small Ways to Live Well

Buy, download or subscribe

See the sample of our latest issue here

Buy a copy of our latest anthology: A Year of Celebrations

Buy a copy of Flourish 2, our wellbeing bookazine

Listen to our podcast - Small Ways to Live Well

The current issue of The Simple Things is out now - buy, download or subscribe

View the sampler here


In Growing, Nest Tags nest, succulents, living wall, issue 33, march, fresh
1 Comment
Photography: Tanya Goodwin

Photography: Tanya Goodwin

Nest: Hellebores

Lottie Storey January 24, 2016

When there is little else to pick in the garden, the hellebore* steps up.

Or bows down, such is the coy nature of its earth- gazing blooms. You could snip a few flowers and float them in a bowl for coffee table showiness, but better to cut a longish stem and pop into a vase, like this splendid swan.

Sarah Raven advises ‘conditioning’ – lowering stem ends (about 2cm) into boiling water for 30 seconds – first, and if that keeps them flowering longer, we’re all for it.

* The hellebore is also known as ‘Christmas rose’ due to its early flowering. Still pretty good in the new year, though.

And look out for more welcome winter blooms in the form of snowdrops gracing our February cover - out Wednesday 27 January.

Read more:

From the January issue

More Nest posts

More gardening posts

January's The Simple Things is out now - buy, download or subscribe.

In Nest, Growing Tags issue 43, january, nest, flowers, gardening
Comment
Recipe by Lia Leendertz, photography by Kirstie Young 

Recipe by Lia Leendertz, photography by Kirstie Young


Growing: Fruit and nut trees

Lottie Storey December 1, 2015

In December's The Simple Things, Cinead McTernan explores the world of fruit and nut trees and selects the species most suitable for a domestic garden. Here, we pick out some of our favourite fruit and nut recipes from previous issues.

Spiced pickled quince

Looks stunning in the jar and goes well with soft goats’ cheese or cold meat.

400g granulated sugar
700ml cider vinegar
1 tsp black peppercorns
1 tsp coriander leaves
1 bay leaf
4 quinces

1. Put sugar, vinegar, peppercorns and herbs into a large saucepan and bring slowly to the boil.

2. Peel, core and quarter the quinces; cut each quarter into three and place in the liquid. Bring back to the boil and then turn the heat down and simmer for 40 mins. The quince will soften and turn a rich pink colour.

3. Allow to cool slightly and then spoon into sterilised jars before pouring the liquor over and sealing. They’ll keep for a couple of months.


Recipe by Lia Leendertz, taken from issue 29 (November 2014 - buy back issue now)


Quick walnut tart

This is very fine if you make your own pastry, but once in a while shop-bought pastry can make the difference between making something and not.

240g sugar
180ml double cream
2 tbsp good honey
1 tsp fennel seed, ground
1 tsp cinnamon, ground
200g walnuts
500g sweet pastry
1 egg, lightly beaten


1 Preheat oven to 180C/Fan 160/350F. 

2 Add sugar to a pan on a moderate heat. Stir as it starts to turn to caramel, and once or twice more until all the sugar turns.

3 With the pan still on the heat, slowly pour in the cream, stirring as you do – it will form ribbons but keep going and it will become smooth. Stir in the honey, fennel, cinnamon and nuts. Leave to cool while you prepare the pastry case.

4 Butter and flour a 22-24cm tart tin.

5 On a floured surface, roll out the pastry to 5mm thick and line the tin.

6 Spike the pastry using a fork and bake for 10 mins. Brush pastry with beaten egg, and bake another 7 mins.

7 Spoon the nut mixture evenly into the tart and bake for about 30 mins in the centre of the oven. Let cool for 10 mins, before removing the side of the tin and leaving to cool on a rack.

Recipe by Mark Diacono, taken from issue 40 (October 2015 - buy back issue now)


Recipe by Lia Leendertz, photography by Kirstie Young

Recipe by Lia Leendertz, photography by Kirstie Young

Gianduja liqueur

This chocolate and hazelnut liqueur is definitely worth the effort of spending a little time with the nutcracker. Gianduja is the forerunner of nutella, a chocolate and hazelnut paste created in Turin during the Napoleonic era, when a resourceful chocolatier mixed his limited supply of cacao with hazelnuts to make it stretch further. This is adapted from a recipe in Andrew Schloss’s Homemade Liqueurs and Infused Spirits. Siphoned off into pretty little bottles, it makes wonderful Christmas presents.

450g hazelnuts
200g cacao nibs
750ml vodka (40% proof)
300ml simple syrup* (you can buy this but it’s easy to make, see below)

1 In a large, dry frying pan, toast the hazelnuts until they start to take colour, then tip them into a cloth and rub off as many of the skins as you can easily get to come off.

2 Pour the cacao nibs into the frying pan and toast briefly, until the aroma hits your nose. Tip out into a cool bowl.

3 In batches, grind hazelnuts and cacao nibs in a food processor until they are the texture of coarse sand (you could use a pestle and mortar instead, but this will obviously take some time). Tip everything into a large, sealable jar and pour on the vodka. Stir well.

4 After around ten days, strain the mixture into a sterilised and cooled jar. Use a colander lined with muslin, and when the bulk of the liquid has passed through, suspend the muslin above the jar and let it drip through for an hour or so. Don’t squeeze or press on the mixture to extract more liquid, as this will cloud the liqueur.

5 Stir in the cooled simple syrup and it is then ready to drink, or to store for up to a year.

*To make the simple syrup
1 I always use American ‘cups’ measurements for making syrup, because you need an equal volume of water and sugar and this is the most straightforward way to measure them. You will need around 1¼ cups each of sugar and water. But if you prefer, this equates to around 300ml water and about 200g sugar.
2 Put the sugar and water into a saucepan and warm through gently until the sugar has dissolved, then turn up the heat and simmer for a minute. Take off the heat and allow to cool.

Recipe by Lia Leendertz, taken from issue 39 (September 2015 - buy back issue now)


Medlar jelly

Little accompanies rich meats and cheese as well as a good jelly. This deep amber preserve has just the right mix of sharp and sweet, with a fruity edge

1kg medlars, quartered (ideally around half bletted, half not)
juice of half–1 lemon
around 500g caster sugar
1 vanilla pod (optional)


1. Put the medlars in a large pan and pour in just enough water to cover. Add the juice of half a lemon, more if you fancy a sharper flavour. Bring to the boil, lower the temperature and simmer for an hour.

2. Leave to strain overnight through a jelly bag or muslin into a bowl.

3. Put a small plate into the fridge to chill. Measure the juice and pour it into a clean pan. For each 500ml of juice, add 375g of caster sugar.

4. Split the vanilla pod along its length and add to the liquid. Warm gently, stirring as the sugar dissolves. Increase the heat to a rolling boil, then boil unstirred, for 5 mins.

5. Turn off the heat and test for the setting point by spooning a few drops onto the cold plate, leaving it for a minute then pushing it with your finger. It should wrinkle. If not, test again in 5 mins.

6. Pour the jelly into warm, sterilised jars and seal. It will keep in a cool, dark place for at least a year, often much longer. Once open, store in fridge - it should last months.


Recipe by Mark Diacono, taken from issue 41 (November 2015 - buy back issue now) 


Almond butter

If you want to make homemade almond butter, you just need almonds and a food processor. Head over to digital editor Lottie Storey's blog - Oyster & Pearl - for a very easy recipe.


December's The Simple Things is full of festive makes and bakes, wreaths of hawthorn and bay, and twinkly lights a-plenty. Buy, download or subscribe now.


In Christmas, Growing, Eating Tags growing, nut, walnut tree, fruit, fruit recipe, christmas, issue 42, december
Comment
  • Blog
  • Older
  • Newer
Featured
  Buy ,  download  or  subscribe   See the sample of our latest issue  here   Buy a copy of our latest anthology:  A Year of Celebrations   Buy a copy of  Flourish 2 , our wellbeing bookazine  Listen to  our podcast  - Small Ways to Live Well
Feb 27, 2025
Feb 27, 2025

Buy, download or subscribe

See the sample of our latest issue here

Buy a copy of our latest anthology: A Year of Celebrations

Buy a copy of Flourish 2, our wellbeing bookazine

Listen to our podcast - Small Ways to Live Well

Feb 27, 2025
Join our Newsletter
Name
Email *

We respect your privacy and won't share your data.

email marketing by activecampaign
facebook-unauth twitter pinterest spotify instagram
  • Subscriber Login
  • Stockists
  • Advertise
  • Contact

The Simple Things is published by Iceberg Press

The Simple Things

Taking time to live well

We celebrate slowing down, enjoying what you have, making the most of where you live, enjoying the company of of friends and family, and feeding them well. We like to grow some of our own vegetables, visit local markets, rummage for vintage finds, and decorate our home with the plunder. We love being outdoors and enjoy the satisfaction that comes with a job well done.

facebook-unauth twitter pinterest spotify instagram