The Simple Things

Taking time to live well
  • Home
  • Subscribe
  • SHOP
  • Newsletter
  • About
  • Work with us
  • Home
  • Subscribe
  • SHOP
  • Newsletter
  • About
  • Work with us

Blog

Taking Time to Live Well

  • All
  • Chalkboard
  • Christmas
  • Competition
  • could do
  • Eating
  • Escape
  • Escaping
  • Fresh
  • Fun
  • gardening
  • Gathered
  • Gathering
  • Growing
  • Haikus
  • Interview
  • Living
  • Looking back
  • Magazine
  • magical creatures
  • Making
  • Miscellany
  • My Neighbourhood
  • Nature
  • Nest
  • Nesting
  • outing
  • playlist
  • Reader event
  • Reader offer
  • Shop
  • Sponsored post
  • Sunday Best
  • Think
  • Uncategorized
  • Wellbeing
  • Wisdom
Fruit leather

Fruit leather

Recipe: Raspberry fruit leather

Lottie Storey August 20, 2015

Use this recipe as a template for all kinds of fruit leathers – it works really well with strawberries, apricots and nectarines too. Essentially, all it entails is making a thick, gloopy purée of fruit and sugar and then drying it out very slowly in the oven until you have a pliable leather as clear and vivid as a stained glass window. Remember to add the lemon juice if you are using fruit that is likely to discolour.

Makes 2 sheets
A little groundnut oil for greasing the tins
500g raspberries
500g peeled, cored and chopped cooking apples
Juice of 1 lemon
130g honey

1. Preheat the oven to 70°C/Gas 1/4. Line two baking sheets of about 24cmx30cm with foil or several layers of clingfilm; lightly oil with groundnut oil.  
2. Put the berries, apples and lemon juice into a pan. Cook gently, partially covered at first, until soft and pulpy, about 20 minutes. Rub through a sieve or mouli into a bowl. You should have about 700g smooth fruit purée. Add the honey and mix well.  
3. Divide between two baking sheets, shaking the tins and smoothing with a spatula so the purée reaches right up to the edges. Place in the oven for 6-10 hours.
4. The leather should be a little tacky but no longer sticky and should peel easily off the clingfilm or foil. Leave to cool completely then roll up the leather in greaseproof paper or cling film and store in an airtight container in a cool place. Use within two months. Alternatively, you can freeze it, well sealed, for up to a year. 

Turn to page 120 of September's The Simple things (on sale 29 August 2015) for Postcards from the Hedge, where Mark Diacono is picking peppercorns and harvesting honey.

Read more

Autumn jam recipes

More Postcards from the Hedge recipes

More from the September issue

September's The Simple Things is on sale today - buy, download or subscribe now.

In Growing, Eating Tags issue 39, september, postcards from the hedge, fruit, fruit recipe, autumn
3 Comments

Recipe: Barbecue baked apples

Lottie Storey August 20, 2015

This is a super-simple way to cook. Local apples are everywhere now, and are an easy but delicious dessert for campers.

BBQ Baked Apples

You’ll need a lidded barbecue to make this delicious apple dessert. Or it can be cooked in the embers of a campfire. 

Serves 4

4 eating apples
1 large knob of butter
2 tbsp light brown sugar
1 tsp ground cinnamon
a handful each of sultanas and chopped nuts
2 tsp demerara sugar
a splash of booze if there’s some around (rum, brandy, cider but – NOT beer or wine!)

1Core the apples, leaving the bottom 2cm in if possible. If that’s too hard, take the whole core out, cut the bottom 2cm off the core and plug it back into the bottom of the apple. This is to stop all the melted butter flowing out later.

2Score a line around the centre of the apple.

3Put the butter, light brown sugar and cinnamon in a bowl.  Mix in the nuts and sultanas. Use your hands if it’s easier to blend it all up into a lumpy paste.

4Push some of the mixture into each apple until it’s all used up.

5Place each apple on the centre of a large double-thickness square of foil. Sprinkle a little demerara sugar and some rum or brandy (if using) over the top, then wrap each apple up tight in its own square of foil.

6Put the foil parcels on your barbecue away from the direct heat and close the lid. You’ll need to rotate the apples occasionally to enable them to cook evenly.

7They will take about 20 minutes to cook and go soft enough to eat (you don’t want them mushy), but this will depend on the size of apples and your heat source, so keep an eye on them. Serve with cream or plain yoghurt.

Recipe from Pitch Up, Eat Local by Ali Ray (AA Publishing with The Camping and Caravanning Club). 

Turn to page 72 of September's The Simple Things for Under Canvas, highlighting secluded, riverside camping pitches. On sale 29 August 2015.


Read more camping posts from The Simple Things...


  • Recipes: The Picnic Loaf, Sunshine Hash, Campfire Beef & Beans
  • How to pitch a tent like a pro
  • Britain's best wild camping spots

September's The Simple Things is on sale today - buy, download or subscribe now.

In Escaping, Eating Tags issue 39, september, camping, camping recipe, recipe, apples, barbecue
Comment
Homemade yoghurt, photography by Tara Fisher

Homemade yoghurt, photography by Tara Fisher

Recipe: Homemade whole milk yoghurt

Lottie Storey August 20, 2015

Making your own yoghurt is very straightforward and tremendously satisfying. It’s not necessarily cheaper than buying it in, but it is a lovely thing to do. The milk powder thickens the yoghurt, but if you prefer a creamier yogurt still, you can substitute 100ml of the milk with single cream.

Makes approx. 500 ml
2 heaped tablespoons organic live yoghurt
500 ml organic whole milk
3 tablespoons milk powder

Equipment

digital thermometer
1-litre Thermos flask

It is vital that everything is spotlessly clean when making yoghurt. To ensure your equipment is in perfect condition, place the whisk and metal spoon inside the mixing bowl and fill it to the brim with boiling water before use. Dip the thermometer tip in, too. Pour the water away, dry the equipment using a clean tea towel or kitchen paper before using.


1.     Place the yoghurt in a spotlessly clean large glass or ceramic mixing bowl and allow it to come up to room temperature (approximately 20–30 minutes).

2.     Pour the milk into a clean saucepan and heat very gently over a very low heat until it reaches exactly 46C – don’t let it get any warmer than this or it will kill the live cultures in the yoghurt when the two are combined. Remove the pan from the heat, sprinkle the milk powder over the surface and whisk it in thoroughly. Carefully pour the warm milk over the yoghurt in the bowl and stir well with a metal spoon.

3.     Pour the yoghurt into the Thermos flask. Screw on the lid and set aside on the kitchen work surface overnight.

4.     By morning your milk should have thickened and turned into yoghurt. Decant it into jars or a Tupperware container, cover with clingfilm or a lid and store in the fridge. Eat within five days.


Recipe from Fermented by Charlotte Pike, photography by Tara Fisher (Kyle Books)

Use this yogurt to make the LEMON AND RASPBERRY YOGHURT LOAF CAKE recipe on page 59 of September's The Simple Things. On sale - 26 August 2015.

Read more:

More from the September issue

More cake recipes

More yoghurt ideas

September's The Simple Things is on sale today - buy, download or subscribe now.

In Eating, Living Tags issue 39, september, homemade, yoghurt, cake in the house
Comment
Violet scones with honeyed cream - a recipe by Pip McCormac. Photography by Yuki Sugiura 

Violet scones with honeyed cream - a recipe by Pip McCormac. Photography by Yuki Sugiura 

Afternoon Tea Week: Violet scones with honeyed cream recipe

Lottie Storey August 11, 2015

Celebrate Afternoon Tea Week 2015 with a recipe for Violet scones with honeyed cream

Parma Violets can taste soapy, but violet flowers, used sparingly and baked, are far subtler.
The honeyed cream is what provides the real sweetness here. It’s thick and indulgent and removes the need for jam or butter, although a dollop of lemon curd goes well if you have a really sweet tooth. If you don’t have violets, use lavender, rosemary or rose petals.

Makes 12 scones

50g butter, plus extra for greasing
225g self-raising flour, plus extra for dusting
25g sugar
150ml milk, plus extra for glazing 1 tsp vanilla extract
3 violet flowers, chopped, plus extra for serving
100g clotted cream
2 tbsp runny honey

1 Preheat the oven to 225C/Fan 205/435F and grease and line a large baking tray. In a food processor, mix together flour, butter and sugar until it resembles breadcrumbs. Pour in the milk and vanilla extract and beat to a stiff dough. Add the violets and give a final few pulses of the processor to combine them into the mixture.

2 Lightly dust your worktop with flour, and place the dough in the middle, sprinkling a little flour over the top. Roll out the dough to about 2cm thick. Take a 5cm round cutter and cut out discs, placing them on the baking tray. Roll the leftover dough out again and cut out more rounds, repeating until the dough is used. Try not to roll the dough too many times as this will lead to tough scones. Brush the top of each with a dab of milk and place the tray in the oven for 12-15 mins until golden. Transfer to a wire rack to cool.

3 Just before serving, put the cream in a bowl and fold in the honey – you want a ripple effect – and top with a few violet petals. Cut the scones and spread a bit of cream on top.

Recipes from The Herb & Flower Cookbook: Plant, Grow and Eat by Pip McCormac (Quadrille). Photography by Yuki Sugiura 


And if you're inspired to eat more flowers, head to our Petal Power Pinterest board for a sweet and beautiful selection of ideas:

Follow The Simple Things's board Edible flowers | Petal power on Pinterest.

Read more:

Afternoon tea posts

More from the August 2015 issue

Three more edible flower recipes


August's The Simple Things is on sale - buy, download, subscribe or look inside now!


In Nest, Eating Tags issue 38, august, afternoon tea, scones, recipe, edible flowers, violet, pinterest
1 Comment

Recipe: Pink lemonade

Lottie Storey August 4, 2015

No August afternoon is complete without lemonade, and the pink variety is pretty as a picture.

Makes about 1.2 litres

grated zest and juice of six large unwaxed lemons
1 small punnet raspberries, crushed through a sieve 
150g caster sugar
1l boiling water
extra slices of lemon to serve

1 Place the lemon zest and juice in a large bowl, add the crushed raspberries and caster sugar and stir in the boiling water until the sugar has dissolved.

2 Leave the mixture to cool, then cover and place in the fridge overnight.

3 Sieve to remove the grated zest, pour into bottles and chill in the fridge. Serve over ice with extra slices of lemon.

4 To keep it cool for a picnic, pour over a handful of ice cubes in a thermos flask. Or you can freeze the lemonade in plastic bottles (filled three-quarters full). The frozen lemonade will gradually defrost, keeping everything else cool.

Recipe from Beside the Seaside by Carolyn Caldicott, photography by Chris Caldicott (Pimpernel Press) 

Read more:

  • More from the August issue
  • Drinks recipes
  • Picnic ideas

August's The Simple Things is on sale - buy, download or subscribe now

In Eating Tags issue 38, august, recipe, drinks, lemonade, picnic
Comment

The Stuff of Life: The Linen Works

louise gorrod July 29, 2015

It’s been a few short months since we first opened the doors of our online shop, The Stuff of Life. Although the paint is barely dry we are fast filling our shelves with some great products. I’m going to be regularly popping over here to the blog to bring you some of my shop picks for the season.


For me, this is the season for eating alfresco whenever the opportunity arises. Doesn’t even the most modest of meals always taste better when eaten outdoors? Picnics and lingering garden dinners are what the warmer longer days call for. When eating outside I still like to 'set the table' and make the simplest of meals an occasion: a simple cloth and napkins is all it takes. Our shop features a generous choice of table linen, including a beautiful range of Italian washed-linen in soft muted colours by The Linen Works. From the pretty Dot Linen and the fresh Arles Stripe to the timeless Linen Hemstitch, the quality of all the designs are second to none. To be quite honest, once you’ve owned a real linen table cloth, you’re never cover your table with anything else.

Click here see the full collection, which also includes bedding and clothing.

View fullsize de22a2b8158b67e8a9d27119e0cf342c41de8e69.jpg
View fullsize d4a2ef8e07a8103d9fc7005882aae79baf7d5a6c.jpg
View fullsize 49d4b7bac4eaf9a3d2eaf02c273cb674739a416b.jpg
View fullsize 19fc3a2a0d3c5092fcd475371f393351c4a66a23.jpg

Credits: Top image | Parisian Blue Dot Linen Tablecloth, Piped Linen Cushion, Piped Parisian Blue Dot Linen Cushion | Arles Striped Placemat, Arles Striped Napkin | Arles Striped Hand Towel |Linen Hemstitch Napkin | Linen Artisan Pinny

Find many more beautiful and useful things at The Stuff of Life shop - shop.thesimplethings.com

August's The Simple Things is on sale - buy, download or subscribe now.


In Shop, Eating, Living Tags shop, the stuff of life, the linen works, linen, table linen, tablecloths, napkins, the simple things shop
Comment

Recipe: Guacamole

Lottie Storey July 27, 2015

As well as being the king of dips, guacamole is delicious in pitta pockets, burritos and wraps. Don’t even consider picnicking without it.

Serves 2

1 large ripe avocado (150g)
1 large tomato, deseeded and finely chopped (80g)
1 small red onion, finely chopped (80g)
1 red or green chilli (optional)
1 tbsp chopped coriander
1tsp finely chopped parsley (optional)
1 tsp extra virgin olive oil
sea salt and freshly ground black pepper
juice of 1 lime, or to taste

1 Mash the avocado with a fork and mix in the tomato, red onion and chilli, if using.

2 Mix in the coriander and parsley (if using) and season with extra virgin olive oil, salt, pepper and plenty of lime juice.

One to try: Place a flour tortilla in a dry frying pan, spread over the guacamole with a sprinkling of grated cheese and fold over to form a semi-circle. Fry on both sides for a couple of minutes until golden brown and the cheese has melted. 

Recipe from Thrive On Five by Nina & Jo Littler and Randi Glenn (Quadrille, £16.99)
Photography by Dan Jones

Read more:

Pack the perfect picnic

Recipe for fruity slaw plus picnic picks from The Simple Things shop

Try a Picnic Loaf

In Eating Tags recipe, picnic, guacamole, issue 37, july
Comment

Recipe: Jostaberry Ripple Ice-cream

Lottie Storey July 21, 2015

Ever wondered exactly what a jostaberry is? It is, in fact, a cross between a gooseberry and a blackcurrant – and the best of both. Jostaberries grow on a large bush with leaves and flowers similar to those of blackcurrant bushes, without the sharp needles of a gooseberry bush. The size of small marbles, with bright-green flesh and reddish-black skins, they have a flavour that swings more towards the blackcurrant. Their star attribute is not only their taste but their outstanding performance in the kitchen. When they are cooked for pies, fools and suchlike, their strong, concentrated flavour really shines. You could, of course, substitute blackcurrants in this recipe.

SERVES 6

For the vanilla ice cream

400ml milk
200ml double cream
1 vanilla pod
6 egg yolks, beaten
100g granulated sugar

For the ripple

400g jostaberries
200g granulated sugar

1 Put the milk and cream in a saucepan. Slit the vanilla pod open lengthwise, scrape out the seeds and put the seeds and pod in the pan. Heat slowly, stirring occasionally, until it is just too hot to put your finger in; do not allow it to boil.

2 Meanwhile, whisk the egg yolks and sugar together in a bowl. When the milk mixture is hot enough, pour it on to the eggs and sugar, whisking constantly. Return the mixture to the pan and heat gently, stirring, until it is thick enough to coat the back of the spoon. This can take up to 15 minutes. Remove from the heat and leave to cool, then chill for at least 2 hours.

3 For the ripple, put the berries and sugar in a pan, cover and cook gently, stirring occasionally to dissolve the sugar (there’s no need to top and tail the fruit, as the sauce will be strained once cooked). Once the fruit has split its skins and the juices are flowing, remove from the heat. Allow it to cool a little, then blitz in a food processor.

4 Strain through a sieve to remove the skin and pips, leaving the syrup to drip through until you are left with a dry pulp in the sieve. Cover the syrup and chill for a few hours.

5 Give the custard a good whisk to ensure it hasn’t separated, then churn it in an ice cream machine according to the manufacturer’s instructions. When it is thick and almost frozen, pour the syrup into the machine and allow it to streak the ice cream as much or as little as you wish.

7 Transfer to a plastic container and freeze. Soften slightly before serving.

Recipe from Fern Verrow by Jane Scotter and Harry Astley. Photography by Tessa Traeger (Quadrille).

This recipe features in August's issue of The Simple Things - out 29 July 2015. 


More ice cream recipes

Blackcurrant leaf ice lollies

Peppermint chocolate chip ice cream

Easiest strawberry ice cream ever

Roasted strawberry and coconut milk lollies 

Berry coconut ice lollies

In Think, Eating Tags ice cream, issue 38, august
2 Comments

Recipe: Easiest strawberry ice cream ever!

Lottie Storey July 2, 2015

No fancy ice cream machine? Fear not, for this frozen berry beauty from our friends at Abel and Cole you only need a freezer. And by using coconut milk instead of cream, is good for vegans too. Everyone's a winner!

Ingredients

1 punnet strawberries
2 tablespoons icing sugar
A splash of cream, coconut milk or orange juice

1. Trim the tops off the berries and roughly chop. Freeze until frozen solid, at least 2 hours but preferably overnight.

2. Break the frozen berries up and place in a food processor with the sugar and 50ml cream. Start the motor going on your food processor and trickle in more cream until the mix comes together.

3. Take it slowly, though, and don't go mad with the cream as the berries will warm up as they churn, gently softening the mix to the most stunningly fresh homemade ice cream you'll ever dip your spoon into. 


Abel and Cole have even made a video showing just how simple this is.

July is National Ice Cream month so give our Peppermint Chocolate Chip recipe a try as well!

In Eating Tags ice cream, strawberry, summer, issue 37, july, abel and cole
Comment
SIM24.MISCELLANY.GinAndTonic.jpg

How to mix the perfect gin and tonic

lsykes June 13, 2015

Gin-lovers of the world rejoice as World Gin Day returns for its seventh year on Saturday 13 June 2015! Learn how to mix the perfect gin and tonic with our expert guide.

A warm summer's evening calls for this most British of aperitifs. We asked the experts at The Gin Garden how to mix one like a pro.

The gin

Some gins are dry, some floral, some citrussy. To establish your favourite, sample a nip, neat. A good traditional gin is No 3 London Dry Gin: its juniper, balanced with sweet orange, grapefruit and cardamom, marries well with a range of tonics.

The tonic

Buy it in the smallest bottles/cans you can find, to maintain fizz. Fever-Tree is an excellent low-sugar option; Fentimans has a distinctively citrus flavour. Waitrose's own-brand tonic has won several 'blind' taste tests.

How much?

Ratio is a personal thing, some prefer 1:2, others, 1:3. We prefer 1:3 - say 50ml of gin to 150ml of tonic water.

Ice matters

Keep ice trays in zip lock bags so that your cubes don't pick up any freezer odours. Look out for an ice tray that will give you bigger cubes - they melt more slowly.

A chilled glass

Keeps your drink as cool as possible for as long as possible. Serve the Spanish way, in big balloon glasses (or red wine glasses), to let the aroma of your gin blossom.

And to finish

Add a citrus twist: using a peeler or sharp knife, shave a thumb-sized strip of rind off a lemon or lime (avoiding the pith), then squeeze, shiny side down, onto the drink to release the oils before plopping it in.


More cocktail recipes to wet your whistle.


June's The Simple Things is available from all good newsagents, supermarkets and our official online store. Sold out? Download it from Apple Newsstand or subscribe now.


In Eating Tags drink, gin, recipe
Comment
Photograph: Kim Lightbody

Photograph: Kim Lightbody

Recipes: Wild cocktails for warm midsummer evenings part two

David Parker May 22, 2015

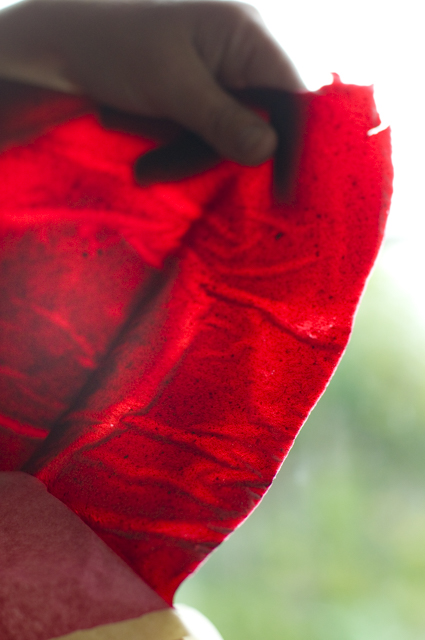
Rose Petal Syrup (for the Chelsea Fringe Collins cocktail)

Makes approximately 750ml

6 handfuls pink and/or red rose petals
1.2kg caster sugar
750ml water
Zest of half an unwaxed, organic orange
1 tbsp lemon juice
Pinch of salt

Equipment
Sealable presentation bottles, sterilized

1 Snip off the bitter white tip at the base of each petal. Or, when picking the petals from the rosebush, pull them in a clump with one hand and snip the base off in one go with the other.

2 Loosely pack the petals in a nonreactive bowl and add about 400g of the sugar. Gently massage it into the petals to bruise them and start the maceration. Cover with a clean dishtowel and leave overnight or for up to 12 hours.

3 You should return to a gooey mess; the petals have shrunk and the sugar has extracted some colour and flavour from them. Tip the mixture into a non-stick pan and add the remaining sugar, water, orange zest, lemon juice and a pinch of salt, and gently bring to a boil. The colour should transfer from the petals into the liquid. Simmer for 5 mins or until you have a thick, unctuous syrup.

4 Let the syrup cool. Strain it into a wide-mouthed pitcher, then funnel into the sterilized presentation bottles and seal. You can store it in the fridge for well over a month. As this is a rich simple syrup, you need only very small quantities in your sodas and cocktails.


Honeysuckle Syrup (for the Honeysuckle cocktail)

Makes approximately 500ml

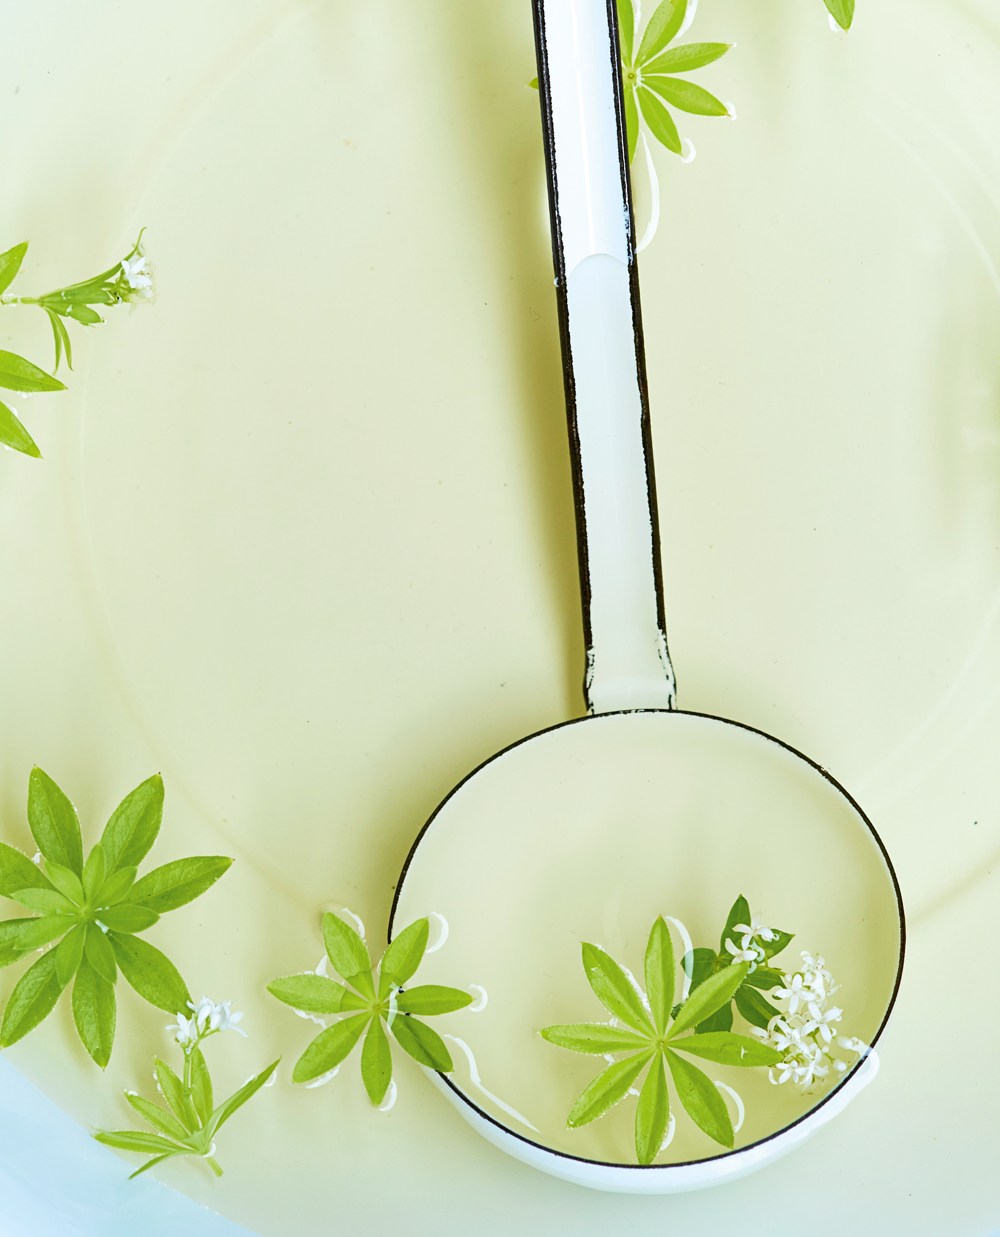
8 large handfuls of unsprayed honeysuckle flowers, leaves and stems removed
400g caster sugar*
Juice of half a lemon

Equipment
Sealable presentation bottles, sterilized

1 Place the honeysuckle flowers in a non-stick bowl and cover with cold water, then leave to steep for 12 hours, or at least overnight, at room temperature. Make sure the flowers are completely covered by the water.

2 Strain the mixture into a measuring cup, discarding the flowers. Pour the liquid into a non-stick pan.

3 Measure an equal amount of sugar to the liquid and add to the pan.

4 Bring to a boil, and simmer for 5 mins.

5 Remove from the heat and allow to cool.

6 Add the lemon juice and funnel into the sterilized presentation bottles.

*Feel free to replace half the sugar with a handful of chopped sweet cicely leaves, but bear in mind that this will adjust the colour


Rowan, Honey and Lemon Foam (for the Honeysuckle Cocktail)

Makes enough foam for 15 drinks

1½  sheets gelatin (platinum grade)
60ml runny honey
60ml Rowan Syrup*
60ml lemon juice
180ml hot water
120ml pasteurized egg whites
Wild honeysuckle blossom

Equipment
Professional cream whipper with 2 N2O cartridges

1 Place the gelatin sheets in a bowl of iced water and soak them until they are pliable (about 10 mins).

2 Meanwhile, combine the honey, rowan syrup, lemon juice and hot water in a non-stick pan over a very low heat, until the honey is dissolved. Strain using a fine-mesh sieve into a clean pan.

3 Squeeze the excess water from the softened gelatin sheets. Drop the sheets into the pan containing the mix and heat gently to dissolve the gelatin. Stir constantly and do not allow to reach boiling point.

4 Turn off the heat as soon as the gelatin is dissolved. Let cool to room temperature (should take about 15 mins).

5 Place the egg whites in a bowl and lightly whisk until slightly frothy and pour into the pan.

6 Funnel this liquid into the whipper. Charge it with the 2 N2O cartridges, following the manufacturer’s instructions. Shake well for at least a minute and refrigerate.

7 Let the foam stabilize for a minimum of 2 hours, preferably overnight, before using.

8 Shake the whipper well before dispensing. Tip it upside down so that it is completely inverted over the cocktail. Let the foam settle for 20 seconds before garnishing with wild honeysuckle blossom.


*Rowan Syrup (for the Rowan, Honey and Lemon Foam, to go in the Honeysuckle cocktail)

Makes approximately 1 litre

1kg very ripe, bright red rowan berries
Approximately 2 litres water
1 heaped tsp salt
700g caster sugar

Equipment
Sealable presentation bottles, sterilized
Large jelly bag or muslin

1 Separate the rowan berries from their stalks, then wash and rinse the berries. Add to a non-stick pan and pour in about 1 litre of water and the salt, making sure the berries are covered.

2 Bring to a boil and simmer long enough for them to become soft (about 25 mins). Remove from the heat.

3 Using the jelly bag/muslin, slowly strain the berries and liquid into a wide-mouthed pitcher.

4 Return the pulp to the pan and add the remaining 1 litre of water. Bring to a boil, then remove from the heat.

5 Strain the pulp, as above, into the pitcher.

6 Return all the strained liquid to the cleaned pan, add the sugar, bring to a boil, and boil hard for 5 mins. Remove from the heat.

7 Funnel the syrup into the presentation bottles while still piping hot. Seal. 8 Store in a cool, dark place. Once opened, keep in the fridge and use within a month.


Cocktail recipes from Wild Cocktails from the Midnight Apothecary by Lottie Muir (CICO Books, £16.99). Over 100 recipes using home-grown and foraged fruits, herbs and edible flowers. www.thecocktailgardener.co.uk


In Eating, Living Tags cocktail recipes, cocktail, june, issue 36, gathering
Comment

Recipe: Sunshine hash

David Parker May 21, 2015

Sunshine hash

Serves 4 very generously

Ingredients
4 sausages (take the opportunity to buy an interesting flavour from the butcher, like caramelised onion, sweet chilli or apple)
800g new potatoes, scrubbed clean
olive oil
8 rashers streaky bacon, roughly snipped or chopped
4 large ripe tomatoes, chopped, or 12 cherry tomatoes, halved
4 spring onions, chopped
1 garlic clove, finely chopped (optional)
salt and pepper
4 large free-range eggs

1 Cook sausages over a medium heat for about 10-12 mins, then remove from the pan and set aside. Wipe the pan with a piece of kitchen roll. 

2 Chop the potatoes into small cubes. Put two tbsp olive oil into the frying pan over a low/medium heat. Cook the potatoes for about 15-20 mins until they are golden.

3 Add the bacon and cook for a further five mins. 

4 Add the chopped tomatoes and cook until they just start to soften, but don’t let them go too mushy. Stir in the spring onions and garlic if using. Then add the sausages (I like to slice them thickly before adding to the pan). Season well with salt and pepper. 

5 Push the hash to one side of the pan and add another tbsp oil. Crack two eggs in the space, and fry until they are cooked to your liking. 

6 Divide the hash between four plates, and pop an egg on top of two of them. Return the pan to the heat and fry the remaining eggs for the last two plates. 

7 Serve with ketchup and big mugs of tea. 


Recipe from Pitch Up, Eat Local by Ali Ray (£16.99, AA Publishing with The Camping and Caravanning Club)

In Escape, Eating Tags issue 36, june, camping, recipe, eating, outdoors
Comment

Two seasonal salad recipes from Abel & Cole for National Vegetarian Week

David Parker May 19, 2015

It's National Vegetarian Week and we're going bright and shiny with two beautifully colourful salad recipes from our friends at Abel & Cole. 

* Offer: The Simple Things readers get a free Abel & Cole grow-your-own-garden - a box of mini plants all ready to plant out in the garden, with an RRP £35 - and 4th veg box free when signing up to a delivery.  Use the code TST15 on sign up. *


Piñata Salad

Grab your salad spoons and whack away at this zesty (thank you, limes) spring number. Blindfold optional of course.

It’ll take
15 mins (prep)
1-2 mins (cook)

It’ll feed
2 people

Ingredients
1 beetroot
2 carrots
1 tbsp cumin seeds
1 lime
A punnet of alfalfa sprouts
A handful of coriander
1 avocado

Step by step

Peel and coarsely grate your beetroot and carrots.

Set a dry frying pan over high heat. Add your cumin seeds. Lower heat. Toast for 1-2 mins till just fragrant*. Scatter all (hang onto a pinch for later) in with your grated veg.

Grate the zest of your lime into the salad mix. Add a good squeeze of juice. Gloss with a little oil. Add a pinch of salt and pepper. Toss to mix.

Rinse and drain your alfalfa sprouts. Roughly chop your coriander. Set aside a pinch of coriander. Gently mix the sprouts and remaining coriander through the salad.

Halve, stone and peel your avocado. Divide the salad between two large bowls or plates. Pop the avocado halves in the centre. Season well. Add a good squeeze of lime juice and a gloss of oil. Finish with the reserved cumin seeds and chopped coriander.

* Going raw? Skip toasting your seeds. If you do toast them it’ll bring out the oils to make them more fragrant and tasty.


Golden Sunshine Salad

It takes 8 minutes and 20 seconds for light to travel from the sun to us. It takes just a few minutes more to whip up this organic sunshine salad.

It’ll take
15 mins (prep)
2 mins (cooking)

It’ll feed 
2-4 people

Ingredients 
1 lettuce
½ pineapple or 1 ripe mango*
A thumb of turmeric
A few pinches of sea salt
A drop of honey (optional)
100g mixed bean sprouts
1 carrot
1 lime
A handful of fresh coriander
2 tsp cumin seeds
A gloss of oil
2 garlic cloves
1 chilli

Step by Step

Slice the base from your lettuce. Tumble the leaves into a large bowl. Gently tear any larger leaves. Rinse well. Drain. Pat dry.

Slice the mango or pineapple into chunks. Cut the skin off. Place all the flesh from your fruit into a food processor or blender. Peel a 2cm chunk of peeled turmeric. Add it with a pinch of salt. Blend till smooth. Taste. Add a drop of honey or more turmeric, if needed, till it’s just right for you.

Gently mix your dressing through the leaves. Arrange the dressed leaves on a large platter or on individual plates.

Rinse your sprouts and carrot. Tumble the sprouts into the bowl you used for the lettuce (let them lap up any leftover dressing). Peel the carrot into thin ribbons using a veg peeler. Add them to the sprouts. 

Add the lime zest and juice. Season with a pinch of salt. Rinse, shake dry, roughly chop and add your coriander to the carrot/sprout mix.

Set a frying pan over medium heat. Add your cumin seeds. Toast till just fragrant. Scatter them over the sprout mix. Arrange this over your dressed leaves.

Pour enough oil into your pan to coat the bottom. Peel and thinly slice your garlic. Thinly slice your chilli. Fold them through the hot oil with a pinch of salt. Sizzle till just golden. Remove with a slotted spoon. Scatter over the salad. Drizzle a hint of the warm, spiced oil over and serve.

*Mango a little firm? Pop it in a paper bag with a banana and it should ripen in day or two. 


These recipes are from Abel & Cole's new Super Salad Box - available weekly for £19.50.


In Eating Tags eat, salad, abel and cole, issue 35, may, national vegetarian week, vegetarian
Comment

Recipe: Blackcurrant leaf ice lollies

David Parker May 13, 2015

"While the blackcurrant blossom is just considering its change into berries, I’m eagerly picking the leaves. It can be hard to tell the black from the red from the white currants by sight, but if you rub them, blackcurrant leaves are thick, full and sweet in fragrance, and make my favourite sorbet, which can easily be twisted into lollipops, as my daughter insists I do." 

Try these unusual ice lollies from our green-fingered foodie, Mark Diacono. Pinch a couple of handfuls of early leaves from across the whole bush, so as not to deplete any part of the plant. The summer and early autumn leaves are still good, but the May leaves are best. This also works well with elderflower and midsummer scented geranium leaves. This makes a fine sorbet, too – just pour the liquid into a plastic tub, freeze for a few hours, then whisk an egg white into the slush and freeze.

Blackcurrant leaf ice lollies

2 large handfuls of young blackcurrant leaves/a 500ml jugful, fairly tightly packed
270g sugar
700ml cold water 
Juice of 3 lemons

1 Crush the blackcurrant leaves to help release the aroma and flavour by either squeezing them tightly in your hand or gently pounding with the end of a rolling pin.

2 Put them in a stainless steel saucepan with the water and sugar. Bring slowly just to the boil, stirring to dissolve the sugar, and simmer for 3 mins only.

3 Allow to completely cool.

4 Add the lemon juice, then strain. 5 Pour the juice into lollipop moulds and freeze. 


Recipe from May's The Simple Things. Buy, download or subscribe now.

In Eating, Growing Tags issue 35, may, ice lollies, postcards from the hedge
Comment

Recipe: Wild garlic pesto

David Parker May 8, 2015

If you’ve been to the woods recently and noticed a rather pungent smell, you’ve probably stumbled across wild garlic, otherwise known as Ramsons, which carpet our woodlands at this time of year. 

We asked expert forager Chris Westgate of Heavenly Hedgerows for her advice on how to pick and eat this most delicious wild plant:

  • The whole plant is edible but the young leaves have the best flavour and their late arrival this year means they should be just about perfect now. They’re best eaten raw in a salad or used as the base for a pesto (see right). Cooking will help reduce the pungency if you find the flavour too strong.
  • Try drying the leaves and adding them to sea salt. They keep for ages and taste wonderful on roast lamb or potatoes.
  • Use the star-like, white flowers to prettify a spring salad.
  • Once flowering, the seeds are also good to use. They pack quite a punch in salad or on top of a soup. They’re great pickled, too. Just pop in a clean jar and cover with vinegar for use during the winter months (they contain Vitamin C). 
  • The plant is most easy to identify by its smell but it can be confused in looks with the poisonous Lily of the Valley, Lords and Ladies and Dog’s Mercury, which also likes to grow alongside wild garlic, so pick it with caution. Always wash the plants carefully at home before eating, making sure the leaves definitely smell of garlic.
  • Abundant as it may be in parts, it’s good practice, as with all wild plants and fruit, to only take what you will use, leaving lots for wildlife and other people. And remember that it’s illegal to uproot a wild plant without the landowner’s permission.


Wild garlic pesto 

60g wild garlic
60g rapeseed oil
22g parmesan cheese
Salt
35g pine nuts
15ml rice or white wine vinegar or lemon juice

1. Wash the wild garlic, ensuring there are no other leaves in the mix. 
2. Finely chop and add to a blender with the pine nuts. Blend to a smooth-ish consistency.
3. Add cheese, salt, vinegar and oil. 
4. Stir with knife or spatula. Put in small jars until ready to use. Use within two weeks.


Sniff out wild garlic in a woodland near you, forage away and, if you’ve got a garlic glut, try one of these three recipes as well.


Wild garlic hummus

A vibrant green dip/spread with a wonderfully, earthy garlicky element, its Middle Eastern heritage remains.


Wild garlic and goat’s cheese pie

Based on the Greek dish, spanokopita, this pie is made with a mixture of wild greens.

Wild garlic gnocchi with tomato ragout

You'll need a translation for this lovely recipe from Fraulein Glucklich blog, but we think it's worth it.

In Eating Tags issue 35, may, recipe, wild garlic, wild
Comment

Recipe: May Bowl

David Parker May 3, 2015

This simple punch originated in Germany and is traditionally served on May Day. Sweet woodruff*, Galium odoratum, is a creeping herb found in shady patches under trees. Its leaves and flowers add sweet, herbal, vanilla and woody notes to dry white wine and champagne. Pick the leaves and flowers the day before, so they dry out slightly and give off a stronger scent.

MAY BOWL

MAKES 14 SERVINGS 
1 small bunch fresh sweet woodruff
250ml water
4 tbsp caster sugar 
750ml bottle dry white wine, such as a German Reisling
750ml bottle champagne or dry sparkling wine

TOOLS
baking sheet
sealable Tupperware 
paper towel
small nonstick pan 
wooden spoon
punch bowl
plastic wrap
ladle

1 First you need to dry out some of the woodruff. Remove any damaged leaves from the bunch and spread out about a third on a baking sheet. Place on the bottom shelf of a recently switched-off oven, with the door open, or in an airing cupboard, overnight.

2 Meanwhile, line a Tupperware box with a damp sheet of paper towel and place the remaining leaves and flowers inside to stay fresh. Seal the box and place in the fridge until just before you serve the punch. 

3 About two hours before serving, heat the water and sugar in the nonreactive pan, stirring until the sugar has dissolved. Leave to cool. Meanwhile, place the semi- dried woodruff in a punch bowl and pour the dry white wine over it. Cover and put in the fridge for at least an hour. 

4 As soon as the sugar syrup has cooled, add it to the punch bowl, stir, and return to the fridge for an hour. Before serving, remove the semi-dried woodruff with a ladle and replace with the fresh leaves and flowers from the Tupperware box.

5 Serve in a wine glass topped up with bubbly and garnished with a woodruff leaf or flower.


Suggestion: Strawberries, or even better, wild strawberries would also make a great addition to this punch, as would wild violet flowers and lemon slices.


* Sweet woodruff has been used since the Middle Ages to treat everything from cuts to liver problems. Today herbalists use it as an anti- inflammatory and to treat stomach ache. It contains coumarin, which is toxic in high doses, so drink this punch in moderation, won’t you?


Recipe taken from Wild Cocktails by Lottie Muir (Cico Books, £16.99) Photography by Kim Lightbody.

In Eating, Fresh Tags issue 35, may, recipe, drink, cocktail
Comment

Recipe: Campfire beef and beans

David Parker April 22, 2015

If you’re camping this summer and want to christen your brand-new Kotlich stove with a hearty stew, look no further than this delicious Campfire Beef and Beans recipe. You could easily use lamb or sausages instead, depending on your proximity to the shops.

Campfire beef & beans

Serves 8–10

1 tsp ghee or butter
1kg good-quality minced beef
8 bacon rashers, diced
2 large onions, diced
2 garlic cloves, diced
2 tsp fresh thyme or 1 tsp dried thyme
½ tsp hot smoked paprika (optional)
4 tbsp black treacle or brown sugar
2 tbsp apple cider vinegar
1 tbsp tomato puree
Salt and black pepper
2 tbsp wholegrain mustard
8 large tomatoes, roughly diced
4 medium carrots, diced
400ml water
A large handful of fresh parsley
1 tin Haricot beans or two handfuls of dried Haricot beans that you have soaked and cooked yourself

1 Brown the beef in ghee or butter, then set aside. Put the bacon into the kotlich and cook until crispy.

2 Add the onions and stir for 8–10 mins until softened. Add the garlic and thyme and stir for a minute, adding the hot smoked paprika if you choose.

3 Add the treacle, vinegar, tomato puree, two pinches of salt, some black pepper and the mustard and fry for a minute, stirring well.

4 Finally add the fresh tomatoes, carrots, the browned beef, parsley, cooked beans and water. Simmer for 2 hours, stirring occasionally. Do keep an eye on it and add water as needed.

5 Serve piping hot with a hunk of crusty bread to mop up the plate.


Recipe taken from The Kotlich Cook.

In Escape, Eating Tags recipe, camping, may, issue 35
Comment
Recipes, photography and styling by Kerstin Rodgers/MsMarmiteLover

Recipes, photography and styling by Kerstin Rodgers/MsMarmiteLover

Recipe: Homemade 'Nutella'

David Parker April 6, 2015

Kerstin Rodgers is better known as the blogger Ms Marmite Lover. She was a pioneer of the secret tea room. These recipes are from her book MsMarmiteLover’s Secret Tea Party.  

Kerstin says "the thing I don’t like about Nutella is the claggy palm oil sensation in your mouth. Making this at home means you know exactly what’s going into it."

Makes 2 200g jars
200g whole hazelnuts, shelled 
350g milk chocolate, chopped 
2 tbsp groundnut or hazelnut oil 
3 tbsp icing sugar
1 tbsp unsweetened cocoa powder 
1/2 tsp vanilla extract
3/4 tsp sea salt or vanilla salt

1 Preheat the oven to 180/Fan 160/350F.
2 Place the hazelnuts in a single layer on a baking sheet and toast them in the oven for 5–10 mins, watching that they don’t burn. Remove from the oven and carefully rub off the papery skins using a rough tea towel. Leave to cool.
3 Melt the chocolate in a bain-marie or in a bowl in short bursts in the microwave (on full power).
4 Grind the toasted hazelnuts with the remaining ingredients in a blender until they form a paste, adding the melted chocolate. The paste will thicken as it cools. 

Homemade ‘Nutella’ will keep for up to a month in an airtight container in the fridge.


Recipe by Kerstin Rodgers from her book MsMarmiteLover’s Secret Tea Party (Random House, £20). Turn to page 24 of April's The Simple Things for the rest of her high tea menu, including recipes for: 

Rachael’s Secret Tea Room Muffins, Hobbit Seed Cake, Lemon, Almond and Pistachio Cake with Lemon Cream Frosting, Homemade Nutella, and Cupcakes baked in a cup.


 April's The Simple Things is out now - buy, download or subscribe today.


In Eating Tags issue 34, april, recipe, chocolate, easter, brunch recipe
Comment
Recipes, photography and styling by Kerstin Rodgers/MsMarmiteLover

Recipes, photography and styling by Kerstin Rodgers/MsMarmiteLover

Recipe: Homemade crumpets

David Parker March 27, 2015

The most important thing when making crumpets is getting enough holes into them. Flat crumpets have nowhere for the butter to sink into! Make sure you beat the butter sufficiently, don’t overfill the rings with butter and cook them very slowly so that the bubbles have enough time to form and then pop.

Makes 12

70g strong white bread flour
70g plain white flour
1 sachet (7g) fast-action dried yeast 
1⁄2 tsp sea salt
1 tsp caster sugar
275l milk, warm (not hot)
1⁄4 tsp bicarbonate of soda
75–100ml warm water
Melted unsalted butter, for greasing 

Lots of salty butter, for spreading! 

Equipment

Cast-iron or good-quality heavy- based frying pan (or griddle)
At least 4 metal crumpet or egg rings or plain metal pastry cutters about 7.5cm in diameter
Heatproof pastry brush


Method

1 Mix together the flours, yeast and salt. Add the sugar and milk and beat until you have a smooth batter. Cover and leave to rise for 45 mins.

2 Combine the bicarbonate of soda with the warm water and mix it into the batter. Cover again and rest for 20 mins. 

3 Heat the pan, then butter it and sufficiently grease the insides of the rings or cutters with the pastry brush. Allow the rings to heat up in the pan, then fill each one with about 2cm batter. Don’t overfill them as the crumpets will take too long to cook and the holes won’t have time to form.

4 Wait. Be patient. Turn your crumpets over only once you can see holes starting to poke through the batter. Then lift away the rings and flip over the crumpets to continue cooking.

5 Brush the empty rings with more butter and ladle in more batter.

6 To keep the crumpets hot, lay them one by one in a large ‘envelope’ of tin foil and keep them in the oven on its lowest heat. Or butter them copiously and rush them out to your guests, piping hot. 


Recipe by Kerstin Rodgers from her book MsMarmiteLover’s Secret Tea Party (Random House, £20). Turn to page 24 of April's The Simple Things for the rest of her high tea menu, including recipes for: 

Rachael’s Secret Tea Room Muffins, Hobbit Seed Cake, Lemon, Almond and Pistachio Cake with Lemon Cream Frosting, Homemade Nutella, and Cupcakes baked in a cup.


 April's The Simple Things is out now - buy, download or subscribe today.


In Living, Eating Tags recipe, baking, afternoon tea, issue 34, march, curious
1 Comment
Photograph: Kirstie Young

Photograph: Kirstie Young

Recipe: Rhubarb and ginger pavlova

David Parker March 13, 2015

Delicately spiced pink rhubarb, lashings of cream and a crisp brown sugar meringue makes for pav perfection. Just the ticket for lunch this weekend.

Rhubarb and ginger pavlova

If you have fussy children to please, you could swap the ginger for white sugar, but this version works beautifully.
The addition of vinegar (a Nigella tip) helps to make the middle beautifully soft and chewy. All but the whipped cream for the topping can be made ahead of time and the whole assembled just before eating. Note that the two main components require plenty of oven time at different temperatures, so plan ahead.

Serves 8
FOR THE MERINGUE
6 egg whites
300g soft brown sugar 
1 tsp red wine vinegar 
50g crystallised ginger, sliced thinly
FOR THE TOPPING
3 sticks rhubarb
3 tbsp honey
Zest and juice of one orange 
1 vanilla pod, split
3 Chinese star anise
1 vanilla pod
500ml double cream, to serve


TO MAKE THE MERINGUE
1. Preheat the oven to 180C/Fan160C/350F. Cover a baking sheet with parchment paper; set aside.
2. In a perfectly clean bowl, whisk the egg whites until they form peaks, then slowly whisk in the sugar a tbsp at a time. It will turn sepia-coloured and shiny. Sprinkle in the vinegar and the crystallised ginger, then carefully fold in until combined.
3. Spoon and smooth the mixture into a circle approximately 23cm across on the lined baking sheet. Place in the oven and reduce the heat to 150C/Fan130/300F. Bake for 1 hour 15 minutes, or until it is dry and crisp on the outside. Turn off the oven, open the door slightly, and leave to cool completely.
FOR THE RHUBARB TOPPING
4. Preheat the oven to 180C/ Fan160/350F. Slice the rhubarb into 2-inch pieces and place in a deep- sided baking dish. Pour over the honey and orange juice. Scrape
the beans out of the vanilla pod into the juices, then add the pod along with the Chinese star anise.
5. Bake for around 30 minutes, until the rhubarb is tender but still holding its shape. Remove from the oven and leave to cool.
6. Whip the cream and spread it generously over the cooled meringue base. Spoon the rhubarb carefully onto the top, dribbling over some of the juices, and serve immediately.


For the rest of Lia Leendertz's rhubarb feature - including recipes for Tempura mackerel with rhubarb relish, and Dusky pink lady cocktails - turn to page 36 of the March issue of The Simple Things. Not got your March issue? Buy now,  subscribe or look inside

In Eating, Living, Growing Tags recipe, rhubarb, mother's day, issue 33, seed to stove, march
Comment
  • Blog
  • Older
  • Newer
Featured
  Buy ,  download  or  subscribe   See the sample of our latest issue  here   Order  our new Celebrations Anthology   Buy a copy of  Flourish 3 , our wellbeing bookazine   Listen to  our podcast  – Small Ways to Live Well
Aug 29, 2025
Aug 29, 2025

Buy, download or subscribe

See the sample of our latest issue here

Order our new Celebrations Anthology

Buy a copy of Flourish 3, our wellbeing bookazine 

Listen to our podcast – Small Ways to Live Well

Aug 29, 2025
Join our Newsletter
Name
Email *

We respect your privacy and won't share your data.

email marketing by activecampaign
facebook-unauth twitter pinterest spotify instagram
  • Subscriber Login
  • Stockists
  • Advertise
  • Contact

The Simple Things is published by Iceberg Press

The Simple Things

Taking time to live well

We celebrate slowing down, enjoying what you have, making the most of where you live, enjoying the company of of friends and family, and feeding them well. We like to grow some of our own vegetables, visit local markets, rummage for vintage finds, and decorate our home with the plunder. We love being outdoors and enjoy the satisfaction that comes with a job well done.

facebook-unauth twitter pinterest spotify instagram