The Simple Things

Taking time to live well
  • Home
  • Subscribe
  • SHOP
  • Newsletter
  • About
  • Work with us
  • Home
  • Subscribe
  • SHOP
  • Newsletter
  • About
  • Work with us

Blog

Taking Time to Live Well

  • All
  • Chalkboard
  • Christmas
  • Competition
  • could do
  • Eating
  • Escape
  • Escaping
  • Fresh
  • Fun
  • gardening
  • Gathered
  • Gathering
  • Growing
  • Haikus
  • Interview
  • Living
  • Looking back
  • Magazine
  • magical creatures
  • Making
  • Miscellany
  • My Neighbourhood
  • Nature
  • Nest
  • Nesting
  • outing
  • playlist
  • Reader event
  • Reader offer
  • Shop
  • Sponsored post
  • Sunday Best
  • Think
  • Uncategorized
  • Wellbeing
  • Wisdom

The Stuff of Life: Home Tour Inspiration

louise gorrod November 9, 2015

White walls in the home are smart, modern and a blank canvas, but have you ever hankered after something a little more dramatic? If you’ve read the home tour in our current issue, you too might be tempted to move over to the darker side of the paint chart.

Peter Win’s Shoreditch flat has won us over: dark and moody grey with startling pops of colour, texture and beautiful decorative objects. Inspired by this beautiful home we’ve shopped The Stuff of Life to get the look. It’s time to get bold indoors.  You can read the full feature and see more images of Peter’s flat in the November issue of The Simple Things, available now.

View fullsize 0f2394d71572f64aaf83bb344faf4667979e1a21.jpg
View fullsize c580528a3b06998bf283527cc27658b008f93ed8.JPG
View fullsize 3c9cbed584809f01af924053176b204b44f80e0d.jpg
View fullsize 07794b0590b60344509d6f7d674e96abf0b13627.jpg
View fullsize c3fbf01c5cc25a6343ce1062d677604384ee615b.jpg
View fullsize 239e371f70ae6e17223e116325340ce763c5a29d.jpg
View fullsize 17f78ed98c49812e05818fb890e5649b1d160965.jpg
View fullsize 926b383e978c135a9a6d54b826ac62d107fb17c1.jpg
View fullsize 5dee05b582de7bf05bae56d7ca12e9487eb62c5c.jpeg
View fullsize 01c6e115bbea41d840837c2e2ed87f121708e9de.jpg
View fullsize 8b7ee42645cc55a77ff2203a6dd29871c8eeabb9.jpg
View fullsize a61b0e96a61005a6c6ce917a0d2cfa9319f0af87.jpg

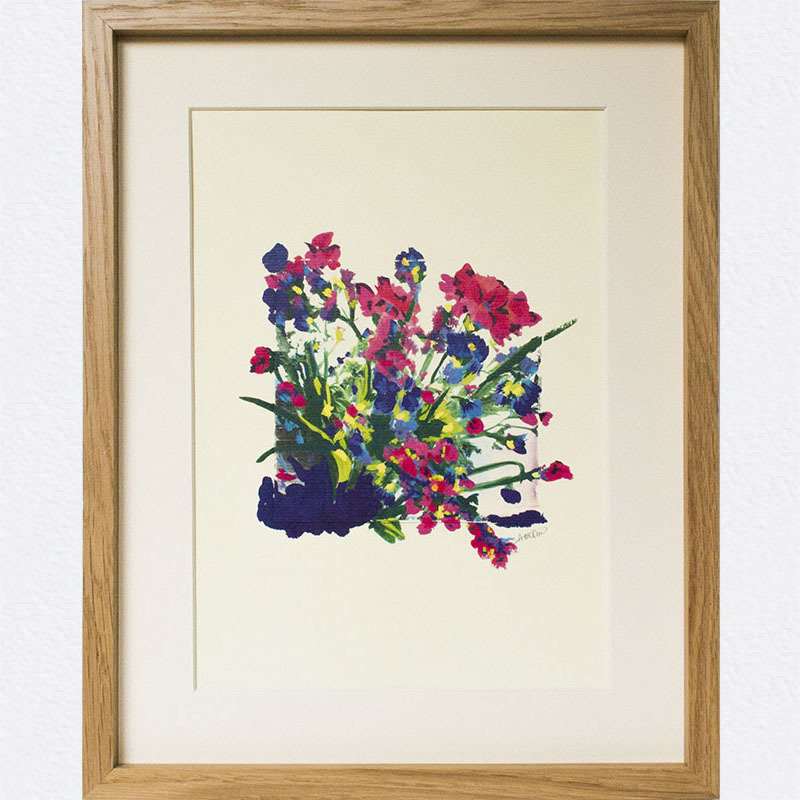
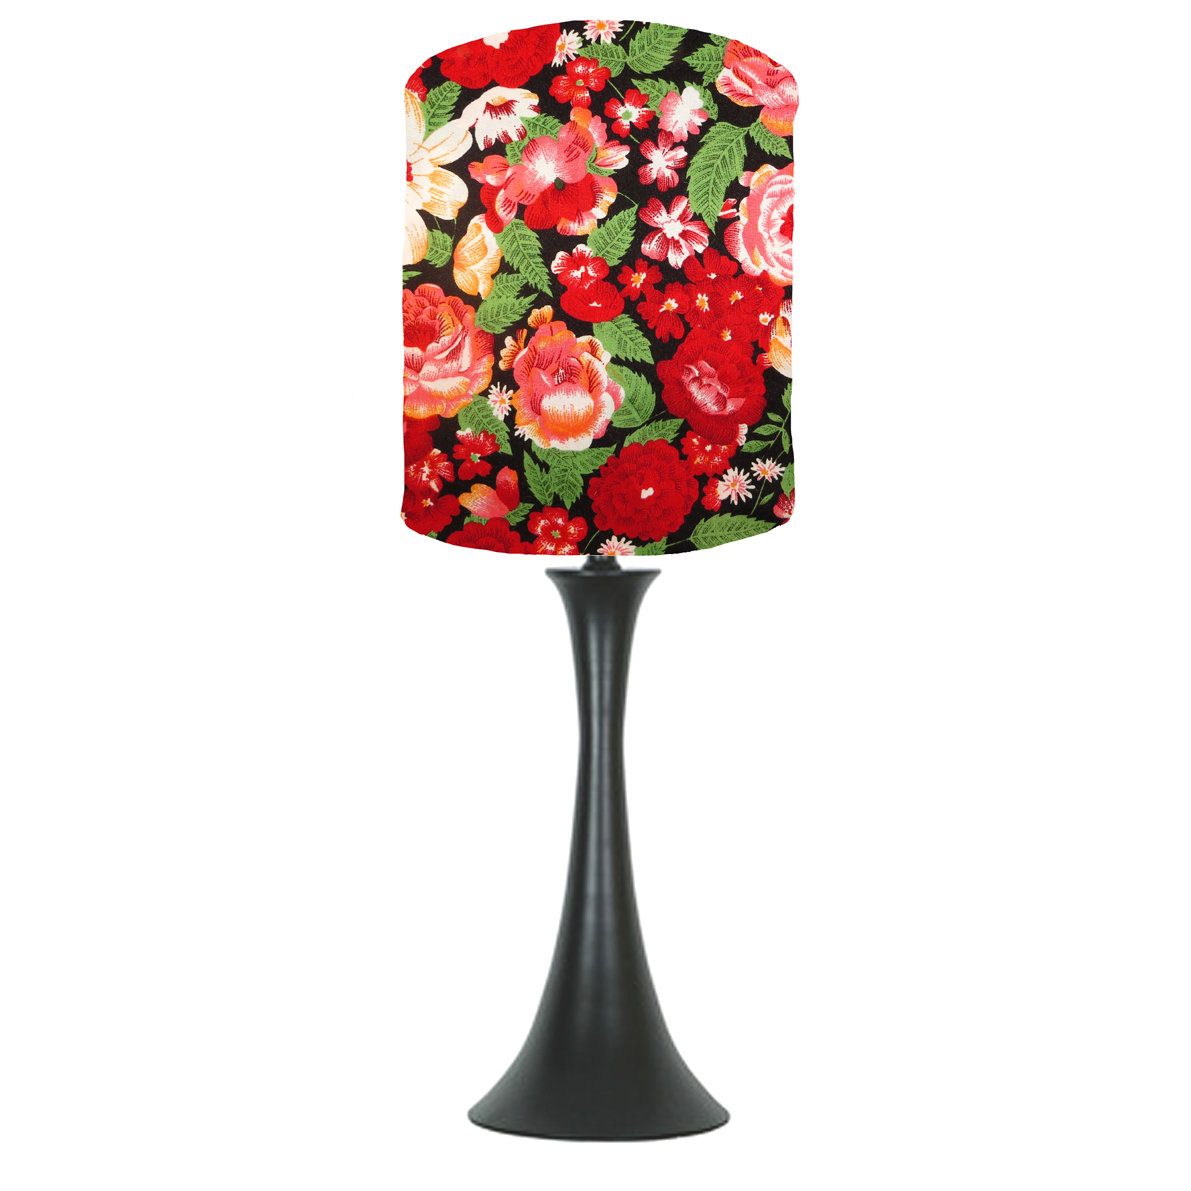
Images from top, left to right: Summery Quilts by Lisa Watson, from £245.00 | Black & Gold Brass Bowl by Home Address, £24.00 | Edible Botany Calendar by Alfie’s Studio, £12.50 | Gold Wall Clock by Home Address, £65.00 | Rose Bowl Vase by Home Address, £20.00 | Everyday Mug by Emma Lacey, £27.00 | Quick Brown Fox Wallpaper by Identity Papers, £65.00 per 10m roll | Sunflower Oblong Cushion by Stuff of Dreams, £30.00 | Wild England Limited Edition Print by Occipinti, from £28.00 | Belly Basket by Olli Ella, £25.00 | Faux Fur Throw by The Glam Camping Company, £230.00 | Red Vintage Lampshade by ByMarie, £25.00.

In Living, Nesting, Shop Tags the stuff of life, home tour, interiors, grey, colour, texture, homes, nesting
Comment

Light up your life with The Stuff of Life.

louise gorrod October 26, 2015

So the clocks went back yesterday meaning our evenings will now get darker all the sooner. It needn’t be all doom and gloom though – with the right lighting you can create a warm and cosy home. Over at The Stuff of Life we have the perfect selection of lighting to see you through the darker months.

View fullsize 4db72e11e00fdd3e64fdbb6768401e3d65a768e1.jpg
View fullsize 25fb2ad7c7f07bd5abaa146f9033f83b2d5398b6.jpg
View fullsize b6acc44e23b9d56ed258127dc67cc630a38373d6.jpg
View fullsize 34c85c743bc581001bbfc06cb7b89a92245cccce.png

From a statement design to a colourful drum shade, a new ceiling pendant can really uplift a living space, while a stylish table lamp will transform dark corners into cosy corners.

View fullsize 3eb630cae11fe926a77826dc3dd14ce0678b63b5.jpg
View fullsize 5801785e8276da0884b1cf479b443fbeefccbc3d.jpg
View fullsize b72c6aca44d3a61e8b9817f34f3ca905a10b60d2.jpg
View fullsize fdc769173253cc28ffee0ad92577e19dae11f580.jpg
View fullsize 2bddca1f8fb7d88f47525a68cc08ccf795cf50b7.jpeg
View fullsize 72bd32c9b5ffaa2d9619c4ff0cbbb62b5a557ed6.png
View fullsize 745a670750d3725be412668606f0d4eec34d7e91.jpeg
View fullsize f7f6e2dc7e92ef717f964d2e22c68e9ddc8b8153.jpg

Group together a small cluster of tea lights or candlesticks, stock up on candles and create a cosy glow in the evening. Or if you’re feeling crafty, why not create your own lampshade? One of these DIY lampshade craft kits is all you need.

View fullsize 226160afa5966c1483cc06beed4583d32c64685a.jpg
View fullsize e0d15f5cca22fd9c713b393c537b606c73b65641.jpg

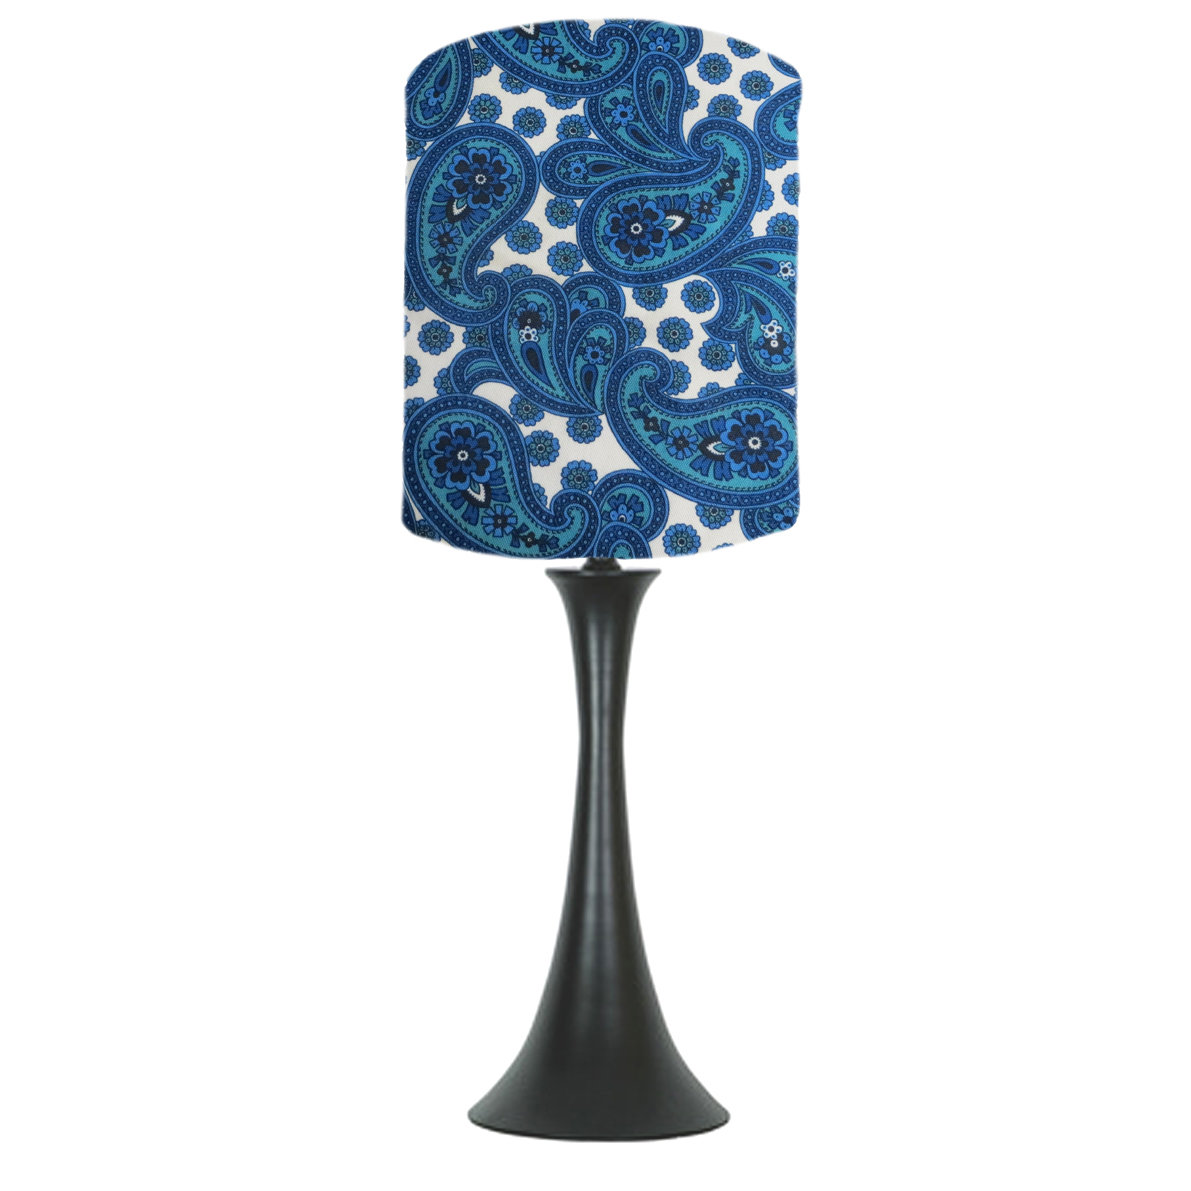
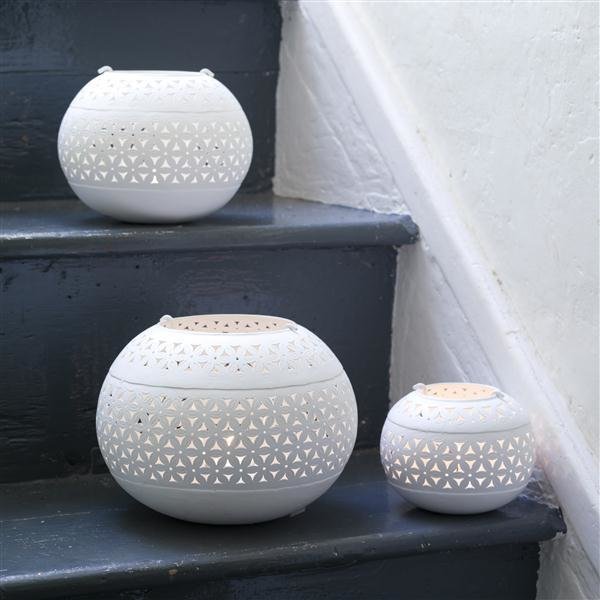
Images from top, left to right: Lampshade selection by Humblesticks, sold with a lamp base, £160.00 | Bike Lampshade by ByMarie, £45.00 | Geometric Beech Suspension Light by Cachette, from £43.00 | Recycled Can Suspension Light by Cachette, from £43.00 | Purple & Pink Vintage Lampshade by ByMarie, £45.00 | Bright Lanterns Demijohn Lamp by Humblesticks, £160.00 | Blue Paisley Vintage Lampshade by ByMarie, £ 25.00 | The Groove Lamp by Stuff of Dreams, from £155.00 | Pink & Brown Block Flower Shade by Lou Hopper Shop, £35.00 | Petal Lanterns by Quince Living, from £12.00 | Mercury Tea Lights by The Glam Camping Company, £7.50 for a pack of 4 | Bakula Candle Stick by Quince Living, £18.00 | Mini Jelly Mold Tea Light by From Victoria, £16.00 | Lampshade Craft Kit by Quince Living, £20.00

In Living, Shop, Nesting Tags the stuff of life, interiors, lighting, shopping, winter, autumn
Comment

New products line the shelves at The Stuff of Life.

louise gorrod October 12, 2015

Over the past few weeks we’ve seen a number of new products filling our shelves at The Stuff of Life. There are now several new brands to discover as well as a fresh offering of products from some our most popular brands. 

How about a new art print for the bedroom or a set of knitted cushions to revive a tired sofa? Maybe your kitchen is crying out for a new set of chopping boards, or how about replacing those greying tea towels with a linen roller towel? All these products are on my wish list.

The Stuff of Life has new products across all its departments that include Wellbeing, Style, Escaping, Reading and Making. Browse the shop for yourself and let us know what’s on your wish list. Happy Shopping!

View fullsize e3a686cb50f6899e918bcb82816ae13b604109b7.jpg
View fullsize eba48a0ef188b589850e0a447c7c6c30ff57a546.jpg
View fullsize cdc238d597ec16bcd4ac58d2d55fc6a51a3a0e82.jpg
View fullsize 773c8b8cb4924bb13efcc37a8e07282e03098a3c.jpg
View fullsize 3a7e162f90c6fb93b398ac07bead9037bd3295f5.jpg
View fullsize 5f4af98e4d020abed7680b2a6902faab85d9dcd2.jpg
View fullsize 2d3012e9e4b981e0c9429acef934659dd702feed.jpg
View fullsize dbc0550fb69034b6b0d63555fe970e55ff26ef51.jpg

Images from top, left to right: For Rest Print by One Must Dash, from £35.00 | Small Ash & Brass Trug by Jane Crisp Bespoke Designer Maker, from £175.00 | Russian Cushion by Hattie Kerrs Knitwear, from £52.00 | Linen Roller Towel by The Linen Works, from £29.00 | Recycled Pickle Jar Light by Cachette, from £42.31 | Hand-carved Trees by Forge Creative, from £36.00 | Porcelain Hanging Planter by From Victoria, from £24.00 | Autumn Wallpaper by Sian Zeng, from £250.00 | Serving Boards by Forge Creative, from £40.00 each.

In Shop, Living, Nest Tags the stuff of life, shopping, new products, homewares, textiles, lighting, homewares kitcheware, wallpaper, chopping boards, decorations, planters, serveware
Comment
Smoked toffee apple bourbon recipe: Lia LeendertzPhotography: Kirstie Young

Smoked toffee apple bourbon recipe: Lia Leendertz
Photography: Kirstie Young

Recipe: Smoked toffee apple bourbon

Lottie Storey October 5, 2015

What’s the only thing better than a sticky toffee apple? This tipsy toffee apple brew, especially when sipped beside the fire

There are a few stages to this, but once made the syrups will last a few weeks in the fridge, so there’s no need to rush through it. The first step is to make a simple syrup, which you will then use to make a caramelised simple syrup that will give the bourbon a beautiful toffee taste.
 

Simple syrup

‘Cups’ are used here not in any exact way, but merely to show that we want the volume of sugar and water to be the same, and so you may as well pour each into the same cup to measure out.

2 cups water
2 cups granulated sugar

1 Heat water and sugar gently in a saucepan until the sugar has dissolved, then bring to the boil and simmer until the liquid turns clear.

2 When completely cool, pour into a jar and store in the fridge.
 

Caramelised simple syrup

This caramelised syrup recipe is adapted from Homemade Liqueurs and Infused Spirits by Andrew Schloss (Storey Publishing).

1 cup granulated sugar
2 cups simple syrup

1 Heat the sugar in a small saucepan on a medium-high heat until it starts to turn brown at the edges. Stir with a wooden spoon. The sugar will turn lumpy. Keep on stirring for a few mins until it turns deep orange and completely liquid.

2 Stand back and carefully pour in the simple syrup. The mixture will bubble furiously and the sugar will turn solid. Keep heating and stirring and the lump of caramelised sugar will slowly dissolve into the syrup.

3 When cool, pour through a strainer into a jar and store in the fridge. Eat the pieces of caramel left behind in the strainer.
 

Bourbon

This infused bourbon combines the tastes and scents of the moment. Caramelised simple syrup is combined with grated apple and the whole given a note of smokiness with the addition of a teaspoon or so of Lapsang Souchong tea.

3 apples
360ml caramelised simple syrup
480ml bourbon
2 cinnamon sticks
2 tsp lapsang souchong

1 Grate the apples into a large, sterilised, sealable jar and pour in the syrup.

2 Muddle together and then add all the other ingredients and mix well. Leave to infuse for five days.

3 After five days, strain through a muslin into another sterilised, sealable jar. Leave to drip through the muslin for a few hours rather than squeezing it, for a clearer result.

4 You can drink immediately, or seal and store somewhere cool and dark for up to a year. 


Read more:

From the October issue

Seed to Stove recipes

Warming drinks


October's The Simple Things is on sale - buy, download or subscribe now.

In Living, Eating Tags seed to stove, autumn, samhain, issue 40, october, alcohol, bourbon, mulled, bonfire night, wassail
Comment
Photography: Kirstie Young

Photography: Kirstie Young

Recipe: Smoked garlic and tomato relish

Lottie Storey September 18, 2015

This relish will use up your tomato glut and, possibly, tempt you to buy some cheese and biscuits to go with it.

Says Lia Leendertz, ‘I made this relish with some smoked garlic I picked up at my local greengrocer which gave a gentle smoky taste, but it works well with ordinary garlic, too.’

Makes 4 jars
1 onion
6 smoked garlic cloves, sliced oil for frying
1 green chilli, seeds removed, finely chopped
800g chopped tomatoes, seeds removed
200ml red wine vinegar
200g sugar
50g capers, rinsed

1 In a large pan, heat a little oil and gently fry the onions until they start to soften. Add the garlic and chilli and slowly soften these too.
2 When the onion is turning translucent add the tomatoes, stir and cook gently for a few minutes. Then pour in the vinegar and the sugar.
3 On a low heat, stir to dissolve the sugar, then bring to a simmer. Simmer and stir for about 40 to 50 minutes, or until the mixture turns jammy. It is ready when you can draw a brief line across the bottom with a wooden spoon.
4 Allow to cool slightly, then stir in the capers and add plenty of salt and pepper, to taste. Pour into warmed jars and seal. 

Sterilising for preserves
If you don’t sterilise your jars before you seal your preserves then they will quickly go off. I tend to go a bit belt and braces and use both sterilising tablets and a warm oven. This usually involves dissolving sterilising tablets in warm water and then bathing the jars in the water for around ten minutes, but check instructions on your particular product. I then rinse them off (you don’t have to, but they can leave a slight taste) and put them in a low oven for about half an hour. This has the added benefit that the jars come out completely dry and warm, so you can pour warm preserve into them and get a better seal. Seal while still warm, label when cold.


September's The Simple Things is on sale - buy, download or subscribe now.


Read more

From the September issue

Seed to Stove recipes

Tomato recipes

In Living, Eating Tags issue 39, september, seed to stove, recipe, tomatoes
1 Comment
Photograph: Rosie Barnett

Photograph: Rosie Barnett

Recipe: Veg patch curry

Lottie Storey September 9, 2015

British veg patch meets Indian flavours for a fusion curry with a taste of mellow sunshine

A celebration of early autumn’s harvest. Use fresh, seasonal veg from your patch or local farm shop for this delicious veg patch curry.

Serves 4–6
1kg fresh tomatoes
350g onions
1 bulb of garlic
4 bay leaves
5cm piece of ginger
2 red chillies
1 star anise
200g coconut milk
small pumpkin or squash
handful of French or runner beans
2 courgettes or yellow summer squash
sea salt
freshly ground pepper
1 corn on the cob
2 tsp fennel seeds
handful of fresh coriander or parsley


1 Preheat your oven to 200C/Fan 180/400F.
2 Halve the tomatoes – or quarter them if you’re using bigger ones. Peel and chop the onions into halves or quarters. Tumble everything into a large roasting tin.
3 Slice 1cm from the pointy tip of your garlic. Put it into the tin, still whole, with the bay leaves. Roast for 30 mins or until the tomatoes have a golden edge to them.
4 Remove the bulb of garlic and bay leaves. Tip tomatoes and onions into a food processor or blender. Squeeze in the garlic cloves from the bulb.
5 Peel and roughly chop the ginger. Thinly slice the chillies. Grind the star anise to a powder. Add the ginger, a good pinch of the chilli and the star anise, plus the coconut milk, to the tomato-and-onion mixture. Blend until smooth.
6 Gently simmer the sauce on the hob while you cook the veg.
7 Cut pumpkin (or squash), beans and courgette into bite-sized hunks. Peel the summer squash if you like. The skin is edible if it’s not too thick.
8 Season the vegetables and toss with a little oil. Grill your veg on the barbecue until it’s lightly charred all over. Or if you prefer, set a large frying pan over a high heat. Add the veg to the pan in a single layer when it’s smoking hot – don’t add any oil to the pan. Cook the veg in batches until it’s tender and lightly charred all over. To get the pumpkin and squash soft, you may have to add a few splashes of water. Put the veg in a low oven or next to the barbecue to keep it warm. 9 Cut the corn kernels from the cob. Fry the sweetcorn, remaining chilli pieces and fennel seeds in a little oil until fragrant and a little crisp around the edges.
10 Spoon the simmered curry sauce into a large bowl or platter. Arrange the grilled or griddled veg on top. Finish with the sizzled and spiced sweetcorn and some fresh herbs.

Turn to page 24 of September's The Simple Things for the rest of this Indian summer menu, including Saffron G&Ts, Herb & spiced lamb lollies with cardamom yoghurt, Golden roti, Thyme and griddled spring onion rice, and Rosy apple tarts.

September's The Simple Things is on sale - buy, download or subscribe now.


Read more:

From the September issue

Autumn roots

More Gathering recipes

In Living, Eating, Gathering Tags recipe, issue 39, september, vegetables, allotment, indian, indian summer, gathering
Comment
Image: Present & Correct

Image: Present & Correct

September: Why we love stationery

Lottie Storey September 7, 2015

Shopping doesn’t get much better than a visit to a stationery shop. Who can resist those shelves of sketchbooks, pots of gel pens, neon highlighters and banks of Post-it Notes? They all promise so much!

Those black Moleskine notebooks with their rounded corners and twangy elastic page holders are just waiting for Big Thoughts, novel outlines, haikus and sketches to be scribbled on their pages (preferably with a Kaweco foundation pen). And that set of highlighter pens and pad of Post-its have the potential to banish a world of chaos and discord, replacing it with calm orderliness.

This love of stationery is firmly rooted in childhood. The purchase of a new pencil case filled with coloured felt pens, a propelling pencil, Bic biro and animal-shaped rubbers was one of the few consolations of going back to school. Zipped up in their carefully chose case, the new stationery items whispered of a fresh start and the promise of triumphs ahead. (The same applies, of course, to the first day in a new job: a smart pen and notebook always cuts the mustard.)

It’s reassuring in a world of technological devices, that stationery has never been more popular: John Lewis reports an increase of 10% in sales of notebooks and journals, and a 12% increase in Filofax purchases, since last year. It seems that we can’t get enough of multi-coloured paper clips, ring binders and hole punches. Lucy Edmonds of cool online stationers Quill London puts this down to an increase in home working: “People are giving more thought to their home office spaces, which means they’re willing to spend a little bit more on stationery they’ll enjoy using and that won’t get pinched.” She also suggests it’s an opportunity to accessorise: “Stationery is a great little everyday vehicle for design, pattern and colour,” she says. “Whether it’s a patterned notebook in your handbag or a brass pencil-holder on your desk.”

Read more:

From the September issue

Back to school picks from our shop

Download our free colouring card


Turn to page 43 of September’s The Simple Things for our picks for filling your satchel and feeding your stationery habit from four excellent small companies.

September's The Simple Things is on sale - buy, download or subscribe now.

In Living Tags living, issue 39, september, back to school, stationery
Comment
Homemade yoghurt, photography by Tara Fisher

Homemade yoghurt, photography by Tara Fisher

Recipe: Homemade whole milk yoghurt

Lottie Storey August 20, 2015

Making your own yoghurt is very straightforward and tremendously satisfying. It’s not necessarily cheaper than buying it in, but it is a lovely thing to do. The milk powder thickens the yoghurt, but if you prefer a creamier yogurt still, you can substitute 100ml of the milk with single cream.

Makes approx. 500 ml
2 heaped tablespoons organic live yoghurt
500 ml organic whole milk
3 tablespoons milk powder

Equipment

digital thermometer
1-litre Thermos flask

It is vital that everything is spotlessly clean when making yoghurt. To ensure your equipment is in perfect condition, place the whisk and metal spoon inside the mixing bowl and fill it to the brim with boiling water before use. Dip the thermometer tip in, too. Pour the water away, dry the equipment using a clean tea towel or kitchen paper before using.


1.     Place the yoghurt in a spotlessly clean large glass or ceramic mixing bowl and allow it to come up to room temperature (approximately 20–30 minutes).

2.     Pour the milk into a clean saucepan and heat very gently over a very low heat until it reaches exactly 46C – don’t let it get any warmer than this or it will kill the live cultures in the yoghurt when the two are combined. Remove the pan from the heat, sprinkle the milk powder over the surface and whisk it in thoroughly. Carefully pour the warm milk over the yoghurt in the bowl and stir well with a metal spoon.

3.     Pour the yoghurt into the Thermos flask. Screw on the lid and set aside on the kitchen work surface overnight.

4.     By morning your milk should have thickened and turned into yoghurt. Decant it into jars or a Tupperware container, cover with clingfilm or a lid and store in the fridge. Eat within five days.


Recipe from Fermented by Charlotte Pike, photography by Tara Fisher (Kyle Books)

Use this yogurt to make the LEMON AND RASPBERRY YOGHURT LOAF CAKE recipe on page 59 of September's The Simple Things. On sale - 26 August 2015.

Read more:

More from the September issue

More cake recipes

More yoghurt ideas

September's The Simple Things is on sale today - buy, download or subscribe now.

In Eating, Living Tags issue 39, september, homemade, yoghurt, cake in the house
Comment
Raw fruit and veg ready for juicing. Image from Juice by Rosemary Ferguson. Photography by Nassima Rothacker.

Raw fruit and veg ready for juicing. Image from Juice by Rosemary Ferguson. Photography by Nassima Rothacker.

Raw food and juicing

Lottie Storey August 14, 2015

There's a buzz about raw food and summer is the best time to swing the balance in favour of raw in your diet. And juicing is 'a thing' again - it tastes great, feels virtuous and justifies a new kitchen gadget. 

Turn to page 56 of August's The Simple Things for Rebecca Frank's juice 101, including four delicious recipes, a rundown of those nutrient powders, a gadget guide for buying your juicer, and a reading list.

Or head over to Pinterest, where we've been compiling our favourite raw recipes.


Read more:

Grow your own smoothie garden

More from the August 2015 issue

Green juice - Lia Leendertz's recipe


August's The Simple Things is on sale - buy, download, subscribe or look inside now!

In Living Tags issue 38, august, juice, raw food, pinterest
Comment

The Stuff of Life: The Linen Works

louise gorrod July 29, 2015

It’s been a few short months since we first opened the doors of our online shop, The Stuff of Life. Although the paint is barely dry we are fast filling our shelves with some great products. I’m going to be regularly popping over here to the blog to bring you some of my shop picks for the season.


For me, this is the season for eating alfresco whenever the opportunity arises. Doesn’t even the most modest of meals always taste better when eaten outdoors? Picnics and lingering garden dinners are what the warmer longer days call for. When eating outside I still like to 'set the table' and make the simplest of meals an occasion: a simple cloth and napkins is all it takes. Our shop features a generous choice of table linen, including a beautiful range of Italian washed-linen in soft muted colours by The Linen Works. From the pretty Dot Linen and the fresh Arles Stripe to the timeless Linen Hemstitch, the quality of all the designs are second to none. To be quite honest, once you’ve owned a real linen table cloth, you’re never cover your table with anything else.

Click here see the full collection, which also includes bedding and clothing.

View fullsize de22a2b8158b67e8a9d27119e0cf342c41de8e69.jpg
View fullsize d4a2ef8e07a8103d9fc7005882aae79baf7d5a6c.jpg
View fullsize 49d4b7bac4eaf9a3d2eaf02c273cb674739a416b.jpg
View fullsize 19fc3a2a0d3c5092fcd475371f393351c4a66a23.jpg

Credits: Top image | Parisian Blue Dot Linen Tablecloth, Piped Linen Cushion, Piped Parisian Blue Dot Linen Cushion | Arles Striped Placemat, Arles Striped Napkin | Arles Striped Hand Towel |Linen Hemstitch Napkin | Linen Artisan Pinny

Find many more beautiful and useful things at The Stuff of Life shop - shop.thesimplethings.com

August's The Simple Things is on sale - buy, download or subscribe now.


In Shop, Eating, Living Tags shop, the stuff of life, the linen works, linen, table linen, tablecloths, napkins, the simple things shop
Comment
Photography: Catherine Frawley

Photography: Catherine Frawley

Recipe: Fruity 'slaw

Lottie Storey July 9, 2015

There’s got to be ’slaw at a barbecue – and this one has extra fruit in the form of mango, raisins and sultanas. 

Fruity 'slaw

Serves 8

3⁄4 medium white cabbage, finely sliced
1⁄4 medium red cabbage, finely sliced
4 carrots, grated
1 red onion, finely sliced
2 mangos, sliced
Large handful mixed raisins and sultanas

For the dressing
3 tbsp sour cream
3 tbsp mayonnaise
21⁄2 tbsp wholegrain mustard
1 lime, juiced
salt and pepper, to taste

1 Mix all the dressing ingredients together in a bowl.
2 Combine the vegetables, mangos and dried fruit in a large bowl and season with salt and freshly ground black pepper.
3 Pour over the dressing and mix well. 

Need some bits and bobs for your next barbecue or picnic? Head over to The Simple Things shop for plenty to buy, including our Here comes the sun collection, for picnic days and for beach days. A few ideas below...

Hand-stamped wooden cutlery, from £3.50


Whitstable BBQ, from £24.00


Acrylic tumblers, from £4.95

In Living Tags issue 37, july, barbecue, summer, recipes, salad, picnic, the simple things shop, shop, gathering
Comment

Meet the bloggers: Louise from Buttercup Days

Lottie Storey July 6, 2015

In the May issue we introduced you to four bloggers on The Simple Things team. In the first of a series of guest posts, Louise Gorrod, Wishlist Editor and author of Buttercup Days, shares a blog post outlining her party planning for daughter Lily's tenth birthday party.

On Tuesday of this week Lily turned 10. A whole decade. To celebrate reaching double-figures I laid on an after-school afternoon tea for her and six close friends. It was relaxed, fun and I hope memorable. Celebrating such moments in life is time well spent in my book.

So I set to work making tiny cheese & cucumber rolls, filling pretty striped paper cups with chipsticks, baking sausage rolls and filling cocktail sized vol au vents. Then there were mini strawberry & cream meringues, individual coconut & cherry loaf cakes, mini chocolate cakes, mini orange & almond cakes and paper cups filled with lemon cupcake popcorn, berries and chocolate discs and to top it all off a 'fox' birthday cake.

It's the decorations and tableware that also make a gathering an occasion and, in this case, turn one of the most special days of the year into one of the prettiest. All the decorations and tableware in this shoot are from My Little Day, a French online boutique that sell all the kit required to host the most beautiful children's birthday parties. From bunting, confetti-filled balloons and tassel garlands to paper plates, cups, straws and napkins in contemporary patterns. I even made party bags using the paper bags and mini paper rosettes  - they were the icing on the cake.

In Living, Magazine Tags meet the bloggers, the simple things, blogger, party, kids, birthday
Comment

Looking back: Salt-Water Sandals

Lottie Storey July 3, 2015

Beloved by bloggers across the globe, Salt-Water Sandals are the classic American summer shoe taking social media by storm. 

But what's so special about these old style sandals? And why are they on our July Wishlist?

As well as being extraordinarily comfortable, they do what the name suggests - you can wear them in the sea, making them perfect for The Simple Things style summer adventures. And they come in a rainbow of shades for instant Instagram potential.

American cult classics since the 1940s, Salt-Water Sandals began as a way to cope with leather shortages in World War II, when Walter Hoy used scrap leather left over from making military boots to shoe his children. Word soon spread and fellow St. Louis families began to ask Walter to make sandals for their kids. 

A summer staple in America for 70 years now, a new generation has discovered Hoy shoes' classic designs for themselves and their children. Grown up fans of the durable, comfortable leather shoes with a fashion savvy attitude include Sienna Miller, Alexa Chung, Paloma Faith, Fearne Cotton and Maggie Gyllenhaal. Plus, a few of The Simple Things’ team! 

Have a look at the Instagram hashtag #sunsansaltwatersandals to see them in all their glory this summer.

In Think, Living Tags looking back, summer, issue 37, july, style
Comment
Photograph: Kristin Perers

Photograph: Kristin Perers

Recipe: Summer spelt almond cake

Lottie Storey June 30, 2015

This nutty, light cake is perfect for scattering with summer fruits. Some will sink in and some will rest on top. If you want a less sweet cake, leave out the rose water icing.

SUMMER SPELT ALMOND CAKE

Makes one 23cm cake (8–10 slices)

FOR THE SPONGE
175g butter, softened, plus more for greasing the tin
175g light brown sugar
2 eggs
1⁄4 vanilla pod, seeds scraped out 125g ground almonds
175g wholemeal spelt flour
2 tsp baking powder
1⁄4 tsp salt
200g halved cherries, or whole raspberries or blueberries
200g peaches or nectarines, sliced 2 tbsp caster sugar, for sprinkling 
rose petals, for scattering (optional)

FOR THE ICING (OPTIONAL)
200g icing sugar 1-2 tbsp rose water

1 Preheat the oven to 160/Fan 140/320F. Butter a 23cm cake tin and line with parchment paper.
2 In the bowl of an electric mixer, cream butter and sugar until light and fluffy. Beat in the eggs one at a time, mixing well after each one. Add the vanilla seeds. Add the almonds and mix to combine.
3 In another bowl, whisk together flour, baking powder and salt, then gently beat these into the creamed butter mixture. The mixture will be rather stiff but that’s OK.
4 Spread the batter into your prepared cake tin and smooth top with a palette knife. Scatter the cherries (or raspberries or blueberries) over the batter, then press the slices of peach (or nectarine) on top to get the fruit inside the cake batter a bit.
5 Sprinkle with the caster sugar and bake for 60–70 mins, until a skewer comes out clean and the top is springy. Let the cake cool for 15 mins before turning it out.
6 If using the icing, whisk the rose water into the icing sugar until smooth and runny. Drizzle over the cooled cake. Scatter with garden rose petals if you have them. This is best eaten on the same day you bake it.

Recipe from The Violet Bakery Cookbook by Claire Ptak, photography by Kristin Perers (Square Peg, £20)

In Living Tags issue 37, july, summer, cake, cake recipe, cake in the house, spelt, recipe
1 Comment

Anna Potter's Instagram picks

Lottie Storey June 16, 2015

Anna Potter is the founder of Swallows and Damsons, a Sheffield flower shop that's a treasure trove of natural, seasonal flowers, rustic posts and curiosities. 

Anna describes her day in cups of tea on page 58 of June's The Simple Things, saying her favourite way to switch off is to head to Instagram.

"I dive into my Instagram world and immerse myself in the most beautiful flower feeds and inspiration."

Follow Anna's Instagram account at @swallowsanddamsons for more of her beautifully blowsy blooms (above) and dramatic vignettes (below).

Anna's favourite Instagram florists are @putnamflowers (above) and @saipua (below), both based in New York.

saipua.jpg

Anna also loves bloggers' favourite, @designsponge (below) - it's easy to see why.


If you don't already, head over to Instagram and follow @simplethingsmag for snaps from your favourite magazine.


June's The Simple Things is available from all good newsagents, supermarkets and our official online store. Sold out? Download it from Apple Newsstand or subscribe now.

In Living Tags instagram, flowers, florist, issue 36, june
1 Comment
Photography by Kirstie Young

Photography by Kirstie Young

Recipe: Gooseberry and honey cake

Lottie Storey June 9, 2015

Lia Leendertz loves a summery cake dotted with whatever fruit is in season at the allotment. This one is fragrant with gooseberries, honey, lemon and elderflower, and is the ultimate cake for afternoon tea on the lawn. Because of the fresh fruit content this is not a cake that ages well: you’ll need to finish it off within a few days. Tricky...

Gooseberry and honey cake

100g gooseberries, washed, topped and tailed
225g butter
225g ground almonds
2tsp baking powder
4tbsp honey
3 eggs
2 tbsp elderflower cordial
zest of one lemon

Equipment:
20cm cake tin

1 Heat the oven to 170C/Fan 150/325F.
2 Line the base and sides of the tin with baking parchment.
3 Firstly, the butter needs to be very soft (see below for a short cut – there isn’t always time to get it out of the fridge in advance).
4 Put all the ingredients bar the gooseberries into a large bowl and mix together, ideally with an electric whisk or in a food processor, until the mixture is fluffy and light.
5 Add the gooseberries and fold in by hand until they are well distributed.
6 Smooth the mixture into the tin and bake on a middle-to-low shelf for about an hour, until a skewer pushed into the centre of the cake comes out clean.
7 Leave to rest in the tin for 10 mins before placing onto a rack to cool.
8 Serve with a dollop of crème fraîche, if you like, and a pot of EarlGrey. 

LIA'S TIP TO SOFTEN BUTTER
My kitchen is naturally cool and my butter never really gets soft enough for easy creaming. But I have a trick. I fill a bowl with lukewarm water
– just slightly warmer than hand temperature, but no more or it will melt – then cut the butter into chunks and drop it in. I leave it to
sit for about five minutes, then drain off the water and tip the butter into my mixing bowl, as soft as can be. 

This recipe is featured in June's The Simple Things. You can buy print editions from our online store, download it from Apple Newsstand or subscribe.


Want more cake recipes? Type cake into the search box and we defy you not to drool...

In Living Tags seed to stove, issue 36, june, cake, recipe, gooseberry
5 Comments
Photography by Catherine Gratwicke.

Photography by Catherine Gratwicke.

Make: Homemade reed diffuser

Lottie Storey June 4, 2015

The roots of homespun alchemy lie in the play of childhood – sneaking bits and pieces from the garden and mixing them in jam jars, hoping for a magical scent. This kind of experimentation is no less fun as an adult, but with these recipes from Rachelle Blondel, author of Forgotten Ways for Modern Days, you’ll get far more satisfying results. Harnessing the natural power of the likes of beeswax, nuts, seeds and rosewater, these are great weekend projects that will reward you – or, in the case of the perfume, perhaps someone else – with some gentle, natural pampering throughout the working week.


To make a reed diffuser you will need:
5-6 thin bamboo skewers
50ml surgical spirit
50ml light oil (grapeseed, sweet almond or light olive oil) 
Narrow-necked vase or bottle 
30-40 drops of your favourite essential oil or blend

1 Remove the pointed ends of the wooden skewers with a pair of sharp scissors and put them to one side.
2 Place the surgical spirit and oil into the vase or bottle and swirl around to mix the two.
3 Add the essential oils and swirl again.
4 Place as many skewers into the bottle as will fit, but don’t over-fill as the skewers will need space to release the fragrance.
5 Leave for several hours, swirling the liquid every now and again, then flip the skewers so that the dry ends are in the liquid.
6 You can repeat the previous step until the wood is completely saturated with the oil and then flip the skewers every couple of days to keep the fragrance wafting. The volume of oil and surgical spirit can be increased according to the size of your vase or bottle, but keep the ratio 1:1. Essential oils can be added at 10 drops to 100ml of base oil: experiment with this volume for a stronger or weaker fragrance.

Taken from Forgotten ways for Modern Days: Kitchen cures and household lore for a natural home and garden by Rachelle Blondel (Kyle Books, £14.99). Photography by Catherine Gratwicke.


There are more homemade projects in June’s The Simple Things, available from all good newsagents, supermarkets and our official online store. Sold out? Download it from Apple Newsstand or subscribe now.

In Living, Making Tags make, homemade, home remedies, june, issue 36
1 Comment
Photograph: Kim Lightbody

Photograph: Kim Lightbody

Recipes: Wild cocktails for warm midsummer evenings part two

David Parker May 22, 2015

Rose Petal Syrup (for the Chelsea Fringe Collins cocktail)

Makes approximately 750ml

6 handfuls pink and/or red rose petals
1.2kg caster sugar
750ml water
Zest of half an unwaxed, organic orange
1 tbsp lemon juice
Pinch of salt

Equipment
Sealable presentation bottles, sterilized

1 Snip off the bitter white tip at the base of each petal. Or, when picking the petals from the rosebush, pull them in a clump with one hand and snip the base off in one go with the other.

2 Loosely pack the petals in a nonreactive bowl and add about 400g of the sugar. Gently massage it into the petals to bruise them and start the maceration. Cover with a clean dishtowel and leave overnight or for up to 12 hours.

3 You should return to a gooey mess; the petals have shrunk and the sugar has extracted some colour and flavour from them. Tip the mixture into a non-stick pan and add the remaining sugar, water, orange zest, lemon juice and a pinch of salt, and gently bring to a boil. The colour should transfer from the petals into the liquid. Simmer for 5 mins or until you have a thick, unctuous syrup.

4 Let the syrup cool. Strain it into a wide-mouthed pitcher, then funnel into the sterilized presentation bottles and seal. You can store it in the fridge for well over a month. As this is a rich simple syrup, you need only very small quantities in your sodas and cocktails.


Honeysuckle Syrup (for the Honeysuckle cocktail)

Makes approximately 500ml

8 large handfuls of unsprayed honeysuckle flowers, leaves and stems removed
400g caster sugar*
Juice of half a lemon

Equipment
Sealable presentation bottles, sterilized

1 Place the honeysuckle flowers in a non-stick bowl and cover with cold water, then leave to steep for 12 hours, or at least overnight, at room temperature. Make sure the flowers are completely covered by the water.

2 Strain the mixture into a measuring cup, discarding the flowers. Pour the liquid into a non-stick pan.

3 Measure an equal amount of sugar to the liquid and add to the pan.

4 Bring to a boil, and simmer for 5 mins.

5 Remove from the heat and allow to cool.

6 Add the lemon juice and funnel into the sterilized presentation bottles.

*Feel free to replace half the sugar with a handful of chopped sweet cicely leaves, but bear in mind that this will adjust the colour


Rowan, Honey and Lemon Foam (for the Honeysuckle Cocktail)

Makes enough foam for 15 drinks

1½  sheets gelatin (platinum grade)
60ml runny honey
60ml Rowan Syrup*
60ml lemon juice
180ml hot water
120ml pasteurized egg whites
Wild honeysuckle blossom

Equipment
Professional cream whipper with 2 N2O cartridges

1 Place the gelatin sheets in a bowl of iced water and soak them until they are pliable (about 10 mins).

2 Meanwhile, combine the honey, rowan syrup, lemon juice and hot water in a non-stick pan over a very low heat, until the honey is dissolved. Strain using a fine-mesh sieve into a clean pan.

3 Squeeze the excess water from the softened gelatin sheets. Drop the sheets into the pan containing the mix and heat gently to dissolve the gelatin. Stir constantly and do not allow to reach boiling point.

4 Turn off the heat as soon as the gelatin is dissolved. Let cool to room temperature (should take about 15 mins).

5 Place the egg whites in a bowl and lightly whisk until slightly frothy and pour into the pan.

6 Funnel this liquid into the whipper. Charge it with the 2 N2O cartridges, following the manufacturer’s instructions. Shake well for at least a minute and refrigerate.

7 Let the foam stabilize for a minimum of 2 hours, preferably overnight, before using.

8 Shake the whipper well before dispensing. Tip it upside down so that it is completely inverted over the cocktail. Let the foam settle for 20 seconds before garnishing with wild honeysuckle blossom.


*Rowan Syrup (for the Rowan, Honey and Lemon Foam, to go in the Honeysuckle cocktail)

Makes approximately 1 litre

1kg very ripe, bright red rowan berries
Approximately 2 litres water
1 heaped tsp salt
700g caster sugar

Equipment
Sealable presentation bottles, sterilized
Large jelly bag or muslin

1 Separate the rowan berries from their stalks, then wash and rinse the berries. Add to a non-stick pan and pour in about 1 litre of water and the salt, making sure the berries are covered.

2 Bring to a boil and simmer long enough for them to become soft (about 25 mins). Remove from the heat.

3 Using the jelly bag/muslin, slowly strain the berries and liquid into a wide-mouthed pitcher.

4 Return the pulp to the pan and add the remaining 1 litre of water. Bring to a boil, then remove from the heat.

5 Strain the pulp, as above, into the pitcher.

6 Return all the strained liquid to the cleaned pan, add the sugar, bring to a boil, and boil hard for 5 mins. Remove from the heat.

7 Funnel the syrup into the presentation bottles while still piping hot. Seal. 8 Store in a cool, dark place. Once opened, keep in the fridge and use within a month.


Cocktail recipes from Wild Cocktails from the Midnight Apothecary by Lottie Muir (CICO Books, £16.99). Over 100 recipes using home-grown and foraged fruits, herbs and edible flowers. www.thecocktailgardener.co.uk


In Eating, Living Tags cocktail recipes, cocktail, june, issue 36, gathering
Comment
Recipes, photography and styling by Kerstin Rodgers/MsMarmiteLover

Recipes, photography and styling by Kerstin Rodgers/MsMarmiteLover

Recipe: Homemade crumpets

David Parker March 27, 2015

The most important thing when making crumpets is getting enough holes into them. Flat crumpets have nowhere for the butter to sink into! Make sure you beat the butter sufficiently, don’t overfill the rings with butter and cook them very slowly so that the bubbles have enough time to form and then pop.

Makes 12

70g strong white bread flour
70g plain white flour
1 sachet (7g) fast-action dried yeast 
1⁄2 tsp sea salt
1 tsp caster sugar
275l milk, warm (not hot)
1⁄4 tsp bicarbonate of soda
75–100ml warm water
Melted unsalted butter, for greasing 

Lots of salty butter, for spreading! 

Equipment

Cast-iron or good-quality heavy- based frying pan (or griddle)
At least 4 metal crumpet or egg rings or plain metal pastry cutters about 7.5cm in diameter
Heatproof pastry brush


Method

1 Mix together the flours, yeast and salt. Add the sugar and milk and beat until you have a smooth batter. Cover and leave to rise for 45 mins.

2 Combine the bicarbonate of soda with the warm water and mix it into the batter. Cover again and rest for 20 mins. 

3 Heat the pan, then butter it and sufficiently grease the insides of the rings or cutters with the pastry brush. Allow the rings to heat up in the pan, then fill each one with about 2cm batter. Don’t overfill them as the crumpets will take too long to cook and the holes won’t have time to form.

4 Wait. Be patient. Turn your crumpets over only once you can see holes starting to poke through the batter. Then lift away the rings and flip over the crumpets to continue cooking.

5 Brush the empty rings with more butter and ladle in more batter.

6 To keep the crumpets hot, lay them one by one in a large ‘envelope’ of tin foil and keep them in the oven on its lowest heat. Or butter them copiously and rush them out to your guests, piping hot. 


Recipe by Kerstin Rodgers from her book MsMarmiteLover’s Secret Tea Party (Random House, £20). Turn to page 24 of April's The Simple Things for the rest of her high tea menu, including recipes for: 

Rachael’s Secret Tea Room Muffins, Hobbit Seed Cake, Lemon, Almond and Pistachio Cake with Lemon Cream Frosting, Homemade Nutella, and Cupcakes baked in a cup.


 April's The Simple Things is out now - buy, download or subscribe today.


In Living, Eating Tags recipe, baking, afternoon tea, issue 34, march, curious
1 Comment
Photograph: Kirstie Young

Photograph: Kirstie Young

Recipe: Rhubarb and ginger pavlova

David Parker March 13, 2015

Delicately spiced pink rhubarb, lashings of cream and a crisp brown sugar meringue makes for pav perfection. Just the ticket for lunch this weekend.

Rhubarb and ginger pavlova

If you have fussy children to please, you could swap the ginger for white sugar, but this version works beautifully.
The addition of vinegar (a Nigella tip) helps to make the middle beautifully soft and chewy. All but the whipped cream for the topping can be made ahead of time and the whole assembled just before eating. Note that the two main components require plenty of oven time at different temperatures, so plan ahead.

Serves 8
FOR THE MERINGUE
6 egg whites
300g soft brown sugar 
1 tsp red wine vinegar 
50g crystallised ginger, sliced thinly
FOR THE TOPPING
3 sticks rhubarb
3 tbsp honey
Zest and juice of one orange 
1 vanilla pod, split
3 Chinese star anise
1 vanilla pod
500ml double cream, to serve


TO MAKE THE MERINGUE
1. Preheat the oven to 180C/Fan160C/350F. Cover a baking sheet with parchment paper; set aside.
2. In a perfectly clean bowl, whisk the egg whites until they form peaks, then slowly whisk in the sugar a tbsp at a time. It will turn sepia-coloured and shiny. Sprinkle in the vinegar and the crystallised ginger, then carefully fold in until combined.
3. Spoon and smooth the mixture into a circle approximately 23cm across on the lined baking sheet. Place in the oven and reduce the heat to 150C/Fan130/300F. Bake for 1 hour 15 minutes, or until it is dry and crisp on the outside. Turn off the oven, open the door slightly, and leave to cool completely.
FOR THE RHUBARB TOPPING
4. Preheat the oven to 180C/ Fan160/350F. Slice the rhubarb into 2-inch pieces and place in a deep- sided baking dish. Pour over the honey and orange juice. Scrape
the beans out of the vanilla pod into the juices, then add the pod along with the Chinese star anise.
5. Bake for around 30 minutes, until the rhubarb is tender but still holding its shape. Remove from the oven and leave to cool.
6. Whip the cream and spread it generously over the cooled meringue base. Spoon the rhubarb carefully onto the top, dribbling over some of the juices, and serve immediately.


For the rest of Lia Leendertz's rhubarb feature - including recipes for Tempura mackerel with rhubarb relish, and Dusky pink lady cocktails - turn to page 36 of the March issue of The Simple Things. Not got your March issue? Buy now,  subscribe or look inside

In Eating, Living, Growing Tags recipe, rhubarb, mother's day, issue 33, seed to stove, march
Comment
  • Blog
  • Older
  • Newer
Featured
  Buy ,  download  or  subscribe   See the sample of our latest issue  here   Buy a copy of our latest anthology:  A Year of Celebrations   Buy a copy of  Flourish 2 , our wellbeing bookazine  Listen to  our podcast  - Small Ways to Live Well
Feb 27, 2025
Feb 27, 2025

Buy, download or subscribe

See the sample of our latest issue here

Buy a copy of our latest anthology: A Year of Celebrations

Buy a copy of Flourish 2, our wellbeing bookazine

Listen to our podcast - Small Ways to Live Well

Feb 27, 2025
Join our Newsletter
Name
Email *

We respect your privacy and won't share your data.

email marketing by activecampaign
facebook-unauth twitter pinterest spotify instagram
  • Subscriber Login
  • Stockists
  • Advertise
  • Contact

The Simple Things is published by Iceberg Press

The Simple Things

Taking time to live well

We celebrate slowing down, enjoying what you have, making the most of where you live, enjoying the company of of friends and family, and feeding them well. We like to grow some of our own vegetables, visit local markets, rummage for vintage finds, and decorate our home with the plunder. We love being outdoors and enjoy the satisfaction that comes with a job well done.

facebook-unauth twitter pinterest spotify instagram