The Simple Things

Taking time to live well
  • Home
  • Subscribe
  • SHOP
  • Newsletter
  • About
  • Work with us
  • Home
  • Subscribe
  • SHOP
  • Newsletter
  • About
  • Work with us

Blog

Taking Time to Live Well

  • All
  • Chalkboard
  • Christmas
  • Competition
  • could do
  • Eating
  • Escape
  • Escaping
  • Fresh
  • Fun
  • gardening
  • Gathered
  • Gathering
  • Growing
  • Haikus
  • Interview
  • Living
  • Looking back
  • Magazine
  • magical creatures
  • Making
  • Miscellany
  • My Neighbourhood
  • Nature
  • Nest
  • Nesting
  • outing
  • playlist
  • Reader event
  • Reader offer
  • Shop
  • Sponsored post
  • Sunday Best
  • Think
  • Uncategorized
  • Wellbeing
  • Wisdom

How to keep your herbs going over winter

Lottie Storey November 20, 2015


Rosemary, sage and bay are hardy fellows and will survive, albeit in go-slow mode if left in the garden over the winter. Your basic garden mint, grown in a pot and kept in a sunny, sheltered spot will muddle through, too. It’s worth providing a bit of extra TLC by mulching around roots to keep out the cold or covering with horticultural fleece.

They won’t put on much growth so don’t demand too much by way of fresh pickings. Go for new leaves and shoots, avoiding old growth if you can.

A few other things you could try:
1. Move varieties like thyme, parsley and oregano into a cold frame or unheated greenhouse, which will help them flourish.
2. You can sow coriander outdoors in February as it copes well with cold weather and will produce leaves within six weeks. 
3. Try dividing perennials like chives, mint, oregano, marjoram and tarragon to encourage plenty of new growth once the growing season starts. Make sure the ground isn’t frozen and dig up the entire plant. Divide the crown and root ball into two or more sections, using a knife or a spade. Protect them once they are back in the ground by mulching or covering with horticultural fleece. 
4. If you struggle without herbs, why not freeze or dry them so you can enjoy a ready supply over the winter months?


Read more:

From the November issue

Herb recipes

Gardening tips

Fancy sea salt hot chocolate, cinder toffee and firepit cakes, a celebration of toast plus ways to tell a good story around the fire, subversive cross stitch and how to keep your herbs going over winter? Oh and bibliotherapy, crafternoons and a poem about beautiful librarians. 

All this in our November COMFORT issue. You'll find us in even more Waitrose and Sainsbury's stores this month plus WH Smiths, Tesco and good independents. We're on sale now somewhere near you.

November's The Simple Things is out now - buy, download or subscribe.

In Miscellany, Growing Tags herbs, winter, issue 41, november
1 Comment
Fruit leather

Fruit leather

Recipe: Raspberry fruit leather

Lottie Storey August 20, 2015

Use this recipe as a template for all kinds of fruit leathers – it works really well with strawberries, apricots and nectarines too. Essentially, all it entails is making a thick, gloopy purée of fruit and sugar and then drying it out very slowly in the oven until you have a pliable leather as clear and vivid as a stained glass window. Remember to add the lemon juice if you are using fruit that is likely to discolour.

Makes 2 sheets
A little groundnut oil for greasing the tins
500g raspberries
500g peeled, cored and chopped cooking apples
Juice of 1 lemon
130g honey

1. Preheat the oven to 70°C/Gas 1/4. Line two baking sheets of about 24cmx30cm with foil or several layers of clingfilm; lightly oil with groundnut oil.  
2. Put the berries, apples and lemon juice into a pan. Cook gently, partially covered at first, until soft and pulpy, about 20 minutes. Rub through a sieve or mouli into a bowl. You should have about 700g smooth fruit purée. Add the honey and mix well.  
3. Divide between two baking sheets, shaking the tins and smoothing with a spatula so the purée reaches right up to the edges. Place in the oven for 6-10 hours.
4. The leather should be a little tacky but no longer sticky and should peel easily off the clingfilm or foil. Leave to cool completely then roll up the leather in greaseproof paper or cling film and store in an airtight container in a cool place. Use within two months. Alternatively, you can freeze it, well sealed, for up to a year. 

Turn to page 120 of September's The Simple things (on sale 29 August 2015) for Postcards from the Hedge, where Mark Diacono is picking peppercorns and harvesting honey.

Read more

Autumn jam recipes

More Postcards from the Hedge recipes

More from the September issue

September's The Simple Things is on sale today - buy, download or subscribe now.

In Growing, Eating Tags issue 39, september, postcards from the hedge, fruit, fruit recipe, autumn
3 Comments
Grow2015LR.JPG

Event: GROW London and ticket offer

Lottie Storey June 10, 2015

Join The Simple Things at GROW London and take advantage of our half price ticket offer.

Taking place 19-21 June 2015, GROW London is an inspiring day out bursting with ideas on how to transform your outside space, no matter how large or small. 100 exhibitors will be offering an unrivalled selection of contemporary and classic garden furniture, rare and hard-to-find plants and flowers from some of the country’s finest nurseries, and a tempting edit of fine garden sculpture, covetable pots, planters, accessories and tools, as well as consultations with experts from the Society of Garden Designers. 

We’ve teamed up with GROW London to offer you half price entry to this year’s fair. Use the code SIMPLETHINGS online at www.growlondon.com to enjoy half price access to the fair, 19-21 June 2015.

In Growing Tags event, ticket offer, grow london, 2015
Comment

Recipe: Blackcurrant leaf ice lollies

David Parker May 13, 2015

"While the blackcurrant blossom is just considering its change into berries, I’m eagerly picking the leaves. It can be hard to tell the black from the red from the white currants by sight, but if you rub them, blackcurrant leaves are thick, full and sweet in fragrance, and make my favourite sorbet, which can easily be twisted into lollipops, as my daughter insists I do." 

Try these unusual ice lollies from our green-fingered foodie, Mark Diacono. Pinch a couple of handfuls of early leaves from across the whole bush, so as not to deplete any part of the plant. The summer and early autumn leaves are still good, but the May leaves are best. This also works well with elderflower and midsummer scented geranium leaves. This makes a fine sorbet, too – just pour the liquid into a plastic tub, freeze for a few hours, then whisk an egg white into the slush and freeze.

Blackcurrant leaf ice lollies

2 large handfuls of young blackcurrant leaves/a 500ml jugful, fairly tightly packed
270g sugar
700ml cold water 
Juice of 3 lemons

1 Crush the blackcurrant leaves to help release the aroma and flavour by either squeezing them tightly in your hand or gently pounding with the end of a rolling pin.

2 Put them in a stainless steel saucepan with the water and sugar. Bring slowly just to the boil, stirring to dissolve the sugar, and simmer for 3 mins only.

3 Allow to completely cool.

4 Add the lemon juice, then strain. 5 Pour the juice into lollipop moulds and freeze. 


Recipe from May's The Simple Things. Buy, download or subscribe now.

In Eating, Growing Tags issue 35, may, ice lollies, postcards from the hedge
Comment

Proudly Homemade Days Out: Planting plans and foraged finds

David Parker April 24, 2015

Join us for a special ‘veg and hedge’ day, hosted by Yeo Valley. Tour the gardens, make a planting plan and fresh pesto to take home, and learn what to cook with wild plants. 

The day takes place on Friday 22 May. Arrive just in time for elevenses in the tea rooms where you’ll be making fresh pesto with ransoms (wild garlic). Then the chefs from Yeo Valley’s staff canteen, Fodder, will bring in foraged finds from the hedgerow and demonstrate what you can use them for.

yeo-valley-2.png

After a leisurely lunch, during which you can taste the morning’s work, you’ll get the chance to tour the gardens with Eileen, Yeo Valley’s garden designer. She’ll talk about how to make your garden both pretty and productive, answer your questions and you’ll get a planting plan for a raised bed to take home with you.

Tea and cake will furnish you for the journey home. All equipment will be provided, just bring your enthusiasm.

To book, contact Jill at events@yeovalley.co.uk or call 01761461425. Limited to 24 places. Price £65 per person. The day takes place at Yeo Valley Organic Garden, Holt Farm, Bath Road, Blagdon, North Somerset BS40 7SQ. Travel to and from Yeo Valley is not included.

In Escape, Reader offer, Growing Tags days out, yeo valley, Reader event, issue 34, april
Comment
Photograph: Kirstie Young

Photograph: Kirstie Young

Recipe: Rhubarb and ginger pavlova

David Parker March 13, 2015

Delicately spiced pink rhubarb, lashings of cream and a crisp brown sugar meringue makes for pav perfection. Just the ticket for lunch this weekend.

Rhubarb and ginger pavlova

If you have fussy children to please, you could swap the ginger for white sugar, but this version works beautifully.
The addition of vinegar (a Nigella tip) helps to make the middle beautifully soft and chewy. All but the whipped cream for the topping can be made ahead of time and the whole assembled just before eating. Note that the two main components require plenty of oven time at different temperatures, so plan ahead.

Serves 8
FOR THE MERINGUE
6 egg whites
300g soft brown sugar 
1 tsp red wine vinegar 
50g crystallised ginger, sliced thinly
FOR THE TOPPING
3 sticks rhubarb
3 tbsp honey
Zest and juice of one orange 
1 vanilla pod, split
3 Chinese star anise
1 vanilla pod
500ml double cream, to serve


TO MAKE THE MERINGUE
1. Preheat the oven to 180C/Fan160C/350F. Cover a baking sheet with parchment paper; set aside.
2. In a perfectly clean bowl, whisk the egg whites until they form peaks, then slowly whisk in the sugar a tbsp at a time. It will turn sepia-coloured and shiny. Sprinkle in the vinegar and the crystallised ginger, then carefully fold in until combined.
3. Spoon and smooth the mixture into a circle approximately 23cm across on the lined baking sheet. Place in the oven and reduce the heat to 150C/Fan130/300F. Bake for 1 hour 15 minutes, or until it is dry and crisp on the outside. Turn off the oven, open the door slightly, and leave to cool completely.
FOR THE RHUBARB TOPPING
4. Preheat the oven to 180C/ Fan160/350F. Slice the rhubarb into 2-inch pieces and place in a deep- sided baking dish. Pour over the honey and orange juice. Scrape
the beans out of the vanilla pod into the juices, then add the pod along with the Chinese star anise.
5. Bake for around 30 minutes, until the rhubarb is tender but still holding its shape. Remove from the oven and leave to cool.
6. Whip the cream and spread it generously over the cooled meringue base. Spoon the rhubarb carefully onto the top, dribbling over some of the juices, and serve immediately.


For the rest of Lia Leendertz's rhubarb feature - including recipes for Tempura mackerel with rhubarb relish, and Dusky pink lady cocktails - turn to page 36 of the March issue of The Simple Things. Not got your March issue? Buy now,  subscribe or look inside

In Eating, Living, Growing Tags recipe, rhubarb, mother's day, issue 33, seed to stove, march
Comment

Fresh: Herbs - how to make them last, PLUS a winter herb salad recipe

David Parker March 9, 2015

March is the perfect month to experiment with herbs, to bring freshness and flavour to your cooking. How hard can it be to make supermarket herbs last? Alive one minute, wilting the next... Help those pots of herbs enjoy a longer lifespan.

Pot on

Supermarket herbs are grown for value, so there is a lot of plant crammed into a little pot, causing overcrowding and competition for nutrients. Potting on in a bigger container will give the plant room to grow.

Best for: Thyme, chives, sage, parsley, basil, mint and rosemary

Pick hard

This encourages growth and lets light in.

Best for: Parsley, oregano, thyme

Pick prudently

On a basil plant, don't be tempted to pick the biggest leaves first. Pinch out the smaller leaves at the top of the stem instead, to encourage growth. 

Best for: Basil

Water carefully

Drenching herbs can kill them. Instead, water from below by sitting the pot on a saucer of water until the soil feels moist, but not wet. Let the soil dry out before repeating.

Best for: all herbs


Recipe: Winter herb salad

Go heavy on the herbs. This Middle Eastern-style dish is packed with punchy flavours. Serves 4.

1 large bunch flat-leaved parsley
1 large bunch coriander
5 cauliflower florets
A handful of radishes
5 spring onions

For the dressing:
Zest and juice of half a lemon
30ml extra virgin olive oil
Salt and pepper

1. Roughly chop the herbs and the radishes and slice the spring onions, and put them together into a large bowl. Take the central stems out of the cauliflowers to break them up into tiny florets. Add to the salad.

2. Put all of the dressing ingredients into a jar and shake them together, then pour over the salad and mix well.


Not got your March copy of The Simple Things? Buy now,  subscribe or look inside

In Eating, gardening, Growing Tags herbs, fresh, herb salad, issue 33, march, supermarket herbs
1 Comment

Pottering in the potting shed: Keep plants toasty and warm this winter

David Parker January 26, 2015

In her Pottering in the potting shed series, our garden editor Cinead McTernan, shares ideas for things to do in your plot. This month, keep plants warm from the winter frost.

"Most of us saw a snowflake or two earlier this month, and if not, there was definitely a chill in the air as a cold band swept the country. Freezing temperatures make us reach for an extra pair of socks to keep us warm and the same thoughts can apply to outdoor plants too.  Even plants that are languishing in the relative protection of a greenhouse. While a layer of horticultural fleece will work wonders for any tender plants in beds and borders, you’ll need to add a bit of warmth to a greenhouse or potting shed too, to ensure that any seedlings you have started off or tender plants you’re overwintering will make it through extremely cold weather. Introducing a bit of heat before another frost will be enough to ward off any damage. 

"There are great products on offer in a range of styles to suit all budgets. If you’re lucky enough to have electricity in your greenhouse or potting shed, the skies really the limit! Mains powered eco and fan heaters can cope with a large-sized greenhouse (from 8x8m) and can be controlled by a thermostat, which helps maintain the right temperature. Expect to pay from £75 to £200 depending on your requirements. Alternatively, you can use gas or paraffin heaters, which are cheaper to buy with prices starting from £20, are economical to run and ideal for smaller spaces (under 6x8m)."

"I’ve got a Mini Greenhouse Paraffin heater which is more than enough for my 6x6m potting shed. Four litres of paraffin will set you back about £7 to £8 and will keep burning for 7 days. Helpfully, you can adjust the flame to help regulate the temperature. For the first time this year I can embrace the beauty of a frost-covered garden rather than worry about my overwintering herbs, perennials and early-sown seeds!"

Words: Cinead McTernan

More from Cinead's Pottering in the potting shed series

In gardening, Growing Tags winter, gardening, cinead mcternan, january, pottering in the potting shed
1 Comment

Pottering in the potting shed: Leaf mould compost

David Parker November 6, 2014

In a new series, our garden editor Cinead McTernan, shares ideas for things to do in your plot. This month, make your own compost using leaf mould.

“As a child I loved autumn. As soon as the leaves started falling, friends and I would pile them up in our school playground to make jumps so that we could spend every lunchtime galloping around and around jumping over them as if we were horses. Oh happy days!

“As a grown up I’m just as excitable about the start of autumn and I still gather leaves in to piles. The only difference is that I now scoop them up and keep them in bin liners for a few years so they can slowly decompose and transform into the most wonderful, crumbly, nutrient-rich compost, called leaf mould. If you’ve got space to store a few bin liners (out of the way behind the potting shed is always good) then it’s well worth giving this a try. If you don’t have enough leaves in your own garden to fill a bin liner or two, nip out to the park or your local woods where you’ll have plenty of material to gather.

“Oak, beech and hornbeam are the ultimate leaves for this bit of garden alchemy – they break down easily and make a very good leaf mould. Sycamore, walnut, horse and sweet chestnut leaves are actually thicker, which means it’s a good idea to shred them before storing them (you can use a rotary lawn mower to do this – just scatter them on the lawn and go over them a few times). It’s best to avoid evergreens and confer needles, as they take much longer to break down and if you’re going to recycle your christmas tree in this way, keep the pine needles separate and use for plants that like an acidic compost, like blueberries, camellias and rhododendrons.

“If the leaves are very dry when you gather them up, sprinkle some water in the bin liner to help them start them to decompose. Tie the bag in a knot and pierce with a fork a few times to create some air holes. You will have to be patient, as the process takes a couple of years, but start now and do it each year and you’ll have a great supply of good quality leaf mould to use as a seed-sowing compost in the spring. If you can’t wait that long or have enough space to store several bags, you can use year-old leaf mould, that hasn’t rotted down so well, as a mulch and soil improver.”

In gardening, Growing Tags autumn, cinead mcternan, gardening, pottering in the potting shed
Comment
IMG_5334.jpeg

Pottering in the potting shed: Spring harvest sowing

lsykes October 17, 2014

Sow seed now to enjoy an early spring harvest! In a new series, our garden editor Cinead McTernan, shares ideas for things to do in your plot.

“This time last year I was busy planning the transformation of our small, urban backyard plot into an edible paradise. Though there was plenty of hard graft to be done outside - we had to take down a dilapidated shed, dig up shrubs from the two narrow borders and lift the lawn - I didn’t want to miss the chance of having veg ready to plant out in early spring and produce early crops. Autumn is a great time to sow some types of vegetables that can cope over the cold, winter months and are ready to put on a growth spurt once the warmer weather arrives in spring.”

“Seed catalogues are the best place to start if you’re looking for inspiration or need a guiding hand about what can be sown and grown in each month. I’m well aware that while lots of friends fold down corners of pages in clothes catalogues, promising themselves they’ll go back and hone down the order to one or two choice items, I do this with pages showing fruit and vegetables. It’s not that I couldn't do with a nice chunky knitted jumper and a new pair of jeans, but I just get more excited about an ‘Earth Chestnut’ from Thomas Etty that produces delicious edible roots that taste like sweet chestnuts, seeds that can be used a substitute for cumin and leaves that taste much like parsley, or ’Egyptian Walking Onions’ from Otter Farm, that quite literally take a stroll through your plot over the growing season!”

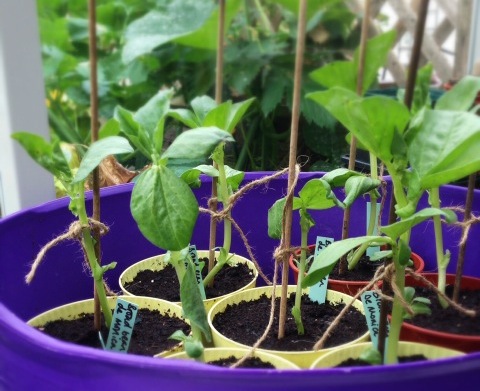
“Broad beans are an excellent crop to sow now, either outdoors in the plot, or, as I did, indoors in pots. Try varieties like ‘Aquadulce Claudia’and ‘De Monica’ which cope well with an autumn sowing. Sow one seed per 9cm pot filled with peat-free multi-purpose compost. I use Carbon Gold’s GroChar seed compost, which is a fantastic growing medium and kind to the environment. Don’t let the compost dry out and keep somewhere that’s cool but frost-free. I don’t have any windowsills and didn’t have a greenhouse, so had to claim a bit of space in our kitchen. It wasn’t ideal - as my husband and son kept telling me - and also meant I was fairly restricted with what I could sow. I managed to do a few sweet peas and a couple of pots of garlic cloves, but there were lots of other varieties I’d loved to have tried.”

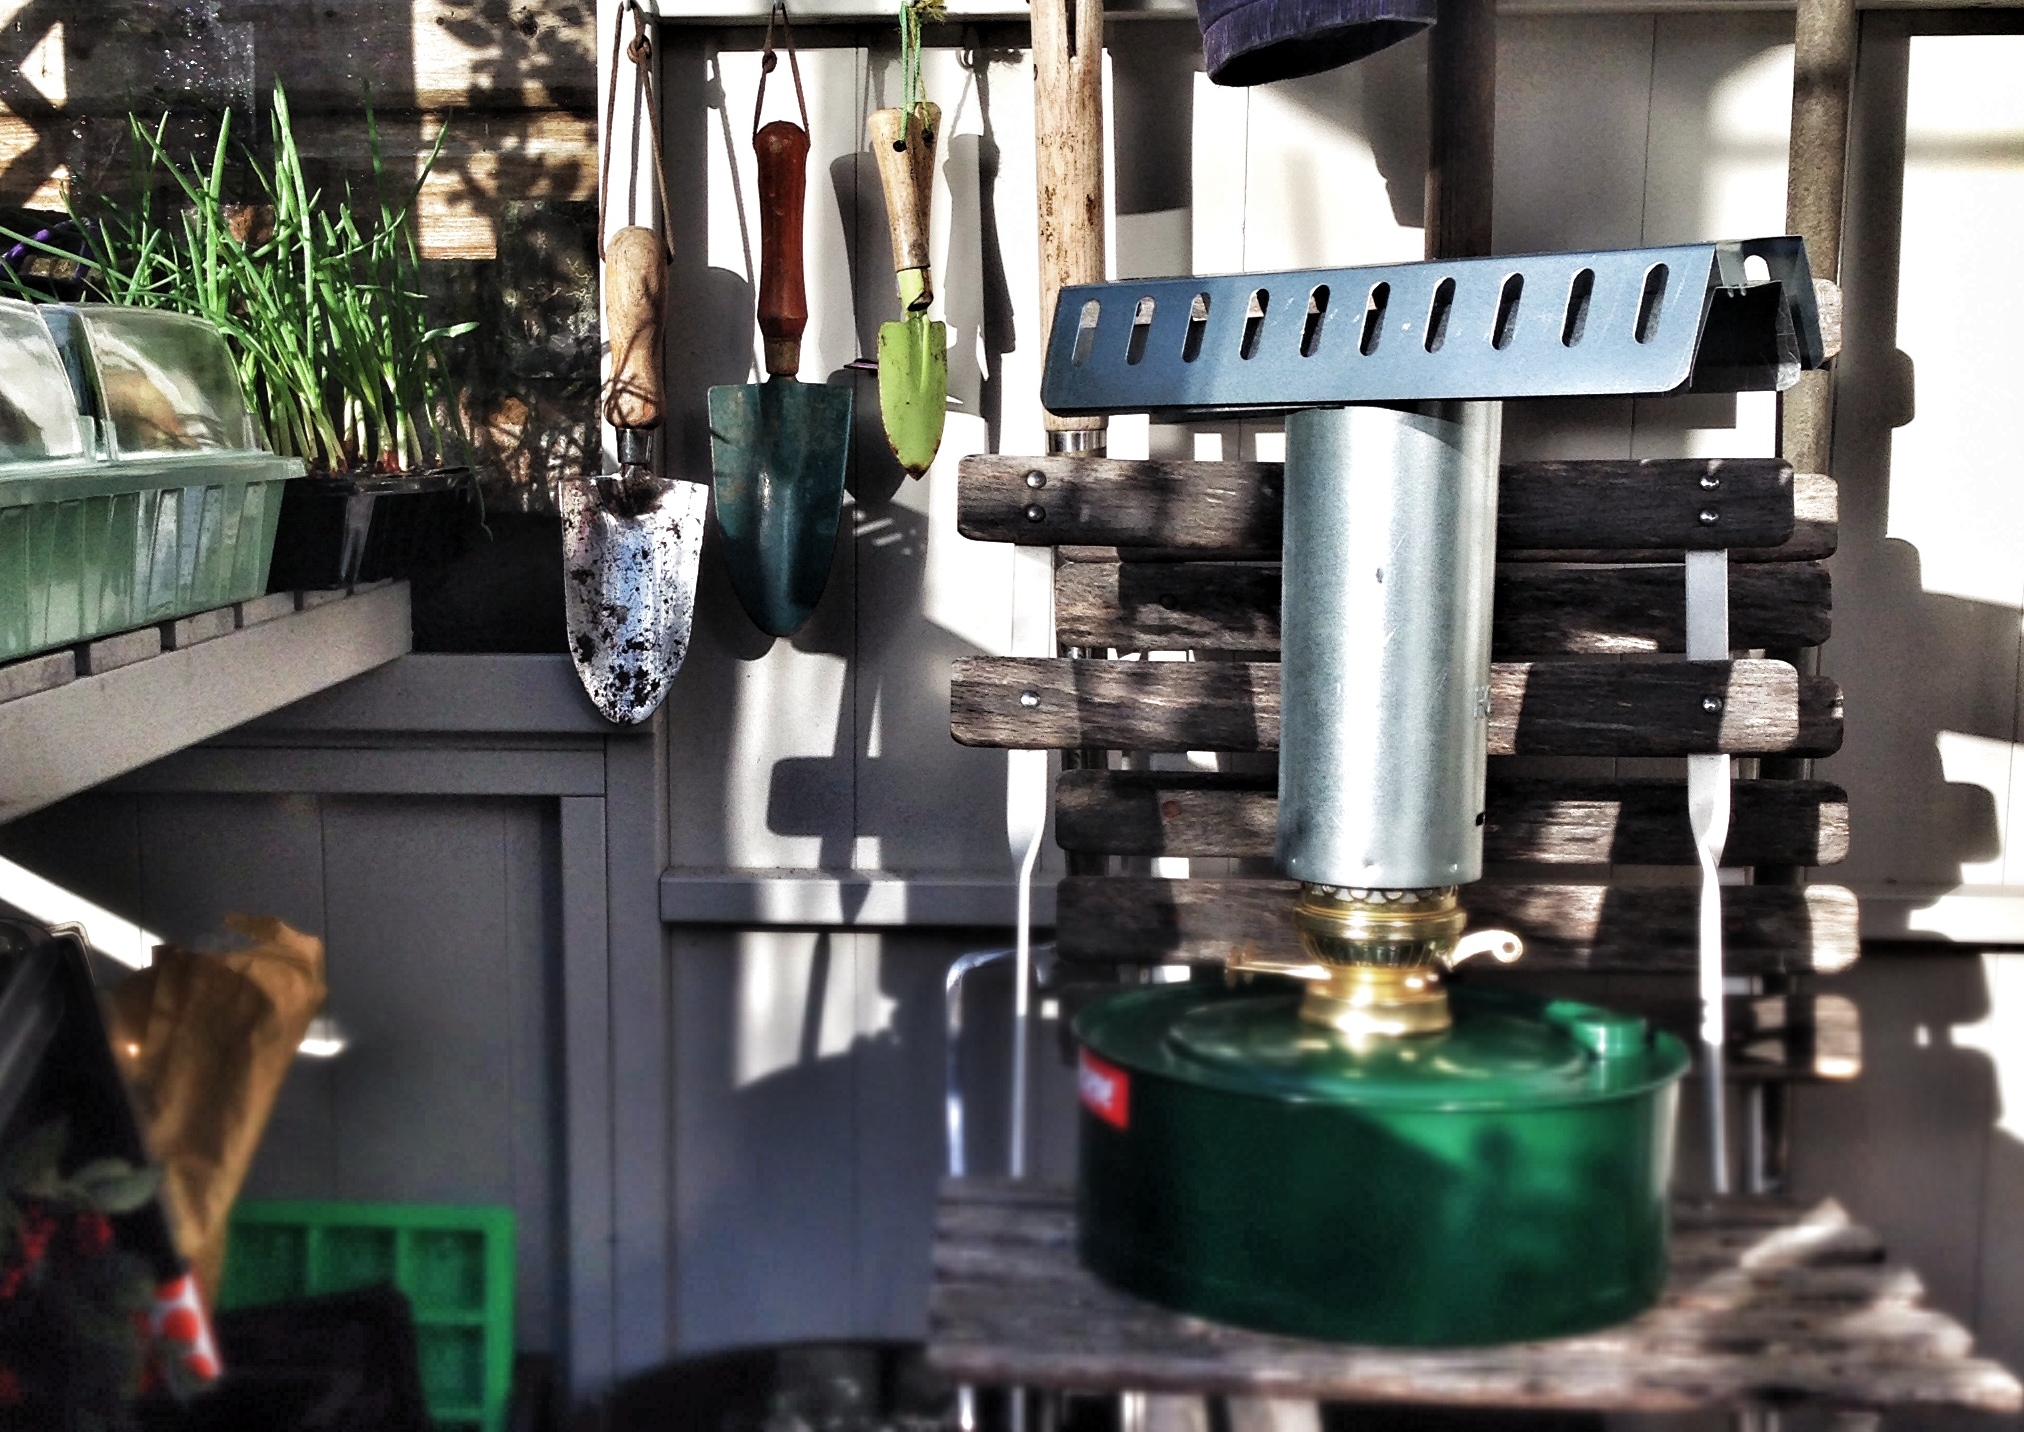
“This year is another story: I have a gorgeous potting shed and it’s made all the difference. It will provide a great environment to get seeds off to an early start so they can produce a crop as early as May. If you have windowsills, a patient husband and children, or a greenhouse or potting shed, here’s my list of seeds you can sow now. I look forward to swapping notes in the spring!"

Garlic

Plant individual cloves in 9cm pots or a modular tray, with the tip just below the surface of the soil. Place in a cool, dry spot and don’t let them dry out over the winter. Plant out in spring, about 10cm apart and keep well watered. Hard-neck types are thought to have stronger flavour but only stores until mid-winter whereas soft-neck types can be kept in the ground until mid-winter (if autumn planted) and produces, smaller tightly packed cloves.

Par cel

New to me this year, I loved the sound of it being a combination of parsley and celery. It’s a winter hardy perennial, which according to Sarah Raven can be sown undercover until September. Given our warm weather, I think it can still be sown over the next week or so! They need light and a frost-free spot. plant out in spring.

Wild rocket

I haven’t had much luck direct-sowing it this summer, so i thought I’d give it a go in a seed tray. A great leaf to sow and grow all year round, it’s going to feature in  autumn suppers I hope – with chilli on spaghetti or as a pesto with gnocchi – yum! It needs a sunny spot and shouldn’t dry out.

Pea shoots

Another all year round crop, which I grew outside in the raised beds this summer. Delicious and so fragrant when you pick the tips. Like the rocket, another great way to get some fresh, lively greens into home cooked autumn and winter dishes. In theory ready to eat in 3 weeks – will be interesting to see if this is in summer, or a mild autumn too.

In gardening, Growing Tags cinead mcternan, gardening, in the potting shed, sowing, pottering in the potting shed
Comment
collecting-seeds.png

Plants for free: How to collect seeds

lsykes October 2, 2014

The flowering season may be coming to an end but there is still abundance in the garden. This is the time to collect seeds, propagate and divide.

October is the time to harvest a different sort of crop: seeds, cuttings and divided plants to fill the garden with colour next year. Here’s how to go about it...

Collect your own seeds

Set off with a brown paper bag, a pair of scissors and a skip in your step. If you want to bulk up stocks of a favourite plant or ensure new supplies of an annual, now’s the time to collect their seeds. Foxgloves (Digitalis purpurea), love-in-a-mist (nigella damascena), cosmos (cosmos bipinnatus) and honesty (lunaria annua) are ideal for beginners and will easily store and germinate the following spring. However, there are many other annuals as well as perennials, biennials, alpines, ornamental grasses, vegetables, herbs and some trees and shrubs that can all be grown from seed that you’ve collected.

1 Choose your plants carefully

Go for strong, healthy ones as they’re likely to have good- quality seed. However, be aware if they’re hybrids (specially bred plants that are unlikely to have the same qualities as the parent plant) rather than species, as the plant won’t “come true” from seed. In the case of hybrids, either buy new plants the following year or be prepared for the collected seeds to produce something completely different from this year’s plants.

2 Collect the seeds

Once you’ve decided which plants you’re saving seed from, the trick is to collect it just before it has dispersed. It’s a bit of a waiting game, but once the seed head has ripened and changed colour (from green to brown, black or red) and is dry and crisp, it’s time to spring into action. Pick individual seed heads and use separate paper bags for each species or, if they’ll come away easily, place a paper bag over the seed head and gently shake.

3 Dry the seeds

Once you’ve gathered all the seeds you want, lay them out on a warm windowsill or a greenhouse bench – you can even find a spot in the airing cupboard. You need to give them time to dry out so you can get to the seed more easily. Clean away the ‘chaff’ or casing until you’re left with just the seed. Check to see which seeds you’ve collected and if they need to be sown straight away. Hellebores, for example, can be stored to sow next spring when the weather warms up.

4 Transfer your seeds into individual paper packets and label them

You’ll be surprised how satisfying this is. Keep them in an airtight container and, if you have any sachets of silica gel from new shoes or bags, place a couple in with the seeds to absorb excess moisture, which would otherwise cause the seeds to rot. If not, add a handful or two of rice to the container and find a spot for the container in the fridge.


Want more? Turn to page 97 of October's The Simple Things. Buy or download your copy now.

In gardening, Growing Tags autumn, gardening, growing, issue 28, October, seeds
Comment
cut-flower-sept-1.png

Sponsored post: September's cut flower patch planting diary

lsykes September 12, 2014

Louise Curley, author of The Cut Flower Patch, shares this month’s planting diary.

'I always think there’s something very reassuring about the cycle of gardening. As one element fades there’s another coming into its own and just as summer merges into autumn it would be easy to become melancholy about the approach of winter but the task of planting spring bulbs reminds me of the year to come.

cut-flower-september-2

'Bulbs might seem like a bit of an extravagance for the cut flower patch as most will only produce one flower stem, unlike your cut and come again summer flowers. But after a long winter it’s a real delight to be able to go out and pick a few bunches of your own daffodils and tulips. And now is the time to be ordering and planting your cut flower bulbs for next year.

'Plant up a patch of bulbs purely for cutting and you’ll have a much wider choice of varieties for cutting than anything you could buy from the shops. For me, scented narcissi are a must. The fragrance is incredible and you’ll only need a few stems in a jar to scent a whole room. My must-have daffodil varieties include ‘Geranium’, ‘Winston Churchill’ and ‘Grand Soleil d’Or’.

cut-flower-september-3

'Tulips come in so many stunning colours and forms, not just the single coloured goblets you’ll find in the supermarket. Conjure up arrangements inspired by Dutch Masters’ paintings with flamboyant Parrot tulips like ‘Rococo’ and plant double flowered varieties such as ‘Angelique’ with it peony-like blooms for dreamily romantic displays. For me, the discovery of scented tulips has been a bit of a revelation – the cream-flowered ‘Verona’ and ‘Ballerina’ with its vibrant red/orange petals and orange jelly scent are my own favourites.

'Think small too. Grape hyacinths and dwarf narcissi such as ‘Tête-à-Tête’ might produce flowers no more than 20cm tall but they look incredibly pretty in small glass jars and are perfect for edging your cut flower beds where they take up very little space.'


Louise Curley is the author of The Cut Flower Patch, published by Frances Lincoln.


In gardening, Growing, Sponsored post Tags flowers, garden, gardening, Sponsored post, summer
Comment
ripening-tomatoes.png

How to ripen tomatoes indoors

lsykes August 23, 2014

This month, the plot's most versatile fruit makes a blushingly late arrival. Find out how to ripen green tomatoes with our top tips.

At the end of the season there are always a few unripe tomatoes kicking about. You can of course but them in a paper bag in a drawer to ripen (never on a window sill: it toughens the skins) or whip them up into a batch of chutney, but all of this slightly overcompensates. A green tomato is actually rather a lovely thing. Cooked – and they do need to be cooked – they have the same tomatoey taste but with a more savoury, vegetable edge.

For a recipe for fried green tomatoes, turn to page 24 of September's The Simple Things.


How to ripen tomatoes indoors

Make sure you pick your green tomatoes before the risk of any frost.

Wash each tomato in cold water, dry with a clean towel, then allow to dry completely.

Remove any tomatoes that have signs of damage, bruising, or spotting.

Source a container large enough to contain all of your tomatoes with around 5cm between each fruit. They should not be touching. Choose a container that will not leak in case any of your tomatoes rot. Line with an absorbent material such as newspaper or paper towel.

Place your tomatoes spaced out, one layer deep in the container.

Store in a cool, dry place, such as a garage, porch or outhouse.

Check on the tomatoes every other day, removing any that are 50% or more red (let these finish ripening in the kitchen) and removing/disposing of any with signs of rot.

It could take three weeks to three months for your tomatoes to fully ripen, depending on the conditions you create for them. You could be eating delicious, ripe, homegrown tomatoes for Christmas.

In Growing Tags allotment, gardening, Lia Leendertz, tomatoes
Comment
cut-flower-patch.png

Sponsored post: August's cut flower patch planting diary

lsykes August 17, 2014

Louise Curley, author of The Cut Flower Patch, shares this month’s planting diary.

'There are bountiful harvests of blooms at the moment and my home is chocked full of vases but it’s hard to ignore the sense that autumn is not far away. As this year’s cut flower patch slowly fades it’s time to start thinking of next year. There’s a short window of opportunity to have bigger, stronger plants which will be more floriferous next year. By sowing certain hardy annuals now they will germinate and form small plants which are able to withstand the winter weather. Then, when the ground warms up next spring, they will romp away. Don’t sow too early as they may be encouraged into flowering prematurely if we get a mild autumn but likewise don’t sow too late as they won’t form large enough plants to cope with winter. The optimum time is mid-August to mid September.

'You could sow direct into a dedicated patch of ground, moving plants in spring to their final planting place or you could sow into pots and overwinter in a greenhouse or cold frame. The best plants for autumn sowing include cornflowers, larkspur, calendula, nigella, ammi and euphorbia oblongata. Autumn sown cornflowers and larkspur on my own flower patch can be a third taller than spring sown plants and produce flowers 3 to 4 weeks earlier.

'There are a few things to bear in mind if you fancy a spot of autumn sowing. If you grow them under protection you’ll need to keep an eye out for fungal problems such as botrytis, a grey fluffy mould that thrives in moist conditions and low light levels. Keep plants slightly on the dry side and ventilate your greenhouse or cold frames on milder autumn and winter days, but remember not to leave them open at night. If you’re growing them directly in the ground and winter turns out to be very cold your little plants will benefit from the protection of fleece or cloches. And, just because it’s winter it doesn’t mean you can forget about those pesky slugs. Check over your plants regularly and use organic slug pellets if necessary. It might seem like a bit of effort but when you’re picking your flowers next may it will all be worth it.'

Louise Curley is the author of The Cut Flower Patch, published by Frances Lincoln.

In gardening, Growing, Sponsored post Tags flowers, garden, gardening, Sponsored post, summer
1 Comment
herbs.png

Get creative with herbs

lsykes August 9, 2014

Copious crops? These culinary ideas will help you cope with a herb glut

Get creative with herbs

Make a vinegar Take a clean jar, fill loosely with your herb, add vinegar to the top, close tightly and leave to steep for 4–6 weeks. strain, then use in marinades or salads.
 As a rule, stronger herbs go well in red wine vinegar; if the herb will colour the liquid, opt for white.

Add to drinks Add mint with cucumber and lemon to water and infuse for 10 mins in the fridge for a great hot-weather quencher. Add handfuls of parsley, dill or basil to juices for a health and flavour boost.

Freeze them in ice cubes to add to meals when fresh supplies are low Fill ice trays about 1/4 full of filtered water, fill with your freshest leaves, then cover with water.


Want to know what to grow? Jekka McVicar’s knowhow is second to none. Here are her top tips.

• Oregano is the easiest herb to grow in poor, dry conditions. It is happy to be planted in the type of soil that other herb varieties wouldn’t put up with.

• Supermarket herbs are best on window sills. Amazing as it sounds, they’re actually raised to cope with indoor conditions. Pick leaves regularly and don’t let them dry out or, indeed, overwater them.

• Contrary to what you might think, coriander is a bit of a tricky customer. It needs shade as well as a rich, fertile soil that doesn’t dry out.

• The easiest herbs to grow from seed are rocket, purslane or dill. They will put on a good show whether sown in trays or directly into the ground.

• Mint is easy to propagate. It’s the best herb to try if you’re new to taking cuttings.

• Plant parsley this month. Sow directly into the soil by the end of August for fresh pickings through winter.

Turn to page 90 of August’s The Simple Things for more herbs. Buy or download your copy now.

In gardening, Growing Tags garden, herbs, jekka mcvicar
Comment
jekka-jason-ingram.jpg

Jekka McVicar's useful but less obvious herbs

lsykes July 23, 2014

Read our feature on Jekka McVicar (page 90 of August's The Simple Things)? Add her suggestions for useful but less obvious herbs to your shopping list.

1. Borage (Borago officinalis)

This frost-hardy annual has attractive, star-shaped, blue flowers in summer which can be used in drinks and salads. Its young leaves pep up salads and mature leaves can be cooked to make a delicious summer soup (chill first). Height: 60cm.

2. Celery leaf (Apium graveolens)

A hardy biennial with tiny, green-white flowers in the summer of the second year. The leaves have a strong celery flavour and young ones are good in salads or as a flavouring in soups and sauces. It is also used medicinally to ease osteo-arthritis. Height: 30cm-1m.

3. Myrtle (Myrtus communis)

The small white flowers of this frost-hardy, evergreen shrub have golden stamens in summer followed by blue/black berries in autumn. Its dark-green, shiny, oval, aromatic leaves are good with roast, pork and game dishes and delicious sprinkled on roast vegetables. Height: up to 3m.

4. Red Orach (Atriplex hortensis var. rubra)

Use the young dark red leaves of this hardy annual in salads or cook its mature leaves like spinach. One word of warning: it's an enthusiastic self seeder! Height: 1m.

5. Fennel (Foeniculum vulgare)

A hardy perennial with large flat umbels of small yellow flowers in summer followed by aromatic edible seeds and soft green feathery foliage. Complements fish, pork and salads. Height: up to 2.1m.

6. Winter Savory (Satureja montana)

The small white flowers of this hardy perennial are tinged with pink in summer. The dark green, linear, pungent leaves are good for salt-free diets. Height: 30cm.

Image: Jason Ingram

For more on Jekka McVicar, buy or download your copy of August's The Simple Things.


In gardening, Growing Tags growing, herbs, jekka mcvicar
Comment
july-cutting-diary.png

Sponsored post: July's cut flower patch planting diary

lsykes July 17, 2014

Louise Curley, author of The Cut Flower Patch, shares this month’s planting diary.

'Mid-summer is the peak for any cut flower patch. July is all about maintaining your patch to get the most from your plants, to enjoy the fruits of your labour and to pick, pick, pick.

'Weeding, watering and deadheading might sound dull but there’s something really quite meditative about an hour or so pottering in amongst your flowers making everything look tidy and well-cared for. You’ll have the visual delight of the colourful tapestry of all of your flowers, the heady scent from sweet peas and the pleasure of seeing so many insects enjoying and sharing the plot too. So don’t see your time maintaining your plot as a chore but revel in the opportunity to be outdoors with bees buzzing and butterflies flying silently past.

'It’s easy for weeds to take over so keeping on top of them with a little regular hoeing is the best way for you and your flowers to not be overwhelmed. Get to weeds before they have a chance to flower and you’ll also prevent another generation of weeds springing up. Cut flower plants are much more tolerant of a dry spell than many vegetables but to keep your plants in tip-top shape, a watering once a week will be of benefit. A good soaking is much better than just a quick sprinkle every day or so. This is really just a waste of time as the water is not sufficient to penetrate the soil and much of it evaporates never actually making it to the plant.

'You won’t need to do too much deadheading if you’re picking flowers on a regular basis. But, if you go away for a holiday or there are flowers you didn’t get round to picking you’ll need to snip them off once they’ve gone over so that the plant doesn’t go to seed. Keep doing this over the summer and your plants will keep on blooming well into autumn.'

Louise Curley is the author of The Cut Flower Patch, published by Frances Lincoln. 

 
In gardening, Growing, Sponsored post Tags flowers, garden, gardening, outdoors, summer
Comment
MIMG-Wild-flowers-2-resized.png

Grow a wildflower meadow

lsykes July 9, 2014

Turn a bare patch, neglected corner, or even a container, into a glorious, wildflower meadow.

To capture the magic of a flower-filled field in miniature, all you need is a sunny spot and a handful of seeds.

You don't need acres... An untidy spot or an existing border in need of a makeover are both prime sites to grow meadow flowers. Turn to page 84 of July's The Simple Things for Cinead McTernan's feature on growing and buying annual, perennial, and mini meadows.

Read on for top meadow growing tips:

Don't shirk the weeding

Putting in the spadework at the start will ensure your plot is weed-free. Once weeded initially, let the soil settle for 3-4 weeks. Spray or hoe any new weeds, rake over - now you can sow.

Sow early

During March or April, but you can sow in September: on lighter soils, autumn-sown seeds generally establish quickly, but you may have to wait until next spring.

Scatter your seed

The simplest way to sow is to mix the seed with sand (so it's easily visible) and scatter evenly. For large areas, divide your plot into square metres and weigh out the right amount of seed for each.

Know your natives

Plantlife suggests buying seed from suppliers that source native plants (for examples see www.floralocale.org). Or contact your local Wildlife Trust as some now collect native seeds from their sites.

Cheat a little

Boost perennial meadows with plug plants or bulbs. Experts recommend yellow rattle - it's a parasitic plant, which weakens grass and so allows wildflower seeds to thrive. for an instant effect on roofs or smaller areas, buy meadow turf.


Not got July’s The Simple Things yet? Buy or download your copy now.


In gardening, Growing Tags flowers, gardening, meadow, wildflower
Comment
mindful-eater.png

How to be a mindful eater PLUS three simple tea infusion recipes

lsykes June 29, 2014

Yes, we love food, but it doesn't always get our full attention. Time to reconnect your mind with your mouth and become a mindful eater.

Many of us fall easily into patterns of mindless eating. We pick at food while working at our computers. We reach for the quickest - and usually the unhealthiest - snacks for a quick energy boost. We don't take proper lunch breaks. We are constantly distracted while we eat, by television, by work by our phones and computers. We have lost a lot of the enjoyment of eating and as a result we are guilty of just shovelling food into our bodies.

Turn to page 100 of July's The Simple Things to read Rebecca Frank's rediscovery of the joys and pleasure of conscious eating. And sit down with a cuppa, taking time to enjoy the fragrant flavours of one of these mindful infusions. Glass tumblers work really well, as you can fully appreciate not only the refreshing taste and aroma, but also the visual delights. You can sweeten any of the teas with a dash of honey.

Simple Mint Tea

2-3 sprigs of fresh mint Freshly boiled water

Place the mint sprigs into your favourite tea tumbler.

Pour over hot water.

Leave to steep for a few minutes and you will notice the water start to turn slightly green. Savour and enjoy.

Mindful tea notes: This simple, refreshing mint tea has long been used as a natural digestive aid. It works well if sipped slowly after a meal.


Rosemary Tea

2-3 tsp finely chopped fresh rosemary leaves Freshly boiled water

Add the fresh rosemary to your favourite tea tumbler.

Pour over hot water and leave to steep for a few minutes.

Enjoy immediately or strain mixture first depending on your preference.

Mindful tea notes: Rosemary is associated with memory and is a lovely tea when you need focus and concentration on your side.


Lemon, Ginger and Lemongrass Tea

1 inch ginger; peeled and sliced into long thin strips 1 organic, unwaxed lemon A few seeds from a cardamom pod 1 stalk lemongrass Freshly boiled water

Press down on the ginger slices and cardamom seeds with the back of a teaspoon to release the flavours and place them in your favourite tea tumbler.

Slice the top and bottom off the lemongrass stalk and then slice in half lengthways, remove the outer layer, and place sliced inner sections into your tumbler.

Pour over hot water and leave to steep for a few minutes.

Squeeze the juice from the lemon and add to the tumbler.

Stir well and enjoy.

Mindful tea notes: The combination of lemon and ginger is energising, while the extra cardamom adds spicy warmth to boost your metabolism.


Not got July's The Simple Things yet? Buy or download your copy now.

More recipes from The Simple Things.

In Eating, Growing Tags herbs, mindfulness, recipes, tea
1 Comment
jekka-jason-ingram.jpg

Jekka's Herbetum Open Days

lsykes June 19, 2014
Don’t miss the chance to sneak a peak behind the scenes of Jamie Oliver’s favourite herb grower, with open days at Jekka McVicar’s new Herbetum in South Gloucestershire.
Over the last 3 years Jekka has slowly transformed her working nursery into a beautiful display garden that showcases over 300 different culinary herbs in rather stylish (and practical) wooden raised beds. It’s said to be the biggest display of its kind in the UK so you’ll find plenty of inspiration about which herbs you can try in your garden, balcony or window sill.
jekka
Jekka takes two mini-tours of her Herbetum during the day, so you have plenty of opportunity to ask her advice and pick up tips about growing herbs as well as taste some of the varieties used in a delicious selection of homemade cakes as well as herbal teas on offer in their tearoom.
Look out for the August issue of The Simple Things, featuring Jekka's herb garden planting plans.
Jekka McVicar’s Herbetum Open Days:
13, 25 & 26 July, 10am - 4pm
(13 July opens for the NGS and a £5 entry fee goes to the charity)
Find out more.
Words: Cinead McTernan
Photograph of Jekka McVicar: Jason Ingram
In gardening, Growing Tags event, garden, Growing herbs, herb garden, jekka mcvicar
Comment
  • Blog
  • Older
  • Newer
Featured
  Buy ,  download  or  subscribe   See the sample of our latest issue  here   Order  our new Celebrations Anthology   Buy a copy of  Flourish 3 , our wellbeing bookazine   Listen to  our podcast  – Small Ways to Live Well
Aug 29, 2025
Aug 29, 2025

Buy, download or subscribe

See the sample of our latest issue here

Order our new Celebrations Anthology

Buy a copy of Flourish 3, our wellbeing bookazine 

Listen to our podcast – Small Ways to Live Well

Aug 29, 2025
Join our Newsletter
Name
Email *

We respect your privacy and won't share your data.

email marketing by activecampaign
facebook-unauth twitter pinterest spotify instagram
  • Subscriber Login
  • Stockists
  • Advertise
  • Contact

The Simple Things is published by Iceberg Press

The Simple Things

Taking time to live well

We celebrate slowing down, enjoying what you have, making the most of where you live, enjoying the company of of friends and family, and feeding them well. We like to grow some of our own vegetables, visit local markets, rummage for vintage finds, and decorate our home with the plunder. We love being outdoors and enjoy the satisfaction that comes with a job well done.

facebook-unauth twitter pinterest spotify instagram