The Simple Things

Taking time to live well
  • Home
  • Subscribe
  • SHOP
  • Newsletter
  • About
  • Work with us
  • Home
  • Subscribe
  • SHOP
  • Newsletter
  • About
  • Work with us

Blog

Taking Time to Live Well

  • All
  • Chalkboard
  • Christmas
  • Competition
  • could do
  • Eating
  • Escape
  • Escaping
  • Fresh
  • Fun
  • gardening
  • Gathered
  • Gathering
  • Growing
  • Haikus
  • Interview
  • Living
  • Looking back
  • Magazine
  • magical creatures
  • Making
  • Miscellany
  • My Neighbourhood
  • Nature
  • Nest
  • Nesting
  • outing
  • playlist
  • Reader event
  • Reader offer
  • Shop
  • Sponsored post
  • Sunday Best
  • Think
  • Uncategorized
  • Wellbeing
  • Wisdom

How to | Win at Pottery Painting

David Parker April 12, 2025

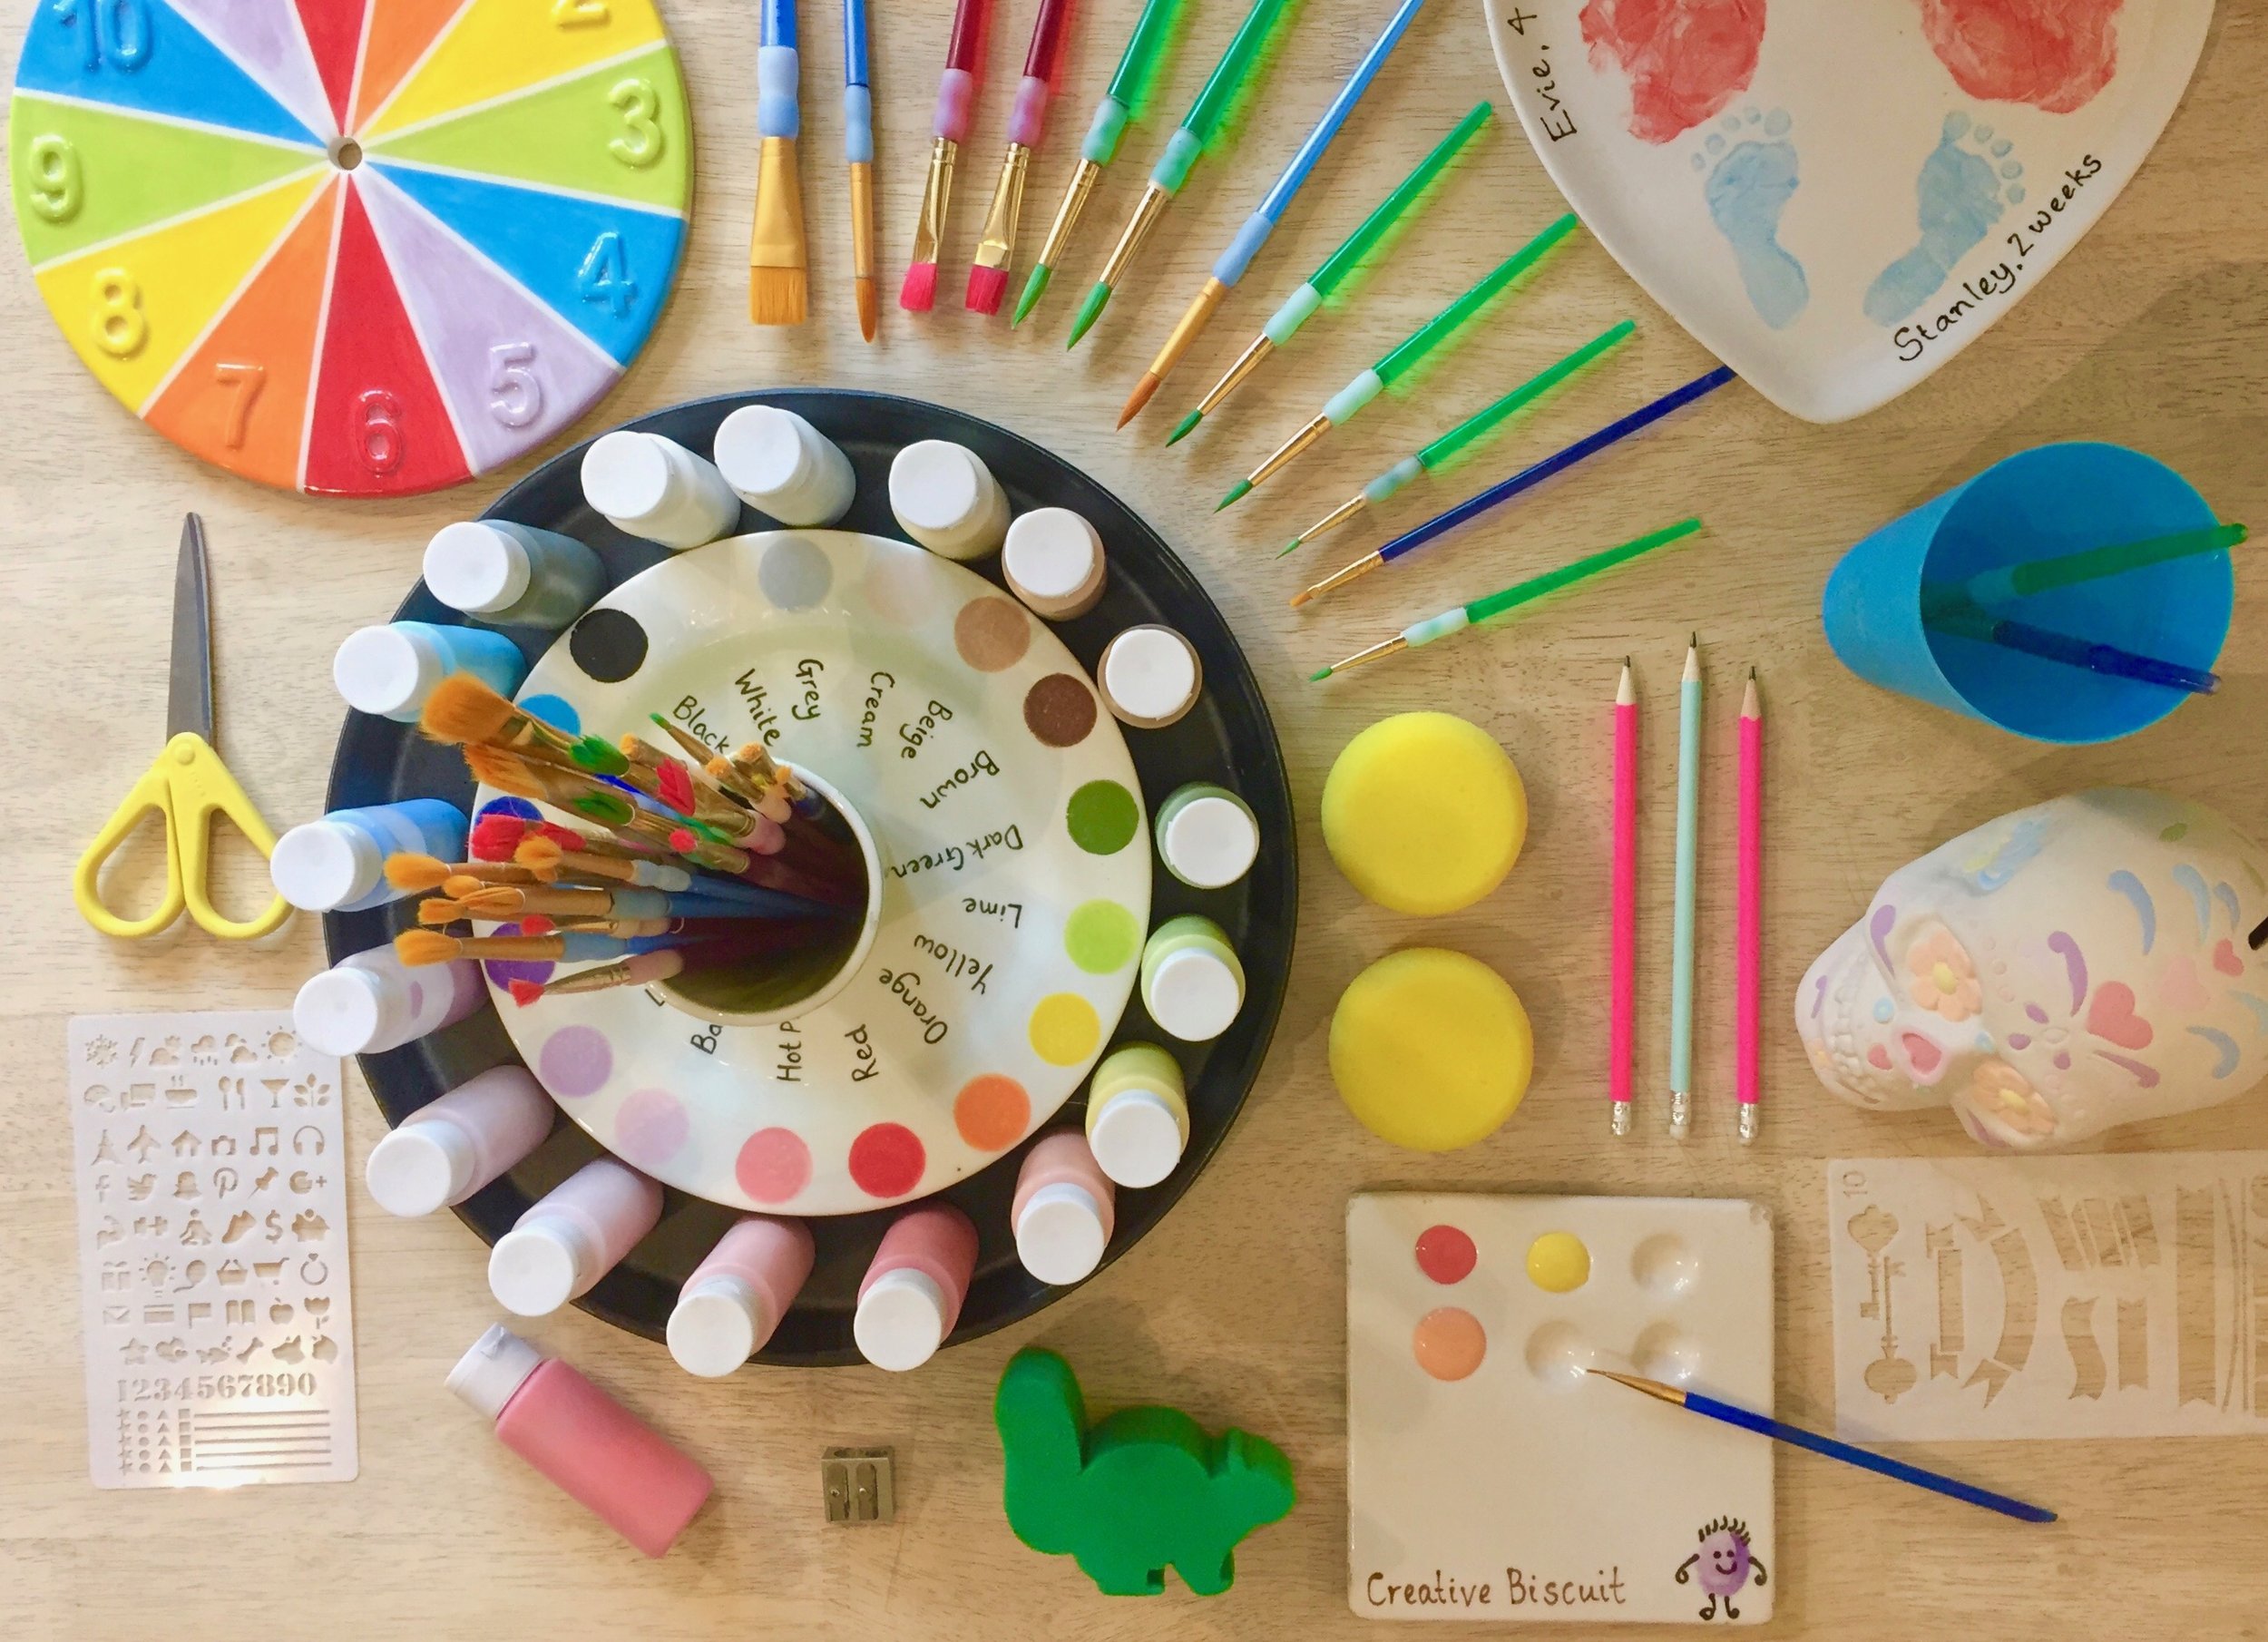
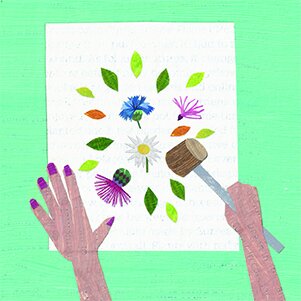
Whether you’re planning a quiet afternoon painting a mug or a get-together with a gang of friends painting plates over a few cuppas in your local pottery cafe, a blank canvas can be a bit overwhelming, especially if you’re no Van Gogh. We asked Karen Dunn, owner of ceramics cafe Creative Biscuit, for her best tips for no-fail designs - even if you struggle to draw a stick man

Patterns – If you don’t think you can draw go for patterns instead. Spots, stripes, a scalloped edge, simple shapes and patterns in bold colours always look great.

Sponges – Go full Emma Bridgewater and use shaped sponges to decorate your ceramics. As above you can use simple shapes such as circles or squares or use a shaped sponge such as a leaf or a heart. Dip the sponge in paint and make sure you fully soak up the paint to get an even print.

Tape – You can use masking tape or similar to create a pattern on ceramic, as wherever you place tape will remain white. Paint over the top and then using a pin to find the end of the tape, pull the tape off to reveal your white pattern underneath – plus the peeling is very satisfying.

Tracing – Copy a picture onto ceramic by taking your drawing or a print out of an image you would like to copy on paper and on the reverse side coat the back of the image with a soft pencil, covering the area in graphite. Next turn it over so the pencil is facing the ceramic and trace over the top of the picture with a ball point pen or similar to transfer the image to ceramic. Note: Pencil burns away in the kiln so make sure you paint everything you want to see when it comes out of the kiln.

Scratching – Like the pottery technique sgraffito, you can create scratched patterns in your underglaze paint. Make sure you put three good layers of paint on your ceramic then using a skewer or anything with a sharp tip to scratch out your pattern.

Bubble painting – A bubble pattern on ceramics looks impressive but is very easy to create. Get some washing up liquid, plus a little bit of water and a lot of the underglaze paint in the colour you wish to use and mix well. Get a straw and blow bubbles in the mixture. You can then either build up a mound of bubbles and wipe the ceramic through them or scoop bubbles with your hand and place them on the ceramic when you would like them to be.

Hand and footprints – Hand and footprints last forever when painted on ceramic and are really easy to do. Paint the hand or foot you want to print with a layer of paint – not too thick so it smudges and not too thin or you won’t see the print. Bring the ceramic to the hand or foot, then press on and off quickly. If you or your child is a bit too big for a hand or footprint, you can always do fingerprints and turn them into other things such as people or patterns.

You can find more inspiration at creativebiscuit.co.uk which is based in East London, and hear more from Karen in our My Day in Cups of Tea pages in our April issue, in shops now.

Buy this month's The Simple Things - buy, download or subscribe

More artistic inspiration…

Featured
Pottery Painting 2.jpeg
Apr 12, 2025
How to | Win at Pottery Painting
Apr 12, 2025
Apr 12, 2025
AliFoxon5.JPG
Apr 10, 2021
New hobby | Plein Air Sketching
Apr 10, 2021
Apr 10, 2021
Sketchbook Club Houses pic.JPG
Apr 10, 2020
Friday Sketchbook Club | Houses
Apr 10, 2020
Apr 10, 2020

More from our blog…

Featured
Water Boatman.jpg
May 24, 2025
Nature | Pond-Dipping for Grown-ups
May 24, 2025
May 24, 2025
RS2832_iStock-1278591330.jpg
May 23, 2025
Sponsored Post | Get your family active with Youth Sport Trust
May 23, 2025
May 23, 2025
Screenshot 2025-05-21 at 08.52.06.png
May 21, 2025
Playlist | Great Heights
May 21, 2025
May 21, 2025
In Fun Tags issue 154, painting, how to
Comment
AliFoxon5.JPG

New hobby | Plein Air Sketching

Iona Bower April 10, 2021

Make a walk an event by sitting down to sketch the landscape for a short while

There aren’t many things that don’t feel just a bit more ‘alive’ for being practised outdoors; eating alfresco is so much more than just supper, sleeping under the stars turns a daily fact of life into something magic… And art? Well, painting a landscape, live, out in the fresh air, is like the difference between watching a BBC schools TV film of Julius Caesar and being in the Globe watching the RSC perform it live. 

‘Plein Air’ painting, the act of painting a landscape like a sitting portrait, with the artist able to better capture the changing light, weather and atmosphere, began in the 1800s, pioneered by Constable, whose painting, Boatbuilding, Near Flatford Mill was conceived and painted entirely outdoors. The catalyst, lovely though the great outdoors is, was the rather more prosaic fact of tubes of oil paints suddenly becoming available. Paints had previously needed to be mixed from raw pigments which did not lend themselves to being thrown into a bag for an impromptu day’s painting out in the fields. A few tubes fitted nicely into your artist’s knapsack alongside a Thermos and a cheese sandwich. 

The Plein Air movement soon spread to the continent, its high point coming with Impressionist landscapes; think the likes of Monet, Renoir and Pissaro with their dappled light and soft, outdoorsy colours. 

Perhaps it’s the fresh air going to our heads, but we think we might just be inspired enough to give plein air a go ourselves now the weather’s warming up. How hard can a few water lilies be to paint anyway? If you fancy trying it too, here are a few tips to get you started.

  1. Put together a bit of a kit. You don’t need a full-on pochade box, though. In fact, it’s best if you travel fairly light. Just a modest art kit (more on that below), something to keep warm if you’re sitting still for long periods, a hat if it’s sunny (or chilly), and we recommend a flask of tea and a generous slice of cake. Art is not fuelled on inspiration alone, you know. 

  2. If you’re painting you just need something to paint on (paper, card, a sketchbook or canvas), a couple of brushes of different sizes, something to put water in and a cloth to wipe your brushes. Watercolours travel more easily than oils but don’t be put off oils or gouache if that’s what you prefer. You don’t need to take them all either; just consider your location, and pick out a few tubes of paint to match the colouring of the scenery.  Plein Air fans often say they prefer to use ‘found’ water for rinsing brushes than taking their own. There’s definitely something charming about using water taken from the sea to paint your beach scene, or even just asking the cafe that features in your scene for a glass of water to paint with.

  3. Of course, sketching with coloured pencils or charcoals is lots of fun, too. We think if Monet had had the wealth of colours offered in a Faber Castell kit, he’d have given it a go, too. 

  4. Choose a location that inspires you. It doesn’t have to be a pastoral idyll; just somewhere that ‘speaks’ to you. It also needs to be somewhere you can easily sit undisturbed (so if the roundabout at Elephant and Castle speaks to you maybe think again). You also need somewhere comfy enough to sit, whether that’s a grassy hillock or a camping chair on a street corner. 

  5. Take a photo of the scene you’re painting just for reference later on. It’s very satisfying once you start to get a little bit good.

  6. Before you start, do a quick sketch of the scene you want to recreate; what plein air artists call a ‘thumbnail sketch’. It just gives you an idea of composition and what’s going where. Try to pick just one or two elements to focus on in the picture.

  7. Once you’re painting or drawing, your watchword is ‘speed’. That might seem to go against the whole ethos of the thing, but you’ll be surprised how quickly the light changes. If painting, use a broad brush and just block in colour. You can add more detail and colour on top later, but you need to get the basics in first so the light doesn’t change the colours and where shadows fall too much while you’re working. 

  8. Be prepared to chat to passers by and show off your work (or adopt the look of a serious artist who must not be disturbed by trivialities and wear obvious headphones). 

The photograph above is by Dr Ali Foxon, who we spoke to in our April issue for our ‘Walking with Purpose’ feature. Ali runs boggydoodles.com which organises green sketching events for groups. Turn to page 44 to meet Ali and more people who have added ‘purpose’ to their walks in different ways. 

Buy this month's The Simple Things - buy, download or subscribe


More from our April issue…

Featured
@Kemitelford pockets.JPG
Apr 18, 2021
Quiz | What's in my pocket?
Apr 18, 2021
Apr 18, 2021
Alamy (mention subs ad).jpg
Apr 17, 2021
Music appreciation | The Flight of the Bumblebee
Apr 17, 2021
Apr 17, 2021
Courtesy of Mills and Boon.jpg
Apr 11, 2021
Why we love | ridiculous romantic novel titles
Apr 11, 2021
Apr 11, 2021

More artistic inspiration…

Featured
Pottery Painting 2.jpeg
Apr 12, 2025
How to | Win at Pottery Painting
Apr 12, 2025
Apr 12, 2025
AliFoxon5.JPG
Apr 10, 2021
New hobby | Plein Air Sketching
Apr 10, 2021
Apr 10, 2021
Sketchbook Club Houses pic.JPG
Apr 10, 2020
Friday Sketchbook Club | Houses
Apr 10, 2020
Apr 10, 2020
In Escape Tags issue 106, outdoor adventures, painting, sketching, drawing
Comment
Illustration: Jennie Maizels

Illustration: Jennie Maizels

Friday Sketchbook Club | Houses

Iona Bower April 10, 2020

Join us in drawing these quirky houses in today’s Friday Sketchbook Club

Welcome back to Friday Sketchbook Club. We’ve teamed up with illustrator Jennie Maizels to bring you a sketchbook project to do every Friday for the next few weeks. We hope you enjoy them. Today we’re drawing rows of houses. 

Jennie started her Sketchbook Club because she believes that anyone can draw. Her principle is that if we treat Art like any other creative pastime and follow simple instructions, just like a recipe, we would all be drawing as much as we are baking, sewing and knitting. Each project comes with instructions, a ‘How to’ video, reference material and often, templates which you can ‘transfer’. They have been carefully designed to suit all ages and abilities.

 A note on materials: Originally designed to introduce a plethora of different paints, collage and methods. All modules can be altered to use what you have available - just substitute as you like or need.

Ready to draw houses? Then we’ll begin. You can watch the Houses video tutorial first if you like and find the instructions and house ‘references’ here or just follow the instructions below, using the pictures above as inspiration,

You will need

An HB pencil
Rubber
A small and a large paintbrush (Jennie used size 6 and size 2)Fineliner (thin one)
Scissors
Glue
Old book
Blue, white and yellow acrylic paints

How to draw your houses

  1. First of all, have a really good look at the houses for reference in the link above (you might also like to look at the hashtag #SketchbookClubHouses on Instagram for further inspiration).
    2. Next, following the reference pictures,start to draw your houses along the bottom of your page. Use a size one or two black fineliner and draw in as much detail as you can, like roof tiles and windows etc.
    3.Next, start to paint the background colour. Do this by mixing a lovely aqua blue acrylic, Jennie made her colour by mixing a mid-blue with a tiny dot of yellow and some white.
    4.While the background paint is drying, start to draw little clouds on an old unwanted book page (or newspaper if you can’t bear to cut up an old book!).Cut the clouds out carefully and once the paint is dry, stick them onto the background sky using a glue-stick. You might like to tear tiny strips out and stick down to make tiny plumes of chimney smoke, too

There are many more modules available on Jennie’s website, Sketchbook Club (only £4 each.), where you can also buy art kits and supplies. For more inspiration, you can follow Jennie on Instagram @jenniemaizels or visit the website jenniemaizels.com. Look out for another Friday Sketchbook Club project with Jennie here next week.

Buy this month's The Simple Things - buy, download or subscribe

From our April issue…

Featured
Picnic Pie Catherine Frawley.JPG
Apr 18, 2020
Recipe | a picnic pie for the garden
Apr 18, 2020
Apr 18, 2020
Ellen's cookbook Kirstie Young.jpg
Apr 15, 2020
Make | a hand-me-down recipe book
Apr 15, 2020
Apr 15, 2020
Newts Zuza Misko.JPG
Apr 7, 2020
Romantic introverts | the newt
Apr 7, 2020
Apr 7, 2020

More fun with paint…

Featured
Folk enamel tumbler.jpg
Aug 5, 2023
Make | Folk art enamelware
Aug 5, 2023
Aug 5, 2023
SIM68.TRYITOUT_Annie Sloan her very self.png
Feb 7, 2018
Life Skills | Furniture painting
Feb 7, 2018
Feb 7, 2018
Jul 27, 2017
Mindfulness | Colour therapy
Jul 27, 2017
Jul 27, 2017
In Making Tags sketchbook club, sketching, drawing, painting
Comment
Illustration: Jennie Maizels

Illustration: Jennie Maizels

Friday Sketchbook Club | Spring Banner

Iona Bower April 3, 2020

Welcome to Friday Art Club! We’ve teamed up with illustrator Jennie Maizels to bring you a sketchbook project to do every Friday for the next few weeks. We hope you enjoy them.

Jennie started Sketchbook Club because she believes that ANYONE can draw. So whether drawing is a long-lost love of yours or you haven’t picked up a colouring pencil since school, do have a go. Jennie’s principle is that if we treat Art like any other creative pastime and follow simple instructions, just like a recipe, we would all be drawing as much as we are baking, sewing and knitting.

Each module comes with instructions, a ‘How to’ video, reference material and often, templates which you can ‘transfer’. They have been carefully designed to suit all ages and abilities. Young children, grandparents and whole families or groups of friends are all drawing and painting together as a result of Sketchbook Club.
 
A note on materials: Originally designed to introduce a plethora of different paints, collage and methods. All modules can be altered to use what you have available - Just substitute as you like / need.

Let’s get started! You can watch the Spring Banner video tutorial and use Jennie’s references to copy or trace. There are flowers and wreaths references, rabbits and birds references and references to trace and copy for the lettering all here. Just click to download and print.
 

You will need (if you have them):

HB pencil
Rubber
Size 1 and size 6 paintbrushes
Watercolour paints
Coloured pencils
White gouache paint (optional)

How to create your Spring Banner picture

  1. Start by transferring your chosen lettering to your Sketchbook by drawing over the whole of the reversed text image with a firm HB pencil.Turn the paper over and position the text on your page and scribble over the back with a lead pencil firmly, making sure it doesn’t move around too much.

  2. Now, using watercolours, start to add colour. You can always add shading, shadows or decorations with coloured pencils later.

  3. Once your lettering is complete you can start to draw in your decorative surround. Firstly, transfer any rabbits and birds using the method above, then if you are nervous going straight to paint, lightly draw in all your squirls and stem positions. To make it symmetrical, transfer a rabbit or a bird on one side then repeat on the other. Do this with the flowers and leaves too.

  4. Once you are happy with the decorative surround and the birds and rabbits, start to add some lovely colour. If you are brave enough, leaves do look better if painted straight on with watercolours. You may also want to add another layer of watercolours for the flowers so they cover the leaves and maybe some further details on the leaves and birds too?

  5. You might also like to add a few white highlights using gouache paint. Do this using little swipes of your size-one brush on the lettering, petals and leaves.

  6. Finally, if you would like, add some coloured pencil details. Jennie added all the shading, ears and whiskers etc. on the rabbits and feather details on the birds and some darker sections of leaves and flowers, too. Jennie also added shadows to the lettering and the tiny words as well.

There are many more modules available on Jennie’s website, Sketchbook Club (only £4 each.), where you can also buy art kits and supplies. For more inspiration, you can follow Jennie on Instagram @jenniemaizels or visit the website jenniemaizels.com. Look out for another Friday Sketchbook Club project with Jennie here next week.

Buy this month's The Simple Things - buy, download or subscribe

From our April issue…

Featured
Picnic Pie Catherine Frawley.JPG
Apr 18, 2020
Recipe | a picnic pie for the garden
Apr 18, 2020
Apr 18, 2020
Ellen's cookbook Kirstie Young.jpg
Apr 15, 2020
Make | a hand-me-down recipe book
Apr 15, 2020
Apr 15, 2020
Newts Zuza Misko.JPG
Apr 7, 2020
Romantic introverts | the newt
Apr 7, 2020
Apr 7, 2020

More art for art’s sake…

Featured
poundedflowerart.jpg
Jul 3, 2022
Make | Pounded Flower Art
Jul 3, 2022
Jul 3, 2022
Kelpies statue Alamy.jpg
Nov 2, 2021
Visit | Giant Statues
Nov 2, 2021
Nov 2, 2021
sketchbook club botanicals.JPG
Apr 24, 2020
Friday Sketchbook Club | Botanicals
Apr 24, 2020
Apr 24, 2020
In Fun Tags sketchbook club, spring, art, painting, drawing
Comment
SIM68.TRYITOUT_Annie Sloan her very self.png

Life Skills | Furniture painting

Lottie Storey February 7, 2018

Spend a day learning a new skill. Mindful and mind full (in a good way). Clare Gogerty joins an Annie Sloan workshop in Oxford

If you've ever attempted to paint a piece of furniture only to be disheartened by the laborious process of sanding, painting and waxing, the day you discover Annie Sloan Chalk Paint is a day of wonder. Developed nearly 30 years ago, it brushes onto surfaces including wood, leather, concrete and leather, with no need to sand or prime. Suddenly that tired old bedside table can be revitalised with just a coat of paint and a layer of wax.

You can develop your skills at an Annie Sloan workshop. I attended one run by Annie at her Oxford HQ, but her stockists in independent shops nationwide are all trained in her techniques and run their own. The morning was spent painting a wooden box with a neutral colour (Old White, in my case), letting it dry, then painting a thin coat of another colour on top (Paloma, a soft grey) and scrunching it off with newspaper. This process, known as frottage,
creates a two-tone marbled effect similar to rag rolling, and can be used on any surface, not just wood.

Colour theory was tackled in the afternoon, with Annie encouraging us to think of colours “like ingredients used in cooking”. She urged us to be brave with colour in our homes and, using her palette of 37 Chalk Paints, fabric swatches and an outline sketch of a room set, we created schemes for a living room and a kitchen/dining area. By the time I got home, no piece of furniture was safe from my brush.

To find your nearest Annie Sloan stockist and your nearest workshop, which also includes gilding and waxing, visit anniesloan.com.


  Buy ,  download  or  subscribe   See the sample of our latest issue  here   Buy a copy of our latest anthology:  A Year of Celebrations   Buy a copy of  Flourish 2 , our wellbeing bookazine  Listen to  our podcast  - Small Ways to Live Well

Get hold of your copy of this month's The Simple Things - buy, download or subscribe

View the sampler here


More home ideas:

Featured
@homeinthehemlocks front door.jpg
Oct 1, 2024
Rituals | Closing the Front Door
Oct 1, 2024
Oct 1, 2024
My Neighbourhood Island.jpg
Sep 17, 2024
10 Reasons | To Live on an Island
Sep 17, 2024
Sep 17, 2024
All purpose cleaner and wipes.jpg
Feb 18, 2023
Make | Homemade Cleaning Wonders
Feb 18, 2023
Feb 18, 2023

More from the February issue:

Featured
SIM68.JOURNAL_113_WordJar_JournalSparks.png
Feb 27, 2018
Journal sparks | Word Jar
Feb 27, 2018
Feb 27, 2018
SIM68.EVENTS_Unknown-1.jpeg.png
Feb 26, 2018
The faces of Fairtrade
Feb 26, 2018
Feb 26, 2018
SIM68.png
Feb 25, 2018
Nest | Cacti
Feb 25, 2018
Feb 25, 2018
In Nest Tags february, issue 68, painting, paint, furniture, vintage furniture, life skills
Comment

Winter activities: A Welsh beachcombing adventure...

thesimplethings January 27, 2013

Our Blowy Walks on Winter Beaches feature in Issue 6 gives you lots of ideas about what to look for by the surf, even in the coldest weather – take a sneaky peek at it here, and enjoy this special photo story from our friend Lizzie Spikes...

Read More
In Escaping Tags painting, printmaking, recycling, sea, travel, wales, winter
1 Comment

Art from the sea: a Q&A with Lizzie of Driftwood Designs...

thesimplethings January 26, 2013

The art of Lizzie Spikes is inspired by the coast near her home in Ceredigion, Wales and uses the flotsam and jetsam that the sea rejects – you can almost smell the tang of the sand-filled air!

Read More
In Making Tags beaches, painting, recycling, sea, travel, wales
Comment
Featured
  Buy ,  download  or  subscribe   See the sample of our latest issue  here   Buy a copy of our latest anthology:  A Year of Celebrations   Buy a copy of  Flourish 2 , our wellbeing bookazine  Listen to  our podcast  - Small Ways to Live Well
Feb 27, 2025
Feb 27, 2025

Buy, download or subscribe

See the sample of our latest issue here

Buy a copy of our latest anthology: A Year of Celebrations

Buy a copy of Flourish 2, our wellbeing bookazine

Listen to our podcast - Small Ways to Live Well

Feb 27, 2025
Join our Newsletter
Name
Email *

We respect your privacy and won't share your data.

email marketing by activecampaign
facebook-unauth twitter pinterest spotify instagram
  • Subscriber Login
  • Stockists
  • Advertise
  • Contact

The Simple Things is published by Iceberg Press

The Simple Things

Taking time to live well

We celebrate slowing down, enjoying what you have, making the most of where you live, enjoying the company of of friends and family, and feeding them well. We like to grow some of our own vegetables, visit local markets, rummage for vintage finds, and decorate our home with the plunder. We love being outdoors and enjoy the satisfaction that comes with a job well done.

facebook-unauth twitter pinterest spotify instagram