The Simple Things

Taking time to live well
  • Home
  • Subscribe
  • SHOP
  • Newsletter
  • About
  • Work with us
  • Home
  • Subscribe
  • SHOP
  • Newsletter
  • About
  • Work with us

Blog

Taking Time to Live Well

  • All
  • Chalkboard
  • Christmas
  • Competition
  • could do
  • Eating
  • Escape
  • Escaping
  • Fresh
  • Fun
  • gardening
  • Gathered
  • Gathering
  • Growing
  • Haikus
  • Interview
  • Living
  • Looking back
  • Magazine
  • magical creatures
  • Making
  • Miscellany
  • My Neighbourhood
  • Nature
  • Nest
  • Nesting
  • outing
  • playlist
  • Reader event
  • Reader offer
  • Shop
  • Sponsored post
  • Sunday Best
  • Think
  • Uncategorized
  • Wellbeing
  • Wisdom

Make | A Macrame Dog Lead

Iona Bower September 18, 2024

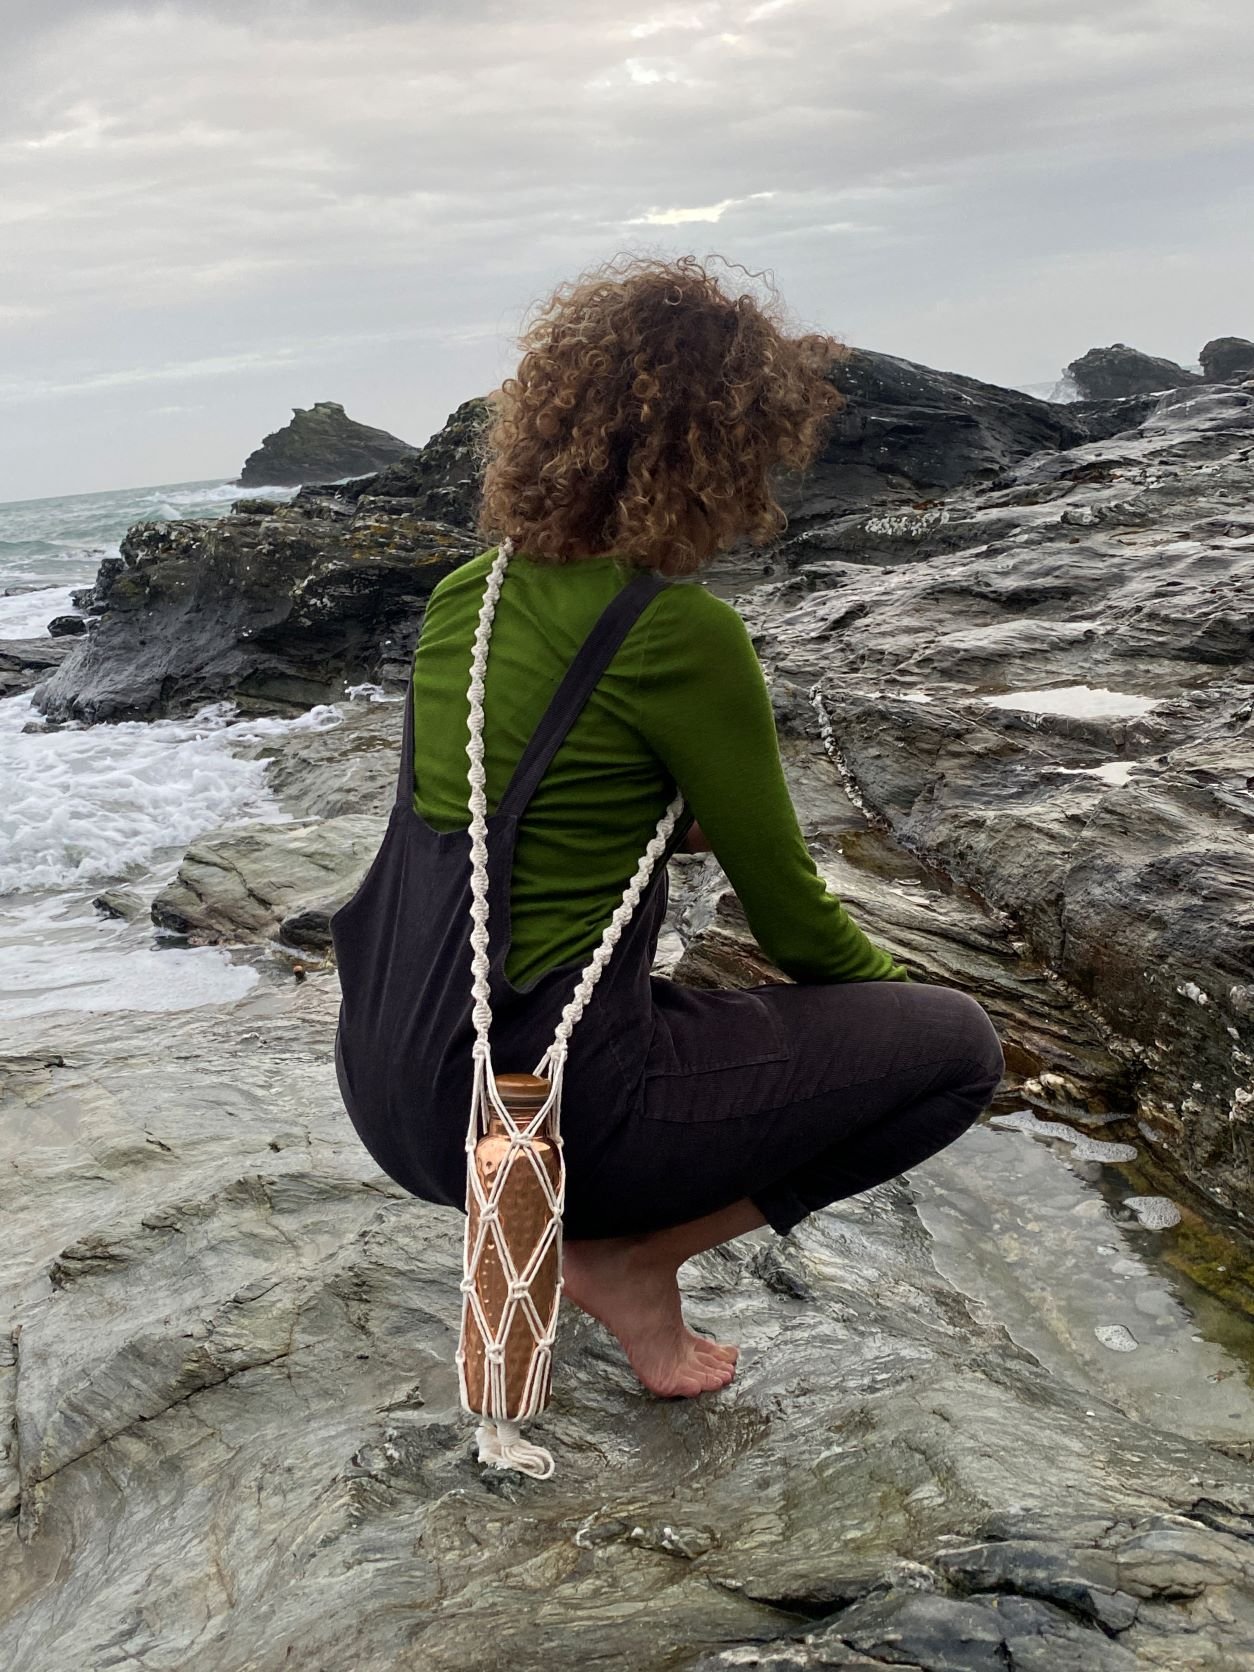
Give your pup some extra flair while keeping them safe and secure on walks. If you’re looking for a project where you can comfortably sit while working, this is a great one to tackle.  


You will need: 

14.6m of 5mm braided cotton cord in off-white/natural color 

13.4m of 5mm braided cotton cord in color of your choice  

Swivel snap hook (approximately 70mm long) – we got ours from trimmingshop.co.uk 

Clipboard 

Measuring tape 

Scissors 


Cut List: 

1 x 13.4m long, of 5mm braided cotton cord in Mustard Yellow (or color of your choice) 

1 x 13.4m long, of 5mm braided cotton cord in off-white/natural color 

1 x 122cm long, of 5mm braided cotton cord in off-white/natural color 


1 Attach the snap hook to a clip board. Take the 13.4m piece of colored cord and use the Bundling Cord technique to bundle up one end until there is about 3m of cord remaining. Measure 2.4m from the remaining end, and fold the cord in half at that point. Create a Reverse Lark’s Head Knot around your snap hook, ensuring that the bundled end is on the outside of your snap hook and the 2.4m end is on the inside. 

2 Repeat step 1 with the 13.4m length of off-white cord. Make sure that when attaching to the snap hook, the shorter ends of both pieces of cord are in the center. These two cords will be our filler cords for the entire project. 

3 Take the left cord and create a loose “4” shape over the second cord. Wrap it behind that cord, and pull the bundle through the loop created. Tighten this knot so it sits right below the Reverse Lark’s Head Knots created in steps 1 and 2. 

4 Repeat by creating a loose “4” shape again with that same cord, but this time cross it over both center cords, wrap it behind these two center cords and pull the bundle through the loop created. Tighten to the knot above. 

5 Repeat steps 3 and 4, but this time create a loose backward “4” shape with your farthest right cord. Take the right cord and cross it over the cord closest to it. Wrap it behind that cord, pull the bundle through the loop created and tighten. Do the same with both center cords just as you did on the left. 

6 Continue this pattern by alternating the left cord and the right cord as your working cords all the way down for 1.5m. Adjust the lead on your clipboard as necessary. Pull cord from each bundle as needed so you have a comfortable amount of cord to work with. 

7 Once this first section of knots measures at 1.5m in length, it is time to create the handle of your leash. Measure 5cm down from your last knot and create a Square Knot using the same working cords. From there, continue making Square Knots until this section of Square Knots measures 38cm in length. 

8 Remove the leash from the clipboard and fold this section of Square Knots in half. You will see the handle start to form. 

9 Take the two filler cords and feed them through the center of the 5cm opening you created. 

10 Using your working cords, create Square Knots around all six cords until you hit the section of knots below. 

11 Take the 122cm three-strand off-white piece of cord and tie a Gathering Knot around this most recent section of Square Knots. 

12 Make sure this knot is nice and tight! Once you feel it is secure, cut off all the ends as close to the Gathering Knot as possible. You can also use the tip of your scissors to help push any excess ends into your Gathering Knot for a cleaner look. 

 You can find more instructions on how to create all these knots in our October issue, where you can also find instructions on how to make a macrame plant pot holder.

Taken from The Complete Beginner’s Guide To Macramé by Alisha Ing (Page Street Publishing)

More from our blog…

Featured
Warbler.jpeg
May 13, 2025
Nature | Why Birds Sing at Dawn
May 13, 2025
May 13, 2025
Broad beans.jpeg
May 10, 2025
Recipe | Spring Beans on Toast
May 10, 2025
May 10, 2025
saad-chaudhry-7vyTHevoeJM-unsplash.jpeg
May 8, 2025
Sponsored Post | Holidays with Peace of Mind
May 8, 2025
May 8, 2025

More things to make…

Featured
Dip Dye Candles.jpg
Oct 27, 2024
Make | Dip Dye Candles
Oct 27, 2024
Oct 27, 2024
LaylasLeash.jpg
Sep 18, 2024
Make | A Macrame Dog Lead
Sep 18, 2024
Sep 18, 2024
EGGShell-tealights-the-simple-things.png
Apr 10, 2023
Eggshell tea lights
Apr 10, 2023
Apr 10, 2023
In Making Tags macrame, craft
Comment

Make | A Macrame Bottle Holder

Iona Bower March 16, 2022

Knot your way to a knotty, natty carrier for your water bottle, leaving you hands free… perhaps to do some more macrame?

All you need to make this cross-body bottle carrier is to master a few simple knots, and you’re away. Everything you need to know, including the knot techniques are in our instructions and all the equipment you need is the rope, some tape and a little patience. Put aside an afternoon on a long weekend to create your bottle holder, or maybe make it your project for April and do a little every day.

If you’re not too TIED UP (sorry) this month, you might also like to make the macrame bag that’s featured in our April issue. Turn to page 106 to find the instructions.

Download the instructions for the macrame water bottle here.


More weekend projects…

Featured
LemongrassChickenRedCurryCoconutSauce.jpg
Aug 23, 2023
Recipe | Tandoor Lemon Chicken with Mango & Coriander Salad
Aug 23, 2023
Aug 23, 2023
Folk enamel tumbler.jpg
Aug 5, 2023
Make | Folk art enamelware
Aug 5, 2023
Aug 5, 2023
Lavender eye pillow.jpg
Jul 22, 2023
Make | A Soothing Lavender Eye Pillow
Jul 22, 2023
Jul 22, 2023

More from our blog…

Featured
Warbler.jpeg
May 13, 2025
Nature | Why Birds Sing at Dawn
May 13, 2025
May 13, 2025
Broad beans.jpeg
May 10, 2025
Recipe | Spring Beans on Toast
May 10, 2025
May 10, 2025
saad-chaudhry-7vyTHevoeJM-unsplash.jpeg
May 8, 2025
Sponsored Post | Holidays with Peace of Mind
May 8, 2025
May 8, 2025
In Making Tags issue 118, macrame, weekend project, make, makes, craft
Comment
Featured
  Buy ,  download  or  subscribe   See the sample of our latest issue  here   Buy a copy of our latest anthology:  A Year of Celebrations   Buy a copy of  Flourish 2 , our wellbeing bookazine  Listen to  our podcast  - Small Ways to Live Well
Feb 27, 2025
Feb 27, 2025

Buy, download or subscribe

See the sample of our latest issue here

Buy a copy of our latest anthology: A Year of Celebrations

Buy a copy of Flourish 2, our wellbeing bookazine

Listen to our podcast - Small Ways to Live Well

Feb 27, 2025
Join our Newsletter
Name
Email *

We respect your privacy and won't share your data.

email marketing by activecampaign
facebook-unauth twitter pinterest spotify instagram
  • Subscriber Login
  • Stockists
  • Advertise
  • Contact

The Simple Things is published by Iceberg Press

The Simple Things

Taking time to live well

We celebrate slowing down, enjoying what you have, making the most of where you live, enjoying the company of of friends and family, and feeding them well. We like to grow some of our own vegetables, visit local markets, rummage for vintage finds, and decorate our home with the plunder. We love being outdoors and enjoy the satisfaction that comes with a job well done.

facebook-unauth twitter pinterest spotify instagram