The Simple Things

Taking time to live well
  • Home
  • Subscribe
  • SHOP
  • Newsletter
  • About
  • Work with us
  • Home
  • Subscribe
  • SHOP
  • Newsletter
  • About
  • Work with us

Blog

Taking Time to Live Well

  • All
  • Chalkboard
  • Christmas
  • Competition
  • could do
  • Eating
  • Escape
  • Escaping
  • Fresh
  • Fun
  • gardening
  • Gathered
  • Gathering
  • Growing
  • Haikus
  • Interview
  • Living
  • Looking back
  • Magazine
  • magical creatures
  • Making
  • Miscellany
  • My Neighbourhood
  • Nature
  • Nest
  • Nesting
  • outing
  • playlist
  • Reader event
  • Reader offer
  • Shop
  • Sponsored post
  • Sunday Best
  • Think
  • Uncategorized
  • Wellbeing
  • Wisdom

Recipe: Easter rabbit biscuits

David Parker April 7, 2023

Studded with juicy currants and scattered with caster sugar, these biscuits would make an alternative sweet treat when chocolate eggs are beginning to cloy. Who says you can’t eat the Easter bunny?

MAKES 14
120g unsalted butter, softened
80g golden caster sugar, plus more to sprinkle
1 egg, separated
200g plain flour, plus more to dust
1 tsp ground cinnamon
1⁄2 tsp mixed spice
Pinch of salt
80g currants
1 tbsp whole milk 

TOOLS
10cm rabbit cutter, or other shape

1 Line two baking trays with baking parchment. Using a food mixer or a large bowl with hand-held electric whisk or wooden spoon, cream the butter and sugar together and beat in the egg yolk. Sift in the flour, spices and salt. Stir in the currants and milk to make a pliable dough. Do not over-mix, or the biscuits will become tough. Wrap in cling film and chill for 30 mins.Preheat the oven to 190C/Fan 170/375F.
2 Lightly flour a work top and a rolling pin and roll the dough out to 5-6mm thick. Cut biscuits out quite close together. You need to press down hard to cut through the currants! Re-roll the dough and cut out the
biscuits until all the dough is used. (At this point, you can freeze the cut-out biscuits.) Place on the baking trays and bake in the preheated oven for about 10 mins.
3 Remove from the oven, brush each biscuit with a little ofthe egg white and sprinkle with caster sugar. Return to the oven for 5–7 mins, until golden. If you’ve used a smaller cutter, bear in mind that the baking time will be slightly less than for these 10cm-long rabbits,
so keep an eye on them.
4 Leave on the tray for a few mins to harden a bit, then carefully remove to cool on a wire rack. These will keep well in an airtight container for a few days.

Recipe taken from Seasonal Baking by Fiona Cairns (Weidenfeld & Nicholson, £17). This recipe was originally published in The Simple Things for Easter 2015.

Get hold of your copy of this month's The Simple Things - buy, download or subscribe

More from the April issue…

Featured
Nature Table.jpg
Apr 22, 2023
April | Nature Table
Apr 22, 2023
Apr 22, 2023
Hedgehog pic.jpg
Apr 18, 2023
Nature | Surprising Things About Hedgehogs
Apr 18, 2023
Apr 18, 2023
Radish Slammers.jpg
Apr 15, 2023
Idea | Radish Slammers
Apr 15, 2023
Apr 15, 2023

More Easter inspiration…

Featured
EGGShell-tealights-the-simple-things.png
Apr 10, 2023
Eggshell tea lights
Apr 10, 2023
Apr 10, 2023
Apr 17, 2022
Recipe: Chocolate truffles
Apr 17, 2022
Apr 17, 2022
Apr 2, 2021
Recipe: Hot Cross Bun Cakes
Apr 2, 2021
Apr 2, 2021
In Eating, Fresh Tags baking, issue 34, april, recipe
Comment

Recipe: Chocolate truffles

David Parker April 17, 2022

Make somebody’s Easter with a box of handmade dark chocolate and vanilla truffles. No hidden ingredients or mysterious methods in this simple but delicious recipe.

Chocolate truffles

Makes about 20 truffles

For the ganache:
125ml fresh double cream
2 whole vanilla pods
250g dark chocolate, finely chopped

For the shell:
200g dark chocolate, roughly chopped
200g dark chocolate, grated 50g unsweetened cocoa powder

1. Place the cream in a heavy- based pan and bring to a simmer. Meanwhile, run a very sharp knife along the vanilla pods to open one side, add them to the cream and continue to simmer for 5 mins.
2. Take the pan off the heat and remove the pods. Using your thumbnail, gently push out the seeds from the pods into the cream. Cover with a cloth for a further 5 mins.
3. Put the chocolate in a bowl, pour over the still-hot cream and stir until fully blended. This is your vanilla ganache. Put in the fridge. 
4. Next, prepare the shell. The tempering process is tricky for beginners, so this is our easy version. It takes about 10 mins; time it so the ganache has had 30 mins in the fridge by the time the tempering is complete.
5. Melt two-thirds of the roughly- chopped chocolate and leave for 5 mins. Now add the remaining pieces and stir with a spatula until they are smooth and melted. Test by putting a spot on your lip - when it feels neither hot nor cold it is ready for coating the ganache balls.
6. Remove ganache from fridge and scoop out small amounts for hand-rolling into balls. Do this quickly so it doesn’t soften too much in your hands. Use a fork to dip them into the shell chocolate and then roll in the chocolate gratings, or leave them to harden at room temperature and roll in cocoa powder.
7. Leave the balls to set.

This was first puclished in our April 2015 issue. The recipe is from Montezuma’s Chocolate Cookbook by Simon and Helen Pattinson
(Kyle Books, £16.99.) 

Buy this month's The Simple Things - buy, download or subscribe

From our April issue…

Featured
Stocksy Words for Rain.jpg
Apr 18, 2022
Rain | The real Dr Foster
Apr 18, 2022
Apr 18, 2022
Tree surgeon - wisdom.jpeg
Apr 16, 2022
How to | Get a Head for Heights
Apr 16, 2022
Apr 16, 2022
SIM119playlist.4ib.jpg
Apr 13, 2022
Playlist | Sing aloud songs
Apr 13, 2022
Apr 13, 2022

More things to make for Easter…

Featured
Easter Cakes.jpg
Apr 19, 2025
Recipe | Gugelhupf (Austrian Easter Cakes)
Apr 19, 2025
Apr 19, 2025
TST154_KitchTherapy_Dyed Eggs - Simple Things - Kitchen Therapy April - Kym Grimshaw -5.jpeg
Apr 17, 2025
Make | Naturally Dyed Eggs
Apr 17, 2025
Apr 17, 2025
Osterbaum.jpg
Mar 30, 2024
Traditions | Osterbaums
Mar 30, 2024
Mar 30, 2024
In Eating Tags easter, baking, reipe, chocolate, issue 34, april
Comment

Recipe: Mothering buns

David Parker March 27, 2022

Sweet and sticky buns to make for Mother’s Day… or just because

A speciality of Bristol, these are made by local bakers the day before Mothering Sunday. Traditionally, on this day only, the Lent fast was relaxed. The buns used to be decorated with caraway or aniseed; today, hundreds and thousands are used.

MAKES 12
FOR THE BUNS
500g strong white bread flour 
1 tsp salt
50g caster sugar
7g sachet instant yeast
50g unsalted butter, diced and softened
300ml water

FOR THE ICING 
200g icing sugar 
2–3 tbsp water


1. Put the flour in a large bowl. Add the salt and sugar on one side, the yeast on the other. Add the butter and three-quarters of the water, then turn the mixture round with the fingers of one hand. Add the remaining water a little at a time, mixing until you have taken in all the flour and the dough is soft and slightly sticky; you might not need all the water.
2. Oil the work surface to stop the dough sticking. Turn out the dough and knead for 5 mins, or until smooth and no longer sticky. Lightly oil the bowl, return the dough to it and cover with cling film. Leave to rise for at least an hour, until doubled in size. Line 2 baking trays
with baking parchment.
3. Scrape the dough out of the bowl onto a lightly floured surface and fold it inwards repeatedly until all the air has been
knocked out and the dough is smooth. Divide into 12 pieces.
4. Roll each piece into a ball by placing it into a cage formed by your hand on the work surface and moving your hand in a circular motion, rotating the ball rapidly. 
5. Put the balls of dough on the prepared baking trays, spacing them slightly apart. (They should just touch each other when they have risen.) Place each tray in a clean plastic bag and leave to prove for about 40 mins, until the rolls have doubled in size. Heat the oven to 220C/Fan 200/425F.
6. Bake for 10–12 mins, until the rolls are golden and sound hollow when tapped underneath. Transfer to a wire rack to cool. 
7. For the icing, mix the icing sugar with enough water to give a thick but pourable consistency. Dip each roll into the icing and then into the hundreds and thousands.


Recipe taken from Paul Hollywood’s British Baking, Photography Peter Cassidy (Bloomsbury, £8)


Mothering Sunday is on 27 March in the UK. It has been celebrated on the fourth Sunday of Lent since the 16th century. This recipe was first published in our March 2015 issue but we don’t think you can make them enough, really.

Buy this month's The Simple Things - buy, download or subscribe

More from our April issue…

Featured
Stocksy Words for Rain.jpg
Apr 18, 2022
Rain | The real Dr Foster
Apr 18, 2022
Apr 18, 2022
Tree surgeon - wisdom.jpeg
Apr 16, 2022
How to | Get a Head for Heights
Apr 16, 2022
Apr 16, 2022
SIM119playlist.4ib.jpg
Apr 13, 2022
Playlist | Sing aloud songs
Apr 13, 2022
Apr 13, 2022

More bakes for springdays…

Featured
Mothers Wisdom.jpeg
Mar 27, 2025
Wisdom | Mother Knows Best
Mar 27, 2025
Mar 27, 2025
Mar 27, 2022
Recipe: Mothering buns
Mar 27, 2022
Mar 27, 2022
Simnel Cake Sam A Harris, Fitzbillies.jpg
Mar 21, 2020
Cake facts | Simnel cake
Mar 21, 2020
Mar 21, 2020


In Eating, Fresh Tags mother's day, baking, recipe, issue 33, march, fresh
1 Comment

Photography by Lauren McLean

Recipe | Emergency Brownies

Iona Bower February 26, 2022

Grab a mug and set destination to the microwave. This will deliver an intense chocolatey hit in two minutes flat, using only store-cupboard ingredients.

“Like their key ingredient – chocolate – brownies have a near-miraculous ability to make us feel good,” says Leah Hyslop, author of The Brownie Diaries. “A single bite sends sugar and serotonin racing through the body, ready to patch up confidence or piece together a shattered heart.”

And there’s a brownie for every occasion, as Leah explains: “A brownie can say a lot of things, very easily and very unfussily. It can say I love you; I’m sorry; I’m thinking of you; let’s be friends; are we still friends? There are people who, when looking back over their lives, can identify occasions and events by the clothes they wore, or the music they listened to. I can chart my life in brownies; from the crumbly squares I scoffed in the school canteen, to the everything-but- the-kitchen-sink blondies I inhaled with friends after a break-up. Whatever else is going on in the world, a brownie always makes things better.”

Hear, hear, we say. And with that, our gift to you, straight from The Brownie Diaries and our March issue, is Leah’s recipe for Emergency Brownies. We think one should always have the ingredients in for these, because you just never know when a brownie emergency might occur…

You will need:

3 tbsp self-raising flour
2½ tbsp caster sugar
1½ tbsp cocoa powder
1 tbsp melted butter or vegetable oil
4 tbsp milk (ideally whole milk)
Handful of milk chocolate chips

To make:

1 Put all the ingredients in a large mug, except for the chocolate chips. Stir together until you have something resembling a batter, making sure to scrape down the sides of the mug. Stir in the chocolate chips.

2 Microwave until set on top – this usually takes between 1 min and 1 min 30 secs (microwaves vary in power, so it’s best to cook this for 1 min, check, then blast again in 30-second increments if needed).

3 Enjoy in pyjamas, on the sofa, perhaps with a scoop of ice cream on top.

Cook’s note: Make sure to use a microwave mug without any metallic decorations, such as a gold or silver trim, as this will spark an emergency of a different variety.

This recipe is featured alongside two others from The Brownie Diaries: Utlimate Fudgy Brownies and First Day on the Job Brownies, beginning on page 82 of the March issue of The Simple Things. Buy this month's The Simple Things - buy, download or subscribe

More baking for weekend days…

Featured
Apr 7, 2023
Recipe: Easter rabbit biscuits
Apr 7, 2023
Apr 7, 2023
Apr 17, 2022
Recipe: Chocolate truffles
Apr 17, 2022
Apr 17, 2022
Mar 27, 2022
Recipe: Mothering buns
Mar 27, 2022
Mar 27, 2022

More from our blog…

Featured
Water Boatman.jpg
May 24, 2025
Nature | Pond-Dipping for Grown-ups
May 24, 2025
May 24, 2025
RS2832_iStock-1278591330.jpg
May 23, 2025
Sponsored Post | Get your family active with Youth Sport Trust
May 23, 2025
May 23, 2025
Screenshot 2025-05-21 at 08.52.06.png
May 21, 2025
Playlist | Great Heights
May 21, 2025
May 21, 2025
In Eating Tags brownies, baking, cakes
Comment
stir-up-sunday-illo.jpg

Illustration: Georgina Luck

Stir-up Sunday

Future Admin November 21, 2021

Get stuck in on Stir-up Sunday. The tradition your tastebuds have been waiting for…

LIKE MANY OCCASIONS THAT end up being about cake, Stir-up Sunday was never supposed to be about cake. The name comes from an Anglican prayer delivered on the last Sunday before Advent (this year, 21st November) and intended to “stir up the wills” of the congregation to go off and perform good deeds. No one mentioned cake. However, at some point, the congregation’s womenfolk found these words served as a timely reminder to start “stirring up” their Christmas cake, mincemeat and puds so they could exchange flavours for five weeks. So pile the table high with dried fruits, nuts, bottles of rum and brandy, lemon halves, plain flour, cinnamon, eggs, butter, muscovado sugar, candied peel and whatever else your chosen recipe suggests, dust off your biggest mixing bowl and a wooden spoon and get stuck in.

This blog was originally published in November 2013. If you need a recipe for a fruit cake, there’s a really rather good one on page 25 of our November 2021 issue which you can still buy in our online store and have delivered to your door mat. Our December issue, with lots more ideas for preparing for Christmas is in all good shops and supermarkets now.

Buy this month's The Simple Things - buy, download or subscribe

More Christmas bakes to make…

Featured
sun bread.jpg
Dec 21, 2021
Bake: sun bread for Yule
Dec 21, 2021
Dec 21, 2021
SIM66.FRESH_Unknown-1_jwret.png
Nov 29, 2017
Recipe | Soft gingerbread tiles with rum butter glaze
Nov 29, 2017
Nov 29, 2017
Dec 7, 2016
Recipe: Saffron bundt cake with pears
Dec 7, 2016
Dec 7, 2016

More from our blog…

Featured
Water Boatman.jpg
May 24, 2025
Nature | Pond-Dipping for Grown-ups
May 24, 2025
May 24, 2025
RS2832_iStock-1278591330.jpg
May 23, 2025
Sponsored Post | Get your family active with Youth Sport Trust
May 23, 2025
May 23, 2025
Screenshot 2025-05-21 at 08.52.06.png
May 21, 2025
Playlist | Great Heights
May 21, 2025
May 21, 2025
In Eating, Living Tags Christmas cooking, Stir-up Sunday, baking
Comment

Recipe: Hot Cross Bun Cakes

Lottie Storey April 2, 2021

Make Good Friday the best Friday ever with these seasonal buns that are just a bit different from an ordinary HCB

Makes 12

2 duck eggs or 3 large chicken eggs
90ml buttermilk
185g butter
Zest of 1 orange
185g self-raising flour
1⁄2 tsp baking powder
70g ground almonds
185g light brown sugar
2 tsp mixed spice
120g sultanas
1 tbsp apricot jam or marmalade 

for the icing
60g cream cheese
40g butter
60g icing sugar
Zest of 1⁄2 an orange equipment

Cupcake tin
12 cupcake cases Piping bag and nozzle 

1 Preheat oven to 180C/Fan 160C/350F. Beat the eggs in a bowl and then add the buttermilk. Melt the butter, add it to the bowl and mix well. Stir in the orange zest. 
2 In a separate bowl, sift together the flour, baking powder, sugar and mixed spice, and stir in the ground almonds. Then fold the dry ingredients into the egg mixture. Stir in the sultanas. 
3 Spoon the cake batter into the cake cases, about three-quarters full, and bake for 18–20 mins until a skewer comes out clean. Cool in the tin for a few mins before transferring cakes in their cases to a cooling rack. 
4 Meanwhile, heat the apricot jam or marmalade in a saucepan with a dash of water until it becomes liquid. Using a pastry brush, glaze the cakes while they are still warm and then allow to cool. 
5 Mix all the icing ingredients together. Spoon the mixture into a piping bag with a small, plain nozzle and pipe a cross onto the top of each cake.

Recipe from Love, Aimee x by Aimee Twigger (Murdoch Books)

 Buy this month's The Simple Things - buy, download or subscribe

From our April issue:

Featured
@Kemitelford pockets.JPG
Apr 18, 2021
Quiz | What's in my pocket?
Apr 18, 2021
Apr 18, 2021
Alamy (mention subs ad).jpg
Apr 17, 2021
Music appreciation | The Flight of the Bumblebee
Apr 17, 2021
Apr 17, 2021
Courtesy of Mills and Boon.jpg
Apr 11, 2021
Why we love | ridiculous romantic novel titles
Apr 11, 2021
Apr 11, 2021

More Easter inspiration:

Featured
EGGShell-tealights-the-simple-things.png
Apr 10, 2023
Eggshell tea lights
Apr 10, 2023
Apr 10, 2023
Apr 17, 2022
Recipe: Chocolate truffles
Apr 17, 2022
Apr 17, 2022
Apr 2, 2021
Recipe: Hot Cross Bun Cakes
Apr 2, 2021
Apr 2, 2021
In Eating Tags issue 58, april, easter, cake, recipe, baking
Comment
Photograph: Cathy Pyle

Photograph: Cathy Pyle

Recipe | Swedish kardemummabullar

Iona Bower December 22, 2020

Making Swedish cardamom buns is a very happy way to spend an afternoon. Schedule in some time with a book while the dough and buns prove, and throw yourself into the slowness of the whole process in the knowledge that the finished buns will be worth every minute of the proving time.


Makes 18 

For the filling: 

100g butter, softened 

½ tsp plain flour 

1 tsp ground cinnamon  

1 tsp ground cardamom 

½ tsp vanilla extract 

50g caster sugar 

50g soft brown sugar 

For the dough: 

250mlfull fat milk 

13g active dried yeast granules 

75g butter 

450g strong white bread flour 

1½ tbsp ground cardamom  

½ tsp salt 

40g caster sugar 

1 egg 

Plus 1 egg, beaten (for brushing the rolls before they go into the oven) 

For the glaze: 

100ml agave or golden syrup 

50g almonds, finely chopped 


To make…

1 Begin by creaming all of the filling ingredients together and then set to one side. 

2 Next, make the dough by heating the milk in a saucepan over a medium heat until it starts to gently bubble, but don’t let it come to the boil. 

3 Pour the warm milk into a mixing bowl, add the yeast and mix together. Cover with a tea towel and leave in a warm room for about 20 mins to activate the yeast. While the yeast is activating, gently melt the butter in a small saucepan over a medium heat, then set aside. 

4 Once the yeast and milk have started to bubble (activated), add the cooled, melted butter and mix them together thoroughly. You can either do this by hand or with a dough hook attachment on a food processor. 

5 Next, take a clean mixing bowl and pour in the flour, cardamom, salt and sugar, then blend together. Slowly add this mix to your bowl of wet dough ingredients. Add one beaten egg and combine. Either using your hands or in a machine with a dough hook, knead the combined dough ingredients for at least 5 mins. If necessary, add a little flour if you’re finding that the dough is sticking to your fingers too much, although it does need to be quite sticky. 

6 Leave your kneaded dough to prove in either the bowl or mixer, covered, in a warm room for 30-45 mins to allow it to rise. 

7 Cover a flat surface with flour and place your dough on top. Knead it by hand (adding a little extra flour if it’s still too sticky to work with) for 5 mins. Once it’s a manageable consistency, roll the dough out into a rectangular shape and cover with the filling, stopping about 5cm from one end – if your table isn’t very big then you may find it easier to do this in two parts, making two smaller rectangles. 

8 Roll the rectangle into a sausage, leaving the bare end until last so that your filling doesn’t start spilling out. Cut your sausage shaped dough (with the filling inside) into 6cm-thick slices. Place the slices onto a lined baking tray and leave to rise for another 30 mins. 

9 Meanwhile, preheat the oven to 200C/180 Fan/Gas 6. When the oven has reached temperature and the swirl-shaped dough slices have sat for 30 mins for a second rising, brush the with a beaten egg and then bake for 8-10 mins, or until golden brown. 

10 While the cardamom buns bake, make the glaze by heating the syrup in a small saucepan over a medium heat until warmed through. As soon as the buns come out of the oven, drizzle with the warmed syrup, then sprinkle the chopped almonds over the top of them. 

11 While they cool, take a clean tea towel and run it under a tap until it is soaked through, then wring it out and place the damp cloth over the baking tray for 5 mins to stop the cardamom rolls from going hard.


These Swedish buns are part of our Merry Midwinter menu from our January issue, a hygge style meal with added log-cabin-cosiness, that includes Smorrebrod, Scandi Fish Stew and more. Recipes by Kay Prestney.

More hyggelich things for January…

Featured
Gathering Janssons Temptation.JPG
Jan 11, 2025
Recipe | Jansson's Temptation
Jan 11, 2025
Jan 11, 2025
Cardamom buns Kay Prestney.jpg
Dec 22, 2020
Recipe | Swedish kardemummabullar
Dec 22, 2020
Dec 22, 2020
HowToLagom.png
Oct 6, 2017
How to live lagom
Oct 6, 2017
Oct 6, 2017

More from our Januaray issue…

Featured
Back cover.JPG
Jan 27, 2021
January | a final thought
Jan 27, 2021
Jan 27, 2021
Seaweed alamy.jpg
Jan 16, 2021
Nature | Seaweed Weather Forecasting
Jan 16, 2021
Jan 16, 2021
Tinker and Fix_June20_114.jpg
Jan 12, 2021
Organise | an excellent toolbox
Jan 12, 2021
Jan 12, 2021


In Eating Tags Scandi, Swedish recipes, buns, baking, January, issue 103, Issue 103, hygge
Comment
Recipes: Lia Leendertz Photography: Kirstie Young

Recipes: Lia Leendertz
Photography: Kirstie Young

Recipe: Wholemeal hot cross buns with whipped honey lemon butter

Lottie Storey April 10, 2020

The addition of wholemeal flour makes these Easter classics wholesome and nutty, while the lemony butter adds decadence to homely hot cross buns

Makes 12 buns
250g strong white flour
200g strong wholemeal flour
1 tsp salt
3 tsp mixed spice
1 tsp cinnamon
4 tsp easy bake yeast
50g golden caster sugar
110g currants
50g candied peel
50g butter, room temperature
150ml hand-hot milk
75ml hand-hot water
1 egg, beaten

for the crosses
75g plain flour
5 tbsp water
for the glaze
3 tbsp apricot jam

1 Sieve the flours, salt, mixed spice and cinnamon into a bowl and add the yeast, sugar, currants and peel.
2 Give it a quick stir, then make a well in the centre and drop in the butter, followed by the warmed milk and water, and the egg. Mix well with a wooden spoon and then go in with your hands and knead, adding a little more milk if the mix feels too dry.
3 Cover the bowl with cling film and leave in a warm place to rise for around two hours, or until it has doubled in size.
4 Turn it out onto a floured surface and knead it briefly again, then divide
it into 12 pieces. Roll each into a bun shape in your hands and place onto a baking tray lined with baking parchment, leaving space for each to rise. Cover with a tea towel and leave to rise for a further 45 mins or so, until doubled again.
5 Heat the oven to 220C/Fan 200/425F while you make the crosses. Mix the flour and the water to a thick paste, spoon into a piping bag and pipe on the crosses. Bake for around 15 mins.
6 Meanwhile, heat the apricot jam in a small pan and then sieve it to remove pieces of fruit. Remove the buns from the oven, place on a wire cooling rack, and paint immediately with the glaze. Allow to cool a little before eating, or cool completely and split and toast.


Whipped honey lemon butter

Smother your hot cross buns with this for a true taste of Ostara

110g butter
4 tbsp honey
zest of 1 lemon

1 Chop the butter into cubes and drop it into a bowl of lukewarm water, then leave it for at least five mins, until really soft. Drain off the water and tip the butter, honey and zest into a large bowl.
2 Use a wooden spoon to beat until all is combined and the butter is creamy. Use straight away or put into a ramekin and chill.

This recipe was first published in our March 2016 issue. Our new April issue is on sale now both in shops and via our website and has lots of ideas on how to do Easter weekend well.

Buy this month's The Simple Things - buy, download or subscribe


From April issue…

Featured
Picnic Pie Catherine Frawley.JPG
Apr 18, 2020
Recipe | a picnic pie for the garden
Apr 18, 2020
Apr 18, 2020
Ellen's cookbook Kirstie Young.jpg
Apr 15, 2020
Make | a hand-me-down recipe book
Apr 15, 2020
Apr 15, 2020
Newts Zuza Misko.JPG
Apr 7, 2020
Romantic introverts | the newt
Apr 7, 2020
Apr 7, 2020

More Easter recipes…

Featured
EGGShell-tealights-the-simple-things.png
Apr 10, 2023
Eggshell tea lights
Apr 10, 2023
Apr 10, 2023
Apr 17, 2022
Recipe: Chocolate truffles
Apr 17, 2022
Apr 17, 2022
Apr 2, 2021
Recipe: Hot Cross Bun Cakes
Apr 2, 2021
Apr 2, 2021


In Eating Tags issue 45, easter, march, seed to stove, hot cross buns, baking
Comment

Recipe | nettle soda bread

Lottie Storey March 11, 2020

Now’s the time to gather treasures from the hedgerows. And then head home and into the kitchen to make this nettle soda bread.

Nettle Soda Bread

Good handful of young nettle leaves and/or wild garlic
½ pint buttermilk
6oz self raising flour (wholemeal or brown)
3oz plain flour
3oz seed & grain bread flour
½ tsp salt
½ tsp bicarbonate of soda

Gather your nettle tips (with gloves on) before they flower. Strip off the stems until you have enough for one large handful of leaves.

Heat oven to 200C/Fan 180/400F

In a blender or large jug, add leaves and buttermilk. Blend until smooth.

Put flour, salt and soda into a mixing bowl. Form a well in the middle and pour in the nettle buttermilk. Quickly mix together with a fork until a soft dough is formed.

Turn out mixture onto a floured surface, lightly need for 2 minutes then form into a round shape.

Put on a floured baking tray. Flatten the top of the dough and score the top in a cross.

Cook for 30 minutes until the dough sounds hollow. Leave to cool on a wire rack.


N.B. You can substitute nettles for ramsons or crow garlic. For a seed top, before baking rub a little buttermilk over the top and add some sedge seeds (found in autumn) or sunflower seeds also work nicely.

 In this month’s Blossom issue, we have a beautiful feature we think you’ll love by Lia Leendertz, in which she looks at cooking and enjoying some of the season’s bounty. Nature’s Table is the first in a new series. Do tell us what you think! This soda bread recipe with photography by Kirstie Young, was first published in our March 2016 issue but it tastes just as good (if not better) four years on.

Buy this month's The Simple Things - buy, download or subscribe

From our March issue…

Featured
Gudrun.jpg
Feb 12, 2021
Competition | win a stylish shopping spree
Feb 12, 2021
Feb 12, 2021
Veg Box Music.jpg
Mar 27, 2020
Make | parsnip panpipes (yes, really)
Mar 27, 2020
Mar 27, 2020
Simnel Cake Sam A Harris, Fitzbillies.jpg
Mar 21, 2020
Cake facts | Simnel cake
Mar 21, 2020
Mar 21, 2020

More foraging fun…

Featured
Broad beans.jpeg
May 10, 2025
Recipe | Spring Beans on Toast
May 10, 2025
May 10, 2025
Sloe and nut 3.jpg
Nov 5, 2022
Recipe | Sticky Sloe and Nut Clusters
Nov 5, 2022
Nov 5, 2022
Seaweed alamy.jpg
Jan 16, 2021
Nature | Seaweed Weather Forecasting
Jan 16, 2021
Jan 16, 2021
In Eating Tags issue 46, april, foraging, nettle, bread, baking
Comment
Photography: Ali Allen

Photography: Ali Allen

The lost art of squirreling away

Iona Bower September 28, 2019

Why we love a larder, and why you should, too

Somewhere in the last 50-or-so years, larders were lost and became a bit of a thing of the past. We probably all remember a grandparent or auntie who had a really decent larder. If you were lucky it was a proper cold room with shelves on all four sides, precariously stacked with tins, jars, packets and boxes. Otherwise it might have been an outhouse, or just a particularly big kitchen cupboard. Either way, they were a bit magic. A woman of a certain age could don a tabard, stick her head briefly inside the larder and - ta dah! - emerge with an armful of packets and tins from which a cake would appear, or a jelly filled with fruit, or simply a tin of cocoa powder and a packet of biscuits. 

But, as post-war kitchens became smaller and fridges ever bigger, the larder fell out of favour, no longer needed as we filled our American-style fridges with food that would last for days and freezers took more of the strain. 

However, in the last decade, larders have been having a moment again, with several big kitchen companies creating beautiful, freestanding larder-armoires, that open their capacious doors as if to hug you to the bosom of their dried goods and tins. And we’re not surprised. Because what is nicer than a larder?

We all aspire to the sort of larder stocked with home-bottled tomatoes, chutney from the allotment and jars of apples dried in a low oven (the sort of larder that calls for large Kilner jars and chalkboard labels). 

But all larders are a joy. The kind you can lean on one Thursday night when the supermarket shut just as you arrived and the fridge is bare, but just at the back of the larder is a packet of dry pasta, a jar of roasted peppers that came in a hamper at Christmas and a bottle of red, and suddenly dinner is saved. Or the sort of larder that seems to be full to the gunwales with flour, currants, rice and other utilitarian things, but you know that one rainy afternoon, if you have a bit of a dig about you will emerge, victorious, with the remains of a homemade fruit cake and a chocolate orange you hid from yourself for just such an occasion.

You don’t even need to have a larder to larder well. Got a shed? Give it a tidy and set up a small book shelf in there for your jars and tins. An outdoor bunker does the job equally well, with the addition of a small storage unit. A cupboard under the stairs makes a good larder, and means you don’t have to set foot outside in inclement weather. Or, for ultimate convenience, dedicate a cupboard in your kitchen to be a larder cupboard and feel the joy every time you open the door. Wherever you choose to create your larder, do make sure it’s mouse and bug proof (there’s nothing sadder than another creature stealing all your hard work). Once you’ve got your space sorted you can set about planning the contents.

There’s an art to squirreling away, you see. Some squirreling requires hard work and forward planning while other aspects require a bit of recklessness and a glint in your eye. You have to consider not only what you might need, but also what you might just fancy. October is prime squirreling time: you can use up the last of the summer gluts making jams, biscuits and other goodies that will cheer the winter months. In fact, we have some fabulous ideas for this from Rachel de Thample in our October issue, everything from marrow marmalade to homemade Worcestershire sauce. But it’s also a good time to stash away a fancy tin of biscuits, some posh chocolates (or maybe simply a Crunchie bar, just for you, hidden on the top shelf behind the butter beans, to be eaten under the duvet with a book on a sad, snowy Sunday). The Norwegians might say: ‘There’s no such thing as bad weather, only bad clothes’. We say ‘there’s no such thing as bad weather, only a badly prepared larder’. Get ready to hunker down. 

Our October issue has several recipes from Gifts from the Modern Larder: Homemade Presents to Make  and Give by Rachel de Thample (Kyle Books). Photography by Ali Allen. The ‘Create’ issue is in shops now.

Get hold of your copy of this month's The Simple Things - buy, download or subscribe

More things we love about October…

Featured
Pumpkin Beer Keg Jonathan Cherry.jpg
Oct 31, 2023
Make | a pumpkin beer keg
Oct 31, 2023
Oct 31, 2023
Apples Cathy Pyle.jpg
Oct 22, 2022
Primer | Know Your Apples
Oct 22, 2022
Oct 22, 2022
Getty Simple Thing.jpg
Oct 12, 2021
A simple thing | darker days
Oct 12, 2021
Oct 12, 2021

More from our October issue…


In Eating Tags issue 88, October, larder, baking, food
2 Comments
Photography: Jonathan Cherry. Recipe: Bex Long. Styling: Gemma Cherry

Photography: Jonathan Cherry. Recipe: Bex Long. Styling: Gemma Cherry

Recipe | Ginger snaps

Iona Bower September 19, 2019

Crunchy, spicy biscuits ideal for eating with pumpkin ice cream

Our October issue has a very special ‘gathering’ feature with recipes for a pumpkin party. It’s got everything from autumnal salads to a fabulously moreish sausage roll and even a pumpkin beer keg. But we have made a date to create the pumpkin ice cream sandwiches pictured above - sweet pumpkin ice cream squidged between ginger snaps and rolled in pistachios. Who says ice cream is for summer?

You can make them using any shop-bought ginger snaps but if you fancy going the whole hog, you can make the ginger snaps using the recipe below.

Ginger snaps

Makes 24

225g plain flour

1 tsp baking powder

1 tsp bicarbonate of soda

1 tbsp ground ginger

Pinch of salt

120g unsalted butter

120g caster sugar

5 tbsp (75g) golden syrup

1 Preheat oven to 180C/Fan 160C/Gas 4. Line 2 baking trays with greaseproof

paper.

2 Sift the flour, baking powder, bicarbonate of soda, ginger and salt into a large

bowl. Cut the butter into cubes and rub into the flour until the mixture

resembles fine breadcrumbs.

3 Stir in the sugar. Add the golden syrup and mix together well. Bring it all

together with your hands to make a smooth ball of dough.

4 Break off small walnut-sized pieces, roll into balls and place on the lined

baking trays. Allow space between each ball as they will spread during cooking.

5 Bake for 10-15 mins until the ginger snaps have spread and turned golden

brown.

6 Leave to cool for 5 mins on the baking trays before using a spatula to

carefully move them to wire racks to cool completely.


Don’t forget to buy the October ‘create’ issue for the rest of the recipes for our pumpkin party.

Get hold of your copy of this month's The Simple Things - buy, download or subscribe


More biscuit inspiration…

Featured
Shortbread.jpg
Nov 11, 2023
Recipe | Chai Spiced Shortbread
Nov 11, 2023
Nov 11, 2023
jammie dodgers Louise Gorrod.jpg
Nov 6, 2021
Recipe | Homemade Jammie Dodgers
Nov 6, 2021
Nov 6, 2021
Feb 13, 2021
Recipe: Peanut butter jammie dodgers
Feb 13, 2021
Feb 13, 2021

More from our September issue…

Featured
Pumpkin Beer Keg Jonathan Cherry.jpg
Oct 31, 2023
Make | a pumpkin beer keg
Oct 31, 2023
Oct 31, 2023
Back cover cartoon.jpg
Oct 22, 2019
October | a final thought
Oct 22, 2019
Oct 22, 2019
Spooky Stories Alamy.jpg
Oct 19, 2019
Build your own spooky story
Oct 19, 2019
Oct 19, 2019


In Eating Tags issue 88, October, baking, biscuits, halloween, pumpkin, ice cream
Comment
Photography: Nassima Rothacker

Photography: Nassima Rothacker

Bake a basic sourdough loaf

Iona Bower September 4, 2019

This month marks Sourdough September and we can’t think of much that’s more worth celebrating

As summer draws to a close our minds turn to home comforts, particularly those that involve flowery hands and warm smells emanating from ovens. For our September ‘Begin’ issue, we visited Sourdough School to begin finding out from sourdough guru Vanessa Kimbell how to make that delicious, crusty, chewy bread. You can read all about it on p22 of the issue. To give you a flavour, though, we’ve posted one of Vanessa’s simple sourdough recipes here. Don’t say we aren’t good to you. You can find out lots more about sourdough at The Sourdough School.

Allow yourself about 3 –4 hours for the dough to be mixed, folded and shaped ready to place in the coldest part of the fridge to prove overnight.(If you are new to bread making, you can, instead of shaping the dough and putting it into a banneton, grease a 2lb bread tin liberally with butter, let the dough rise in it overnight in the fridge and then bake as per the recipe instructions below.)

Equipment:
A large mixing bowl
A round cane banneton
2 clean tea towels
A Dutch oven or La Cloche
A large heatproof pan, a sharp knife or ‘lame’ to slash the dough with

Ingredients:
300g water
100g sourdough leaven (made with your starter)*
100g of stoneground organic wholemeal flour
400g organic strong white flour
10g fine sea salt mixed with 15g of cold water
25g rice flour mixed with 25g of stone ground white flour (for dusting your banneton)
Semolina to dust the bottom of the baking surface

Makes 1 loaf

Late afternoon

In a large bowl whisk your water and starter and mix well. Add all the flour and mix until all the ingredients come together into a large ball.

Cover with a clean damp cloth and let the dough rest on the side in the kitchen for between 30 mins and 2 hours – this what bakers call Autolyse

Add the salt mixed with the water and dimple your fingers into the dough to allow the salty water and salt to distribute evenly throughout the dough.  Leave for 10 mins.

Next lift and fold your dough over, do a quarter turn of your bowl and repeat 3 more times. Repeat 3 times at 30 min intervals with a final 15 min rest at the end.

Shape the dough lightly into a ball then place into a round banneton dusted with flour (If you don’t have a banneton then use a clean tea towel dusted with flour inside a colander). Dust the top with flour, then cover with a damp tea-towel

Leave your dough to one side until it is 50% bigger then transfer to the fridge , and leave to prove there for 8 – 12 hours.

The following morning

The next morning preheat your oven to 220°C for at least 30 mins before you are ready to bake. Place your cloche or baking stone in the oven and a large pan of boiling water underneath (or use a Dutch oven). The hydration helps form a beautiful crust.

Once the oven is up to full heat, carefully remove the baking stone from the oven, taking care not to burn yourself, dust with a fine layer of semolina, which stops the bread sticking, then put your dough onto the baking stone and slash the top with your blade. This decides where the bread will tear as it rises. Bake for an hour.

Turn the heat down to 180°C (and remove the lid if you are using a Dutch oven) and bake for another 10 -15  mins.  You need to choose just how dark you like your crust but I suggest you bake until it is a dark brown – it tastes much better.

Storage

Sourdough is really best left to cool completely before slicing and is even better if left for a day to let the full flavour develop. Once your sourdough has cooled, store in a linen or cotton bread bag, or wrapped in a clean tea towel. If you don’t like a crunchy crust on your sourdough bread, simply wrap your bread in a clean tea towel whilst it is still warm.

* To make 100g of leaven, use 1 tbsp of sourdough starter, 40g of water and 40g of strong white flour, mix well and leave, covered on the side in the kitchen in the morning. It will be lively and bubbly and ready to bake with in the evening.

Get hold of your copy of this month's The Simple Things - buy, download or subscribe

More from our September issue…

Featured
back cover.JPG
Sep 24, 2019
September | a final thought
Sep 24, 2019
Sep 24, 2019
Coastal Path.jpg
Sep 21, 2019
Walking on the edge of land
Sep 21, 2019
Sep 21, 2019
Tiny Books Rachel Hazell.jpg
Sep 18, 2019
In praise of | teeny, tiny books
Sep 18, 2019
Sep 18, 2019

More sourdough (and other) baking inspiration…

Featured
Lammas Loaf.jpg
Aug 1, 2023
Bake | A Lammas loaf
Aug 1, 2023
Aug 1, 2023
Tomato focaccia 2.jpg
Sep 15, 2022
Recipe | Tomato Focaccia
Sep 15, 2022
Sep 15, 2022
Mar 11, 2020
Recipe | nettle soda bread
Mar 11, 2020
Mar 11, 2020
In Eating Tags issue 87, september, sourdough, baking, bread
Comment
The Earth’s Crust Bakery, Castle Douglas

The Earth’s Crust Bakery, Castle Douglas

Nostalgia | Forgotten bakery goods

Iona Bower August 14, 2019

The joy of a good bakery, like the joy of a good bookshop, never ages. They might have become more artisan, more European, more generally fancy, but at the heart of a good bakery is that same ‘nose-pressed-to-the-glass, nostrils heady with the scent of sugar feeling that captured us as children, eyes like dinner plates and hands ready to grab. 

In our August issue, we’ve featured a few of the most inspiring bakeries in the world, taken from Europe’s Best Bakeries by Sarah Guy. And we have to say it’s an awe-inspiring collection, including The Earth’s Crust Bakery at Castle Douglas, pictured above. It took us right back to our earliest memories of bakeries, and - we’re going to give away our age here - we’ve collated below a few of our favourite classic bakery goods. There’s nothing civilised about most of them. Each is a frivolous carb- and sugar-fuelled mini feast. Exactly as it should be. 

Join us on a trip down memory lane. And leave us a comment at the end of the blog reminding us of any bakery goods you enjoyed as a child that we might have forgotten…


Traffic light biscuits

Oh the indulgence! Two shortbread biscuits sandwiched together, the top with three tempting holes cut out, through which oozed not one, nor two but THREE differently coloured fruit curds (red, yellow and green obviously). We still have no idea what flavour each colour was meant to denote. Presumably strawberry, lemon and… erm… lime? Apple? Green flavour? It matters not. The point was that buttery shortbread crumbling beneath your gappy-toothed bite and nearly falling to the floor, but for the curd that kept it safely anchored to the main biscuit. 

Nest cakes

Mysteriously sold all year round, these Easter treats were usually assembled from Cornflakes or Shredded Wheat, crushed and mixed with melted chocolate, dolloped into paper cases and decorated with tiny eggs. And none of your posh Mini Eggs of today, oh no. These eggs were of the 1980s ‘pure sugar, encased in a shell, again of pure sugar’ variety. Just looking at them made your teeth ache. What’s not to love?

Ice cream cone ‘cakes’

We struggled to remember what the deal was here but we remember jealously coveting them, that’s for sure. Askey’s wafer cones, filled with some sort of sticky sugary goo, that bonded any two surfaces quicker than Bostick. We think it was meant to represent ice-cream. The whole thing was topped with Hundreds and Thousands  - the proper sugar strands, not your modern, ball-style nonsense. We clearly remember that they were created in a rainbow colourway, with multicolured sugar strands atop a pink sugar goo and there was also a chocolate version, with a chocolate goo topped with only dark chocolate sugar strands (for the more classy and discerning eight-year-old, presumably). 


Iced fingers

Take off the icing and you basically have a plain, unassuming roll, but lined up in the bakery window, iced fingers were pure joy. There’s something deliciously simple (and almost unashamedly cheeky) about icing a plain bread roll and calling it a cake. We admire this. 


Meringue ghosts

Not just for Halloween, these crumbly creatures of the night seemed to be on bakery shelves all year round. Swirls of wonky meringue with chocolate drop eyes and a demeanour that would terrify an apple puff. 

Sticky buns

We’re taking a very specific type of sticky here. Not your average iced bun (we’ve covered those), and not a Chelsea bun either (no glace cherries here). Proper sticky buns were simple fruit buns made sticky with some sort of mysterious glaze and tiny crystals of sugar that were inexplicably perfect cube shapes. What WERE those things? Anyway, inexplicably sticky buns were a classic and have somehow not been the same in the last 30 years at least. And we still don’t know where that mad square sugar came from. Intriguing!


Do leave us memories of your forgotten bakery goods below. We can’t wait to read them. Pick up our August issue to read more about some of the best bakeries in the world.


Get hold of your copy of this month's The Simple Things - buy, download or subscribe


More from our August issue…

Featured
BACK COVER.jpg
Aug 22, 2019
August | a final thought
Aug 22, 2019
Aug 22, 2019
TheWayHome, MarkBoyle.jpg
Aug 17, 2019
Lost arts | writing a nice, newsy letter
Aug 17, 2019
Aug 17, 2019
Earth's Crust Castle douglas Europe’s Best Bakeries by Sarah Gu.jpg
Aug 14, 2019
Nostalgia | Forgotten bakery goods
Aug 14, 2019
Aug 14, 2019

More classic bakes to relive…

Featured
Apr 7, 2023
Recipe: Easter rabbit biscuits
Apr 7, 2023
Apr 7, 2023
Apr 17, 2022
Recipe: Chocolate truffles
Apr 17, 2022
Apr 17, 2022
Mar 27, 2022
Recipe: Mothering buns
Mar 27, 2022
Mar 27, 2022
In Eating Tags bakeries, cakes, biscuits, baking, august, issue 86
Comment
Photography: Con Poulos

Photography: Con Poulos

Cake facts | Upside-down cake

Iona Bower June 30, 2019

A look at the history of this wrong-way-up cake, which is a classic… whichever way you look at it

The history of cake is dotted liberally with fine examples of retro ideas that have wholly endured. In fact, why we think of them as retro is a mystery, since they never really went away. The upside-down cake is an excellent example, and none more than the classic - the Pineapple Upside-down Cake, which has been eliciting excited ‘oohs’ from children and overgrown children alike for over a century.

Upside-down cakes have, in truth, existed for hundreds of years. When cakes would have been cooked over a fire, a clever way to get a nice decorative top with caramelised fruit adorning it, was to put the fruit and sugar in the bottom of a skillet over the fire, so that when the skillet is turned out, the unattractive top becomes the bottom of the cake and the fruity goodness that was on the bottom becomes the top.

But it wasn’t until the advent of the Pineapple Upside-down cake that topsy-turvy patisserie really ‘had a moment’. And for that we have to thank one James Dole. That’s right. Him of the tinned pineapple.

In 1901 Dole invented a machine that could cut pineapples into perfectly sized rings, that he could put into tins. Quickly, one of the most popular uses for pineapple rings became to put their flavour and attractive shape into an upside-down cake. As an aside, we’d also like to award a retro medal to whomever was the first amateur baker to pop a few maraschino cherries in the holes of the pineapple rings. Genius!

In our July issue, we have a less retro but no less welcome topsy turvy cake from Annie Bell’s Baking Bible (Kyle Books). Photography by Con Poulos. Find it on page 7.

Get hold of your copy of this month's The Simple Things - buy, download or subscribe

More from our July issue…

Featured
Back cover Michelle Rial from Am I Overthinking this Chronicle Books.jpg
Jul 23, 2019
July | a final thought
Jul 23, 2019
Jul 23, 2019
Lavender Lia Leendertz and Kirstie Young.jpg
Jul 20, 2019
Science | why lavender calms
Jul 20, 2019
Jul 20, 2019
Reader holiday.jpg
Jul 18, 2019
Reader offer | The Simple Things Holiday
Jul 18, 2019
Jul 18, 2019

More cakes to bake…

Featured
Dec 28, 2024
Recipe: Slow Orange Poppy Seed Cake
Dec 28, 2024
Dec 28, 2024
Oct 31, 2019
Recipe: Soul cakes
Oct 31, 2019
Oct 31, 2019
SIM76.CAKE_175_portuguese_tarts.png
Oct 13, 2018
Recipe | Portugese custard tarts (Pastéis de nata)
Oct 13, 2018
Oct 13, 2018


In Eating Tags July, issue 85, cake, cake fact, baking, upside down
Comment
Photography: Catherine Frawley

Photography: Catherine Frawley

Cake facts: the best banana loaf

Iona Bower May 8, 2019

Because if a cake’s worth doing it’s worth doing properly

We’ve got a delicious banana walnut loaf in our May issue (pictured above, from Nourish Cakes by Marianne Stewart, Quadrille). Everyone has their own tips for creating the ‘best banana loaf cake in the world’, usually handed down from capable grandparents and great-grandparents. But the one we all know is that black bananas are best. But why?

Black (or slightly over-ripe bananas) are often recommended as being easier to digest, but what makes them the best choice for a banana loaf cake is their flavour and texture.

Firstly, as they ripen and the yellow skin gets steadily blacker, chemical reactions inside the banana flesh turn the starch into sugars, making them taste sweeter and that bit more banana-y in the cake.

Secondly, the flesh becomes softer and easier to mash, and it also breaks down more easily during the baking process, so you don’t get lumps of banana in the cake once it’s cooked. You might like lumps of banana in your cake, in which case, don’t allow us to lead you down a black banana path - feel free to go your own way - but a riper banana gives a smoother cake, nonetheless.

Catching your bananas at the perfect level of cake-readiness is tricky. Ideally, you want a banana that is pretty dark but still has some yellow on it and lots of big, black spots and patches, but you can definitely still bake with completely black bananas. And here’s a pro-banana tip for you: if you’ve got to Tuesday and your bananas look perfect for a loaf cake but you know you won’t be baking until Saturday, pop them in the freezer. The skins will turn completely black in there but the flesh inside will remain at the same level of ripeness, waiting for you to release it from the freezer drawer (take them out a couple of hours before you want them), mash the banana and help it on its way to its higher state of being, transformed from slightly disappointing fruit bowl fellow to much welcomed fluffy banana loaf.

You’ll find the recipe for the banana walnut cake on p29 of our May issue.

Get hold of your copy of this month's The Simple Things - buy, download or subscribe

More from our May issue…

Featured
Kite Getty.JPG
Feb 28, 2020
How to | make a kite
Feb 28, 2020
Feb 28, 2020
Back cover Mari Andrew.jpg
May 27, 2019
May: a final thought
May 27, 2019
May 27, 2019
Analogue Jonathan Cherry.jpg
May 11, 2019
Etymology: jukebox
May 11, 2019
May 11, 2019

More cakes to bake…

Featured
Dec 28, 2024
Recipe: Slow Orange Poppy Seed Cake
Dec 28, 2024
Dec 28, 2024
Oct 31, 2019
Recipe: Soul cakes
Oct 31, 2019
Oct 31, 2019
SIM76.CAKE_175_portuguese_tarts.png
Oct 13, 2018
Recipe | Portugese custard tarts (Pastéis de nata)
Oct 13, 2018
Oct 13, 2018


Get hold of your copy of this month's The Simple Things - buy, download or subscribe

In Eating Tags may, issue 83, banana bread, baking, cake
Comment
Photography: Cristian Barnett

Photography: Cristian Barnett

Your (sourdough) starter for ten

Iona Bower January 29, 2019

Don’t think of your sourdough starter as a recipe. Think of it as a pet…

Who knew that people give their sourdough starters names? Oh OK, you did then. We had no idea! But now we do we just can’t stop thinking of excellent monikers for them.

Overused it may be but Clint Yeastwood still brings a smile to our faces. And if you want a celebrity starter there’s definitely a rich seam to be tapped. How about Bread Dibnah, or Sheena Yeaston? Matthew Breaderick, Crustin Hoffman or Dough Berrick? Philip Loafyield? Too tenuous?... Yes, ok we’ll leave it there.

You could of course choose something more ‘under the radar’. Bubbles, perhaps. Or Gloopy-Lou.

Or simply go oblique. On one sourdough forum a user explained “Mine is called Eve. She started all this trouble after all.” Another says firmly that she never considered naming hers. Fair enough: “I love my starters, they are my boys, like children, I talk to them  and I'm proud of them. I miss them when I away. But I have never wanted to give them names.” We’re lost for words now, frankly.

In some ways it’s no surprise people feel they need to name their starters. They become like one of the family in many ways, needing regular feeding, plenty of love and attention. A bit like a very low-maintenance pet.

But look after it you must, so we asked Luc Martin, sourdough expert and owner of Pig and Rye Sourdough Bakery, Breakfast and Lunchroom in Tllburg, The Netherlands.

“The best way to look after a starter is feed it every day. At the bakery we use 3-10kg a day and the few hundred grams that’s left gets mixed with fresh flour and water to be used the next day. Our starter is wholegrain rye based, I’ve kept it alive for over ten years but I don’t believe the age of the starter has any effect on the finished bread.”

He has this advice for newbies to the world of sourdough starters: “For a home baker keeping a starter alive is trickier because you don’t necessarily bake every day. The best thing to do is keep the starter alive in a small quantity, like 150g total, then every day bin 100g and refresh with 50g flour 50g water. There are tricks like storing in the fridge, or keeping the starter hydration lower, both will slow fermentation and extend time between feedings but if you make a mistake you can end up killing the starter.” And that would be a sad day indeed. Keep it simple then, folks.

And what does a sourdough guru call his starter? “Mine has no name I’m afraid, but if I did name it it would probably be Blueberry which is how it smells when it’s ready to bake with.”

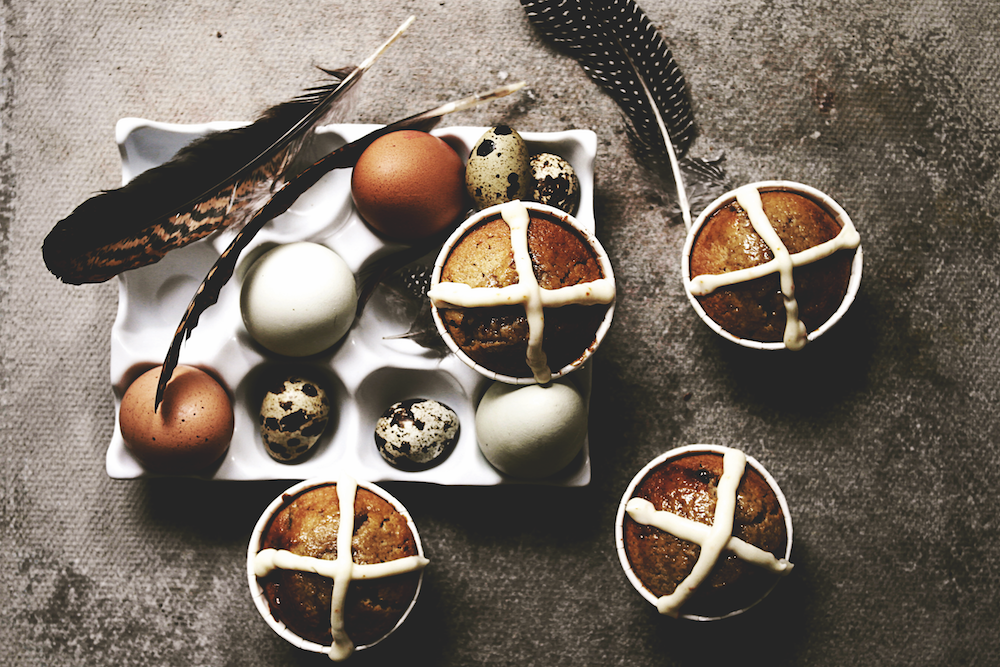
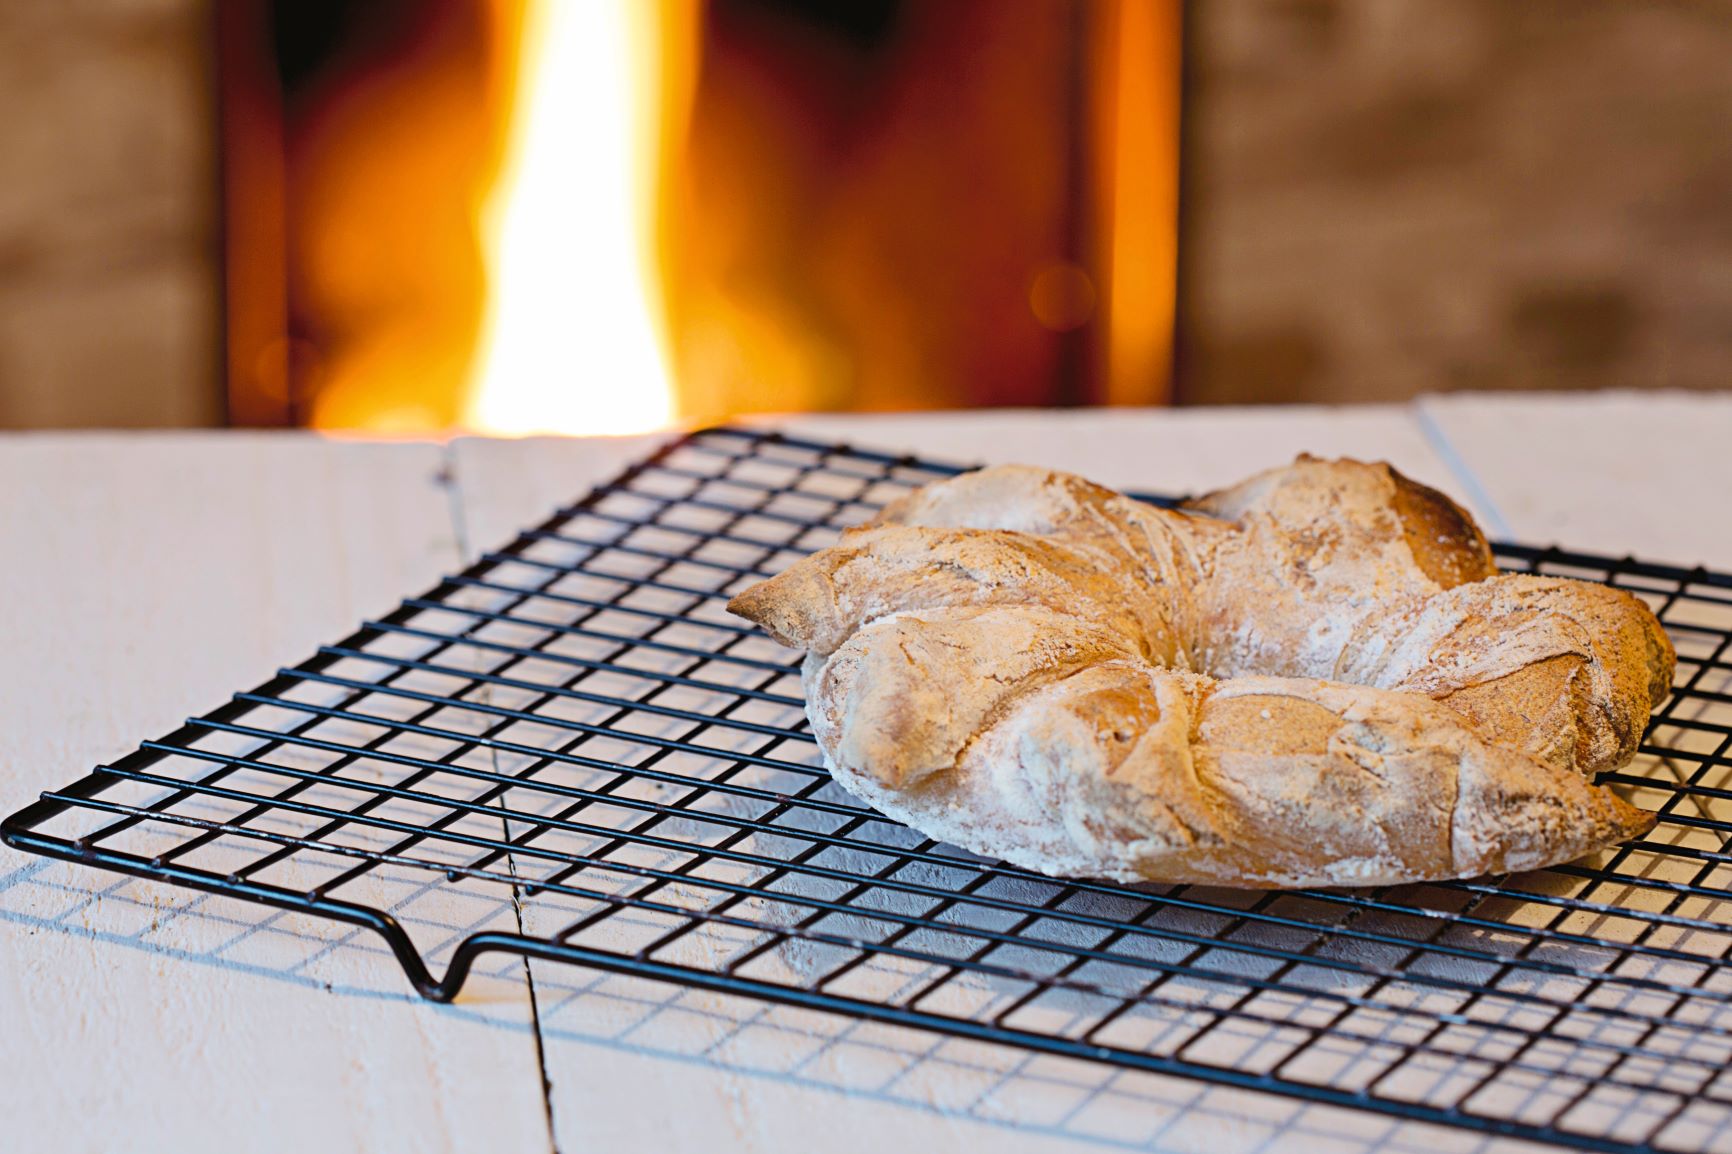
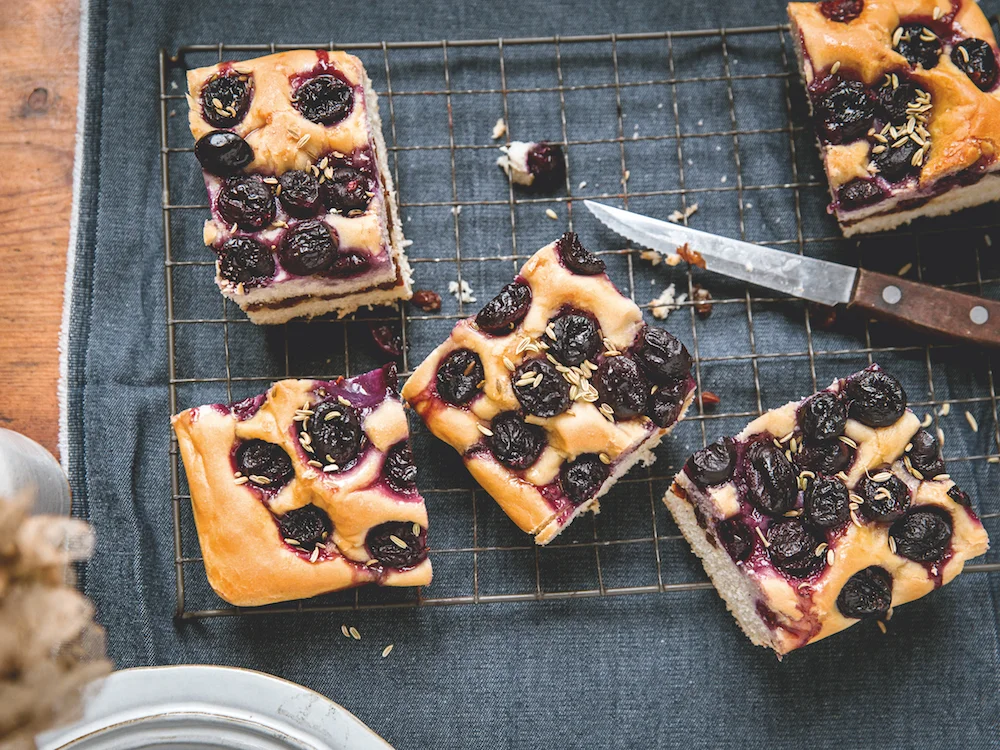
In our February issue we have a feature on overnight bakes that will make good use of your starters, keep you busy on a Saturday night before bed, and give you a warm glow of smug satisfaction (and a lovely loaf to boot) on Sunday morning. We have recipes by Rachel de Thample for sweet loaves, crumpets, an oat loaf and even apple and cardamom buns. But we especially enjoyed the recipe for this crusty overnight baguette. We strongly recommend you have a go yourself this weekend. And let us know what you named your sourdough starter, too, so we can give Philip Seemore Loafman the credit, too. Here’s one of our February issue recipes to get your started (see what we did there).

Breakfast baguettes

Baguettes are a great way to get into bread-making. They’re easy to make and super satisfying to see (and eat!) the results. Especially great with salted butter and jam.

  • Makes 4 small or 2 large sticks

  • 250g active sourdough starter*,  or 5g instant yeast

  • 325ml water

  • 1 ¾ tsp sea salt

  • 500g strong white bread flour


1  Mix everything together to form  a dough. Give it a good knead until it’s nice and stretchy. Cover with a damp cloth and let rise at room temperature for 8–12 hours, or until doubled in size.

2  Punch down and shape into  2 really long or 4 shorter rectangles – flatten and roll into a baguette shape, tapering and tucking the ends in.

3 Lightly oil a large baking sheet – or two, if needed. Dust with semolina or flour. Arrange the baguettes on the prepared baking sheets, leaving a little room around them so they can rise. Cover with floured plastic and allow to rise for 1½–2 hours or until almost doubled in size.

4 Make diagonal slashes across  each loaf using a sharp knife or razor blade. Bake at 220C/Fan 200C/ Gas 8 for about 15–20 mins or until well browned. Spray with water before baking, then 5 mins and  10 mins into the cooking time.

Cook’s note To activate your sourdough starter, remove from the fridge. Feed 2–4 tbsp of starter with 150g strong white bread flour, plus 150ml water. Whisk or stir until well mixed. Cover loosely with a lid or  a clean cloth. Let it ferment in a warmish place for 8–12 hours.

*For instructions on how to make a sourdough starter visit thesimplethings/blog/sourdoughstarter.

Get hold of your copy of this month's The Simple Things - buy, download or subscribe


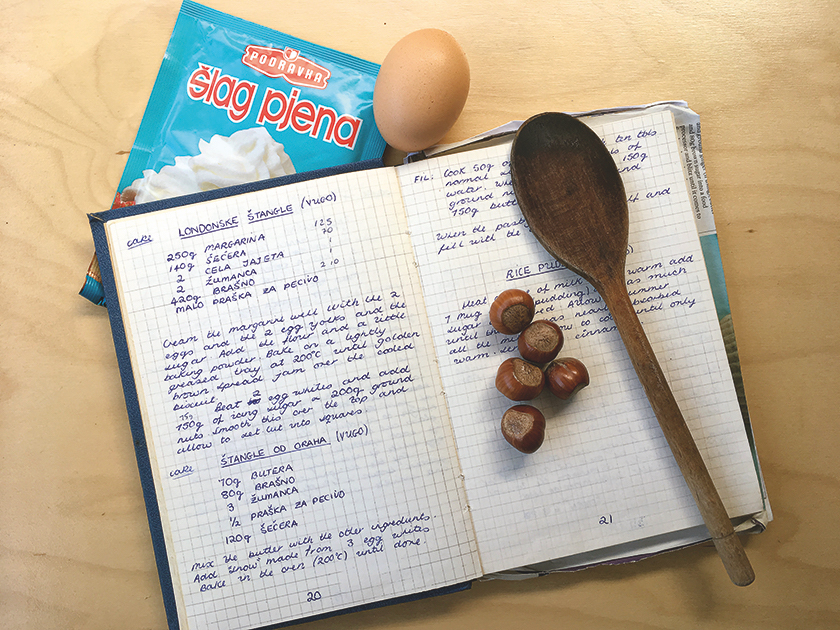
More breads and bakes to enjoy…

Featured
Lammas Loaf.jpg
Aug 1, 2023
Bake | A Lammas loaf
Aug 1, 2023
Aug 1, 2023
Tomato focaccia 2.jpg
Sep 15, 2022
Recipe | Tomato Focaccia
Sep 15, 2022
Sep 15, 2022
Mar 11, 2020
Recipe | nettle soda bread
Mar 11, 2020
Mar 11, 2020

More from our February issue…

Featured
Feb chalkboard.jpg
Feb 27, 2019
February: a final thought
Feb 27, 2019
Feb 27, 2019
feb+cake.jpg
Feb 20, 2019
Cake facts: drizzle me this
Feb 20, 2019
Feb 20, 2019
dressing gown.jpg
Feb 16, 2019
Etiquette: dressing gowns
Feb 16, 2019
Feb 16, 2019


In Eating Tags issue 80, february, sourdough, bread, baking
Comment
Photography: Cristian Barnett

Photography: Cristian Barnett

How to: make a sourdough starter

Iona Bower January 24, 2019

Rachel de Thample explains how to make your own sourdough starter

In our February issue we have a feature on ‘wake-up bakes’, that is loaves, cakes, crumpets and baguettes that can be started on a Saturday evening and left overnight to give you fresh bread for Sunday breakfast. The sourdough recipes require what’s called a starter, and you can learn how to make one here. You can find all of the full recipes starting on p38 of the February issue. Take your marks, get set, start your starters!

Simple sourdough starter

Simply mix 100g strong white bread flour with 100g filtered or mineral water (measure it on a digital scale for best results). Loosely cover with a cloth. Set at room temperature in a dark place and leave to ferment for 1 day. If the starter has yet to produce lots of little bubbles across the top, indicating that it is active, add an additional 100g strong white bread flour and 100g filtered or mineral water. Mix well and continue this exercise each day, topping up the starter, until it’s risen slightly and has a good number of little bubbles formed at the top. Once you have your starter activated, you can make sourdough loaves, crumpets and more… If your starter is getting off to a slow start, try adding a piece of dried fruit such as a dried apricot or prune to the mix, a 5cm piece of rhubarb and/or 1 tbsp natural yogurt or kefir, to help feed it.


Dark rye sourdough starter

Rye flour is more absorbent than white flour, so you use slightly more water to get a rye starter going.


Day 1: Add 50ml filtered or mineral water to 2 tbsp rye flour. Stir to make a smooth paste. Cover with a cloth and leave at room temperature (about 20C) away from direct sunlight for 24 hours.

Days 2–4: Repeat the process above. By Day 4 you should start to see some bubbles.

Day 5: Stir in 100g rye flour and 200ml filtered or mineral water.

Day 6: By now your rye sourdough starter or leaven should be active and have developed a fruity smell. Double the quantity of batter using 100g rye flour and 200ml filtered or mineral water.

Day 7: Your starter is ready to make your first batch of bread. Store the starter in the fridge for up to 1 month between bakes. Before making a loaf of bread, take the starter out 12 hours before and feed it with 100g flour and 200ml filter or mineral water to reactive it.

Get hold of your copy of this month's The Simple Things - buy, download or subscribe


More bakes to inspire…

Featured
Want, knead, love: Real, down-to-earth bread baking
Oct 8, 2014
Want, knead, love: Real, down-to-earth bread baking
Oct 8, 2014
Oct 8, 2014
Recipe: Chocolate fridge cake
Aug 15, 2014
Recipe: Chocolate fridge cake
Aug 15, 2014
Aug 15, 2014
Win a KitchenAid or Aga mixer, plus sponge cake recipe (closed 8 July 2014)
May 22, 2014
Win a KitchenAid or Aga mixer, plus sponge cake recipe (closed 8 July 2014)
May 22, 2014
May 22, 2014

More from our February issue…


In Eating Tags issue 80, sourdough starter, sourdough, bread, baking, February
2 Comments
Photography: Jean Cazals

Photography: Jean Cazals

Recipe: Yule log

David Parker December 7, 2018

Roll up, roll up – for our festive yule log! 

This bake is just a little bit fancy but when the making of it is as leisurely and lovely as the eating of it, it’s all worth it. This is no chuck-it-in-the-oven crowd pleaser so embrace the opportunity that brings: take an afternoon off work when the house is quiet and dedicate it to some mindful baking to share with friends and family later on.

The filling

250ml whole milk
1 vanilla pod
3 medium egg yolks
60g caster sugar
25g plain flour
100g soft butter, cut into pieces 
50g hazelnuts in their skins

1. Pour milk into a heavy-based pan. Split the vanilla pod, scrape seeds into the milk, along with split pods. 2. Whisk egg yolks and sugar in a bowl until pale and creamy. Add the flour and mix until smooth. Put the pan of milk over medium heat, bring to just under the boil, take off the heat and slowly pour half of it into the egg, sugar and flour mixture, whisking well as you do so. Add the remaining milk and whisk in well, then pour mixture back into pan.
3. Bring to the boil, whisking continuously, then keep boiling and whisking for one minute, take off the heat and pour into a clean bowl.
4. Scoop out the halves of vanilla pod. Cover the surface of the bowl with greaseproof paper straight away to prevent skin forming. Cool in fridge. Once cool, remove from fridge and whisk to the consistency of a light mayonnaise. Add butter, whisking in a little at at time until the cream is smooth and quite white.
5. Preheat the oven to 180C/Fan 160C/350F. Spread the hazelnuts out over a baking tray and toast for 15–20 mins, shaking occasionally for even cooking. Leave to cool, then grind to a paste using a coffee grinder or pestle and mortar. Mix this into the cream and set aside.


The sponge

125g caster sugar
4 medium eggs
1 tbsp cocoa powder
125g plain flour
25g butter, melted, plus extra for greasing
You will need:
Two 35cm x 27cm x 2cm baking trays, greased and lined

1. Preheat the oven to 180C/Fan 160C/350F. Whisk sugar and eggs in a bowl over a pan of barely simmering water (don’t let base of bowl touch the water) for 3-4 mins until foamy and tripled in volume.
2. Transfer to a food mixer with whisk attachment or use a handheld one and whisk at high speed for 4–5 mins until mixture has cooled and clings easily to the whisk, leaving ribbon trails when you lift it.
3. Sieve cocoa into flour and gently fold in to the mixture a little at a time with a metal spoon. Do the same with the melted butter.
4. With a spoon, turn the mixture into trays and tilt so it spreads into the corners. Bake for 12–15 mins until golden and the centre is springy. Turn out onto cooling rack.

And the rest...

100g sugar
2 tbsp kirsch
Icing sugar, for dusting
500g good natural marzipan 
400g good quality dark chocolate (70%), broken into pieces
Dark chocolate curls or ‘pencils’, cocoa powder, and edible gold leaf (optional), for decoration

1. Start by making a kirsch syrup. Put the sugar in a pan with 200ml water and bring to the boil. Reduce the heat and simmer until the sugar has dissolved and you have a colourless syrup. Take off the heat, stir in the kirsch, and leave to cool.
2. Have ready a large sheet of baking paper. Turn the chocolate sponge onto it so that the top is downwards. Brush with two-thirds of the syrup, then spread hazelnut cream filling on top. Now roll up like a Swiss roll. Lift up the baking paper
and as the sponge starts to roll, tuck it under with your fingertips, then continue to lift the paper and it will continue to roll.
3. Lightly dust your work surface with icing sugar and roll out the marzipan to 2mm thick. Cut out a rectangle just large enough to wrap the log in and set aside trimmings. 
4. Brush the log with the remaining syrup, then lay on top of marzipan, off centre, seam upwards. Bring the marzipan over the top and press down lightly, so that it fits snugly. Tuck marzipan under the log and fold in the ends.
5. Mould marzipan trimmings into balls, then roll into ‘sausages’ to snake along the top of the log, pressing down lightly so they stick. 
6. Have ready a rack over a tray or sheet of baking paper. Using a palette knife or fish slice under each end of the log, lift it onto the rack. Leave these in position so you can easily lift the log up again.
7. Put the chocolate into a heatproof bowl over a pan of barely simmering water – make sure the water comes close to the bottom of the bowl but doesn’t actually touch it. Keep the heat very low so that you don’t get steam in the bowl. Keep stirring all the time and let the chocolate melt slowly, then remove bowl from heat. A little at a time, with the help of a spoon, pour the chocolate over the log until it is covered.
8. As it begins to cool and set a little, use the tip of a spoon or fork to make rough bark-like marks in the chocolate. When the coating is set enough to stay put, lift the log off the rack and onto a board or plate. Decorate with cocoa, chocolate and gold leaf, if you like. Leave for 3–4 hrs at room temperature, then put in the fridge, if necessary, in a box to keep its shine.

Taken from Patisserie Maison by Richard Bertinet (Ebury Press, £20)

This was first published in our December 2014 issue. Our new December issue is out now. If you enjoyed this recipe, be sure not to miss our feature, For the Love of Baking in there. It has recipes, by Rachel de Thample, for Austrian Linzer biscuits, Icelandic Klejner, mulled wine brownies and more. The perfect way to occupy yourself on a quiet, calm day at home during Advent.

Get hold of your copy of this month's The Simple Things - buy, download or subscribe


In Eating, Living Tags recipe, cake, christmas, cake in the house, issue 30, december, baking
Comment
Photography & styling: Kym Grimshaw

Photography & styling: Kym Grimshaw

Recipe | Schiacciata di uva

Lottie Storey September 26, 2018

Schiacciata di uva

A RECIPE TO CELEBRATE HARVEST (SCHIACCIATA MEANS ‘SQUASHED’)

Serves 12

200g raisins
250ml vin santo or moscatel
850g strong white bread flour
2 scant tsp fast-action yeast
435ml warm water (100-110C)
1 1⁄2 tbsp extra virgin olive oil, plus extra for brushing
450g black seedless grapes, washed and stalks removed
2 tbsp demerara sugar
2 tbsp fennel seeds
you will need
A 33 x 22cm baking tray

1 In a small pan, bring the raisins and vin santo or moscatel to a boil, then turn off the heat and set aside for at least 1 hour, preferably overnight.

2 Mix the flour and yeast with 1 tsp salt. In a jug, combine the warm water with the olive oil. Pour into the flour mixture and combine, then knead until smooth and elastic. Or use a mixer with dough hook attachment.

3 Brush a thin layer of oil over the inside of a large bowl and put the dough inside, turning it over in the oil. Cover with cling film or a plastic bag and leave in a warm place to rise until doubled in size (about 1 hour 30 mins).

4 Brush a 33 x 22cm baking tray with oil. Divide the dough into two and roll half out to the size of the tray, pushing it into the corners. Drain the raisin mixture and spoon over the dough. Roll out the second half of dough to the same size and sandwich over the first. Pinch the edges to join. Leave in a warm place, covered with a clean tea towel, until risen (at least 30 mins).

5 Preheat oven to 190C/Fan 170C/ Gas 5. When the dough has risen, scatter over the grapes, then sprinkle over the sugar and fennel seeds.

6 Bake in the preheated oven for 45 mins, until you have a golden crust and the grapes are bubbling and releasing their juices. Cool on a wire rack for 15 mins, then cut into generous slices to serve, with coffee or as a dessert in its own right.

Turn to page 24 of October’s The Simple Things for more of our autumn fruit feast, including Blistered grapes, ricotta & toasted sourdough, Parma-wrapped chicken with figs & gorgonzola, Herb-roasted veg Kale & fennel salad, and Poached prunes with Pedro Ximénez.

SIM76.GATHERING_SimplethingsHarvest5.jpg

A feast of autumn fruit was inspired by the annual harvest days at Dunleavy Vineyards in the Chew Valley, Somerset, when friends and family join together to help harvest grapes and share a meal in the vineyard afterwards.

Launched in 2008 by Ingrid Bates, the vineyard produces multi-award winning rosé wine from Pinot noir and Seyval blanc grapes. Dunleavy Vineyards’ first sparkling wine will be available from October 2018.

dunleavyvineyards.co.uk

  Buy ,  download  or  subscribe   See the sample of our latest issue  here   Buy a copy of our latest anthology:  A Year of Celebrations   Buy a copy of  Flourish 2 , our wellbeing bookazine  Listen to  our podcast  - Small Ways to Live Well

Get hold of your copy of this month's The Simple Things - buy, download or subscribe

View the sampler here.


More from the October issue:

Featured
back cover 76.png
Dec 21, 2020
It's better to light a candle than curse the darkness
Dec 21, 2020
Read More →
Dec 21, 2020
SIM76.TODAY,TOMORROW,TOKEEP_Hazelnuts-Pesto-7353.jpg
May 9, 2020
Cook | hazelnut pesto and gnocchi with fennel
May 9, 2020
Read More →
May 9, 2020
the simple things gift subscription.png
Oct 23, 2018
Christmas gift subscription offer
Oct 23, 2018

Christmas gift subscription offer from The Simple Things magazine. Treat friends and family to a gift subscription this Christmas and we'll do the wrapping and sending for you. Just £44 – saving 26%* on the usual cover price.

Read More →
Oct 23, 2018

More harvest recipes:

Featured
Pumpkin Beer Keg Jonathan Cherry.jpg
Oct 31, 2023
Make | a pumpkin beer keg
Oct 31, 2023
Oct 31, 2023
David Grant Suttie.jpg
Oct 24, 2021
Pumpkin varieties | What are they gourd for?
Oct 24, 2021
Oct 24, 2021
Apples Stocksy.jpg
Sep 25, 2021
Etymology | Scrumping
Sep 25, 2021
Sep 25, 2021
In Eating Tags october, issue 76, grapes, harvest, italian, bread, baking, gathering, autumn, autumn recipes
Comment
Photography: Peter Cassidy

Photography: Peter Cassidy

Recipe | Nettle & seed crackers

Lottie Storey March 5, 2018

Spring brings tender new nettle shoots. Harvest them to bring a punch of flavour to these delicious, seedy crackers. These crunchy, tasty crackers are great for dipping, loading with toppings or just eating alone

Makes 16–20 crackers
50g sesame seeds
50g linseeds
80g sunflower seeds
80g pumpkin seeds
20g chia seeds
50g buckwheat flour
2 large tbsp dried or fresh nettle tops (blanched)*, plus extra to scatter
Pinch of xantham gum
31⁄2 tbsp cold pressed rapeseed oil or good olive oil
150ml boiling water
1⁄4 tsp salt
Flaky sea salt, to taste

1 Preheat oven to 150C/Fan 130C/Gas 2. Take two baking sheets and line with baking parchment. Add all the ingredients (apart from the sea salt and extra nettles) to a bowl and stir well.
2 Split the mixture in half and place one half on each lined baking sheet. Place another piece of baking parchment on top (sandwiching the mixture between) and roll out the mixture thinly and evenly to fit the baking sheet.
3 Remove the top layer of parchment and scatter with more nettles (for a stronger flavour) and some flaky sea salt, to taste. Repeat with the second batch of mixture. 
4 Bake for around 50 to 60 mins – do keep an eye on them to check the seeds don’t brown too much – until they are completely cooked and dry. Then turn the oven off and leave crackers in the oven while it cools down, to ensure they are completely dry. Break it up into smaller pieces and store in an airtight container.

Taken from ScandiKitchen Summer by Brontë Aurell (Ryland, Peters & Small).

 * If using fresh nettles, harvest in spring. To remove the sting, immerse in boiling water and 16 make sure you press all the water out before use or the crackers will be too wet.
 

  Buy ,  download  or  subscribe   See the sample of our latest issue  here   Buy a copy of our latest anthology:  A Year of Celebrations   Buy a copy of  Flourish 2 , our wellbeing bookazine  Listen to  our podcast  - Small Ways to Live Well

Get hold of your copy of this month's The Simple Things - buy, download or subscribe

View the sampler here.


More from the March issue:

Featured
EGGShell-tealights-the-simple-things.png
Apr 10, 2023
Eggshell tea lights
Apr 10, 2023
Read More →
Apr 10, 2023
anna-jimenez-calaf-64616-unsplash.jpg
Mar 20, 2021
You know spring has properly arrived when...
Mar 20, 2021
Read More →
Mar 20, 2021
SIM69.WHATITREASURE_J Hitt What I Treasure Recipe Book Image.JPG
Mar 26, 2018
What I treasure | My hand-written recipe book
Mar 26, 2018
Read More →
Mar 26, 2018

More baking:

Featured
Apr 7, 2023
Recipe: Easter rabbit biscuits
Apr 7, 2023
Apr 7, 2023
Apr 17, 2022
Recipe: Chocolate truffles
Apr 17, 2022
Apr 17, 2022
Mar 27, 2022
Recipe: Mothering buns
Mar 27, 2022
Mar 27, 2022
In Eating Tags issue 69, march, baking, biscuits, crackers, cheese
Comment
  • Blog
  • Older
  • Newer
Featured
  Buy ,  download  or  subscribe   See the sample of our latest issue  here   Buy a copy of our latest anthology:  A Year of Celebrations   Buy a copy of  Flourish 2 , our wellbeing bookazine  Listen to  our podcast  - Small Ways to Live Well
Feb 27, 2025
Feb 27, 2025

Buy, download or subscribe

See the sample of our latest issue here

Buy a copy of our latest anthology: A Year of Celebrations

Buy a copy of Flourish 2, our wellbeing bookazine

Listen to our podcast - Small Ways to Live Well

Feb 27, 2025
Join our Newsletter
Name
Email *

We respect your privacy and won't share your data.

email marketing by activecampaign
facebook-unauth twitter pinterest spotify instagram
  • Subscriber Login
  • Stockists
  • Advertise
  • Contact

The Simple Things is published by Iceberg Press

The Simple Things

Taking time to live well

We celebrate slowing down, enjoying what you have, making the most of where you live, enjoying the company of of friends and family, and feeding them well. We like to grow some of our own vegetables, visit local markets, rummage for vintage finds, and decorate our home with the plunder. We love being outdoors and enjoy the satisfaction that comes with a job well done.

facebook-unauth twitter pinterest spotify instagram