The Simple Things

Taking time to live well
  • Home
  • Subscribe
  • SHOP
  • Newsletter
  • About
  • Work with us
  • Home
  • Subscribe
  • SHOP
  • Newsletter
  • About
  • Work with us

Blog

Taking Time to Live Well

  • All
  • Chalkboard
  • Christmas
  • Competition
  • could do
  • Eating
  • Escape
  • Escaping
  • Fresh
  • Fun
  • gardening
  • Gathered
  • Gathering
  • Growing
  • Haikus
  • Interview
  • Living
  • Looking back
  • Magazine
  • magical creatures
  • Making
  • Miscellany
  • My Neighbourhood
  • Nature
  • Nest
  • Nesting
  • outing
  • playlist
  • Reader event
  • Reader offer
  • Shop
  • Sponsored post
  • Sunday Best
  • Think
  • Uncategorized
  • Wellbeing
  • Wisdom
AliFoxon5.JPG

New hobby | Plein Air Sketching

Iona Bower April 10, 2021

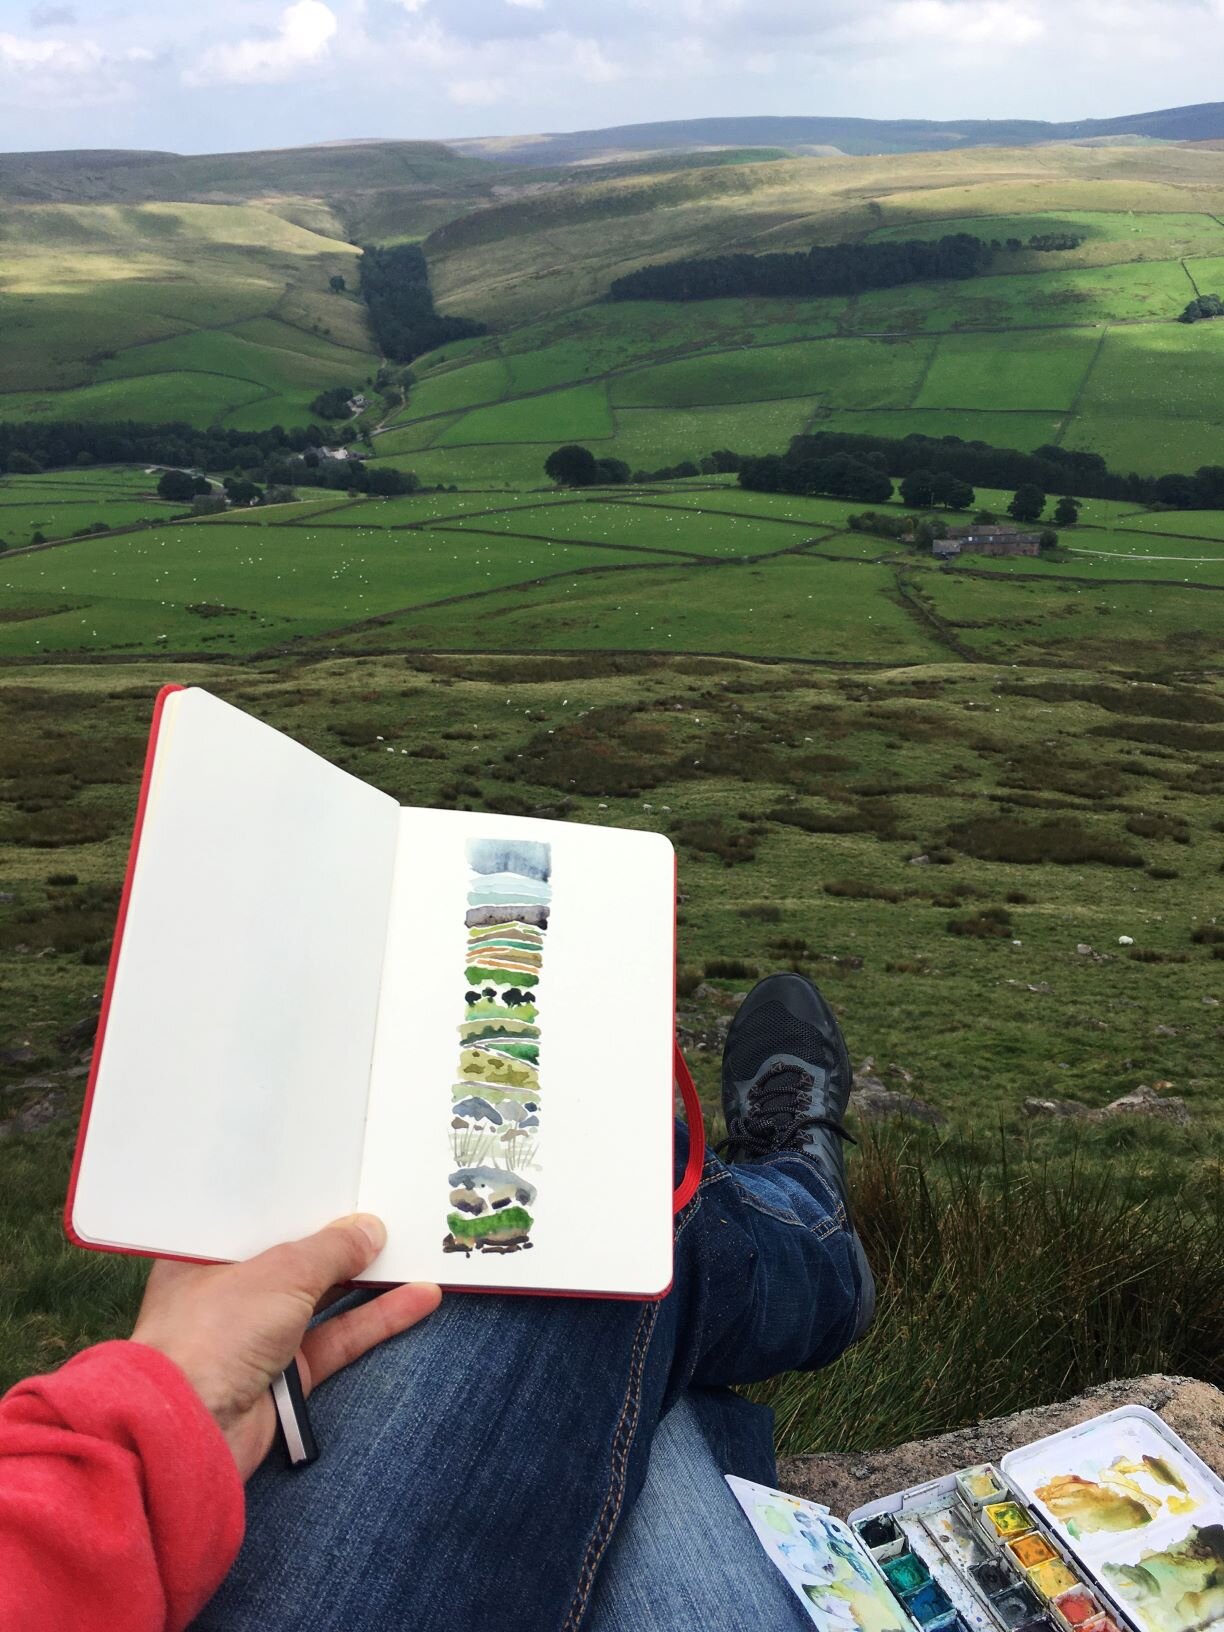
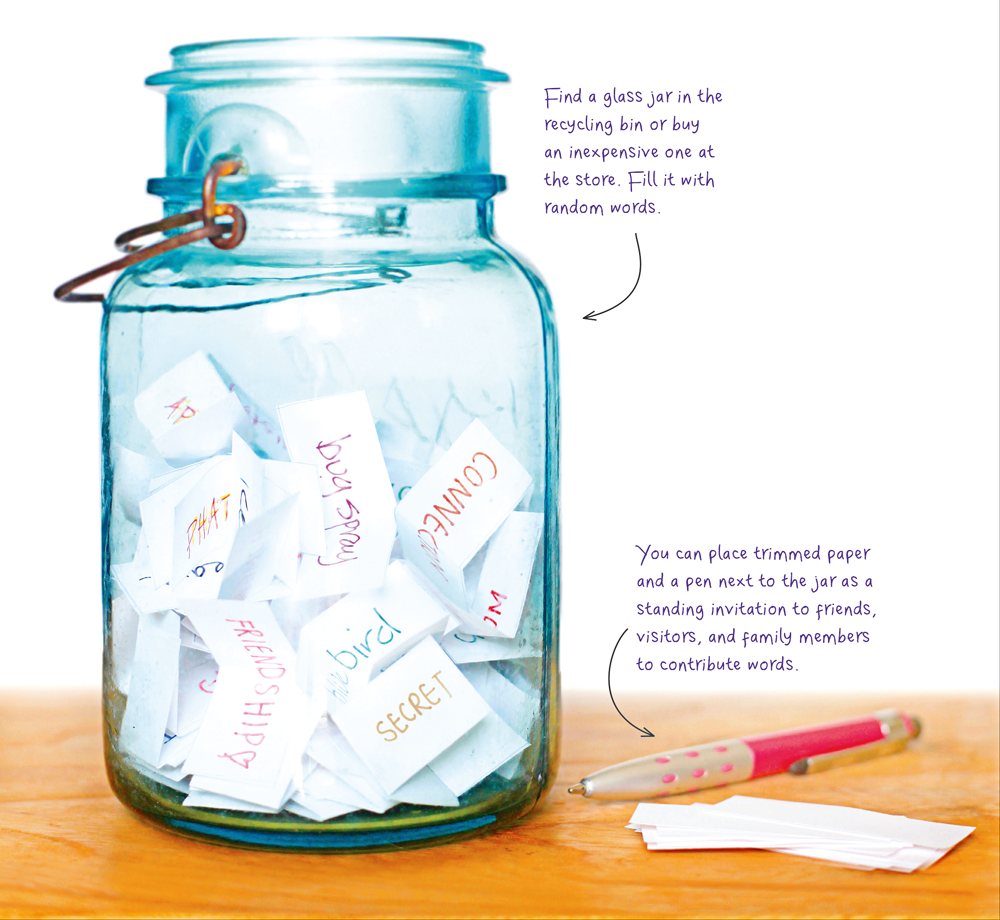
Make a walk an event by sitting down to sketch the landscape for a short while

There aren’t many things that don’t feel just a bit more ‘alive’ for being practised outdoors; eating alfresco is so much more than just supper, sleeping under the stars turns a daily fact of life into something magic… And art? Well, painting a landscape, live, out in the fresh air, is like the difference between watching a BBC schools TV film of Julius Caesar and being in the Globe watching the RSC perform it live. 

‘Plein Air’ painting, the act of painting a landscape like a sitting portrait, with the artist able to better capture the changing light, weather and atmosphere, began in the 1800s, pioneered by Constable, whose painting, Boatbuilding, Near Flatford Mill was conceived and painted entirely outdoors. The catalyst, lovely though the great outdoors is, was the rather more prosaic fact of tubes of oil paints suddenly becoming available. Paints had previously needed to be mixed from raw pigments which did not lend themselves to being thrown into a bag for an impromptu day’s painting out in the fields. A few tubes fitted nicely into your artist’s knapsack alongside a Thermos and a cheese sandwich. 

The Plein Air movement soon spread to the continent, its high point coming with Impressionist landscapes; think the likes of Monet, Renoir and Pissaro with their dappled light and soft, outdoorsy colours. 

Perhaps it’s the fresh air going to our heads, but we think we might just be inspired enough to give plein air a go ourselves now the weather’s warming up. How hard can a few water lilies be to paint anyway? If you fancy trying it too, here are a few tips to get you started.

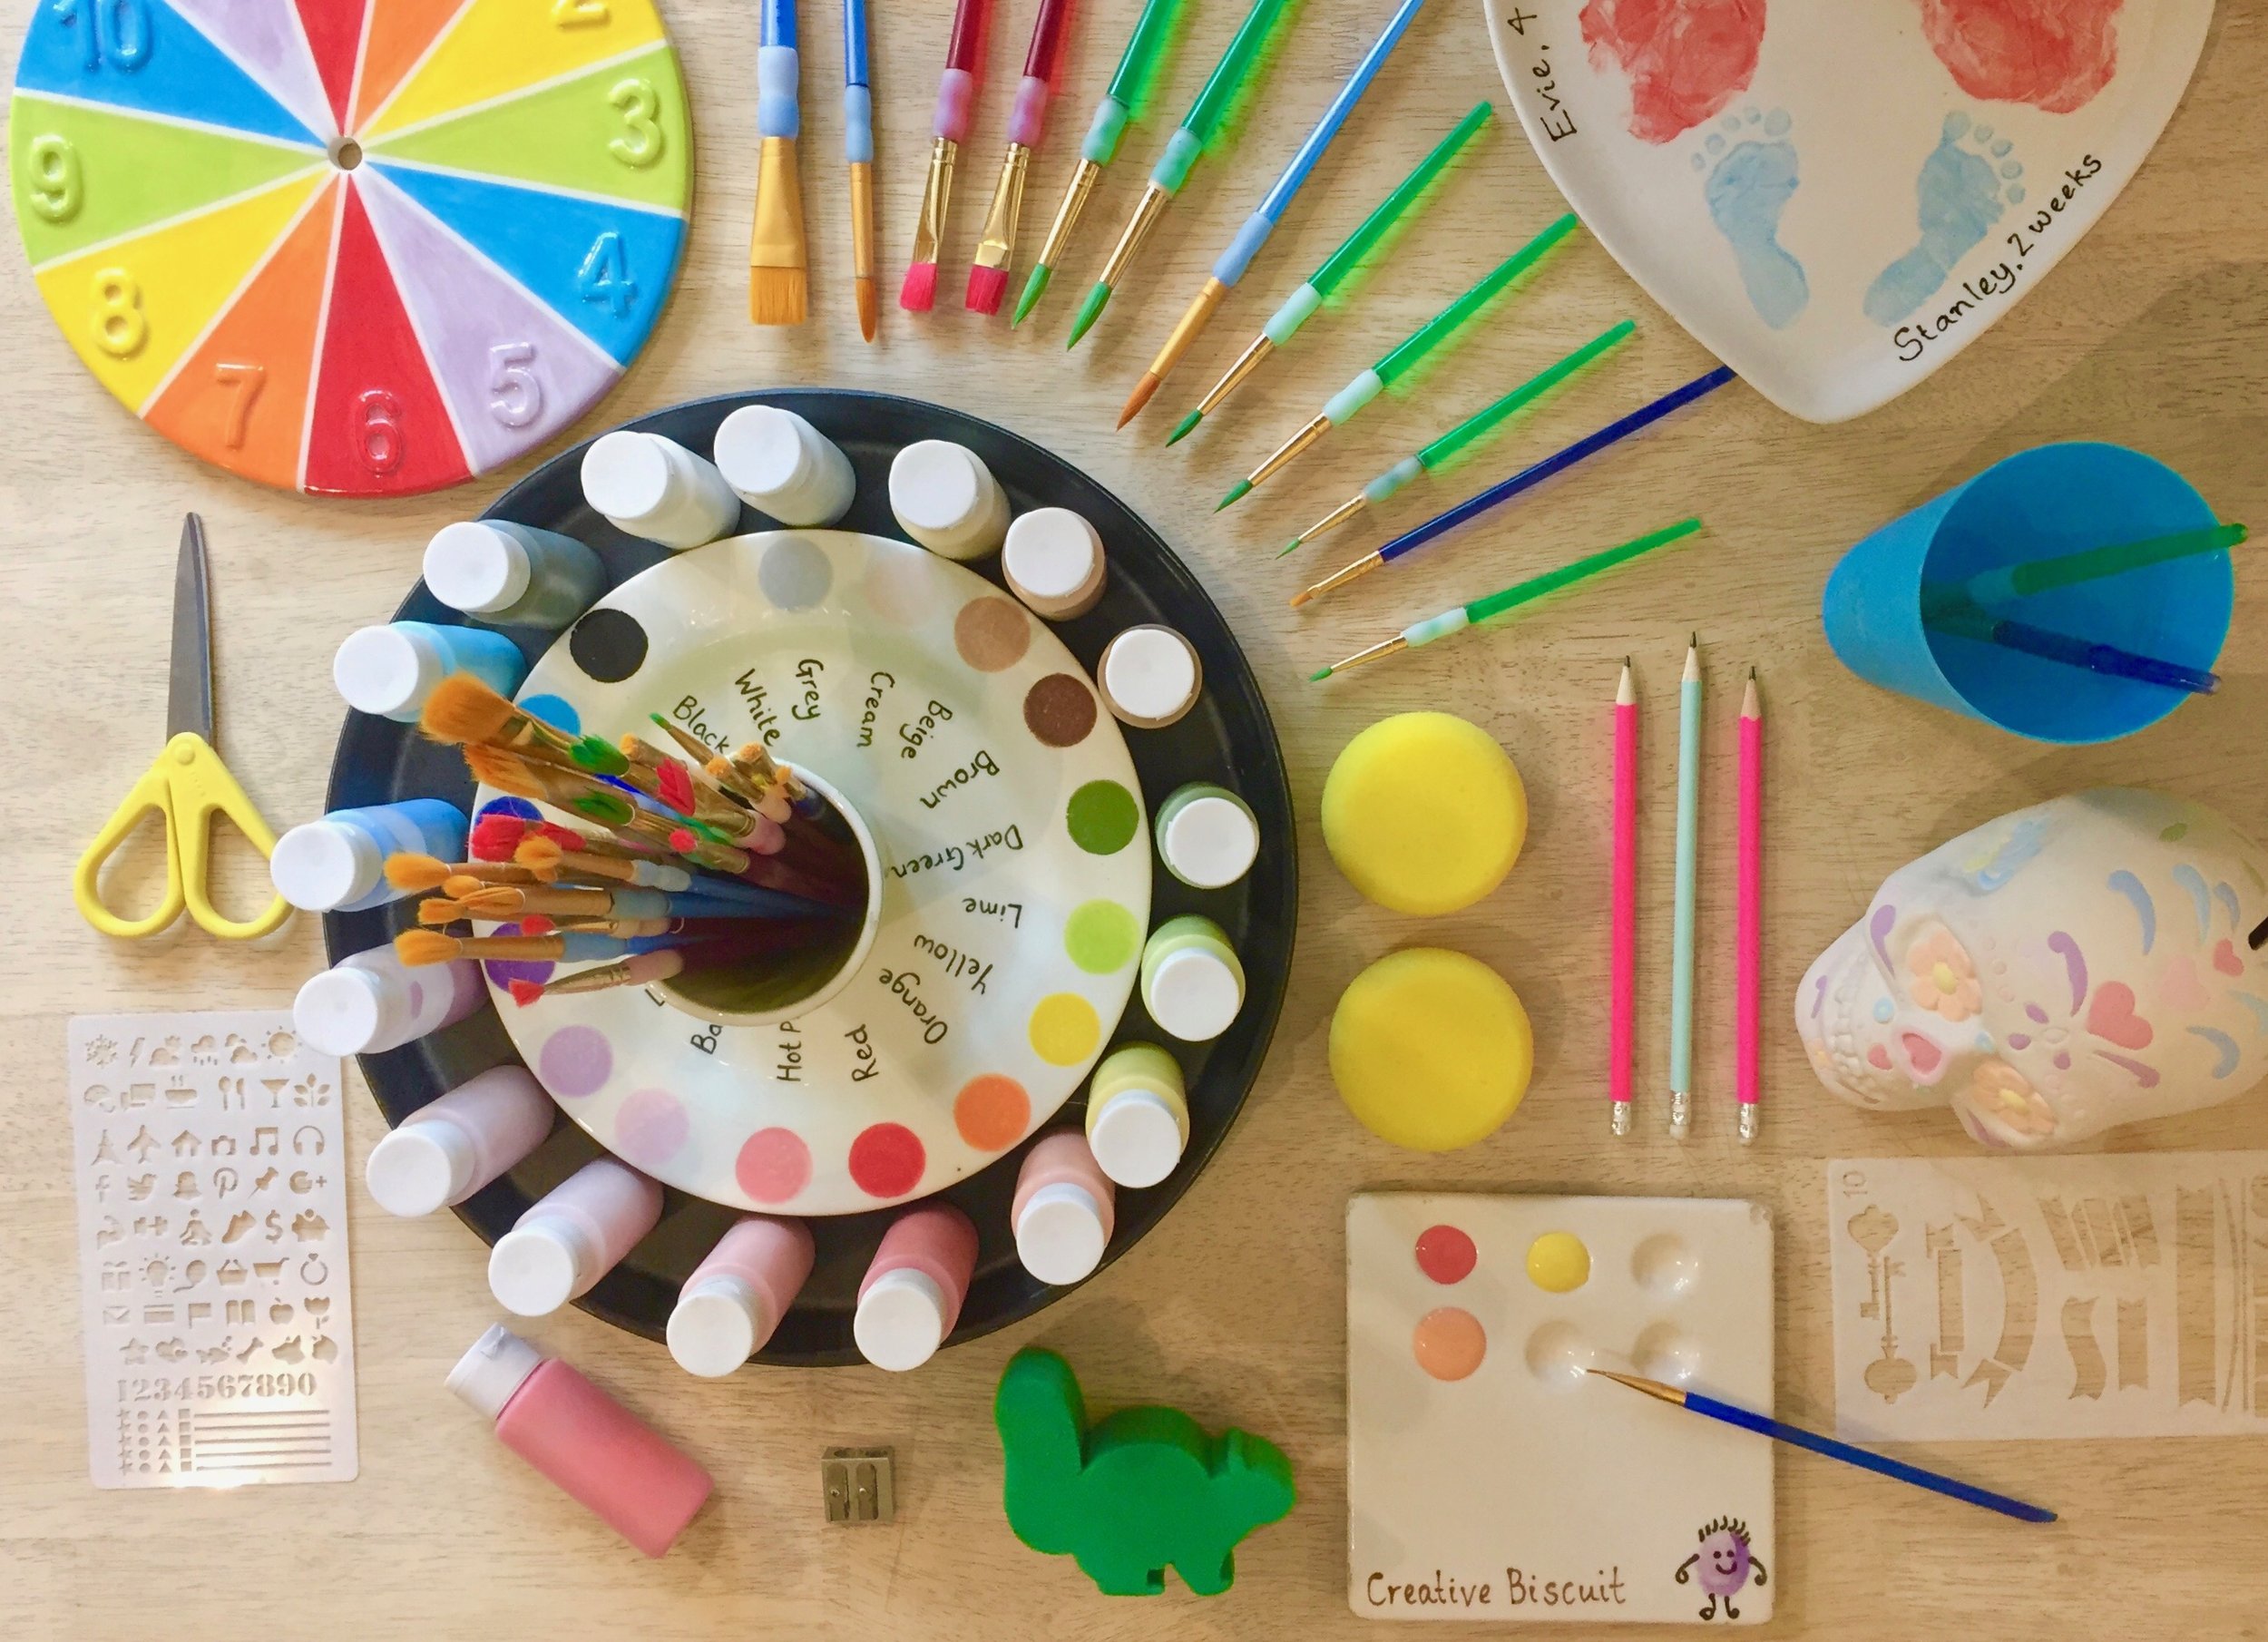
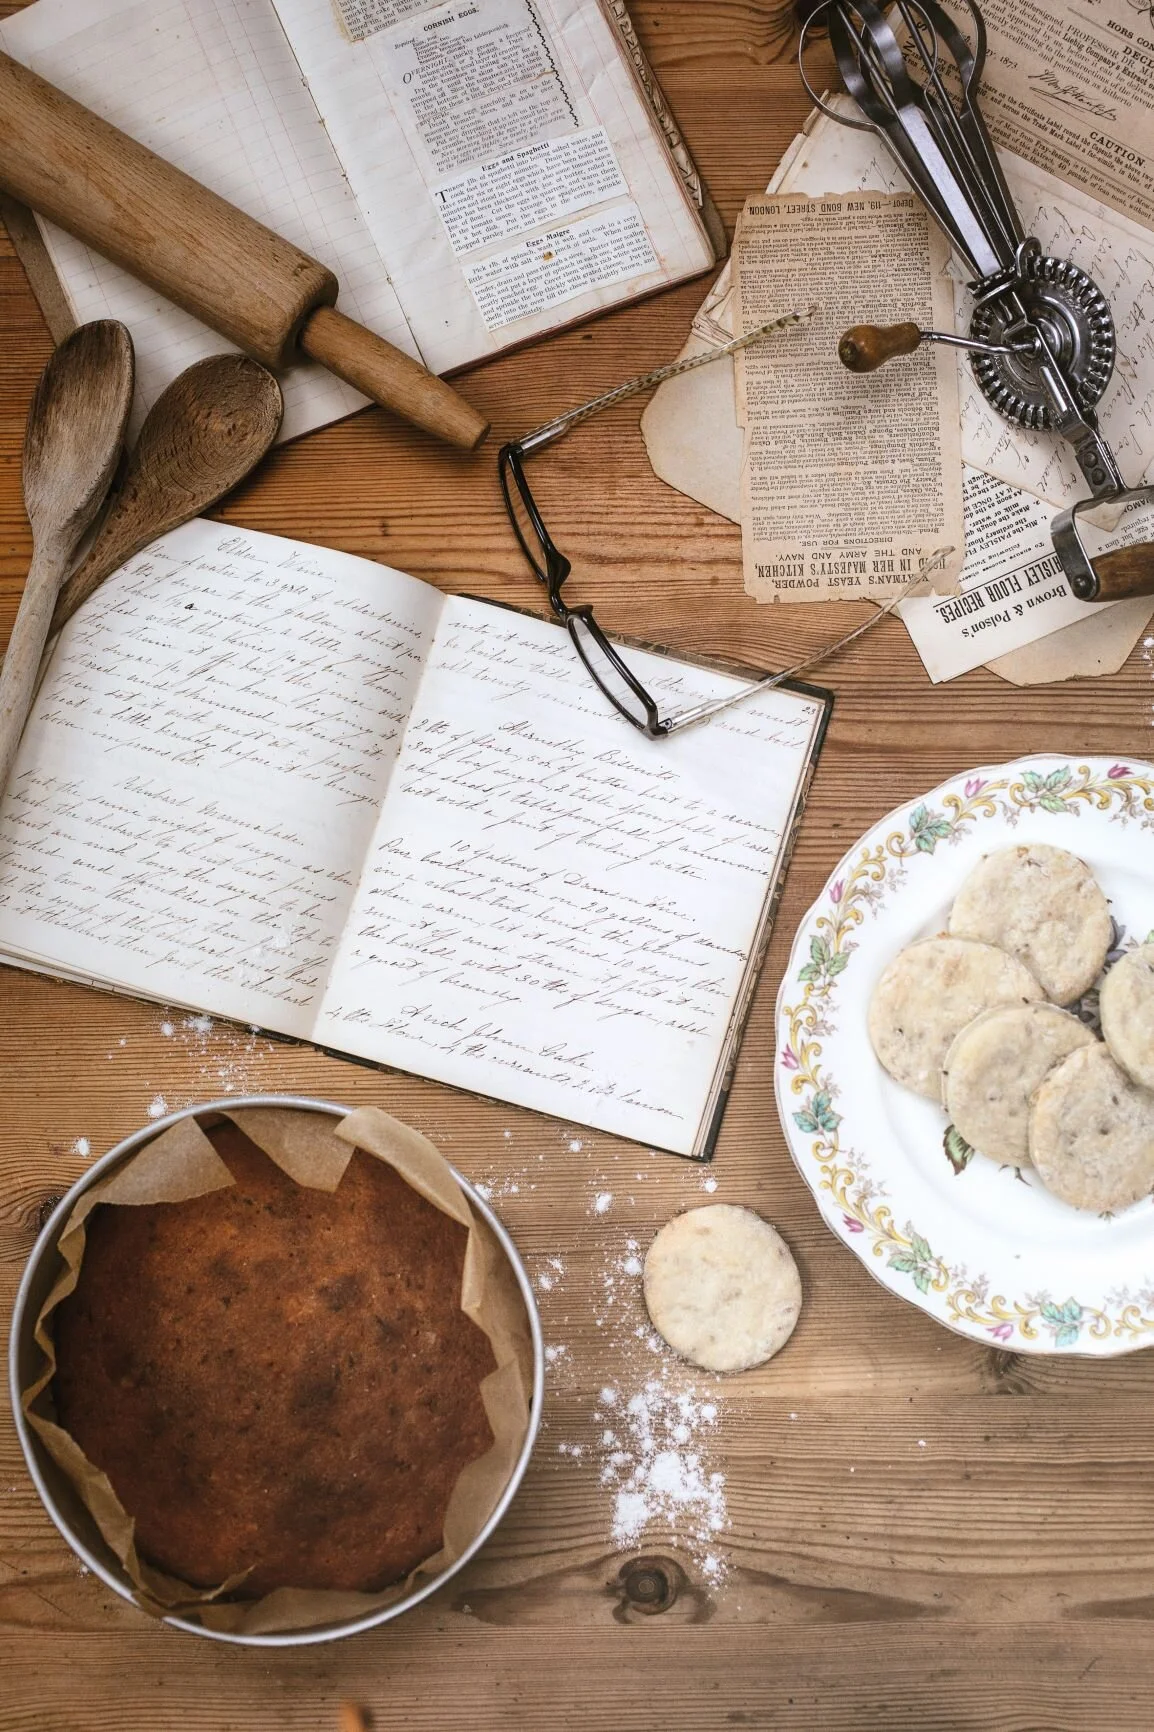
  1. Put together a bit of a kit. You don’t need a full-on pochade box, though. In fact, it’s best if you travel fairly light. Just a modest art kit (more on that below), something to keep warm if you’re sitting still for long periods, a hat if it’s sunny (or chilly), and we recommend a flask of tea and a generous slice of cake. Art is not fuelled on inspiration alone, you know. 

  2. If you’re painting you just need something to paint on (paper, card, a sketchbook or canvas), a couple of brushes of different sizes, something to put water in and a cloth to wipe your brushes. Watercolours travel more easily than oils but don’t be put off oils or gouache if that’s what you prefer. You don’t need to take them all either; just consider your location, and pick out a few tubes of paint to match the colouring of the scenery.  Plein Air fans often say they prefer to use ‘found’ water for rinsing brushes than taking their own. There’s definitely something charming about using water taken from the sea to paint your beach scene, or even just asking the cafe that features in your scene for a glass of water to paint with.

  3. Of course, sketching with coloured pencils or charcoals is lots of fun, too. We think if Monet had had the wealth of colours offered in a Faber Castell kit, he’d have given it a go, too. 

  4. Choose a location that inspires you. It doesn’t have to be a pastoral idyll; just somewhere that ‘speaks’ to you. It also needs to be somewhere you can easily sit undisturbed (so if the roundabout at Elephant and Castle speaks to you maybe think again). You also need somewhere comfy enough to sit, whether that’s a grassy hillock or a camping chair on a street corner. 

  5. Take a photo of the scene you’re painting just for reference later on. It’s very satisfying once you start to get a little bit good.

  6. Before you start, do a quick sketch of the scene you want to recreate; what plein air artists call a ‘thumbnail sketch’. It just gives you an idea of composition and what’s going where. Try to pick just one or two elements to focus on in the picture.

  7. Once you’re painting or drawing, your watchword is ‘speed’. That might seem to go against the whole ethos of the thing, but you’ll be surprised how quickly the light changes. If painting, use a broad brush and just block in colour. You can add more detail and colour on top later, but you need to get the basics in first so the light doesn’t change the colours and where shadows fall too much while you’re working. 

  8. Be prepared to chat to passers by and show off your work (or adopt the look of a serious artist who must not be disturbed by trivialities and wear obvious headphones). 

The photograph above is by Dr Ali Foxon, who we spoke to in our April issue for our ‘Walking with Purpose’ feature. Ali runs boggydoodles.com which organises green sketching events for groups. Turn to page 44 to meet Ali and more people who have added ‘purpose’ to their walks in different ways. 

Buy this month's The Simple Things - buy, download or subscribe


More from our April issue…

Featured
@Kemitelford pockets.JPG
Apr 18, 2021
Quiz | What's in my pocket?
Apr 18, 2021
Apr 18, 2021
Alamy (mention subs ad).jpg
Apr 17, 2021
Music appreciation | The Flight of the Bumblebee
Apr 17, 2021
Apr 17, 2021
Courtesy of Mills and Boon.jpg
Apr 11, 2021
Why we love | ridiculous romantic novel titles
Apr 11, 2021
Apr 11, 2021

More artistic inspiration…

Featured
Pottery Painting 2.jpeg
Apr 12, 2025
How to | Win at Pottery Painting
Apr 12, 2025
Apr 12, 2025
AliFoxon5.JPG
Apr 10, 2021
New hobby | Plein Air Sketching
Apr 10, 2021
Apr 10, 2021
Sketchbook Club Houses pic.JPG
Apr 10, 2020
Friday Sketchbook Club | Houses
Apr 10, 2020
Apr 10, 2020
In Escape Tags issue 106, outdoor adventures, painting, sketching, drawing
Comment
Photography: Carmel King

Photography: Carmel King

Primer | colouring colours we loved

Iona Bower September 6, 2020

September is ‘new pencil cases’ time for us. Join us in a celebration of colouring crayons

There’s not much that cheers our hearts more than the idea of a bit of new stationery. Once you’ve sharpened your colouring pencils ready for the new term, buy a copy of our September issue, in which we have a Sketchbook Club feature with artist Jennie Maizels to help you learn to draw beautiful birds. We also were lucky enough to visit her colourful home, and you can see those pictures and read all about it from p94. We particularly coveted her bright studio with its pots upon pots of colouring pencils, paints and crayons, and it reminded us of a time when we knew the ‘names’ of all our crayons and always had a favourite - definitely a top ten at least. 

So here, in no particular order and judged completely on whim and without reason, are our favourite Crayola Crayon colours. Do share yours with us in the comments section below. 

  1. Cerulean. Blue is repeatedly voted the nation’s favourite crayon colour. After all, it deserves some credit after all that stoic painting of skies and seas. Plus, we just loved the name. Why aren’t more children called Cerulean?

  2. Inchworm. Named for the bright green caterpillar of the geometer moth (which disappointingly is itself a sludgy brown). It reminded us of the Hans Christian Andersen song, too. 

  3. Macaroni and Cheese. A warm orange hue, named by a child as part of a competition Crayola ran in 1993 with Kraft Foods. 

  4. Purple Mountains’ Majesty. This scores points for just being really fancy - and giving Farrow and Ball a run for its money. 

  5. Corn silk. Back in the good old days, crayon colours were a bit educational, too. We mused for hours (while filling in suns and sandy beaches) over what corn silk might be. Turns out it’s the stringy bits on the top of a corn cob. Anyway, it’s a much better name than the brighter Unmellow Yellow… who wants their yellow UNmellow? 

The colourful array of colouring things in the picture by Carmel King above is from artist and founder of Sketchbook Club, Jennie Maizel’s home, which is featured in our September issue. You can find a tutorial on how to draw birds by Jennie on page 102. Jennie has run Sketchbook Club from her home and online for five years. For all the kit you need to get started, including paints, pencils and paper, visit: jenniemaizels.com and head to Jennie Maizels’ Sketchbook Club YouTube Channel for supporting ‘How to’ videos for these projects. You can also follow Jennie on Twitter and Instagram at @jenniemaizels.

Buy this month's The Simple Things - buy, download or subscribe

More from our September issue…

Featured
Keeping warm Kavel Rafferty.JPG
Sep 20, 2020
How to | stay warm outside on cooler evenings
Sep 20, 2020
Sep 20, 2020
Larks and Owls Shutterstock.JPG
Sep 19, 2020
Are you a night owl or a lark?
Sep 19, 2020
Sep 19, 2020
Good mood food.JPG
Sep 15, 2020
Recipe | Sweet potato with cauliflower and minted yoghurt
Sep 15, 2020
Sep 15, 2020

More Sketchbook Clubs…

Featured
Pencils.jpg
Sep 6, 2020
Primer | colouring colours we loved
Sep 6, 2020
Sep 6, 2020
sketchbook club botanicals.JPG
Apr 24, 2020
Friday Sketchbook Club | Botanicals
Apr 24, 2020
Apr 24, 2020
Sketchbook Club Camping.JPG
Apr 17, 2020
Friday Sketchbook Club | Camping
Apr 17, 2020
Apr 17, 2020
In Fun Tags sketchbook club, sketching, drawing, colouring, crayons, colour, issue 99
Comment
Illustration: Jennie Maizels

Illustration: Jennie Maizels

Friday Sketchbook Club | Botanicals

Iona Bower April 24, 2020

A pretty project that looks great framed in a kitchen or simply makes a beautiful page in your sketchbook

Welcome again to Friday Sketchbook Club! We’ve teamed up with illustrator Jennie Maizels to bring you a sketchbook project to do every Friday in April. We hope you enjoy them. Today we’re drawing botanicals. 

Jennie started Sketchbook Club because she believes that anyone can draw. Her principle is that if we treat art like any other creative pastime and follow simple instructions, just like a recipe, we would all be drawing as much as we are baking, sewing and knitting.

Each module comes with instructions, a ‘How to’ video, reference material and often, templates which you can ‘transfer’. They have been carefully designed to suit all ages and abilities. A note on materials: the projects were originally designed to introduce a plethora of different paints, collage and methods but all can be altered to use what you have available. Just substitute as you like or need.

Ready to draw the Botanicals ? Then we’ll begin. You can watch the Botanicals video tutorial here and find the references for leeks, passion fruit, and  tomatoes here as well as the transfers you might need. Alternatively, you can just follow the instructions below, using the picture above as inspiration, 

You will need

A sheet of A4 black paper or card
HB pencil
Set of gouache paints
One thin and one larger paintbrush (Jennie used a size 1 and a size 6)
Colouring pencils

How to draw your Botanicals

  1. Have a good look at the reference sheets and choose a fruit or vegetable to paint.
    2. Start by drawing out your composition. Feel free to transfer any of the images rather than copying them if you would prefer. To transfer onto your black paper, turn the chosen image over (it might help to cut them out first) and, using the side of your chalk, rub evenly over the whole of the back of your image, then turning the page over so the plant/flowers are on top, hold your transfer page firmly so it doesn’t move around at all, on top of your black paper. Then, using a Biro, draw over the whole of the plant or flower image.Carefully take the transfer sheet off to reveal the chalky template on your black paper.
    3. Work on your composition, making sure all the chosen illustrations are evenly spaced out, maybe filling any big spaces with some seeds or petal details.
    4. Next,start to paint the botanical illustrations. look at the reference, you may want to use a white pen once the base layers of paint has dried,for some of the detail (or your size 1 paint brush). Adding a little white to colour, especially the reds, yellows and oranges,will make them really jump out. For flowers or seed heads, you could use a sponge, working in darker then lighter colours, dabbing on lightly.
    5. For the lettering, first of all write it in pencil in ‘best’ italics, then paint over with cream or white paint using a fine brush, paint as thin as you can,adding depth to the lettering afterwards. You could write over the pencil using a white gel pen if you are nervous about painting lettering,it looks just as good.
    6. When the page is dry, add detail to the illustrations using coloured pencils. Try white pencil for very thin root strands and dark green for leaf lines.You might prefer to draw in the majority of details in pencil rather than in paint, for example, just painting a green circle for the top of the leek and once the paint is dry, drawing in all the little circles in a dark green pencil and a white gel pen or pencil.

There are many more modules available on Jennie’s website, Sketchbook Club (only £4 each.), where you can also buy art kits and supplies. For more inspiration, you can follow Jennie on Instagram @jenniemaizels or visit the website jenniemaizels.com. Look out for another Friday Sketchbook Club project with Jennie here next week.

Buy this month's The Simple Things - buy, download or subscribe

More meetings of Sketchbook Club…

Featured
Pencils.jpg
Sep 6, 2020
Primer | colouring colours we loved
Sep 6, 2020
Sep 6, 2020
sketchbook club botanicals.JPG
Apr 24, 2020
Friday Sketchbook Club | Botanicals
Apr 24, 2020
Apr 24, 2020
Sketchbook Club Camping.JPG
Apr 17, 2020
Friday Sketchbook Club | Camping
Apr 17, 2020
Apr 17, 2020

From our April issue…

Featured
Picnic Pie Catherine Frawley.JPG
Apr 18, 2020
Recipe | a picnic pie for the garden
Apr 18, 2020
Apr 18, 2020
Ellen's cookbook Kirstie Young.jpg
Apr 15, 2020
Make | a hand-me-down recipe book
Apr 15, 2020
Apr 15, 2020
Newts Zuza Misko.JPG
Apr 7, 2020
Romantic introverts | the newt
Apr 7, 2020
Apr 7, 2020
In Making Tags art, drawing, sketchbook club, sketching
Comment
Illustration: Jennie Maizels

Illustration: Jennie Maizels

Friday Sketchbook Club | Camping

Iona Bower April 17, 2020

Learn how to create this cheery spring camping scene. Sketchbooks at the ready

It’s Friday Sketchbook Club time. We’ve teamed up with illustrator Jennie Maizels to bring you a sketchbook project to do every Friday for the next few weeks. We hope you enjoy them. Today we’re drawing this very jolly camping scene. 

Jennie started Sketchbook Club because she believes that anyone can draw. Her principle is that if we treat art like any other creative pastime and follow simple instructions, just like a recipe, we would all be drawing as much as we are baking, sewing and knitting.

Each module comes with instructions, a ‘How to’ video, reference material and often, templates which you can ‘transfer’. They have been carefully designed to suit all ages and abilities. A note on materials: the projects were originally designed to introduce a plethora of different paints, collage and methods but all can be altered to use what you have available. Just substitute as you like or need.

Ready to draw the Camping scene? Then we’ll begin. You can watch the Camping video tutorial here and find the river template you’ll need here along with the camping ‘references’. Alternatively, you can just follow the instructions below, using the picture above as inspiration, 

You will need

A sheet of A4 green paper or card
Biro
Gluestick
HB pencil
Set of gouache paints
One thin and one larger paintbrush (Jennie used a size 1 and a size 6)Colouring pencils

How to draw your Camping scene

  1. Start by placing the river template over your green card and draw over very firmly with a biro pen, this will leave an indentation of the lines of the river. Next, carefully tear along these lines on the green card. Stick each side down into your sketchbook using a glue stick.
    2 .Next, have a good look at the reference and roughly sketch out your first tent, caravan or Teepee. You might like to transfer some of the more difficult items, such as cars and camper-vans.Do this by drawingover the whole of the chosen image with a firm HB pencil. Turn the paper over and position the car/caravan etc.onto your page and scribble over the back with a lead pencil firmly, making sure it doesn’t move around too much.
    3. Using  Gouache paints and a size one brush, start to add colour. Continue this way until your page is peppered with campers.
    4. You can add details with coloured pencils now or later.
    5. Add trees as you go, some behind campers and some in front. Really look at the reference and experiment with some of the more stylized shapes, again, adding pencil for detail later if you wish.
    6. Finally, add little coloured pencil blue wavy lines in the river.

There are many more modules available on Jennie’s website, Sketchbook Club (only £4 each.), where you can also buy art kits and supplies. For more inspiration, you can follow Jennie on Instagram @jenniemaizels or visit the website jenniemaizels.com. Look out for another Friday Sketchbook Club project with Jennie here next week.

Buy this month's The Simple Things - buy, download or subscribe

From our April issue…

Featured
Picnic Pie Catherine Frawley.JPG
Apr 18, 2020
Recipe | a picnic pie for the garden
Apr 18, 2020
Apr 18, 2020
Ellen's cookbook Kirstie Young.jpg
Apr 15, 2020
Make | a hand-me-down recipe book
Apr 15, 2020
Apr 15, 2020
Newts Zuza Misko.JPG
Apr 7, 2020
Romantic introverts | the newt
Apr 7, 2020
Apr 7, 2020

More drawing inspiration….

Featured
AliFoxon5.JPG
Apr 10, 2021
New hobby | Plein Air Sketching
Apr 10, 2021
Apr 10, 2021
Pencils.jpg
Sep 6, 2020
Primer | colouring colours we loved
Sep 6, 2020
Sep 6, 2020
sketchbook club botanicals.JPG
Apr 24, 2020
Friday Sketchbook Club | Botanicals
Apr 24, 2020
Apr 24, 2020
In Making Tags sketchbook club, friday sketchbook club, art, drawing
Comment
Illustration: Jennie Maizels

Illustration: Jennie Maizels

Friday Sketchbook Club | Houses

Iona Bower April 10, 2020

Join us in drawing these quirky houses in today’s Friday Sketchbook Club

Welcome back to Friday Sketchbook Club. We’ve teamed up with illustrator Jennie Maizels to bring you a sketchbook project to do every Friday for the next few weeks. We hope you enjoy them. Today we’re drawing rows of houses. 

Jennie started her Sketchbook Club because she believes that anyone can draw. Her principle is that if we treat Art like any other creative pastime and follow simple instructions, just like a recipe, we would all be drawing as much as we are baking, sewing and knitting. Each project comes with instructions, a ‘How to’ video, reference material and often, templates which you can ‘transfer’. They have been carefully designed to suit all ages and abilities.

 A note on materials: Originally designed to introduce a plethora of different paints, collage and methods. All modules can be altered to use what you have available - just substitute as you like or need.

Ready to draw houses? Then we’ll begin. You can watch the Houses video tutorial first if you like and find the instructions and house ‘references’ here or just follow the instructions below, using the pictures above as inspiration,

You will need

An HB pencil
Rubber
A small and a large paintbrush (Jennie used size 6 and size 2)Fineliner (thin one)
Scissors
Glue
Old book
Blue, white and yellow acrylic paints

How to draw your houses

  1. First of all, have a really good look at the houses for reference in the link above (you might also like to look at the hashtag #SketchbookClubHouses on Instagram for further inspiration).
    2. Next, following the reference pictures,start to draw your houses along the bottom of your page. Use a size one or two black fineliner and draw in as much detail as you can, like roof tiles and windows etc.
    3.Next, start to paint the background colour. Do this by mixing a lovely aqua blue acrylic, Jennie made her colour by mixing a mid-blue with a tiny dot of yellow and some white.
    4.While the background paint is drying, start to draw little clouds on an old unwanted book page (or newspaper if you can’t bear to cut up an old book!).Cut the clouds out carefully and once the paint is dry, stick them onto the background sky using a glue-stick. You might like to tear tiny strips out and stick down to make tiny plumes of chimney smoke, too

There are many more modules available on Jennie’s website, Sketchbook Club (only £4 each.), where you can also buy art kits and supplies. For more inspiration, you can follow Jennie on Instagram @jenniemaizels or visit the website jenniemaizels.com. Look out for another Friday Sketchbook Club project with Jennie here next week.

Buy this month's The Simple Things - buy, download or subscribe

From our April issue…

Featured
Picnic Pie Catherine Frawley.JPG
Apr 18, 2020
Recipe | a picnic pie for the garden
Apr 18, 2020
Apr 18, 2020
Ellen's cookbook Kirstie Young.jpg
Apr 15, 2020
Make | a hand-me-down recipe book
Apr 15, 2020
Apr 15, 2020
Newts Zuza Misko.JPG
Apr 7, 2020
Romantic introverts | the newt
Apr 7, 2020
Apr 7, 2020

More fun with paint…

Featured
Folk enamel tumbler.jpg
Aug 5, 2023
Make | Folk art enamelware
Aug 5, 2023
Aug 5, 2023
SIM68.TRYITOUT_Annie Sloan her very self.png
Feb 7, 2018
Life Skills | Furniture painting
Feb 7, 2018
Feb 7, 2018
Jul 27, 2017
Mindfulness | Colour therapy
Jul 27, 2017
Jul 27, 2017
In Making Tags sketchbook club, sketching, drawing, painting
Comment
Illustration: Jennie Maizels

Illustration: Jennie Maizels

Friday Sketchbook Club | Spring Banner

Iona Bower April 3, 2020

Welcome to Friday Art Club! We’ve teamed up with illustrator Jennie Maizels to bring you a sketchbook project to do every Friday for the next few weeks. We hope you enjoy them.

Jennie started Sketchbook Club because she believes that ANYONE can draw. So whether drawing is a long-lost love of yours or you haven’t picked up a colouring pencil since school, do have a go. Jennie’s principle is that if we treat Art like any other creative pastime and follow simple instructions, just like a recipe, we would all be drawing as much as we are baking, sewing and knitting.

Each module comes with instructions, a ‘How to’ video, reference material and often, templates which you can ‘transfer’. They have been carefully designed to suit all ages and abilities. Young children, grandparents and whole families or groups of friends are all drawing and painting together as a result of Sketchbook Club.
 
A note on materials: Originally designed to introduce a plethora of different paints, collage and methods. All modules can be altered to use what you have available - Just substitute as you like / need.

Let’s get started! You can watch the Spring Banner video tutorial and use Jennie’s references to copy or trace. There are flowers and wreaths references, rabbits and birds references and references to trace and copy for the lettering all here. Just click to download and print.
 

You will need (if you have them):

HB pencil
Rubber
Size 1 and size 6 paintbrushes
Watercolour paints
Coloured pencils
White gouache paint (optional)

How to create your Spring Banner picture

  1. Start by transferring your chosen lettering to your Sketchbook by drawing over the whole of the reversed text image with a firm HB pencil.Turn the paper over and position the text on your page and scribble over the back with a lead pencil firmly, making sure it doesn’t move around too much.

  2. Now, using watercolours, start to add colour. You can always add shading, shadows or decorations with coloured pencils later.

  3. Once your lettering is complete you can start to draw in your decorative surround. Firstly, transfer any rabbits and birds using the method above, then if you are nervous going straight to paint, lightly draw in all your squirls and stem positions. To make it symmetrical, transfer a rabbit or a bird on one side then repeat on the other. Do this with the flowers and leaves too.

  4. Once you are happy with the decorative surround and the birds and rabbits, start to add some lovely colour. If you are brave enough, leaves do look better if painted straight on with watercolours. You may also want to add another layer of watercolours for the flowers so they cover the leaves and maybe some further details on the leaves and birds too?

  5. You might also like to add a few white highlights using gouache paint. Do this using little swipes of your size-one brush on the lettering, petals and leaves.

  6. Finally, if you would like, add some coloured pencil details. Jennie added all the shading, ears and whiskers etc. on the rabbits and feather details on the birds and some darker sections of leaves and flowers, too. Jennie also added shadows to the lettering and the tiny words as well.

There are many more modules available on Jennie’s website, Sketchbook Club (only £4 each.), where you can also buy art kits and supplies. For more inspiration, you can follow Jennie on Instagram @jenniemaizels or visit the website jenniemaizels.com. Look out for another Friday Sketchbook Club project with Jennie here next week.

Buy this month's The Simple Things - buy, download or subscribe

From our April issue…

Featured
Picnic Pie Catherine Frawley.JPG
Apr 18, 2020
Recipe | a picnic pie for the garden
Apr 18, 2020
Apr 18, 2020
Ellen's cookbook Kirstie Young.jpg
Apr 15, 2020
Make | a hand-me-down recipe book
Apr 15, 2020
Apr 15, 2020
Newts Zuza Misko.JPG
Apr 7, 2020
Romantic introverts | the newt
Apr 7, 2020
Apr 7, 2020

More art for art’s sake…

Featured
poundedflowerart.jpg
Jul 3, 2022
Make | Pounded Flower Art
Jul 3, 2022
Jul 3, 2022
Kelpies statue Alamy.jpg
Nov 2, 2021
Visit | Giant Statues
Nov 2, 2021
Nov 2, 2021
sketchbook club botanicals.JPG
Apr 24, 2020
Friday Sketchbook Club | Botanicals
Apr 24, 2020
Apr 24, 2020
In Fun Tags sketchbook club, spring, art, painting, drawing
Comment
SIM68.JOURNAL_113_WordJar_JournalSparks.png

Journal sparks | Word Jar

Lottie Storey February 27, 2018

This is one of the simplest yet most fruitful and rewarding journal prompts, because it’s uncomplicated and never fails to inspire, sitting on your shelf or desk, always available for spontaneous creativity.

Find a glass jar in the recycling bin or buy an inexpensive one. Fill it with random words. Leave trimmed paper and a pen next to it as a standing invitation to friends, family and visitors to contribute words.

Instant inspiration

Choose a word or a few words from the jar and write them on a journal page. Draw a sketch based on the word(s) or incorporate them into a small piece of writing – a poem, a blurb, the beginning of a story or a speech bubble. When you’re finished, add a new word to the jar.

Turn to page 77 of February's The Simple Things for another Journal Sparks idea: Picture your day in geological layers.


  Buy ,  download  or  subscribe   See the sample of our latest issue  here   Buy a copy of our latest anthology:  A Year of Celebrations   Buy a copy of  Flourish 2 , our wellbeing bookazine  Listen to  our podcast  - Small Ways to Live Well

Get hold of your copy of this month's The Simple Things - buy, download or subscribe

View the sampler here


More from the February issue:

Featured
SIM68.JOURNAL_113_WordJar_JournalSparks.png
Feb 27, 2018
Journal sparks | Word Jar
Feb 27, 2018
Feb 27, 2018
SIM68.EVENTS_Unknown-1.jpeg.png
Feb 26, 2018
The faces of Fairtrade
Feb 26, 2018
Feb 26, 2018
SIM68.png
Feb 25, 2018
Nest | Cacti
Feb 25, 2018
Feb 25, 2018

More creative inspiration:

Featured
SIM68.JOURNAL_113_WordJar_JournalSparks.png
Feb 27, 2018
Journal sparks | Word Jar
Feb 27, 2018
Feb 27, 2018
journal sparks 2.jpg
Dec 27, 2017
Journal sparks
Dec 27, 2017
Dec 27, 2017
In Think Tags journal sparks, diary, drawing, creativity, issue 68, february
Comment
SIM68.MISCELLANY_HowHardPortrait.png

How to draw a realistic portrait

Lottie Storey February 15, 2018

You may not be quick on the draw, but these suggestions will help you make your mark

Portraiture is hard, especially if you know the person – it’s easy to notice if the likeness isn’t spot on. Suffice to say, you won’t become Leonardo overnight, but if you want to improve your skills, using this process may be helpful...

  • Forget what you think you know about the face. Don’t bother about the details initially – consider the whole head. Lightly sketch out the structure of the head first, using an H or HB pencil: focus on the areas where bones are nearest to the skin: that’s cheekbones, brow, forehead, chin and jawline.

  • You could draw a very light line down the middle of the face to centre the nose, and another for the eyes so they don’t go wonky later.

  • Shade in the shadows with a softer pencil (something like a 3B). Again, go lightly. You could take a photo and change the filter to black and white to help you work out where the shadows should be. Keep blending, using your finger or a smudging tool.

  • Finally, add the details, such as the eyes and lips.

  Buy ,  download  or  subscribe   See the sample of our latest issue  here   Buy a copy of our latest anthology:  A Year of Celebrations   Buy a copy of  Flourish 2 , our wellbeing bookazine  Listen to  our podcast  - Small Ways to Live Well

Get hold of your copy of this month's The Simple Things - buy, download or subscribe

View the sampler here


More how to posts:

Featured
Pottery Painting 2.jpeg
Apr 12, 2025
How to | Win at Pottery Painting
Apr 12, 2025
Apr 12, 2025
9.new years final.png
Dec 31, 2024
How to | Make a Could-Do List Happen
Dec 31, 2024
Dec 31, 2024
Synchronised swimmers.jpg
Aug 17, 2024
How to | Do a Swimming Pool Handstand
Aug 17, 2024
Aug 17, 2024

More from the February issue:

Featured
SIM68.JOURNAL_113_WordJar_JournalSparks.png
Feb 27, 2018
Journal sparks | Word Jar
Feb 27, 2018
Feb 27, 2018
SIM68.EVENTS_Unknown-1.jpeg.png
Feb 26, 2018
The faces of Fairtrade
Feb 26, 2018
Feb 26, 2018
SIM68.png
Feb 25, 2018
Nest | Cacti
Feb 25, 2018
Feb 25, 2018
SIM68.CAKE_Choc,orange,almond cake_TivoliRoadBaker.jpeg.png
Feb 24, 2018
Recipe | Chocolate, orange and almond cake
Feb 24, 2018
Feb 24, 2018
SIM68.WELLBEING_Stocksy_txpaa950e24sln100_Original_145550.png
Feb 22, 2018
Alternative funerals
Feb 22, 2018
Feb 22, 2018
Vera Fletcher.png
Feb 19, 2018
What I treasure | My Spode Mug
Feb 19, 2018
Feb 19, 2018
In Think Tags february, issue 68, How to, drawing
3 Comments
journal sparks 2.jpg

Journal sparks

Lottie Storey December 27, 2017

Longitudinal journal challenge

‘Longitudinal’ means you will make it a habit to look at the same thing every so often over a long time. The key is to find something that changes in some way – whether very gradually, daily, or weekly. You don’t have to track it every

day or even particularly regularly. Just be sure to continue to observe it, and try to remember to record your observations in the same journal or section of a journal. This way you can see how the thing is changing and how your observations evolve.

Things you could observe:

A tree
Your desk
Someone’s shoes
A lake or river
A chalkboard
A bookshelf
A storefront window
A garden
A street bench
The dinner table
The sky at night
An anthill


  Buy ,  download  or  subscribe   See the sample of our latest issue  here   Buy a copy of our latest anthology:  A Year of Celebrations   Buy a copy of  Flourish 2 , our wellbeing bookazine  Listen to  our podcast  - Small Ways to Live Well

Get hold of your copy of this month's The Simple Things - buy, download or subscribe

View the sampler here


More from the January issue:

Featured
SIM67.MAKES_Step3_5.png
Sep 18, 2021
Make | Dip dye stationery
Sep 18, 2021
Sep 18, 2021
SIM67.FRESH_LEON Happy Soups_Sausage-Spinach & Orzo.png
Jan 26, 2018
Spinach, sausage and orzo soup
Jan 26, 2018
Jan 26, 2018
rawpixel-com-274862.png
Jan 22, 2018
Storytelling
Jan 22, 2018
Jan 22, 2018

More creative inspiration:

Featured
SIM68.JOURNAL_113_WordJar_JournalSparks.png
Feb 27, 2018
Journal sparks | Word Jar
Feb 27, 2018
Feb 27, 2018
journal sparks 2.jpg
Dec 27, 2017
Journal sparks
Dec 27, 2017
Dec 27, 2017
In Think Tags journal sparks, diary, drawing, creativity, issue 67, january
Comment
Featured
  Buy ,  download  or  subscribe   See the sample of our latest issue  here   Buy a copy of our latest anthology:  A Year of Celebrations   Buy a copy of  Flourish 2 , our wellbeing bookazine  Listen to  our podcast  - Small Ways to Live Well
Feb 27, 2025
Feb 27, 2025

Buy, download or subscribe

See the sample of our latest issue here

Buy a copy of our latest anthology: A Year of Celebrations

Buy a copy of Flourish 2, our wellbeing bookazine

Listen to our podcast - Small Ways to Live Well

Feb 27, 2025
Join our Newsletter
Name
Email *

We respect your privacy and won't share your data.

email marketing by activecampaign
facebook-unauth twitter pinterest spotify instagram
  • Subscriber Login
  • Stockists
  • Advertise
  • Contact

The Simple Things is published by Iceberg Press

The Simple Things

Taking time to live well

We celebrate slowing down, enjoying what you have, making the most of where you live, enjoying the company of of friends and family, and feeding them well. We like to grow some of our own vegetables, visit local markets, rummage for vintage finds, and decorate our home with the plunder. We love being outdoors and enjoy the satisfaction that comes with a job well done.

facebook-unauth twitter pinterest spotify instagram